Evaluate under 'Audrey' for us please!

ProjectPuma

Help Support ProjectPuma:

This site may earn a commission from merchant affiliate links, including eBay, Amazon, and others.
It a dirty job, but someone's got to do it! Don't wear your best clothes!
I put mine up on blocks to get at the underside easier:
I used Surfex HD for the degrease. You'll need a stiff-bristled brush to agitate some of dirt/deposits.
http://www.bilthamber.com/car-cleaning-and-degreasing/surfex-hd

Here's a link to my topic on PumaPeople:
http://www.pumapeople.com/forum/index.php?showtopic=97645
 
yippeekiay said:
[post]363546[/post] Sure I read in this forum a few times about Peugeot 205 front wheel arch sections you can buy (not full arch obviously) that fit the opposite side rear arches on a Puma so as to keep the same radius. In light of the bodyshop guy fabricating any - this way could be easier, quicker, possibly cheaper & a better finish. Not saying your bodywork guy isn't good at his job. He may be a dab hand at fabrication/panel beating. :wink:

Hopefully someone can enlighten me and you, if of course it's the usual rear arch rusting issue you're having that we see on nearly all Puma.


I did mention the 206 arches. He's quoted me £800 for both sides plus the lower front quarters.
 
YOG said:
[post]363547[/post] It a dirty job, but someone's got to do it! Don't wear your best clothes!
I put mine up on blocks to get at the underside easier:
I used Surfex HD for the degrease. You'll need a stiff-bristled brush to agitate some of dirt/deposits.
http://www.bilthamber.com/car-cleaning-and-degreasing/surfex-hd

Here's a link to my topic on PumaPeople:
http://www.pumapeople.com/forum/index.php?showtopic=97645

Ah brilliant, I was hoping someone had done this and documented it :grin: Thanks
 
Hi Mate
Just a few things before you start this. I just had a quick look at YOG's post (Rick) and it was a few years ago on a good condition car so don't expect your car to be as good as his. If you want to do it properly you need to take off the tank, exhaust system and heat shields and maybe the rear beam (which is a pain in the ass) but worth it. Then you can attack the rust with wire brushes etc to assess whether it's rust or rot. If anywhere appears to be rot add it to the list for your welder to deal with prior to it going in for the arches doing. Insist that your welder cuts out all rot before applying any new panels and don't rustproof with any oily chemicals until all the welding is completed.
Barry
 
Hi Barry,

Sounds quite a hefty job list, something the amateur could do, removing those pieces? I really want to get as much done as possible before October as my other half will start using it again as she works at a Uni. I'm determined to push through with it. I'm just wondering if a cheap (£40 at Lidl) inspection camera will offer any insight on hard to access areas condition.
 
Hi Mate
The best bet to start off with is to get it as high as you can off the floor (safely) and assess it first. The heat shields come off fairly easily (22 or 24mm socket I think) and will give you lots more access. Then you can have a good look around to see if you need to take off the exhaust and tank to get at any rust/rot as both of these can be a pain to take off. I'm not a big fan of rust converter type chemicals but if you are going to use them at least attack the rust with wire brushes etc to remove as much as you can before you apply the chemicals.
Barry
 
I spent a lot of time to ensure I did the best job possible. As the Puma is a "hobby" car, I had no time-constraints.
Mine was a planned refurbishment, which included:
+ Removing the cat-back exhaust system (replaced by an S/S Blueflame). The studs/nuts were a real pain, and I ended up cutting/grinding then off, drilling out the studs and refitting the exhaust with s/s nuts and bolts.
+ Removing spare wheel and carrier.
+ Removing the fuel tank. Although the bodywork behind the tank was relatively rust-free, the "top" of it required de-rusting and treatment. The fitting bolts can be difficult to remove.
+ Removing the heatshields.
+ Removing the suspension, fitting new KYB dampers, top mounts, ball joints, wheel bearings, track rod ends, bushes, etc. Removing the arch liners.
+ Removing the front and rear bumpers.
+ Removing the rear axle. Shot-blasting, powder-coating, and fitting new bushes.
+ Removing all trim to spray anti-corrosion wax.

As I worked around the car, carrying out the refurbishment work, I de-rusted/rust-treated/painted as required.

This work took many weeks, but, as I said, easier when the car is a "hobby". I carried this work out in 2010-11, so, obviously your Puma is a lot more rusty.
 
Hi Mate
I did pretty much the same as Rick only in 2013 and my car had just over 37k miles on it. I thought I'd got away with just a couple of patches on the rear end but I ended up welding in numerous small patches on the front floors but I was being really picky and wanted a totally rust free car. The rubberised underseal applied to the outside half of the floors was a real bad point for me as all that seems to do is hold water against the metal and I can see from your earlier photos that rust is bubbling through it around your floor strengtheners but even if it is rotten it will be an easy and cheap repair from your welder. If you have a look at the first few pages of my build thread on here you'll see where you are likely to encounter rust.
Barry
 
That's a massive help Barry. I understand now where I need to concentrate. I'll concentrate on the areas that look rough, and may affect MOT, then I can just cake it in ACF50 before winter then attack it again next year the areas not cleared of rust. If I can just hold those areas with that stuff I'll be happy.
 
When you apply ACF50 you apply it thinly with supplied sprayer brush or a cloth.Apply it to the spot welded seams ,wishbones, road springs etc.Have a look at Dinitrol products for cavity box sections and general underbody protection.I know some people aren't keen their products but if you use them as instructed you can keep 40-50 year old cars rust free indefinitely.
 
It won't be all relevant, but my thread for my FRP will give you an idea of how to do it properly if possible, and how rust lurks!!

https://www.projectpuma.com/viewtopic.php?t=28244
 
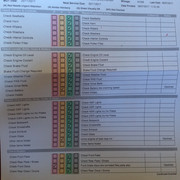
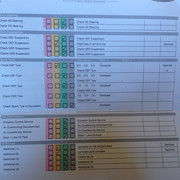
I took the car in for a free visual health check over the weekend. Below is the outcome along with a video from the technician. I'm pretty pleased actually. Didn't mention anything that made me nervous. So now you can see under the car more from the video.

I have purchased a Sealey SG19 and 191 extension probe to do all the chassis. I also purchased some ACF50 but I think I'll go with Bilt Hamber for the chassis as I believe I'll have to be reapplying after 8 months using the ACF50 on exposed parts.

Maybe I could use it inside the sills, behind the arch liners and under the bonnet.


https://video.citnow.com/vxWy2V3dqmd
 

Latest posts

Back
Top