Made this a while back on pumapeople.com, not shure if it is on here, so I thought I'd share it  hopefully somone wil find it usefull.
This is from Ford ETIS
hi, so I found this info whilst digging in my etis /> thought I'd make a wiki, but found I had no idea how
  /> so here goes, hopefuly somone wil find this useful, I'm going to atempt this myselfe soon, and wil try to add photos
  />
/>
edit: this instruktion is for use whit original parts, but should be adaptable to replica parts />
/>
Removal and Installation
Removal
1. General Notes
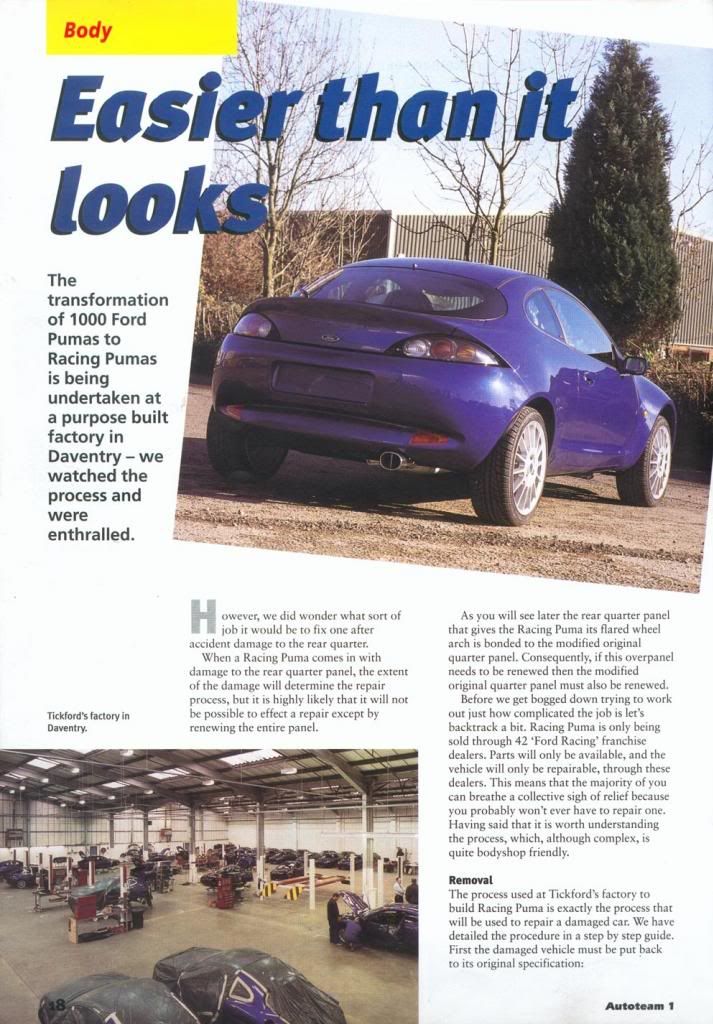
Required disassembly operations: Bumper, rear lamp, rubber seal - liftgate, bezel - forced air extraction, tank cap, fuel tank filler neck, side window, trims, inner fender, seat cushion, rear seat, safety belt, rubber seal - door and lock striker.
Fold back the carpets and move the wiring out of the working area.
2. Quarter panel

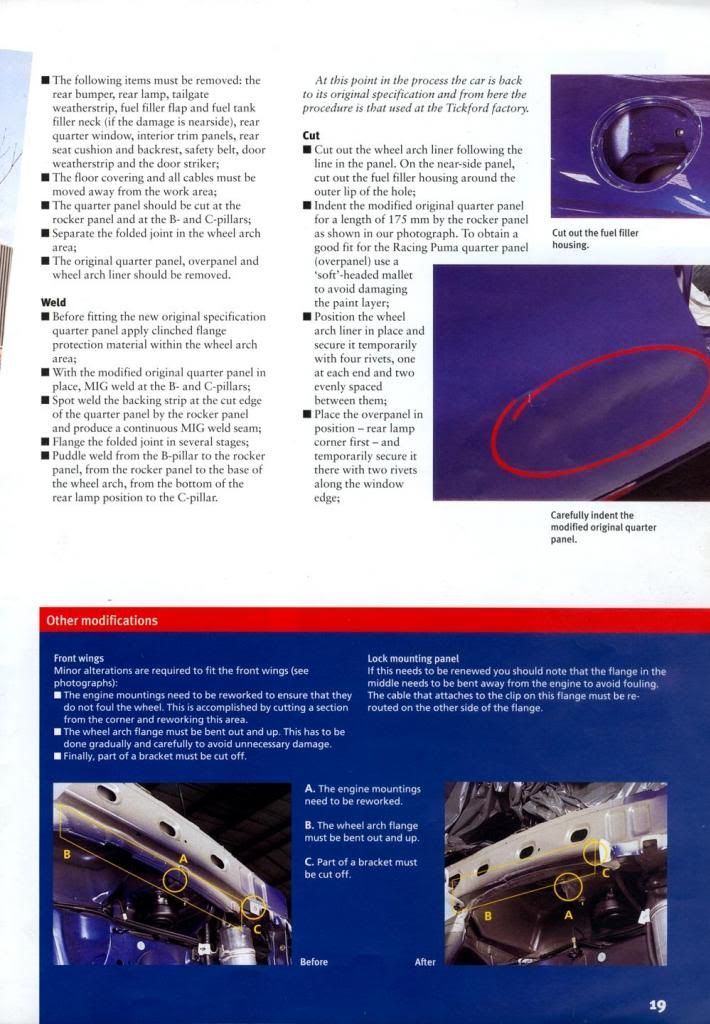
1. Cut locations.
2. Separate clinched flange.
Installation
1. Quarter panel

1. Continuous MIG weld seam.
2. Spot weld backing strips to the cut edge and weld using MIG continuous seam.
3. Apply two-component metal adhesive prior to inserting the quarter panel. Clinch the flange in several stages.
4. Puddle welding.
2. Cut around the marked line on the new quarter panel.

3. Cut out the wheel arch liner, following the line in the panel.

4. Cut out the fuel filler flap housing around the outer lip of the hole.

5. Indent the new quarter panel for approximately 175 mm. to accommodate the joining flange inside the overpanel.

6. Position the wheel arch inner liner and secure temporarily with four rivets.

7. Lay the overpanel onto the vehicle and when positioned correctly, secure temporarily with two rivets.

8. Mark the position where the overpanel meets the C-pillar.

9. Remove the overpanel and wheel arch liner.
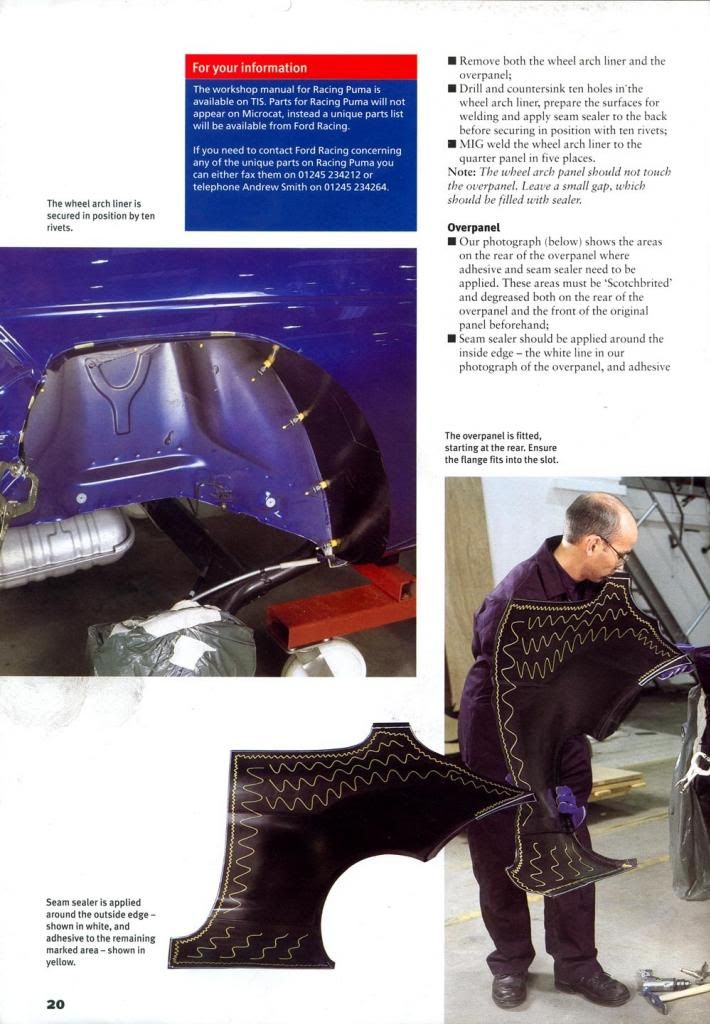
10. Drill and countersink ten holes in the wheel arch liner to accommodate the rivets.
11. Apply seam sealer to the back of the wheel arch liner.
12. Secure the wheel arch liner with ten rivets.

13. Prepare surfaces and MIG weld the wheel arch liner to the quarter panel in five places.

14. Drill two pilot holes and cut a slot along the mark made in step 8. This is necessary to accommodate the flange on the overpanel.

15. Scothbrite and degrease the inside of the overpanel within the bolded area shown.

16. Scotchbrite and degrease the existing quarter panel in line with the area on the overpanel in step 15.
17. Apply seam sealer around the inside edge of the overpanel where shown.

18. NOTE: Do not allow the seam sealer and body adhesive to come in contact with each other, as curing will be impaired.
Apply body panel adhesive within the bolded area shown.

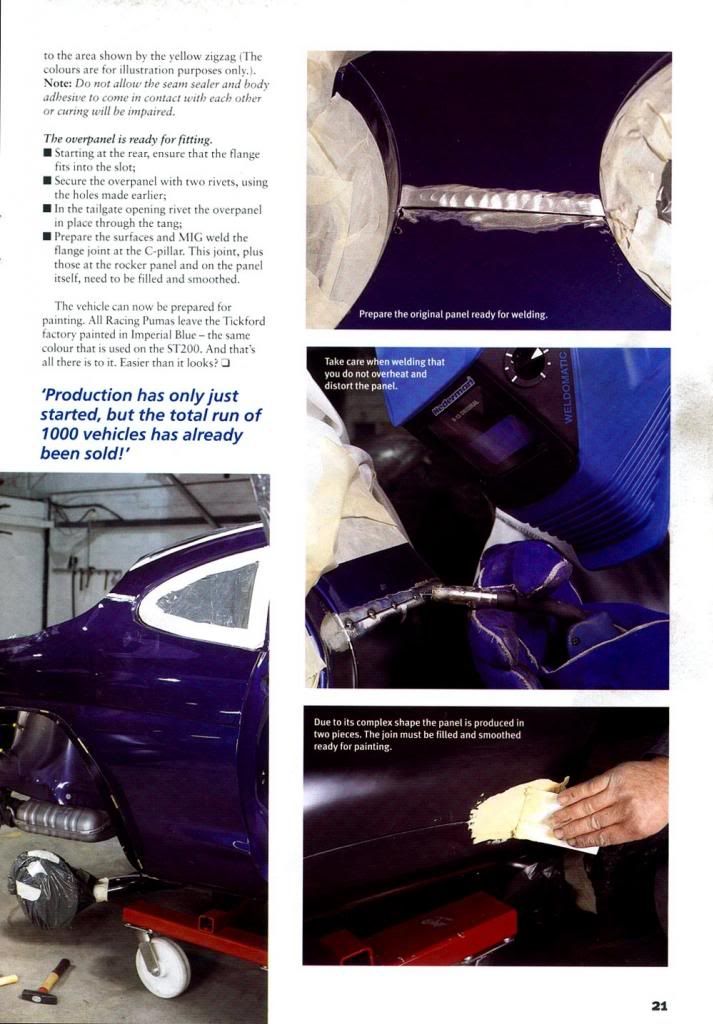
19. Install the overpanel to the vehicle, starting from the rear and making sure the flange fits into the slot.

20. Secure the overpanel using two rivets in the holes made in step 7.

21. Secure the overpanel in the liftgate opening with a rivet through the tang.

22. Prepare the surfaces and MIG weld the flange joint at the C-pillar.

23. Fill the flange joint on the overpanel.
24. Fill and smooth joints on the overpanel at C-pillar and rocker panel.

good luck />
/>
This is from Ford ETIS
hi, so I found this info whilst digging in my etis
edit: this instruktion is for use whit original parts, but should be adaptable to replica parts
Removal and Installation
Removal
1. General Notes
Required disassembly operations: Bumper, rear lamp, rubber seal - liftgate, bezel - forced air extraction, tank cap, fuel tank filler neck, side window, trims, inner fender, seat cushion, rear seat, safety belt, rubber seal - door and lock striker.
Fold back the carpets and move the wiring out of the working area.
2. Quarter panel

1. Cut locations.
2. Separate clinched flange.
Installation
1. Quarter panel

1. Continuous MIG weld seam.
2. Spot weld backing strips to the cut edge and weld using MIG continuous seam.
3. Apply two-component metal adhesive prior to inserting the quarter panel. Clinch the flange in several stages.
4. Puddle welding.
2. Cut around the marked line on the new quarter panel.

3. Cut out the wheel arch liner, following the line in the panel.

4. Cut out the fuel filler flap housing around the outer lip of the hole.

5. Indent the new quarter panel for approximately 175 mm. to accommodate the joining flange inside the overpanel.

6. Position the wheel arch inner liner and secure temporarily with four rivets.

7. Lay the overpanel onto the vehicle and when positioned correctly, secure temporarily with two rivets.

8. Mark the position where the overpanel meets the C-pillar.

9. Remove the overpanel and wheel arch liner.
10. Drill and countersink ten holes in the wheel arch liner to accommodate the rivets.
11. Apply seam sealer to the back of the wheel arch liner.
12. Secure the wheel arch liner with ten rivets.

13. Prepare surfaces and MIG weld the wheel arch liner to the quarter panel in five places.

14. Drill two pilot holes and cut a slot along the mark made in step 8. This is necessary to accommodate the flange on the overpanel.

15. Scothbrite and degrease the inside of the overpanel within the bolded area shown.

16. Scotchbrite and degrease the existing quarter panel in line with the area on the overpanel in step 15.
17. Apply seam sealer around the inside edge of the overpanel where shown.

18. NOTE: Do not allow the seam sealer and body adhesive to come in contact with each other, as curing will be impaired.
Apply body panel adhesive within the bolded area shown.

19. Install the overpanel to the vehicle, starting from the rear and making sure the flange fits into the slot.

20. Secure the overpanel using two rivets in the holes made in step 7.

21. Secure the overpanel in the liftgate opening with a rivet through the tang.

22. Prepare the surfaces and MIG weld the flange joint at the C-pillar.

23. Fill the flange joint on the overpanel.
24. Fill and smooth joints on the overpanel at C-pillar and rocker panel.

good luck


