johnny h
Member
I started a thread on this site about my rally car build in 2013, but as I have been concentrating all my efforts on the car I have neglected to update my thread. Rather than following on from the last thread I thought it would be easier to start at the beginning with a new thread.
There is a lot more steps (and work) than I have put in the thread below but hopefully it will give you an idea of what was involved.
I’ve no mechanical expertise but I have a Haynes Fiesta manual, a Ford S1400 rally build manual and I have relied heavily on the advice on this forum. As I am not a mechanic I may have made mistakes which will no doubt become apparent on my first event. Whilst writing this, the car is not finished but it’s not far off. There are many more things that I want to do to the car but funds have now slowed me down. Also I want to start competing soon rather than continuing to spend money and time on the car. The other upgrades can wait.
I debated whether to get a 1.7, 1.6 or 1.4 but I decided to go for a 1400. The reason for this decision is that; the 1.7 would put me in a class with 2.0 cars and there is only 10bhp between the 1.4 and 1.6. So I opted for the 1400 to be in the lower class with 1.4 cars.
I have rallied previously in a 205 with my trusty Co-Driver Johnny M, and loved every minute of it. The previous events have all been forest stages but we have decided to try tarmac for a change and therefore I have prep’d the car accordingly.
The story so far……
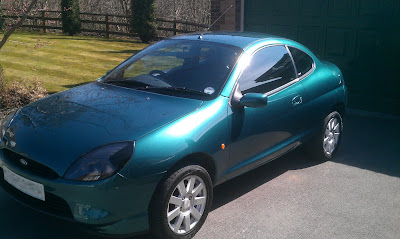
I bought a low mileage puma in good condition for the donor car. I think there are different thoughts on this as some would go for a cheap car as many of the components are being replaced but I wanted a good strong reliable car as a starting point. Green wasn’t my first choice of colour but as it was in good nick compared to the others I looked at I decided to go for it-
I then stripped the interior of the car which was great fun….
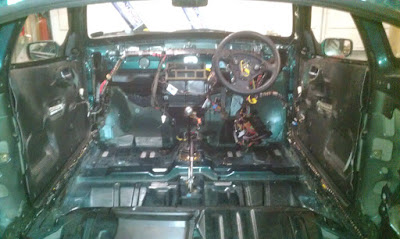
Ditched all the metalwork from behind the dashboard to save weight….
Cleaned up the seams….

To try and save money I bought an arc welder and had a go at welding the seams but I blew holes in the floor and set fire to the underseal under the car.

(I have since been advised on this forum that arc welders are too aggressive on thin car metal). I therefore decided to leave the seam welding to the experts and to have it done when I was ready for the cage to be welded in.
Next I removed the sealant from the boot floor to save some weight (it all adds up!)

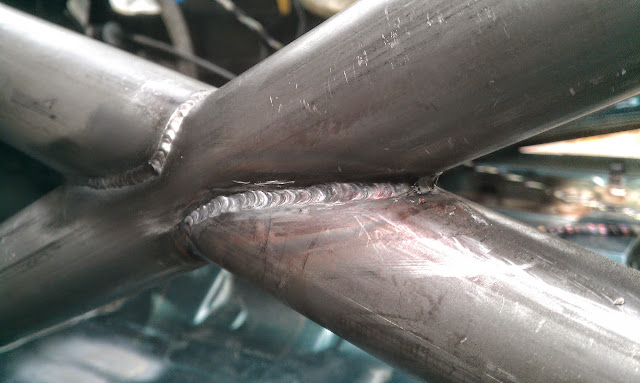
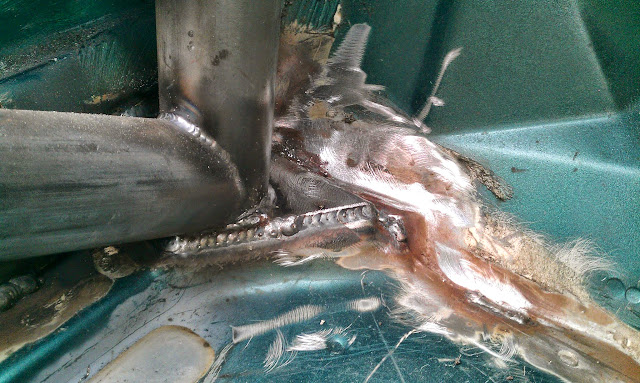
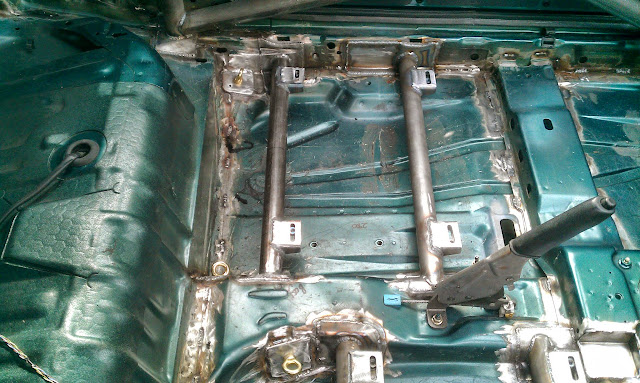
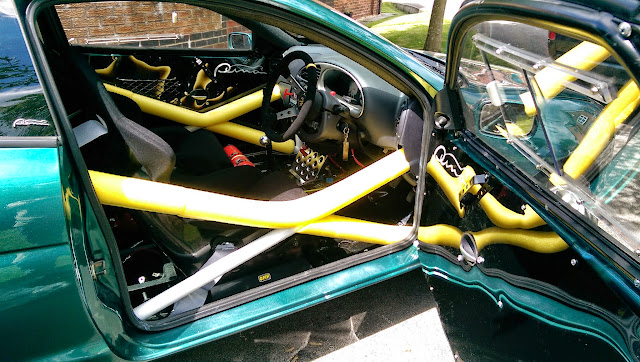
After my roll cage was delivered from Custom Cages I then trailered the car up to North Yorkshire to have; the roll cage fitted, seat rails and harness points welded and the seams welded. The quality of the work was brilliant …
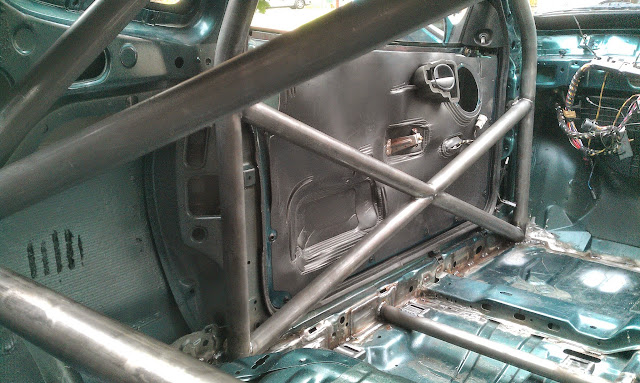
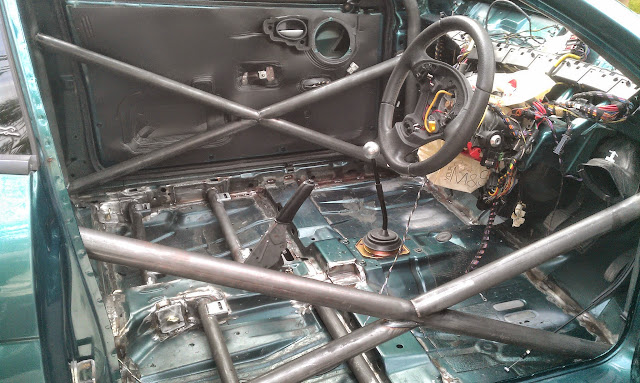
As the puma is quite small inside, the rollcage fitter cut a section out of the cross member to provide more room for the seat….
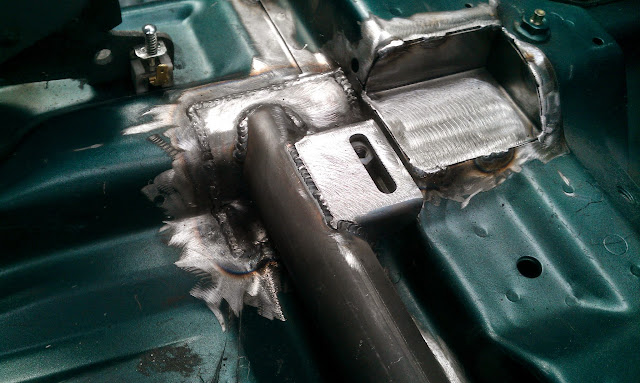
Cage fitted and painted, I then fitted a fibreglass fuel tank guard (I know there are stronger alternatives but I needed to keep an eye on the funds)….
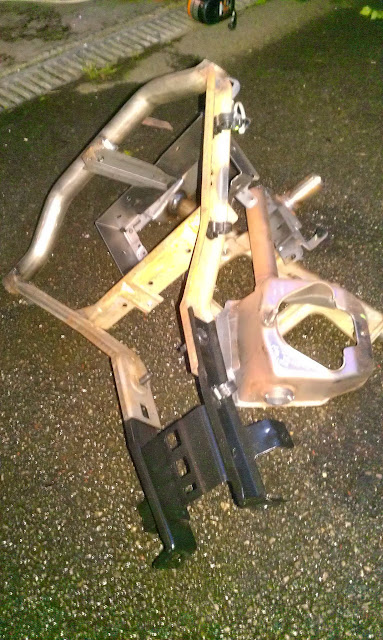
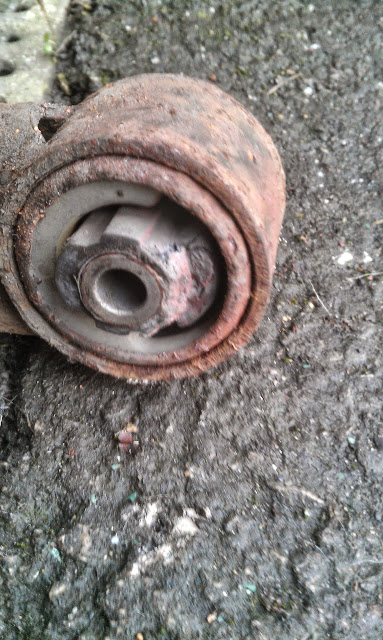
I then decided to change the bushes for poly. The old ones were that worn the back end wobbled like Beyonce’s backside. I decided to go for the black powerflex motorsport ones all round to help stiffen up the ride. I started by removing the old ones by pin-drilling the rubber, then hacksawing into the steel casing of the bush (taking care not to saw into the beam metal) they then popped out quite easily..
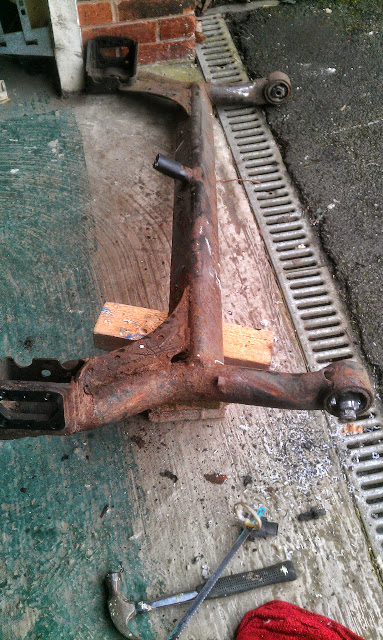
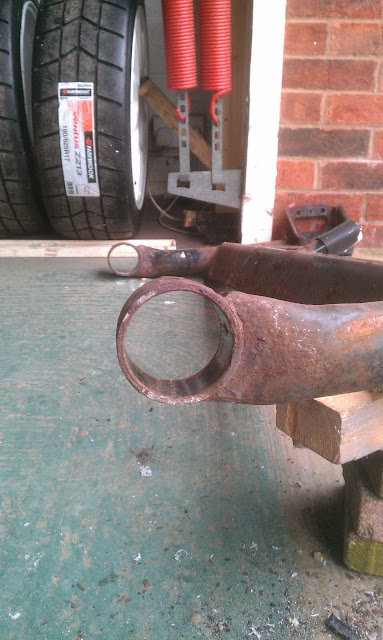
I then painted the beam before putting the new bushes back in…
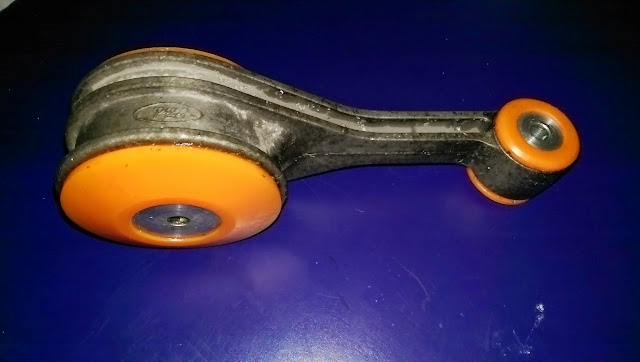
I replaced the bushes in the rear engine mount (dogbone) with poly..
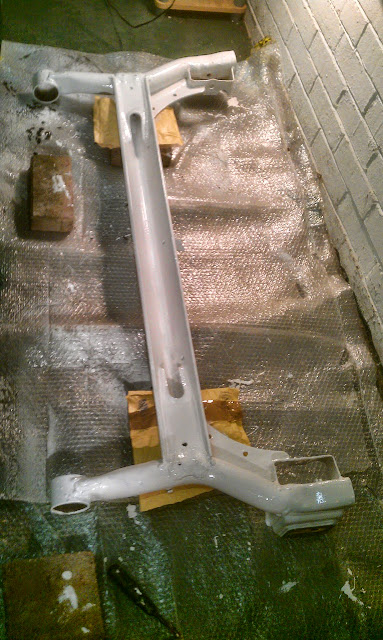
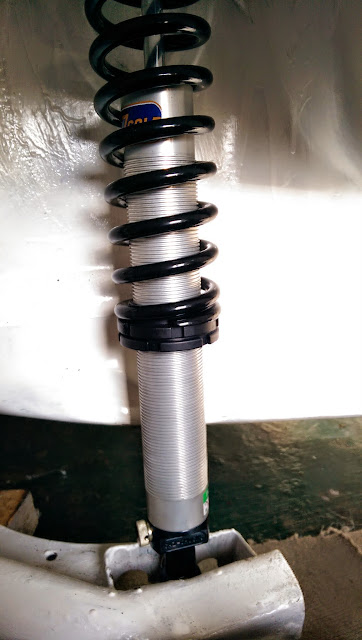
I then stripped all the underseal off the car and painted it white. The nice courier man then arrived with my new Gaz Gold shocks….
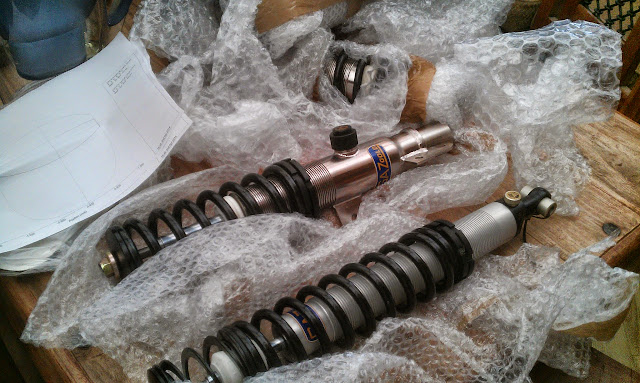
I then put the beam back on, fitted the shocks and ST170 hubs and discs …
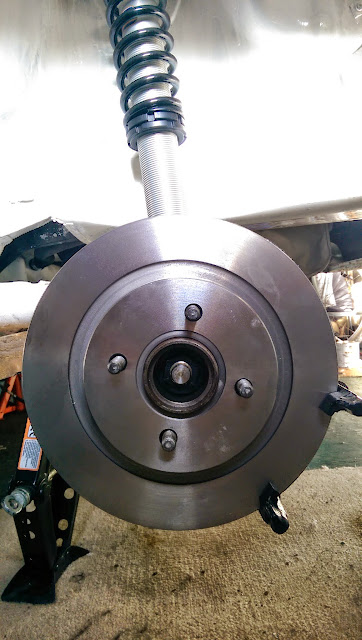
Funny thing that followed was that even with the springs down to their lowest setting, the car’s ride height was higher than when the original ford shocks were fitted (you can see this in the wheel picture further down this thread). I rang Gaz shocks to complain that they had supplied the wrong shocks/springs. They confirmed that they were the correct ones…… so after a lot of head scratching and several cups of tea, I realised that I had re-fitted the beam upside down …dooh!
Easily sorted and back on with the build, I then fitted the front shocks
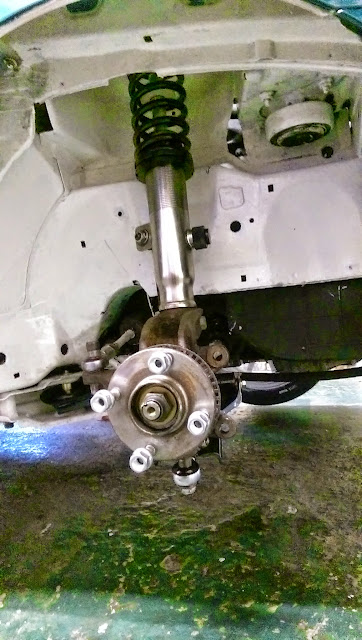
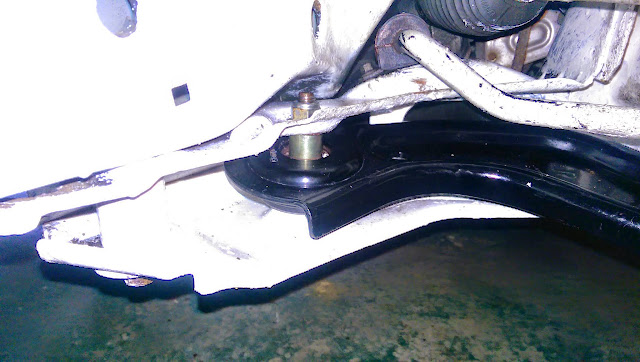
I intended on fitting the powerflex bushes in the front wishbones; however they were non-ford wishbones and following advice on here I realised that they would not fit. I then ditched the old wishbones and bought new ones with rose jointed solid bushes. I also fitted rose jointed track rod ends…
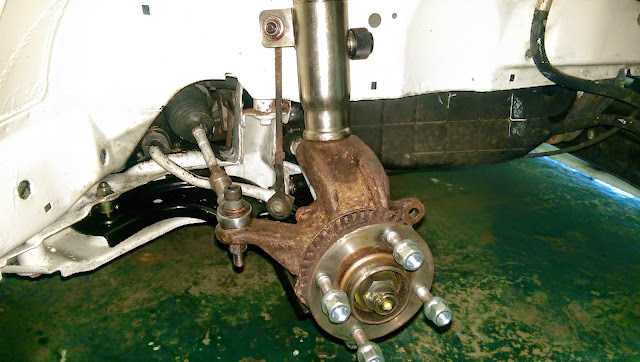
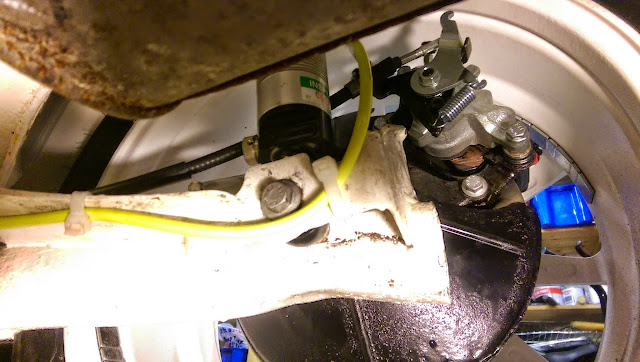
I then fitted the Mondeo big brake set up on the front. I went for mintex 1144 pads on the rear and 1166 on the front. The 1166 are not normally available for the Mondeo caliper, so I had to pay for a special production run. Really impressed with the braking performance of the car now.
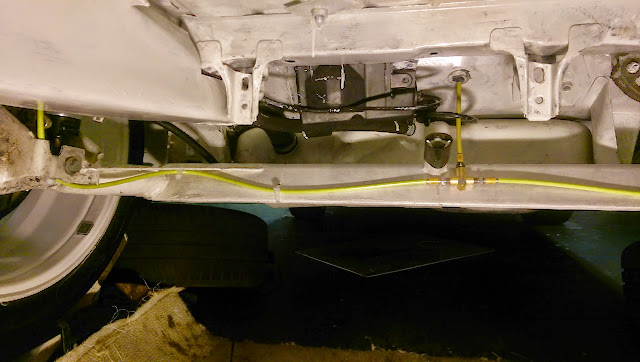
I then ran HEL braided brake lines throughout, running the lines through the inside of the car. Below are pictures of the rear brake line exiting from the inside of the car just above the rear beam and Tee’d to each wheel….
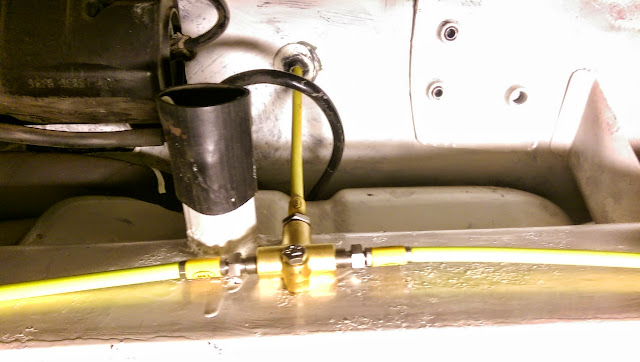
I then ran aeroquip fuel lines from the fuel tank to the engine, routed through the inside of the car. I first routed the fuel lines through the side of the rear seat floorpan but the 90 degree aeroquip fittings made the fuel tank sit too low and I was concerned that the fuel tank would be the lowest point under the car (not a good idea for rallying!), so I then routed the fuel lines vertical into the tank as below so that the tank would be higher…
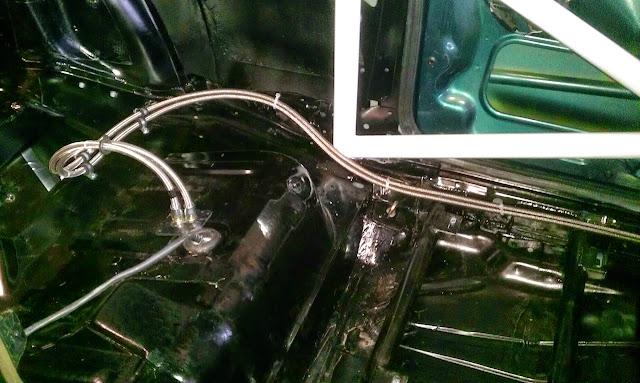
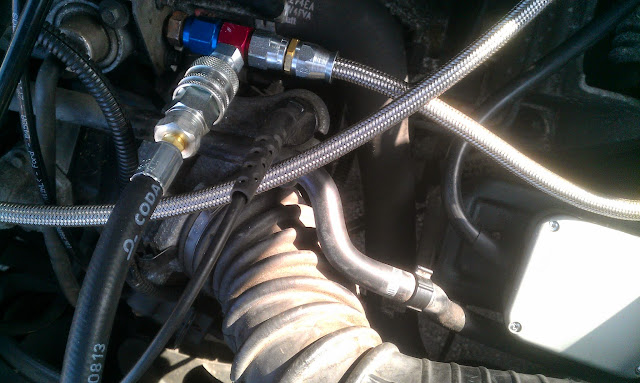
However I did not like the fuel lines being stuck up like in the picture above in case something rolling about in the car struck them and snapped the connections so I have since modified it so that they are flat on the floor with a 90 degree bend just above the fuel pump with a metal housing above the entry point to cover the holes.
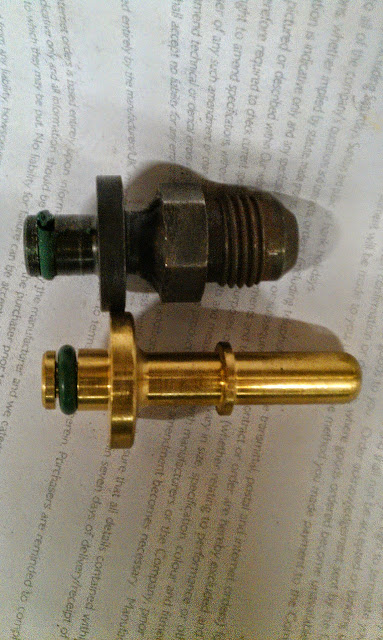
The guy who fitted my rollcage also made me fuel fittings with threads to allow for aeroquip fittings. You can see the standard ford fitting and the threaded type below –
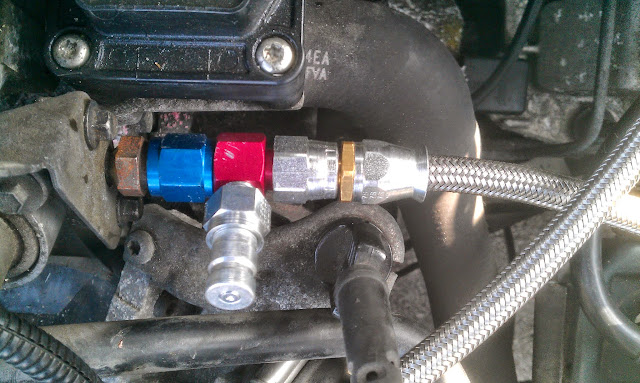
and the fuel lines connected with a fuel sample take-off (to comply with new MSA regs)…
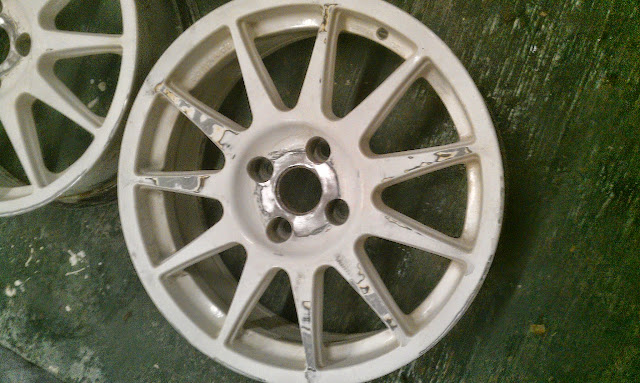
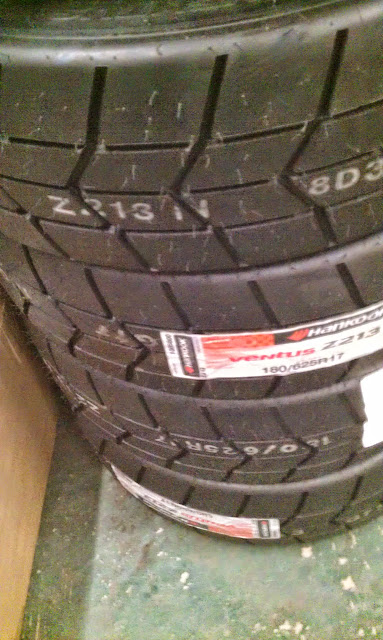
Wheels and tyres next….. I bought 4 secondhand speedlines, one of which was damaged so had to be scrapped, I then bought another 2 more speedlines but they were the wrong offset (not as per his advert!), but I have put these wider offset on the front and it seems to handle okay. Cleaned them all up and had the Hankook intermediate rally tyres fitted…..
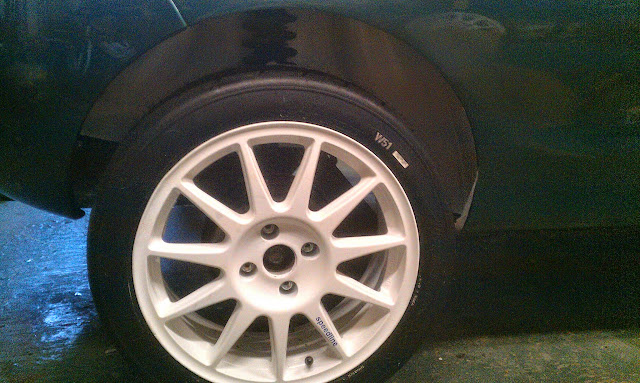
Above is the picture with the high ride height I talked about earlier!!
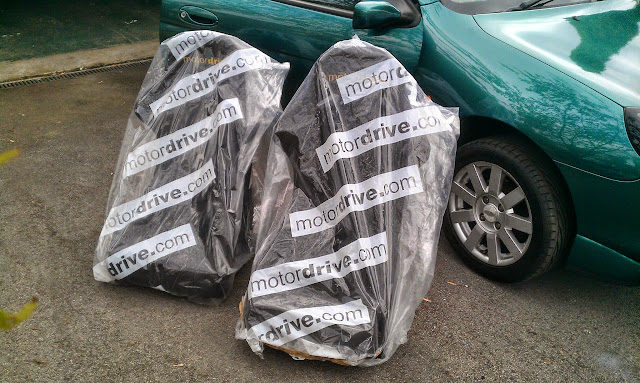
Me and my Co-driver Johnny M then went to Motordrive to be fitted up for the seats. I don’t know of any other seat manufacturer that builds the seat around you! Seats and harnesses then arrive….
Motordrive 6-point belts fitted to seat rails…
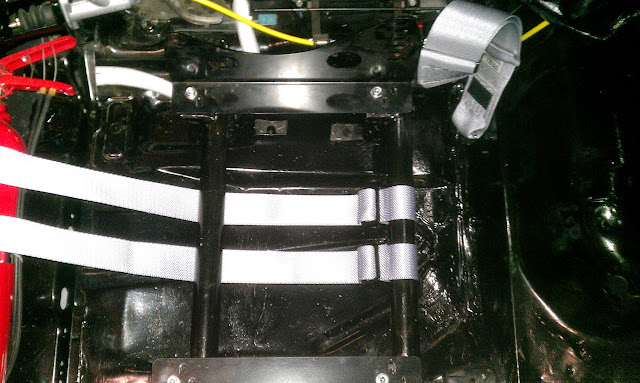
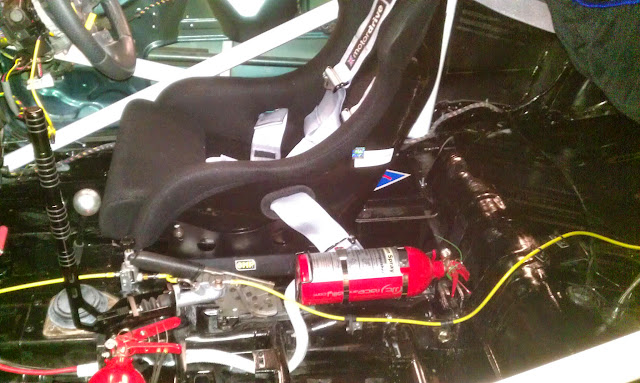
Drivers seat now fitted along with hydraulic handbrake, brake bias and 2 fire extinguishers – plumbed in and handheld…
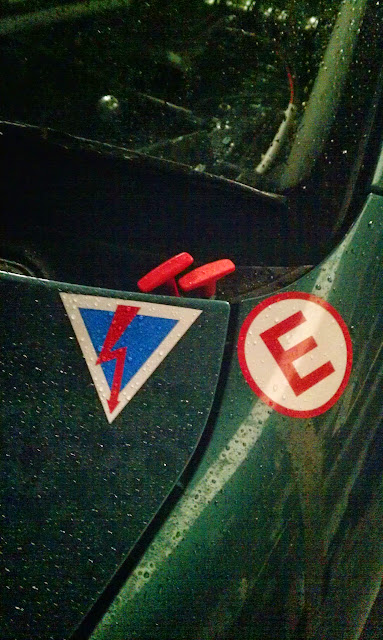
Next was the electrical kill and extinguisher pull cables. I have since moved these two further apart as there would be a chance of a marshal pulling both by mistake….
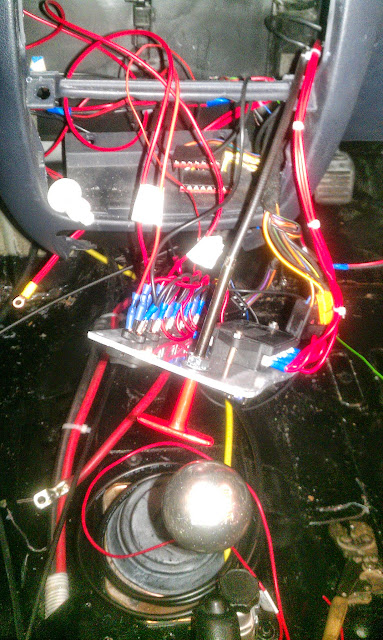
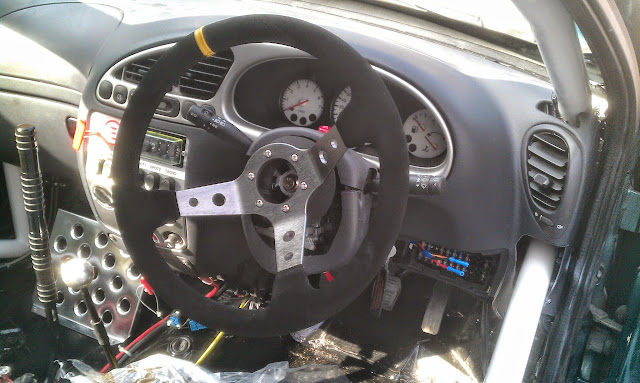
I then wired in the aux switches and the cockpit fire pull cable plus fitted an alcantara wheel..
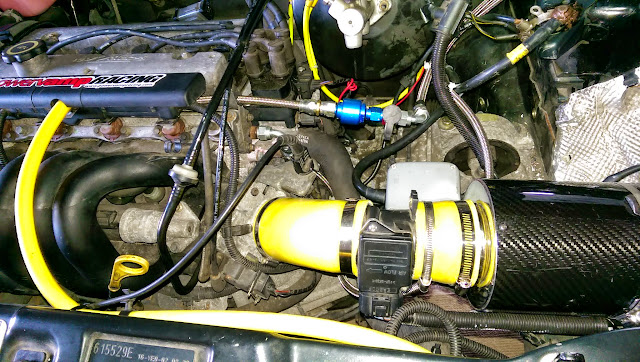
New air intake…
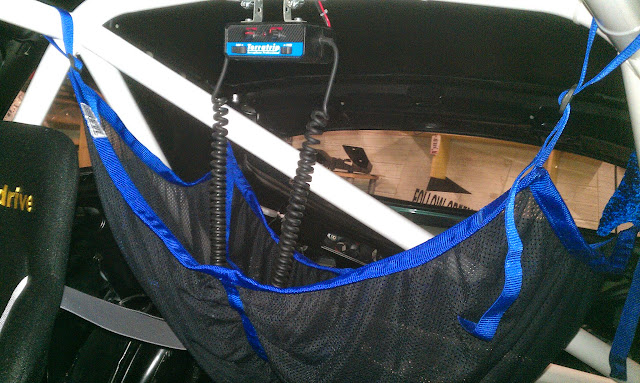
Helmet hammock and intercom…
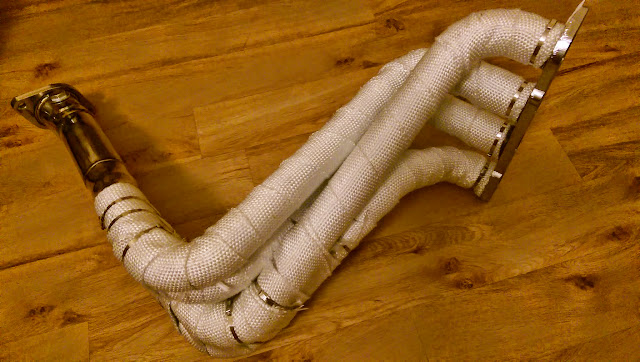
New 4-2-1 manifold with heat wrap…
oil cooler…

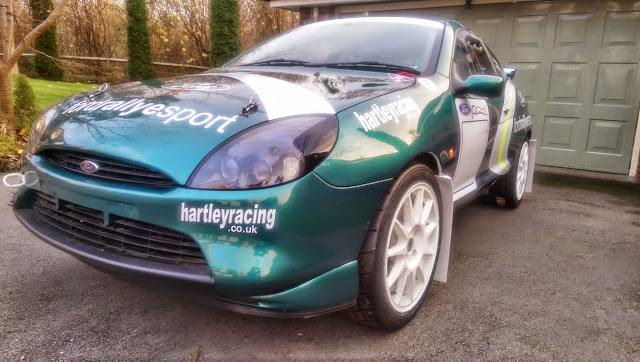
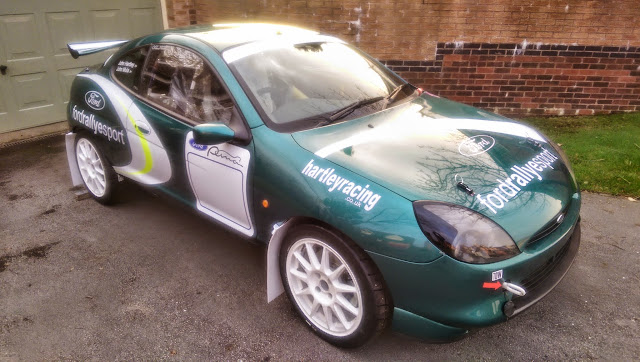
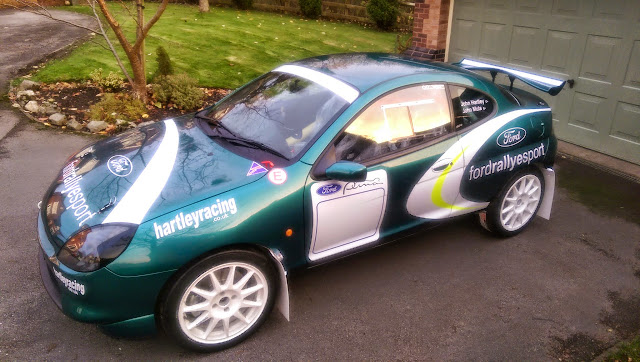
And hey presto, an MSA log booked Puma Rally Car….
There is a lot more steps (and work) than I have put in the thread below but hopefully it will give you an idea of what was involved.
I’ve no mechanical expertise but I have a Haynes Fiesta manual, a Ford S1400 rally build manual and I have relied heavily on the advice on this forum. As I am not a mechanic I may have made mistakes which will no doubt become apparent on my first event. Whilst writing this, the car is not finished but it’s not far off. There are many more things that I want to do to the car but funds have now slowed me down. Also I want to start competing soon rather than continuing to spend money and time on the car. The other upgrades can wait.
I debated whether to get a 1.7, 1.6 or 1.4 but I decided to go for a 1400. The reason for this decision is that; the 1.7 would put me in a class with 2.0 cars and there is only 10bhp between the 1.4 and 1.6. So I opted for the 1400 to be in the lower class with 1.4 cars.
I have rallied previously in a 205 with my trusty Co-Driver Johnny M, and loved every minute of it. The previous events have all been forest stages but we have decided to try tarmac for a change and therefore I have prep’d the car accordingly.
The story so far……
I bought a low mileage puma in good condition for the donor car. I think there are different thoughts on this as some would go for a cheap car as many of the components are being replaced but I wanted a good strong reliable car as a starting point. Green wasn’t my first choice of colour but as it was in good nick compared to the others I looked at I decided to go for it-
I then stripped the interior of the car which was great fun….
Ditched all the metalwork from behind the dashboard to save weight….
Cleaned up the seams….
To try and save money I bought an arc welder and had a go at welding the seams but I blew holes in the floor and set fire to the underseal under the car.
(I have since been advised on this forum that arc welders are too aggressive on thin car metal). I therefore decided to leave the seam welding to the experts and to have it done when I was ready for the cage to be welded in.
Next I removed the sealant from the boot floor to save some weight (it all adds up!)
After my roll cage was delivered from Custom Cages I then trailered the car up to North Yorkshire to have; the roll cage fitted, seat rails and harness points welded and the seams welded. The quality of the work was brilliant …
As the puma is quite small inside, the rollcage fitter cut a section out of the cross member to provide more room for the seat….
Cage fitted and painted, I then fitted a fibreglass fuel tank guard (I know there are stronger alternatives but I needed to keep an eye on the funds)….
I then decided to change the bushes for poly. The old ones were that worn the back end wobbled like Beyonce’s backside. I decided to go for the black powerflex motorsport ones all round to help stiffen up the ride. I started by removing the old ones by pin-drilling the rubber, then hacksawing into the steel casing of the bush (taking care not to saw into the beam metal) they then popped out quite easily..
I then painted the beam before putting the new bushes back in…
I replaced the bushes in the rear engine mount (dogbone) with poly..
I then stripped all the underseal off the car and painted it white. The nice courier man then arrived with my new Gaz Gold shocks….
I then put the beam back on, fitted the shocks and ST170 hubs and discs …
Funny thing that followed was that even with the springs down to their lowest setting, the car’s ride height was higher than when the original ford shocks were fitted (you can see this in the wheel picture further down this thread). I rang Gaz shocks to complain that they had supplied the wrong shocks/springs. They confirmed that they were the correct ones…… so after a lot of head scratching and several cups of tea, I realised that I had re-fitted the beam upside down …dooh!
Easily sorted and back on with the build, I then fitted the front shocks
I intended on fitting the powerflex bushes in the front wishbones; however they were non-ford wishbones and following advice on here I realised that they would not fit. I then ditched the old wishbones and bought new ones with rose jointed solid bushes. I also fitted rose jointed track rod ends…
I then fitted the Mondeo big brake set up on the front. I went for mintex 1144 pads on the rear and 1166 on the front. The 1166 are not normally available for the Mondeo caliper, so I had to pay for a special production run. Really impressed with the braking performance of the car now.
I then ran HEL braided brake lines throughout, running the lines through the inside of the car. Below are pictures of the rear brake line exiting from the inside of the car just above the rear beam and Tee’d to each wheel….
I then ran aeroquip fuel lines from the fuel tank to the engine, routed through the inside of the car. I first routed the fuel lines through the side of the rear seat floorpan but the 90 degree aeroquip fittings made the fuel tank sit too low and I was concerned that the fuel tank would be the lowest point under the car (not a good idea for rallying!), so I then routed the fuel lines vertical into the tank as below so that the tank would be higher…
However I did not like the fuel lines being stuck up like in the picture above in case something rolling about in the car struck them and snapped the connections so I have since modified it so that they are flat on the floor with a 90 degree bend just above the fuel pump with a metal housing above the entry point to cover the holes.
The guy who fitted my rollcage also made me fuel fittings with threads to allow for aeroquip fittings. You can see the standard ford fitting and the threaded type below –
and the fuel lines connected with a fuel sample take-off (to comply with new MSA regs)…
Wheels and tyres next….. I bought 4 secondhand speedlines, one of which was damaged so had to be scrapped, I then bought another 2 more speedlines but they were the wrong offset (not as per his advert!), but I have put these wider offset on the front and it seems to handle okay. Cleaned them all up and had the Hankook intermediate rally tyres fitted…..
Above is the picture with the high ride height I talked about earlier!!
Me and my Co-driver Johnny M then went to Motordrive to be fitted up for the seats. I don’t know of any other seat manufacturer that builds the seat around you! Seats and harnesses then arrive….
Motordrive 6-point belts fitted to seat rails…
Drivers seat now fitted along with hydraulic handbrake, brake bias and 2 fire extinguishers – plumbed in and handheld…
Next was the electrical kill and extinguisher pull cables. I have since moved these two further apart as there would be a chance of a marshal pulling both by mistake….
I then wired in the aux switches and the cockpit fire pull cable plus fitted an alcantara wheel..
New air intake…
Helmet hammock and intercom…
New 4-2-1 manifold with heat wrap…
oil cooler…
And hey presto, an MSA log booked Puma Rally Car….
