748
New member
OK, I know a few of these have been done but I don't think it hurts to see more than one.
Anyway, last week I was out in the wife's 1.6, queuing in traffic, and totally without warning there were clouds of steam and that unmistakeable hot coolant smell.
I managed to get off the road, lifted the bonnet and the problem was apparent straight away...one of the engine side hose inlets too the HCV had broken off!
There had been no warnings or signs that this was going to happen, the heating was working fine and no previous loss of coolant.
So a call to the friendly breakdown service and it took him about 10 mins to do this..

Fortunately the only coolant last was from the expansion tank. Topped up with water, ran up to temperature and I was on my way.
First job when I got home was to get on t'interweb for one of these...
http://www.ebay.co.uk/itm/400590269854?_trksid=p2059210.m2749.l2648&ssPageName=STRK%3AMEBIDX%3AIT" onclick="window.open(this.href);return false;
Finally got round to fitting it today and decided to take a few pics on the way to help anyone who hasn't done this before and wasn't too sure how to go about it.
This is a 1.6 but the procedure is the same for other models, and depending on the year of manufacture, some of the firewall fixings may be different.
This really is not a difficult job, the most difficult part of the job is actually getting to it :?
First thing to do is remove the rubber seal which runs along the top of the firewall. It just pulls off.
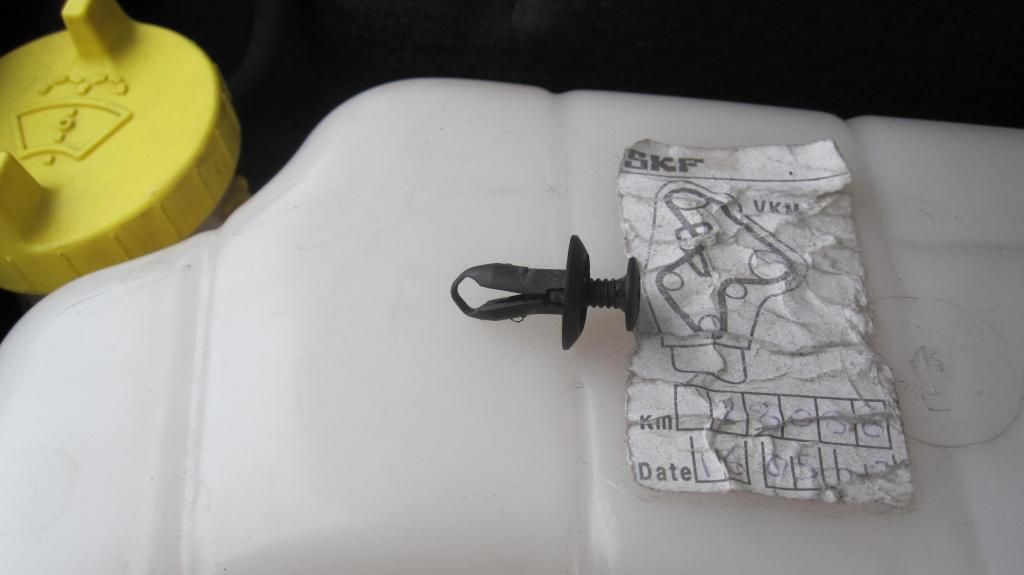
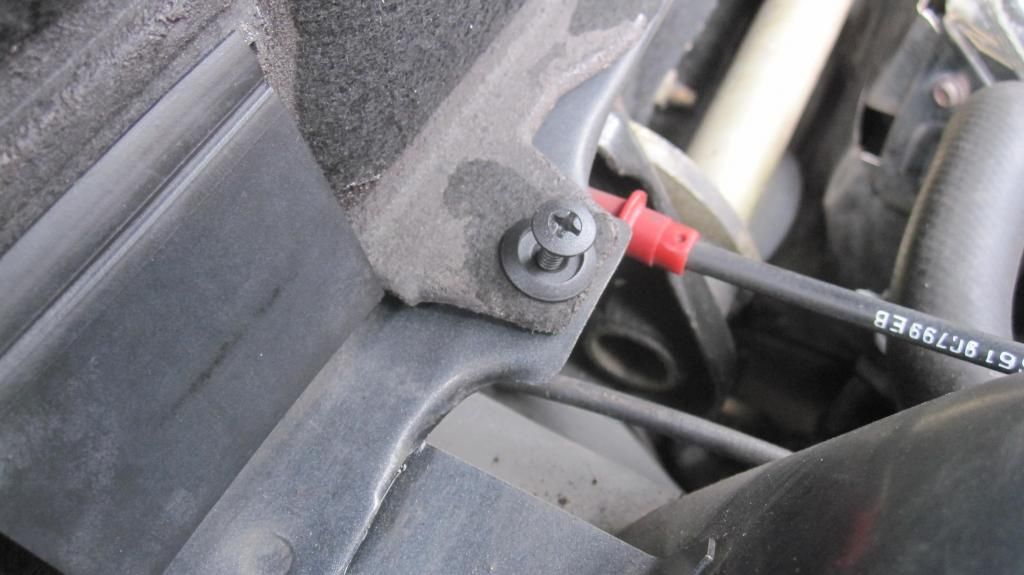
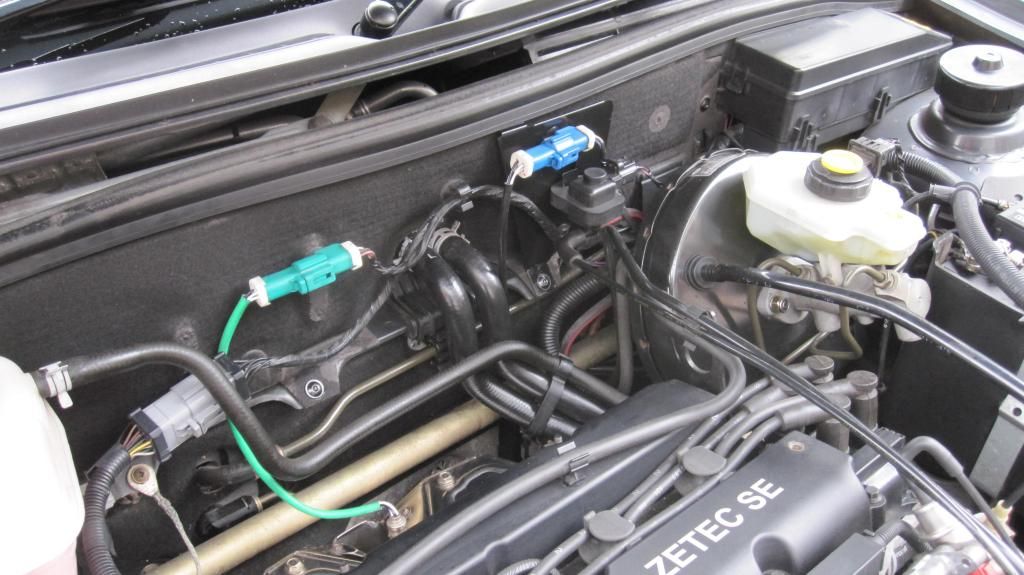
Then the firewall panel needs to come out, it's quite obvious to see which fasteners need to come out apart from the ones near the expansion tank.There is one tucked away behind the washer bottle filler neck and one under the expansion tank, they look like this....
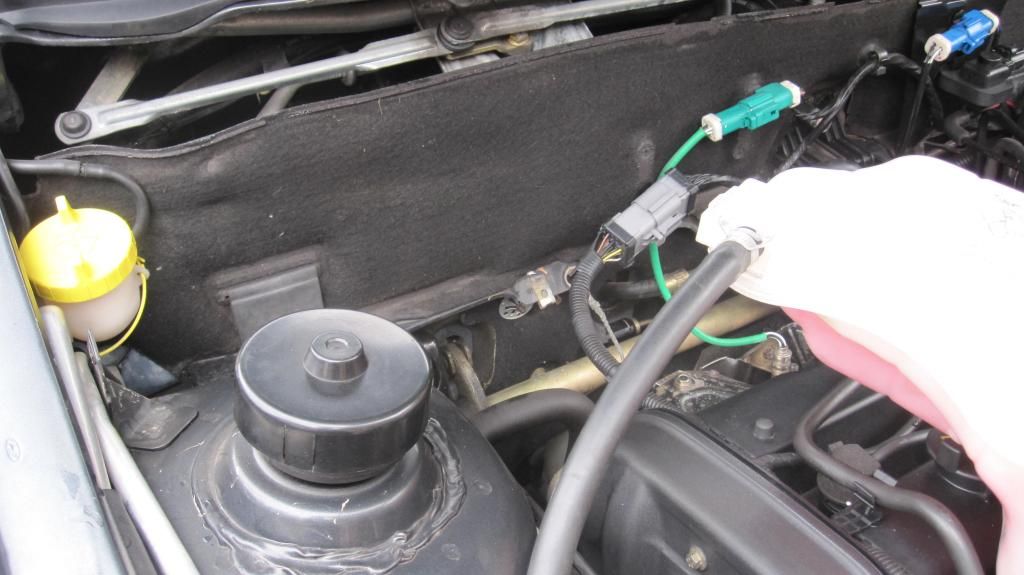
To get to the one under the tank, it has to be removed from it's mounting, no need to disconnect any hoses, just lift out the way and rest on top of the engine. (There is a tricky clip which holds it near the inside of the wing and a fastener at the bottom bracket). Then you will see the little bogger :grin:
Again, depending on the year and model, there will be a few connectors to remove and get out of the way. Then the panel can be lifted out and the HCV can be easily accessed...
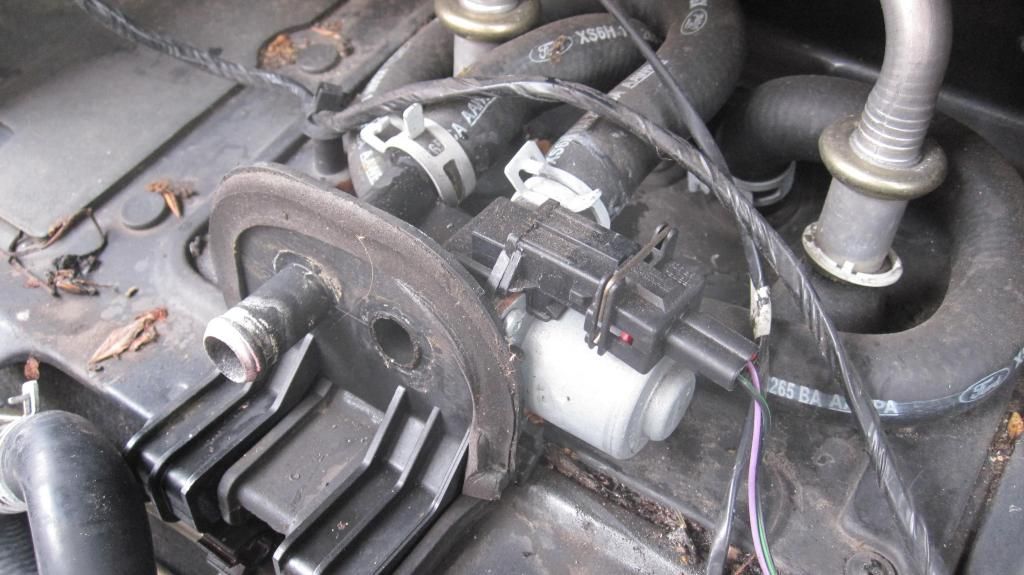
Remove the rubber cover (it just lifts up and off), disconnect the electrical connector (push down in the middle of the spring clip and pull it off), compress the spring hose clips with whichever tool you prefer (pliers, pipe grips, mole grips) and move them back along the hoses.
At this point you may want to get some sort of vessel or use an old towel to catch the coolant which will inevitably spill out of the hoses when you pull them off.
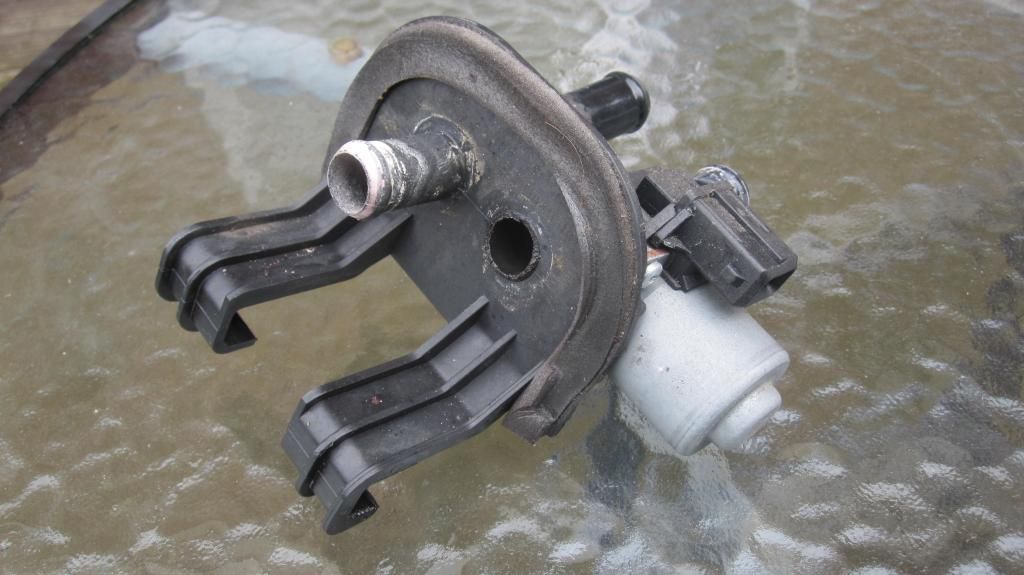
When the hoses are off the HCV simply lifts away from the bulkhead. Here's a close up of my old one...
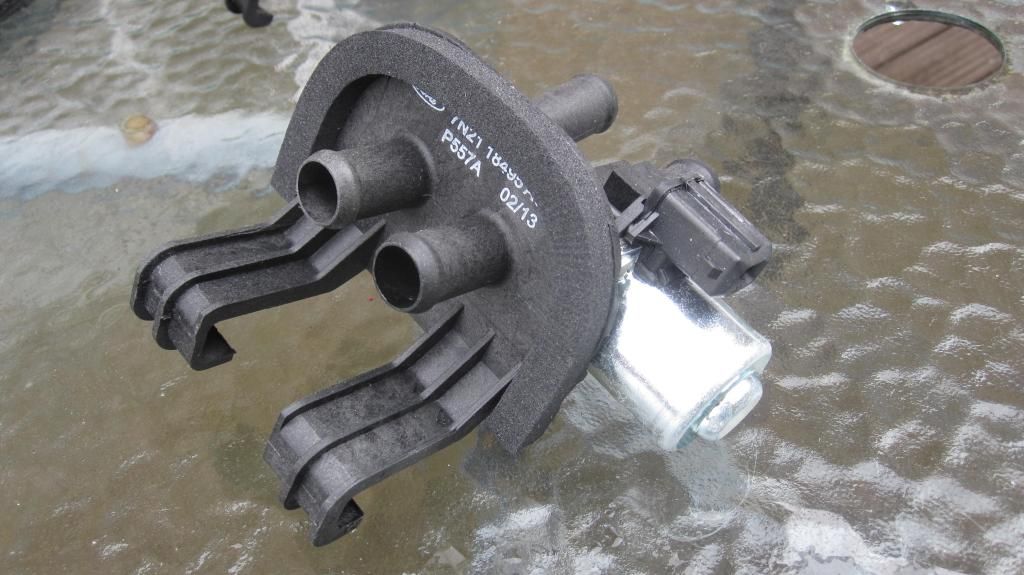
And the new one....
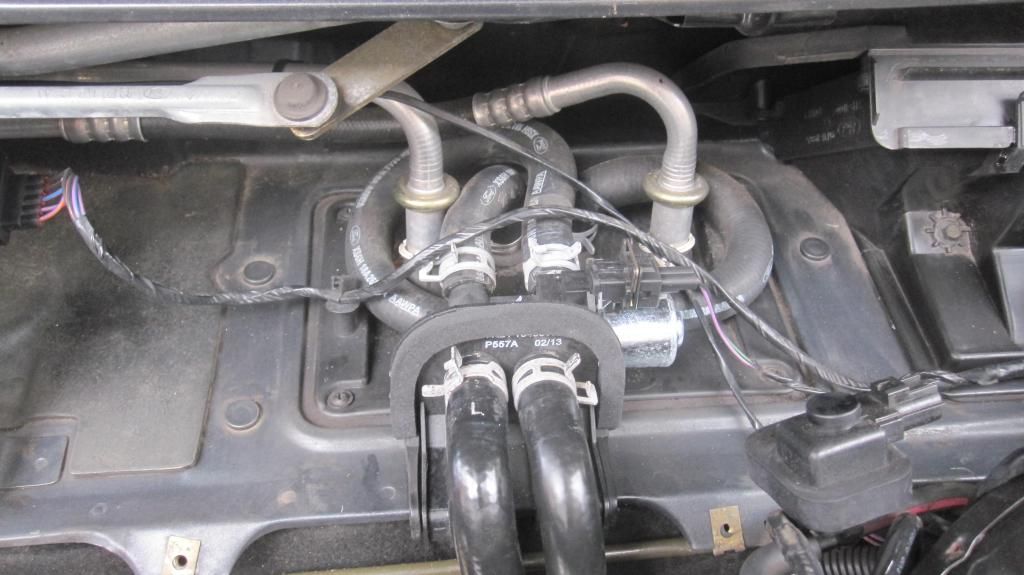
New one installed with hoses refitted and clips back in position...
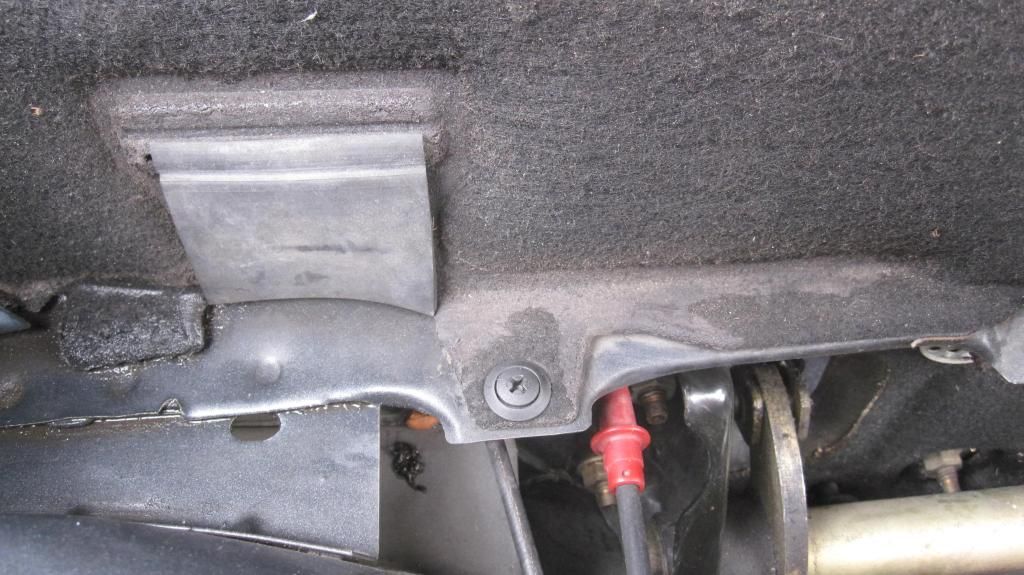
Then it's time to start reassembling everything, here's a pic showing how the elusive fasteners work.They just push in") ...
...
All built up and ready for testing...

Now top up the coolant to the correct level and start up the engine with the cap OFF, and the heater control set to HOT.
You should see bubbles appearing in the expansion tank as air is expelled from the system.
When the engine is up to normal temperature, replace the expansion tank cap and check for leaks.
Check that the heater works on hot and cold.
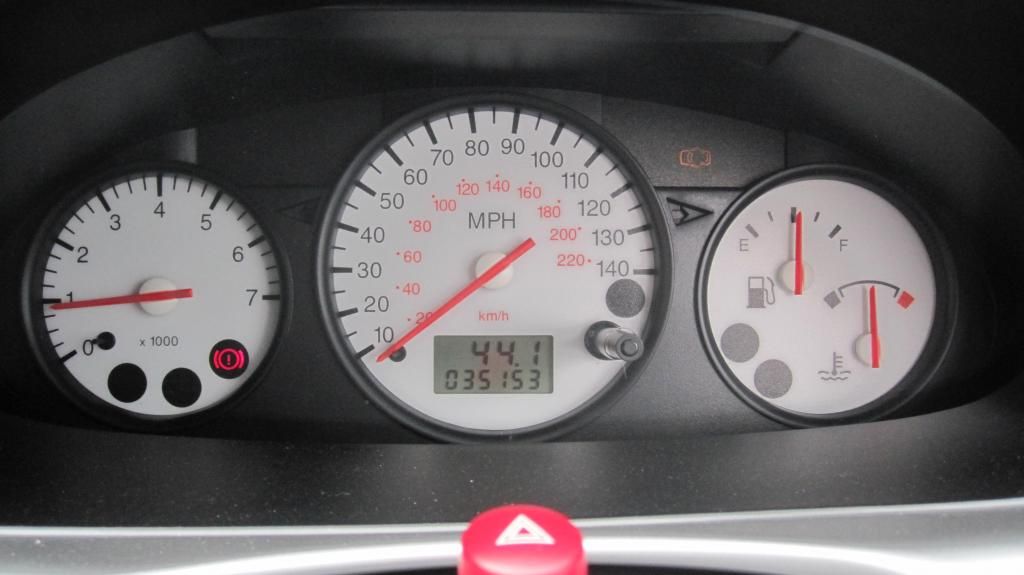
Temperature gauge up to normal position and steady ....
Based on my experience with this, I would advise anyone to carry a bit of spare coolant (even if it's just water) and a bit of pipe like this...
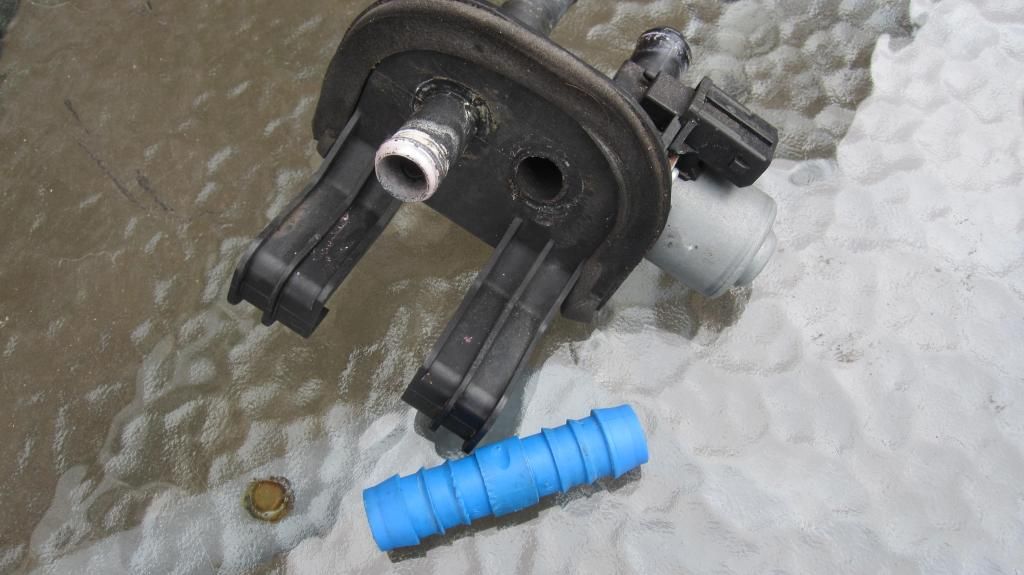
It's about 18mm OD. With this and a pair of decent pliers it could get you going again if you're not a member of a recovery service.
Paul
Anyway, last week I was out in the wife's 1.6, queuing in traffic, and totally without warning there were clouds of steam and that unmistakeable hot coolant smell.
I managed to get off the road, lifted the bonnet and the problem was apparent straight away...one of the engine side hose inlets too the HCV had broken off!
There had been no warnings or signs that this was going to happen, the heating was working fine and no previous loss of coolant.
So a call to the friendly breakdown service and it took him about 10 mins to do this..

Fortunately the only coolant last was from the expansion tank. Topped up with water, ran up to temperature and I was on my way.
First job when I got home was to get on t'interweb for one of these...
http://www.ebay.co.uk/itm/400590269854?_trksid=p2059210.m2749.l2648&ssPageName=STRK%3AMEBIDX%3AIT" onclick="window.open(this.href);return false;
Finally got round to fitting it today and decided to take a few pics on the way to help anyone who hasn't done this before and wasn't too sure how to go about it.
This is a 1.6 but the procedure is the same for other models, and depending on the year of manufacture, some of the firewall fixings may be different.
This really is not a difficult job, the most difficult part of the job is actually getting to it :?
First thing to do is remove the rubber seal which runs along the top of the firewall. It just pulls off.
Then the firewall panel needs to come out, it's quite obvious to see which fasteners need to come out apart from the ones near the expansion tank.There is one tucked away behind the washer bottle filler neck and one under the expansion tank, they look like this....

To get to the one under the tank, it has to be removed from it's mounting, no need to disconnect any hoses, just lift out the way and rest on top of the engine. (There is a tricky clip which holds it near the inside of the wing and a fastener at the bottom bracket). Then you will see the little bogger :grin:


Again, depending on the year and model, there will be a few connectors to remove and get out of the way. Then the panel can be lifted out and the HCV can be easily accessed...

Remove the rubber cover (it just lifts up and off), disconnect the electrical connector (push down in the middle of the spring clip and pull it off), compress the spring hose clips with whichever tool you prefer (pliers, pipe grips, mole grips) and move them back along the hoses.
At this point you may want to get some sort of vessel or use an old towel to catch the coolant which will inevitably spill out of the hoses when you pull them off.
When the hoses are off the HCV simply lifts away from the bulkhead. Here's a close up of my old one...

And the new one....

New one installed with hoses refitted and clips back in position...

Then it's time to start reassembling everything, here's a pic showing how the elusive fasteners work.They just push in
...
All built up and ready for testing...


Now top up the coolant to the correct level and start up the engine with the cap OFF, and the heater control set to HOT.
You should see bubbles appearing in the expansion tank as air is expelled from the system.
When the engine is up to normal temperature, replace the expansion tank cap and check for leaks.
Check that the heater works on hot and cold.
Temperature gauge up to normal position and steady
....
Based on my experience with this, I would advise anyone to carry a bit of spare coolant (even if it's just water) and a bit of pipe like this...

It's about 18mm OD. With this and a pair of decent pliers it could get you going again if you're not a member of a recovery service.
Paul