How do I replace cracked plexiglass on dash?

ProjectPuma

Help Support ProjectPuma:

This site may earn a commission from merchant affiliate links, including eBay, Amazon, and others.
Do you mean the plastic covering the instrument cluster/clocks?

You need to take the surround off to get to and may have to take the clocks out. Remove the headunit first, this will give you access to the screws securing the surround there. Pop all switches out too. There's a screw under the little black cover to the left of the switches too.

Then I think there's two screws by the top of the clocks too. And the surround should come away. That should give you access to the clocks and its screws if you need to take them out.

I think that's it off the top of my head. Sorry I don't have any pictures of a dash apart.
 
It's easy! Will take some pictures later for you as going to put a new silver surround on mine sometime this weekend and that's half the job. Got a some spare screens and clocks so will take some detailed pics for you.

It's basically as Ben says above, once it's out you then take out the two dash illumination bulbs on the top and pop the clips. Is it analogue or digi dash?
 
Ok mate, first job is remove the steering wheel shroud, you don't need to remove the wheel, I'd only done this as putting my newly recovered wheel on and replacing the silver trim. There are two smaller screws holding the top and bottom sections together, two holding the bottom shroud to the column, and then a larger screw towards the back. Next up, up the silver surround.


There are three screws for the surround, one under the plastic triangle on the far left of the silver surround, and two above the stalks. There are some clips at the bottom that will pop out and then unplug everything.

Next unscrew the single screw on the top of the stalks, lift up and unplug, then remove. It's best to have disconnected the battery before doing all this by the way, partly as you're working near the airbags, but also as you wiggle the stalks up its easy to set the horn off!

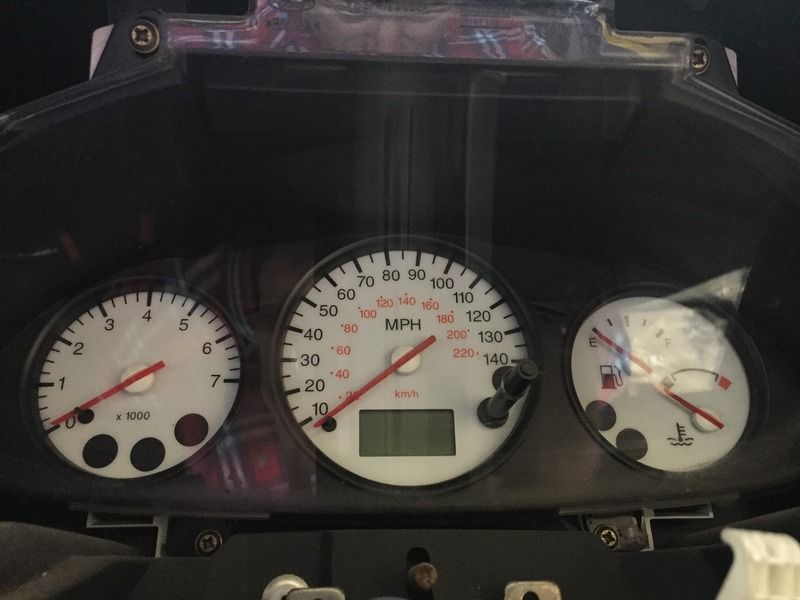
There are four screws holding the cluster itself in...


As you pull the cluster out, get a small screwdriver and pop up the clip that holds the wiring in. I have a small fetish for that clip. It works so well and as you pop it up the connector slides up. Lovely engineering for the sake of it!

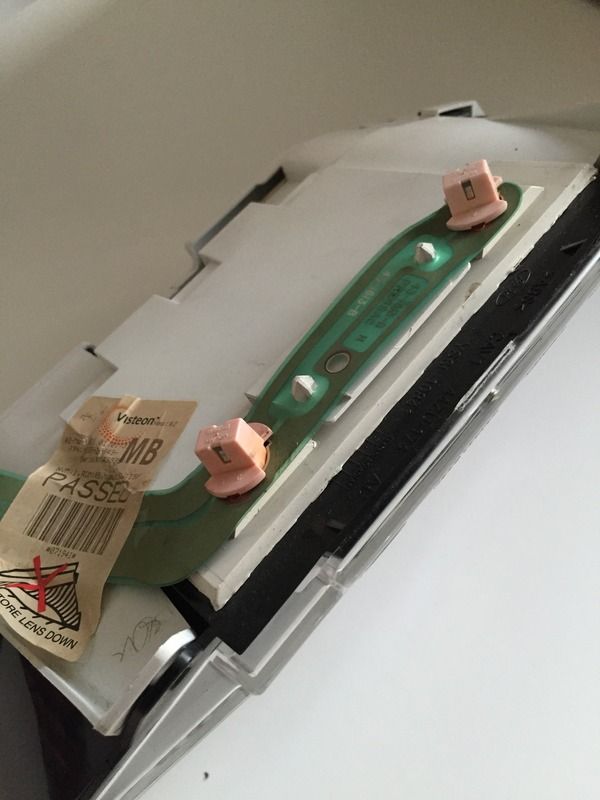
Once the cluster is out, take the two pink bulbs out of the top


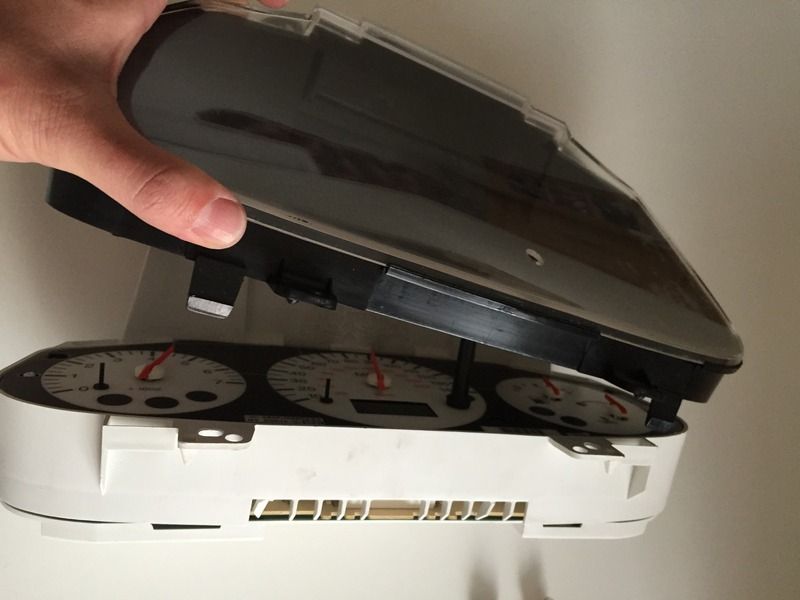
Then starting off at the bottom, pop out the bottom clips, stick your finger in the crack as you do it and then do the side and it will start popping apart


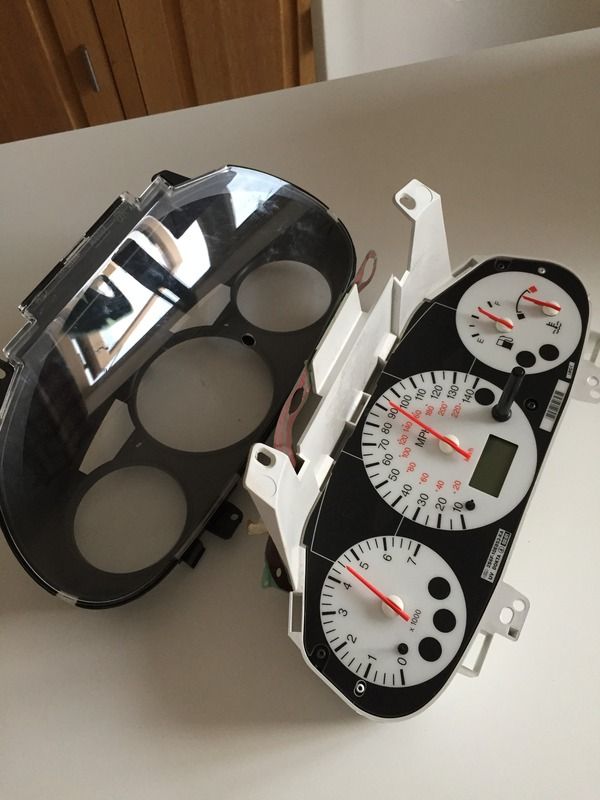
Then separate the two


And finished!


Do you need a new glass?
 
Brilliant XAF great guide. Finished the job. No more cracked panel. So chuffed. Thanks for your help.
 
That is a great guide, hopefully one of the moderators will move it to the How To Guides section.

Thank you XAF
 
I'll move it to the 'How To's' and it'll remain useful for as long as XAF keeps the photos available on his Photobucket :D

Good write-up.
 
can somebody give me some measurements?

diameter of the tachos, and of course positions of the cursors?

thanks
 
Where are you, I have an old digi dash sitting on top kitchen cupboards for some reason or other if you want it to play with?
 

Latest posts

Back
Top