The "If I can do it, you can" thread...

ProjectPuma

Help Support ProjectPuma:

This site may earn a commission from merchant affiliate links, including eBay, Amazon, and others.
g-whizz said:
[post]348746[/post]
moondustka said:
[post]348743[/post] The best way of checking how bad that rust really is, is getting a large flat head screw driver in there and scrapping and poking around at it to see if the metal is still solid.
Hi Ben,
That, and a bit of wire-brushing, was basically how I ended up with the photos...it's solid, bar the brake pipe fixing, if none too pretty (bit like myself)....but that can be sorted (unlike myself) :eek:k:

That's good then! Can now prep it and treat it :thumbs:
 
....hmmm, today was slightly trying, as for all my trying there was slight return.

Anyone ever read the O. Henry story "Witches' Loaves"? Today I fear that I had my own version of it...though I'd be more fearful if it was for the same reason... :grin:

Having spent the last few days researching how best to remove or remedy rust, and then calculating what was the most cost-effective approach for me, then removing the bumper& liners and wire-brushing; today I was waiting for the Vactan, BondaPrimer etc. to arrive, so I thought I might as well clean off the arch liners in the meantime.

After 17 years on the car they were filthy enough to have made Antoine de Caunes blush. Took nearly an hour to do both with a powerwasher, soapy water, and a scrubbing brush but after they were cleaner than a Bruce Forsyth joke.

So, feeling rather pleased, I thought I'd drop them off with the guy who is repairing my arch. My beaming smile as I entered soon transformed into something of a rictus grin, however, for my well-intentioned welder (who is mid-70's and a lovely bloke) proudly announced that I wasn't to trouble myself any further with the rust as he'd kindly popped the bumper back on and shultzed the car! :roll:

TBH I was not best pleased (partly because I'm still not exactly clear what the feck shultz is, but mainly because I'm pretty sure that whatever it is, on its own it's not the best answer to preventing the Puma's premature demise) but out of fear of turning into Catherine Tate's "Nan" character I did my best to thank him sincerely, whereupon I promptly went home to find the Vactan and Bonda Primer had arrived :grin:

So, am I best just trying to remove this stuff as soon as I get the car back, and if so, with what; or, is it basically ok and I should just stop being such a soggy duvet?

Oh, and my stainless nipples (on the right) also here...
001 by G Whizz, on Flickr

Though a fair bit smaller than the originals they do make the seal and so hopefully will be fine to fit.

Now they're here I have a suspicion that these are in fact the same dimensions as the ones Ben first recommended, just cost £8 the pair instead of £5, so def go with the first of the two links previously listed :eek:k:
 
Hi Greg
Schutz is bitumen based underseal so it should be black and wipe off fairly easily with petrol or white spirits especially if it's only just been applied. It's what I used as a final coat on mine after all the rust had been cleaned off/cut out and re-welded.
Barry
 
tuonokid said:
[post]348797[/post] Hi Greg
Schutz is bitumen based underseal so it should be black and wipe off fairly easily with petrol or white spirits especially if it's only just been applied. It's what I used as a final coat on mine after all the rust had been cleaned off/cut out and re-welded.
Barry
Cheers Barry, yeah, it's black...it will have only been on for a few days by the time I get the car back, so best get cracking then, bit of a shame really... and probably a lot of scraping/wiping now to get it clean enough to Vactan & Bonda Prime :roll: Ah well, done with the very best of intentions...I shall now return the family pet unharmed in that case :grin:
 
Yes, Schutz is pretty good stuff but should be applied a bit further down the line rather than straight onto rust!

As Barry says you'll get it off with white spirit or petrol.
 
...Axle stands- check; car jack- check; sockets - check; fleece, head-to-toe waterproofs, and wellies - check... yep, it's been just another day on Puma patrol!

Looking more like I was on the Arctic Convoy than my mum's drive, today was not in fact spent sending tanks to Mr Stalin but bringing out the water cannon to tackle a dirty protest by one of Mr Ford's finest. Very dirty, as it happens, as not only had my rocker cover gasket started leaking again but other fluid decided to come out in support... and there was I thinking I'd finally taken control.

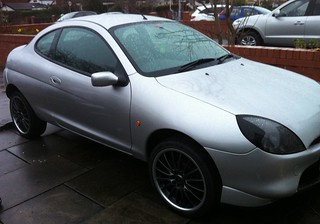
The week had started so well.

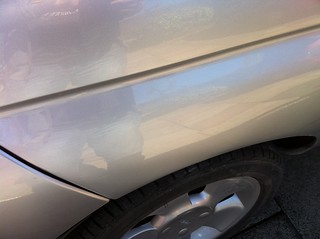
I picked up the car from my Septuagenarian sprayer and was really pleased. One scabby arch...
055 by G Whizz, on Flickr

cut out, German arch panel welded in & resprayed...
002 by G Whizz, on Flickr

plus surface rust on the other arch, plus schulzting of both inners (albeit a little premature it will do until the weather dries out), plus driver's door... all sorted!
001 by G Whizz, on Flickr

The car looked decent and was working well. Puma progress!

All it needed now was to start on the upgrades, first being some larger alloys so I could get my 300mm brakes on, and as luck would have it I landed a nice looking set of Team Dynamic 17's via eBay. Yeah, yeah...17's don't handle etc. etc. but if they good enough for an FRP then I'll cope with the ribbing, especially as they only set me back £137 with tyres. :wink:

As such I planned a little road trip on Thurs to go pick up the wheels and drop by the Puma world renowned Ian G to grab some other bits and bobs on the way back.

The journey itself was really rather pleasant. It meant going via my hometown of Liverpool and actually took me through parts I hadn't been to since I was a teenager and Frankie Goes to Hollywood were telling us all to chill out.

The sun was shining, I had David Bowie on the CD again (mainly because I can't get the damn thing out now it's in there, I really must get an aftermarket stereo) and as I went past the road my first girlfriend had lived on and then the pub in Childwall we'd frequent as 16-year-olds (fooling no-one that we were old enough), lots of memories danced in my mind and with the sunlight; their footsteps sending little tingles through me that dislodged more memories again. All-in-all I was pootling along in a bit of a blissful revery and it was all so very pleasant. Until it wasn't.

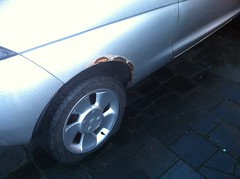
First, I noticed a juddering from 60mph, then, when having to turn, a weird graunching noise. Crap. As I'd already picked up the wheels, I limped the car over to Ian's and gingerly picked my way past potholes big enough to have their own caving expeditions on the track down to his workshop/Puma cemetery.

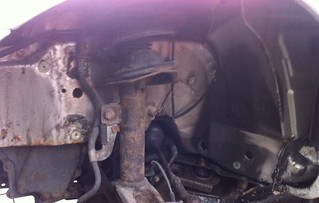
Once there it only took the time to exchange hellos and mention the problem for us to look under the car and find a small puddle of power steering fluid. On inspection the pipe joints were dry and the pump seemed it too but we couldn't pinpoint the leak due to the goop underneath (presumably a mix of power steering fluid, engine oil, bits of Ian's path and the ground up remains of some cavers)... hence today's power wash frenzy. The steering fluid also seemed thin and watery in the reservoir. Weirdly the flow slowed right down while there for a few hours (compared to the speed of the initial small puddle) and despite running and revving etc. we couldn't get it to do it again, though I've dropped about 7mm on the reservoir bottle level since then.

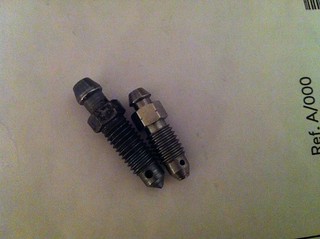
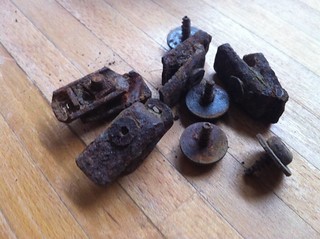
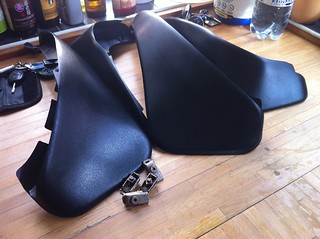
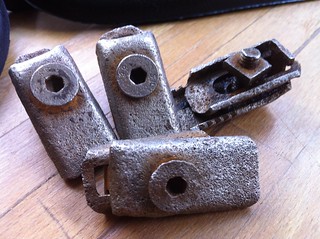
Not getting anywhere fast with that, Ian sorted me some Ford wishbones (to re-bush but actually look better than the ones I have on at the moment after cleaning them up), a full set of mud flaps and some caps for the door cards... Oh, plus that rain shield thing that goes over the pollen filter housing. He gave me a wry smile when I asked for it and I understood why when he got one for me as it looks like it comes straight from a box of chocolates. It's more Quality Street than quality control that's for sure, I wouldn't be surprised to see Cadbury's stamped on it instead of Ford. Didn't stop me from getting it back on the Puma though and thankfully the fluid loss and shuddering didn't stop me from getting home.

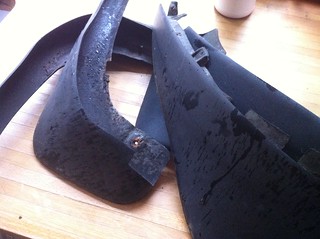
So today was spent in the rain, power washing anything within reach: the new wheels; the old wheels; the underneath; the front arches, without the liners and then the liners themselves; plus, the wishbones and the mudflaps.

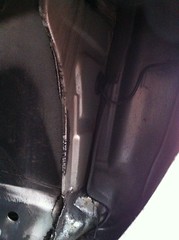
During the process, I got to look at my front arches for the first time...

016 by G Whizz, on Flickr
017 by G Whizz, on Flickr
015 by G Whizz, on Flickr

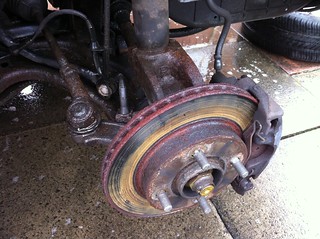
don't look too bad (but still on the rust treatment list for when the weather gets a bit better) which is more than can be said for the brakes....I think that 300mm upgrade can't come soon enough.
013 by G Whizz, on Flickr

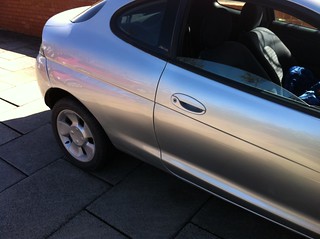
Best of all I finally got to put the 17's on...
028 by G Whizz, on Flickr

Am really pleased with them looks-wise but they were a bit of a punt offset-wise as the guy had them on a MK3 Capri (normally et22) and said he didn't know what they were (v. annoyingly not stamped) but after looking online he thought they "might" be 37. I was initially fine with this as only 3mm out from standard Puma but now realise that being 7j they should be more like 25mm. So, the upshot it seems is they might be anywhere from 22-37, confused? Glad it not just me then. :grin:

Proof of my being a pudding will be in the driving. Apart from a bit more road noise, which may well be down to the tyres, they don't seem as bad as I feared they might be. Mind, have only driven a mile or so as the wheel nuts don't seem to fit quite as well now either. I could only get 10 full turns on the front and 8 on the rears, but having spoken to an alloys specialist they've assured me that should be fine. Hmmm. All in all, some spacers, and longer wheel studs, may well be on the cards, grrrr.

So having started the week thinking I had brought order out of chaos and that peace and tranquillity were now restored to Pumaland, by the end of it the Puma's guerilla war tactics means I now have this to sort:
1) Power steering...
2) Brakes...
3) Rocker cover gasket (again but will get another Ford gasket this time)
4) Figure out what the real offset is...(assuming that's a tyre off, measure width, backspace, and calculate, job?) then possibly hubcentric spacers and longer wheel studs...

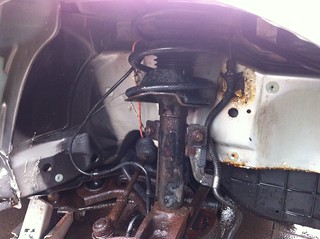
....Oh, and as I was fitting the driver's side rear alloy the shock was moving up and down and clunking...(top mount?) and I noticed I'd lost one of the rear covers next to the fog lights (probably somewhere along Ian's Rubicon Trail :grin: ) and that my nearside headlight bulb had gone...at which point I decided this Puma played dirty in more ways than one, and that this time I wanted my mummy... good job I didn't have to go far really.
 
...Well if Shirley Manson, Butch Vig and co are "Only Happy When It Rains" they'd be well chuffed with my little Puma as it seems it never rains but it pours... (although I may just be feeling sorry for myself)...

You see, to console myself after the problems in my previous post... to which BTW not one soul even bothered to make a single helpful suggestion or offer a tiny word of encouragement, that's all I wanted, just one... OR, even a comment on the new arch or alloys... but noooo, nothing, nada, zilch! Blub. Sniffle. (See told you I was feeling sorry for myself :grin:)... I decided to crack on with the 300mm brake mod today as my 12mm cobalt bits had finally arrived to drill the hub with.

You may recall that I was breaking new ground a tad as I'd gotten some Grand C Max front brakes and, after cleaning them over several days as the brake dust was really baked on, I gave them another go before I set about masking them up to paint. I'd give them a coat and it'd be drying while I was prepping. Then another could dry while drilling. No rush.

I noticed a bit of gunk in the caliper carrier bolt hole thread which also needed cleaning, this gave me a perfect opportunity to dig out that tap and die set I'd bought years ago on a complete whim (it had reminded me of school metalwork classes) and which had sat there humming "Someday My Prince Will Come" ever since.

Even my limited engineering knowledge could immediately recognise I had a major problem, however, as the M12 tap went straight through my carrier! Gordon Bennet! When researching it seems I'd overlooked one important dimension, the Grand C Max, although using the same ATE caliper as the ST170, for some reason doesn't have M12 carrier bolts but M14!

This is rather problematic. It seems I can either drill the hub to 14mm, or somehow source a set of ST170 carriers on their own...or sell the lot in a hissy fit. :roll: Any thoughts on drilling the hub to 14mm guys, is that too much of a leap?

To make myself feel better, I retreated to my mechanical safe place and consoled myself with cleaning up the mudflaps I got from Ian G...going from this:
011 by G Whizz, on Flickr
007 by G Whizz, on Flickr

via a scrub & Autoglym for the 'flaps with a bit of wire wool (plus a three day soak in apple cider vinegar) for clips, to this:
IMG_2118 by G Whizz, on Flickr
IMG_2119 by G Whizz, on Flickr

Much more my level it seems :lol:
 
Hi Greg
From memory when drilling out for the caliper carriers I think 14mm may be a step too far and leave you with not enough meat left on the knuckles. Also when I drilled out for mine I took the holes out very steadily using a mix of imperial and metric drill bits to make sure I got the holes straight.
Barry
 
tuonokid said:
[post]349585[/post] Hi Greg
From memory when drilling out for the caliper carriers I think 14mm may be a step too far and leave you with not enough meat left on the knuckles. Barry

Hi Barry,
Yeah, that was what I feared...v. annoying, will see if I can find some ST170 carriers... cheers :eek:k:
 
Hi Greg
It was only from memory so Have a look for yourself but the knuckles seem prone to laminating off rust so the outer layer of the bolthole will probably knock off with a blow from a hammer leaving not much else left.
You're welcome :)
Barry
 
tuonokid said:
[post]349587[/post] Hi Greg
It was only from memory so Have a look for yourself but the knuckles seem prone to laminating off rust so the outer layer of the bolthole will probably knock off with a blow from a hammer leaving not much else left.
You're welcome :)
Barry
Hi Barry,
Did have a look, just seemed to me that taking it 2mm closer to the edge might be putting too much stress on the lugs? Especially when they aren't pristine as you say. Hmmm, decision, deciions...time to sleep on it! :)
 
I would agree with Barry, Greg. I think drilling them out further is probably a step too far. They aren't the largest of lugs in the first place.

I would probably find some ST170 carriers as you say, or sell that whole setup and buy the ST170 callipers whole.

Enjoying the posts anyhow (not your misfortune!) and, yes, the arches look good!
 
Haha! Enjoying this thread.

Another option for cleaning your Calipers would be Soda blasting, worked really well for me with a cheap £15 kit and an airline, I did seal mine up so nothing could get inside. I did also use a sand blaster, as I had one to hand. I highly recommend VHT Caliper paint & clear gloss, sprays very well and stays on very well, hasn't flaked off with track abuse.

Those arches look good, where did you buy the repair panel from?
 
moondustka said:
[post]349590[/post] I would agree with Barry, Greg. I think drilling them out further is probably a step too far. They aren't the largest of lugs in the first place. I would probably find some ST170 carriers as you say, or sell that whole setup and buy the ST170 callipers whole. Enjoying the posts anyhow (not your misfortune!) and, yes, the arches look good!
moondustka said:
Hi Ben, yeah, you guys confirming what I feared.. was hoping to avoid more outlay, as pretty sure it not water vapour but pound coins which trickle out the exhaust pipe at present, but seems I'll just have to bite down and bear it (bit like Michelle Collins on Mission Survive) and cheers for that link too, oh and re. my ever so pretty arches :grin: P.S. It's fine by me to enjoy the misfortune just a little bit, I love the smell of schadenfreude in the morning! :lol:

Milkie said:
[post]349593[/post] Haha! Enjoying this thread. Another option for cleaning your Calipers would be Soda blasting, worked really well for me with a cheap £15 kit and an airline... I highly recommend VHT Caliper paint & clear gloss, sprays very well and stays on very well, hasn't flaked off with track abuse. Those arches look good, where did you buy the repair panel from?
See Milkie does too! :lol: Cheers for recommendations Milkie, will probably need them if have to go st170 calipers as well, though I suspect the corrosive effect of my bitter tears might do the job too :grin: I got the panels yonks ago on a group buy organised by EvilRob. Puma Schmiede in Germany still do them if you interested, it's 96 euros incl. shipping to UK, so about £77 currently, that's for the pair. Here's a link:
http://www.puma-schmiede.de/shop/index.php?a=591 :eek:k:
 
:cool: the arch repair looks great, sorry to hear that she's been rejecting your affection by giving you more to do, or maybe that's just a ploy to enjoy more man hours?!
 
red said:
[post]349648[/post] :cool: the arch repair looks great, sorry to hear that she's been rejecting your affection by giving you more to do, or maybe that's just a ploy to enjoy more man hours?!
...Cheers red, and must have been taking tips from my beloved if so :wink:
 
slayllian said:
[post]350431[/post] This is a great thread, it's awesome to follow as you go along.

Cheers, much appreciated, bit quiet at the moment as waiting on doing diagnosis...and crossing fingers it isn't a nasty report :)
 

Latest posts

Back
Top