You are using an out of date browser. It may not display this or other websites correctly.
You should upgrade or use an alternative browser.
You should upgrade or use an alternative browser.
JASAPP
- Thread starter Wild E. Coyote
- Start date
Help Support ProjectPuma:
This site may earn a commission from merchant affiliate
links, including eBay, Amazon, and others.
tuonokid
Active member
Hi Sinisa
I can't believe you were nervous about changing your filter after fitting an LSD to your gearbox and doing a rear disc conversion but well done anyway") On my later Fiesta the fuel filter is plastic and just pops into 2 plastic clips on the body, it's sooo easy to change and no tools needed, much better than the Puma set up.
On my later Fiesta the fuel filter is plastic and just pops into 2 plastic clips on the body, it's sooo easy to change and no tools needed, much better than the Puma set up.
Nice paint work, lets hope you don't have any of those massive hail storms now!!!!
Barry
I can't believe you were nervous about changing your filter after fitting an LSD to your gearbox and doing a rear disc conversion but well done anyway
On my later Fiesta the fuel filter is plastic and just pops into 2 plastic clips on the body, it's sooo easy to change and no tools needed, much better than the Puma set up.Nice paint work, lets hope you don't have any of those massive hail storms now!!!!
Barry
Cheers, all.
Barry, I was nervous as the car is my daily and I was affraid the clips might break and then I have no car for a while. As the car is old, all the plastic bits make me nervous as they are prone to breaking. Usually, before I do anything on any plastic part I heat it up with heat gun to avoid breakage, but for obvious reasons I couldnt do it with fuel lines....
Those stickers work like charm so far!
It has been more than two months since my last update. The car is working nicely, but some things are developing and I just realised I had taken so much images I have to start posting although nothing is finished yet! I am using my puma as daily and to get to work and back I need about 110-115 mostly motorway kilometers. As we all know, puma is built for everything BUT the motorway with its rather short gearing so I started looking into the gearbox conversion. But not the usual, i.e. no replacement of 5th gear to make it taller as that would kill the spirit of the car, but to add an additional gear instead. So, now you all know what am I doing, I guess... :wink:
Thanks to Erroll, this crate arrived safely to me
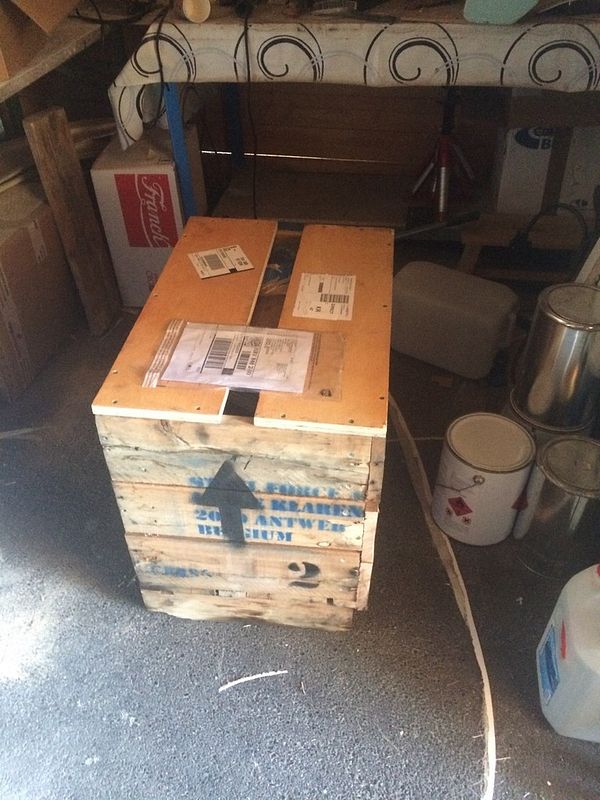
And in it was.....
The sticker says it all :grin:
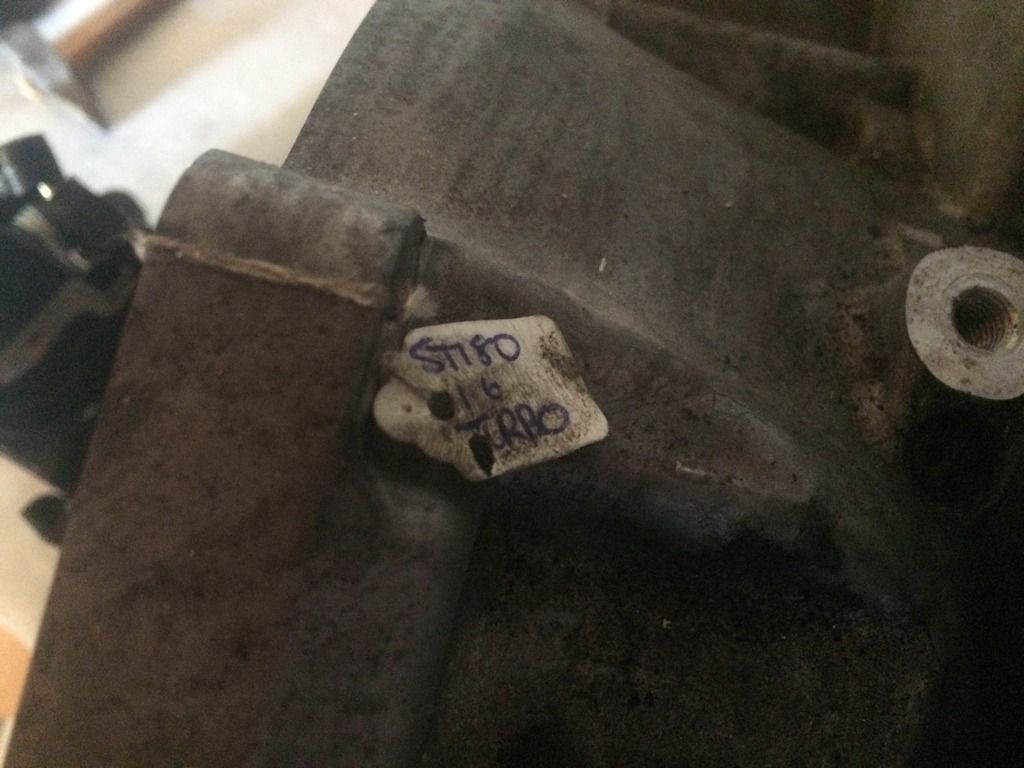
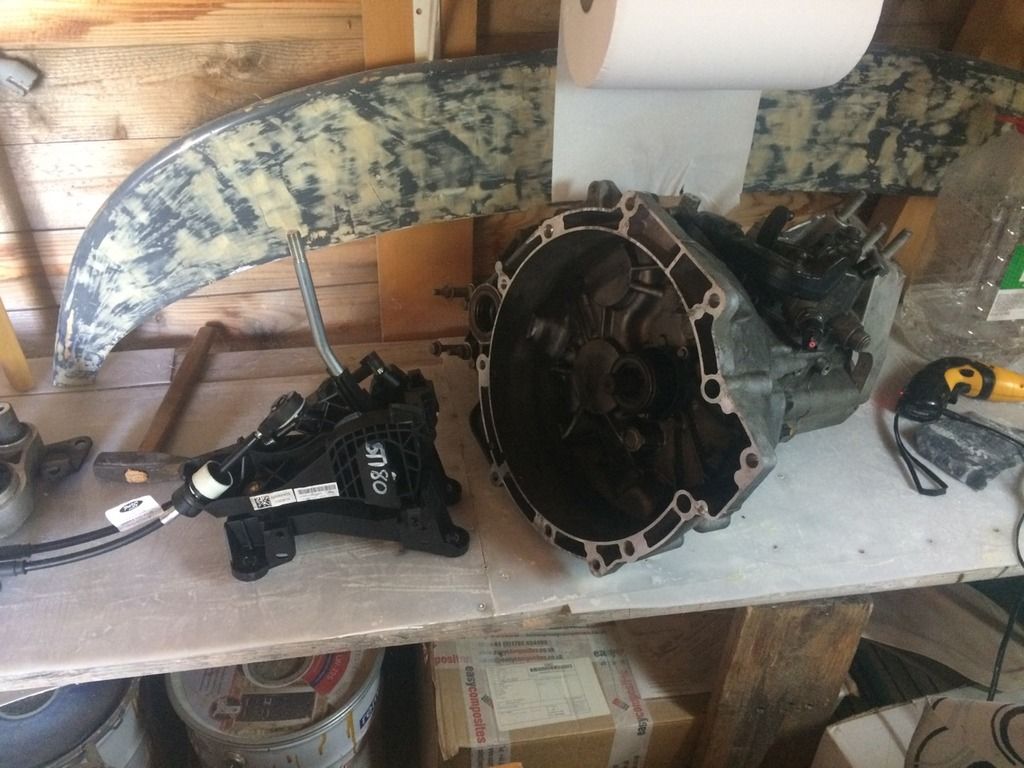
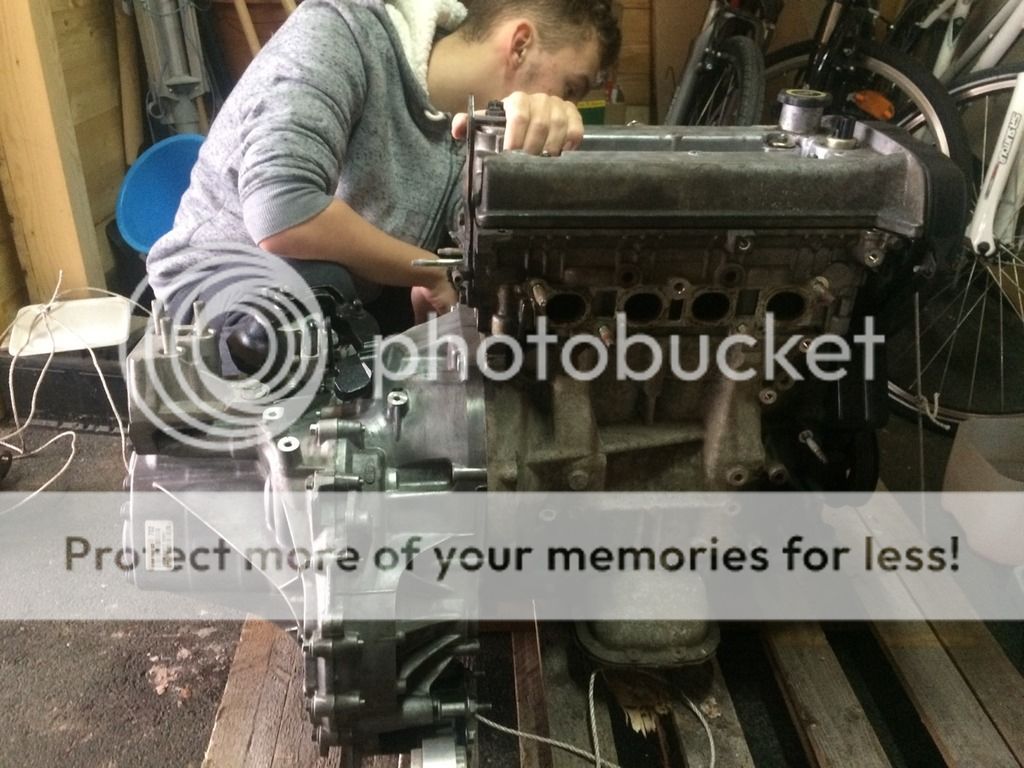
Yes, I am going to install the six speed gearbox out of fiesta ST180. Now, the first and obvious prerequisite is there: the bellhousing bolt pattern matches the one of the 1.7 engine. As the 1.6 ecoboost is derived from ZETEC-SE family, it made sense to keep it the same. Ford did so and B6 gearbox can be bolted to the engine instead of IB5. Good, the first box is ticked :thumbs:
The first mating of B6 and 1.7 engine (my kid assisting)
The second hurdle is obviously the shifting mechanism. B6 is cable operated, IB5 in puma is shift operated. That necessitated obtaining the cables and the shifter as well. Ok, that was easy. The problems left to solve: driveshafts, clutch and some other stuff.
The IB5 gearbox has a spline count of 17, the B6 is for some reason splined at 20. So I did some serious research into it. Fiesta ST180 and the Mk3 1.6 ecoboost focus use DMF. The clutch plate on ST180 is 228 mm (OD), on focus 240 mm (OD). ST180 is solid clutch (as DMF does the damping at taking off) and focus has some small springs. The biggest problem is that the pressure plate wouldn't bolt to puma flywheel. I thought of just using the clutch plate, but at 228 mm OD it most probably wouldn't fit under the puma pressure plate and it is, as said, solid so taking off would be jerky.
Something else was needed so I started browsing through the parts catalogue for all the cars searching for the clutch plate that has 20 teeth, and dimensions are 20,3 x 23 mm. After about two weeks of spending at least half an hour per day I found out that clutch for Fiat barchetta (and Alfa 146 1.6 TS) is listed as 20 teeth and 23 x 20.3.
Having known that Italians are sometimes different just because they are Latin, contacted the biggest parts distrobutor about that clutch. And, as it covers really lots of Fiat-Alfa-Lancia cars they had it on stock and were willing to loan it to me for half a day.
To cut a long story short..... and picture is worth 1000 words etc....
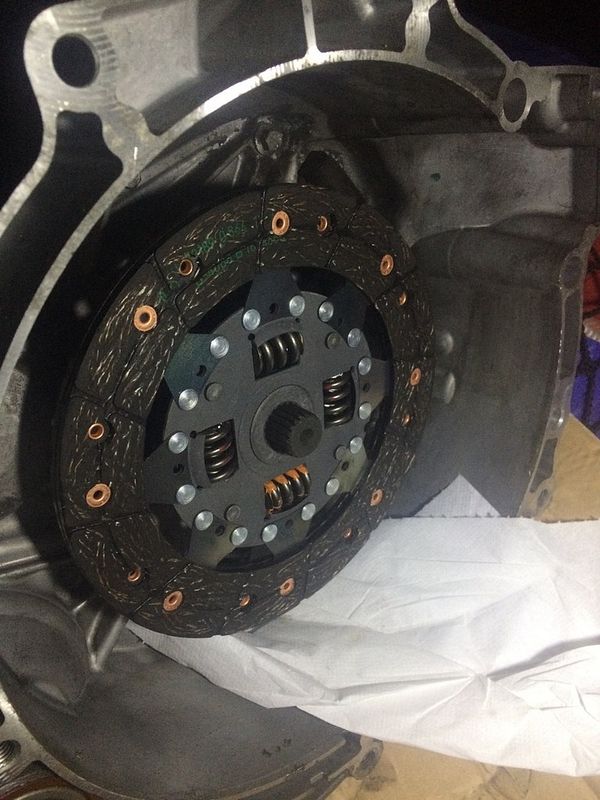
It fits perfectly! OD is 215 mm, exactly like puma needs so can use the existing pressure plate :thumbs: :thumbs:
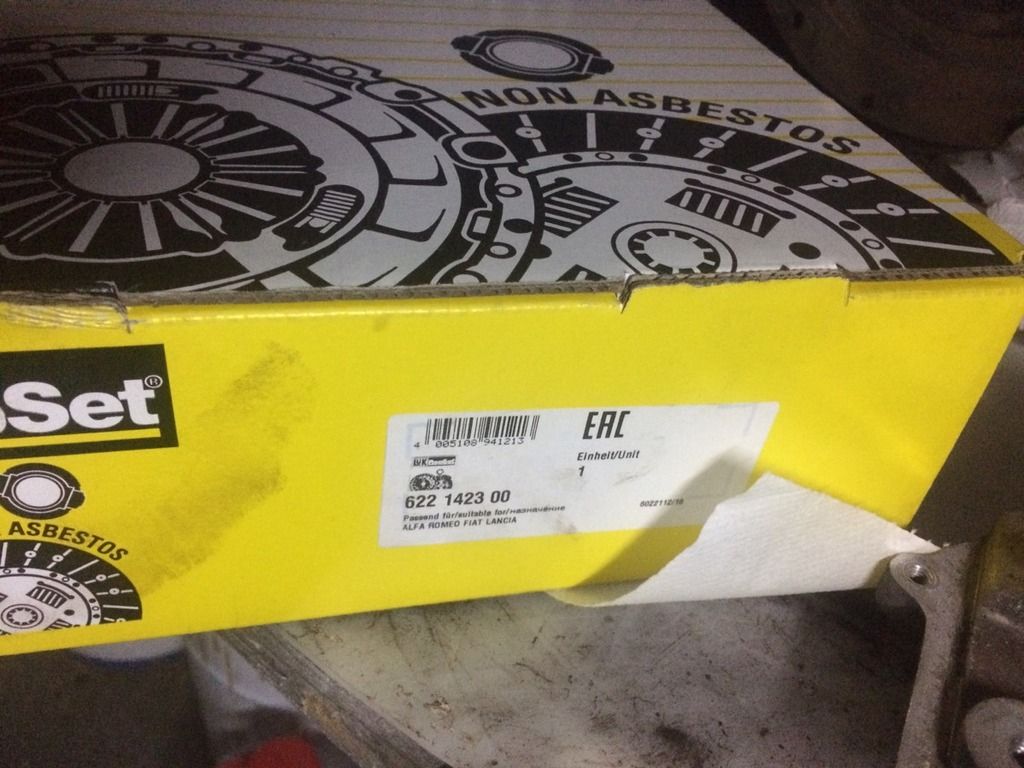
Unfortunately, you have to buy a complete set, but at 60 GBP (LUK set) it is not prohibitively expensive. These are the numbers needed:
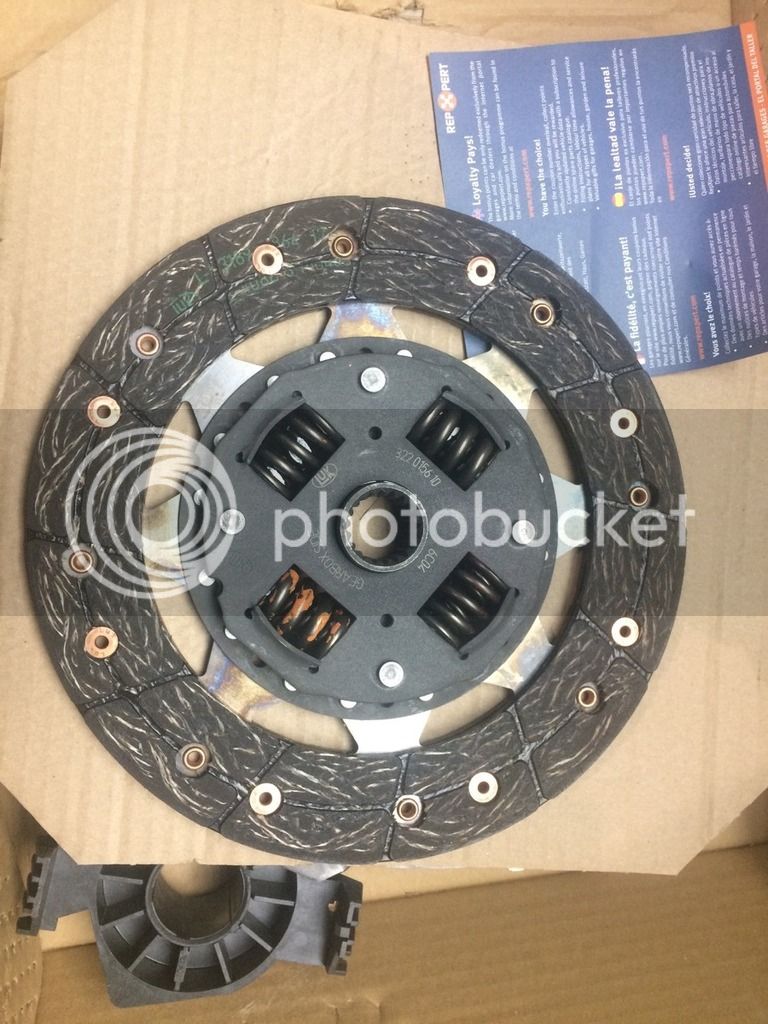

and the complete set
Fortunately, with gearbox came the clutch slave cylinder. It is different to the puma one and the puma one won't fit in the B6 gearbox. However, both have the same height so the ST180 should be able to operate the puma pressure plate without problems.
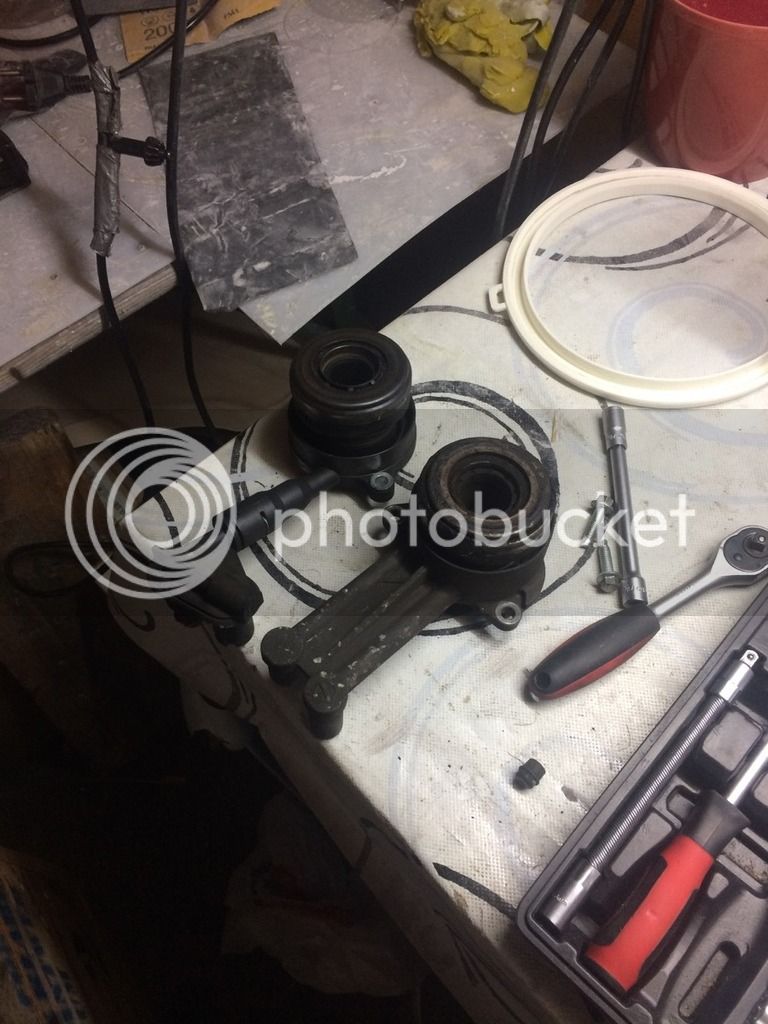
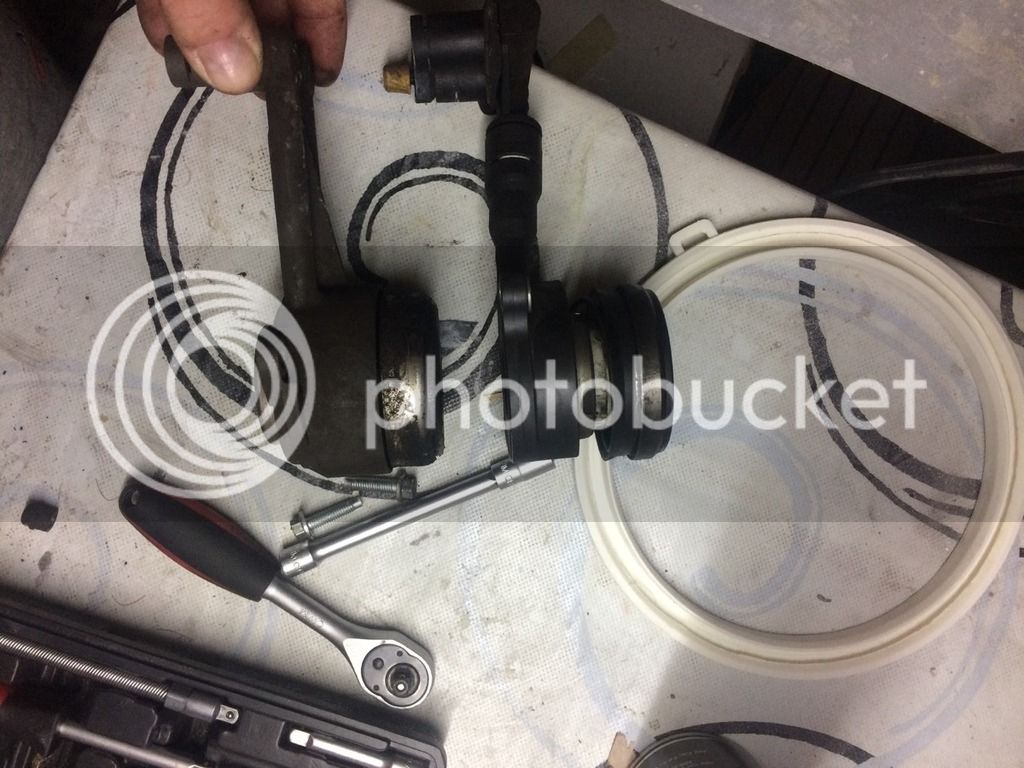
The dirty one is puma original (the left one) and the right one is ST180.
The slave cylinders being different have also the different lines. Puma one won't fit the ST180. Contacted a breaker via ebay for that line and he gave me the quote of 115 GBP! And I got the complete gearbox for 200! Crazy. I asked Ford, and this is incredible, the lower part of clutch line connecting to the slave cylinder costs less than 20 GBP! So I ordered one and the plan is to make an adaptor to connect it to the existing line going from the master clutch cylinder.
Next hurdle are the driveshafts. Again, Ford did some change just for the hell of it and made things more difficuilt, but not impossible. The spline count on driveshafts from the differential is again different. Puma (IB5 gearbox) needs 23, the B6 needs 26, I think. But, the splines at hubs are also different so you can't just take the ST180 driveshafts as they wouldn't mate the hubs (puma uses 25, ST180 27). However, the parts catalogue have indictated that the tripod might be the same so my plan is to get the ST180 driveshafts and use the lover part of puma driveshafts mated to the parts that mate with differential. If that fails, I will just make custom shafts that would take the puma CV joint and the tripod of ST180 driveshafts. As the shafts haven't arrived yet, remains to be seen what course of action will I take.
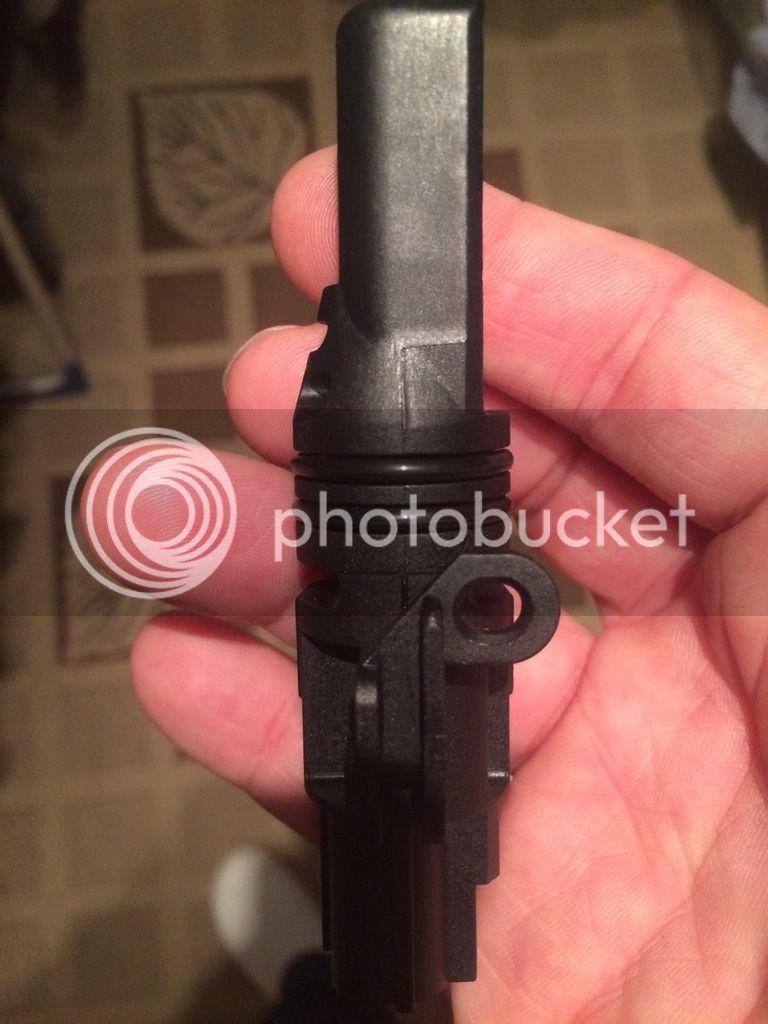
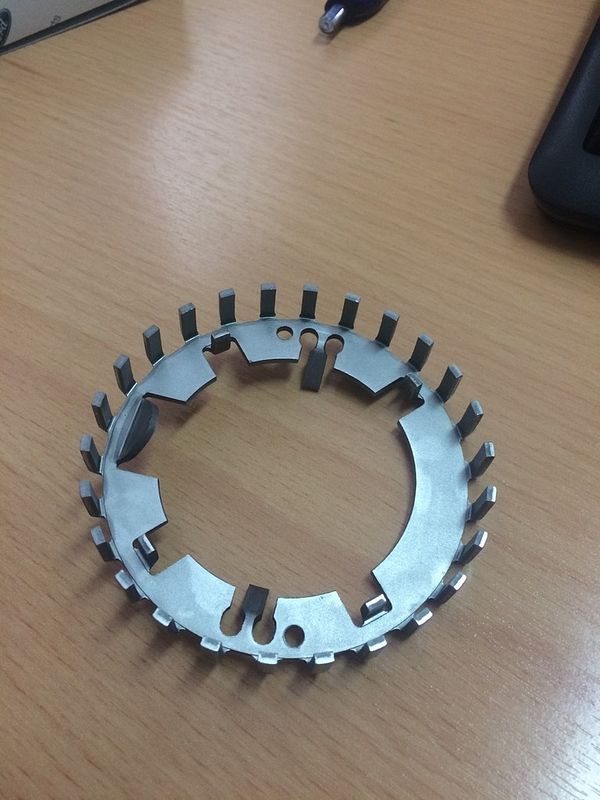
I hope it won't be, but have fear the biggest problem will turn out to be the VSS (vehicle speed sensor). B6 is new gearbox designed for new cars that get their speed signal from ABS system. So there is no provison on the housing and differential for a speed ring and VSS. I am suspecting the speed ring might be installed on the differntial, but don't fancy drilling the casing for VSS with a handheld drill. So my plan is to make a carrier for the VSS and put the ring on the long driveshaft and install VSS there. It is a hall type from MK1 focus (mk6 fiesta) so it is magnetic and should work.
Of course, the signal will need some tweaking, and that is why I got the speedo corrector for that. The easiest way would be to take the gear from IB5, but that would ask for oiling and sealing and it is just to complicated.
Maybe you have noticed I haven't said a word about the mounts. Somehow I think that is the least of my worries as I hope it will need just some additional welding (I have the ST180 mount) to be able to take this combination.
So, still some serious work to be done, but I hope it would be worth it. Also, this conversion would make a possible turbo conversion of the engine much easier as the gerabox is stronger and designed to take on the turbocharged engine...
Cheers for interest (and this is not all in the pipeline :wink: )
Thanks to Erroll, this crate arrived safely to me

And in it was.....

The sticker says it all :grin:

Yes, I am going to install the six speed gearbox out of fiesta ST180. Now, the first and obvious prerequisite is there: the bellhousing bolt pattern matches the one of the 1.7 engine. As the 1.6 ecoboost is derived from ZETEC-SE family, it made sense to keep it the same. Ford did so and B6 gearbox can be bolted to the engine instead of IB5. Good, the first box is ticked :thumbs:
The first mating of B6 and 1.7 engine (my kid assisting)

The second hurdle is obviously the shifting mechanism. B6 is cable operated, IB5 in puma is shift operated. That necessitated obtaining the cables and the shifter as well. Ok, that was easy. The problems left to solve: driveshafts, clutch and some other stuff.
The IB5 gearbox has a spline count of 17, the B6 is for some reason splined at 20. So I did some serious research into it. Fiesta ST180 and the Mk3 1.6 ecoboost focus use DMF. The clutch plate on ST180 is 228 mm (OD), on focus 240 mm (OD). ST180 is solid clutch (as DMF does the damping at taking off) and focus has some small springs. The biggest problem is that the pressure plate wouldn't bolt to puma flywheel. I thought of just using the clutch plate, but at 228 mm OD it most probably wouldn't fit under the puma pressure plate and it is, as said, solid so taking off would be jerky.
Something else was needed so I started browsing through the parts catalogue for all the cars searching for the clutch plate that has 20 teeth, and dimensions are 20,3 x 23 mm. After about two weeks of spending at least half an hour per day I found out that clutch for Fiat barchetta (and Alfa 146 1.6 TS) is listed as 20 teeth and 23 x 20.3.
Having known that Italians are sometimes different just because they are Latin, contacted the biggest parts distrobutor about that clutch. And, as it covers really lots of Fiat-Alfa-Lancia cars they had it on stock and were willing to loan it to me for half a day.
To cut a long story short..... and picture is worth 1000 words etc....

It fits perfectly! OD is 215 mm, exactly like puma needs so can use the existing pressure plate :thumbs: :thumbs:
Unfortunately, you have to buy a complete set, but at 60 GBP (LUK set) it is not prohibitively expensive. These are the numbers needed:


and the complete set

Fortunately, with gearbox came the clutch slave cylinder. It is different to the puma one and the puma one won't fit in the B6 gearbox. However, both have the same height so the ST180 should be able to operate the puma pressure plate without problems.


The dirty one is puma original (the left one) and the right one is ST180.
The slave cylinders being different have also the different lines. Puma one won't fit the ST180. Contacted a breaker via ebay for that line and he gave me the quote of 115 GBP! And I got the complete gearbox for 200! Crazy. I asked Ford, and this is incredible, the lower part of clutch line connecting to the slave cylinder costs less than 20 GBP! So I ordered one and the plan is to make an adaptor to connect it to the existing line going from the master clutch cylinder.
Next hurdle are the driveshafts. Again, Ford did some change just for the hell of it and made things more difficuilt, but not impossible. The spline count on driveshafts from the differential is again different. Puma (IB5 gearbox) needs 23, the B6 needs 26, I think. But, the splines at hubs are also different so you can't just take the ST180 driveshafts as they wouldn't mate the hubs (puma uses 25, ST180 27). However, the parts catalogue have indictated that the tripod might be the same so my plan is to get the ST180 driveshafts and use the lover part of puma driveshafts mated to the parts that mate with differential. If that fails, I will just make custom shafts that would take the puma CV joint and the tripod of ST180 driveshafts. As the shafts haven't arrived yet, remains to be seen what course of action will I take.
I hope it won't be, but have fear the biggest problem will turn out to be the VSS (vehicle speed sensor). B6 is new gearbox designed for new cars that get their speed signal from ABS system. So there is no provison on the housing and differential for a speed ring and VSS. I am suspecting the speed ring might be installed on the differntial, but don't fancy drilling the casing for VSS with a handheld drill. So my plan is to make a carrier for the VSS and put the ring on the long driveshaft and install VSS there. It is a hall type from MK1 focus (mk6 fiesta) so it is magnetic and should work.


Of course, the signal will need some tweaking, and that is why I got the speedo corrector for that. The easiest way would be to take the gear from IB5, but that would ask for oiling and sealing and it is just to complicated.
Maybe you have noticed I haven't said a word about the mounts. Somehow I think that is the least of my worries as I hope it will need just some additional welding (I have the ST180 mount) to be able to take this combination.
So, still some serious work to be done, but I hope it would be worth it. Also, this conversion would make a possible turbo conversion of the engine much easier as the gerabox is stronger and designed to take on the turbocharged engine...
Cheers for interest (and this is not all in the pipeline :wink: )
gingerdave
Member
Looks interesting,how do the intermediate gear ratios compare with the the standard puma box,i find the standard box is perfect for the 1.7 engine.
...really hope you have success with this Sinisa as it would be a great addition to the mods list if it can be done and it suits the 1.7, fingers crossed for you! k:
Also hoping someone trailblazes getting the ecoboost lump in as well in the new year, I'll put it on my list for Santa :grin:
k: Also hoping someone trailblazes getting the ecoboost lump in as well in the new year, I'll put it on my list for Santa :grin:
gingerdave said:[post]359002[/post] Looks interesting,how do the intermediate gear ratios compare with the the standard puma box,i find the standard box is perfect for the 1.7 engine.
The 1st and second gear are slightly shorter (by 2-3%), the 3rd is exact fit (i.e. the same ratio), 4th and 5th are taller by 2%. That is close enough, I would say, and then there is addition of 6th :wink:
tuonokid
Active member
Well done Sinisa...awesome!!!
Barry
Barry
trublustu
New member
Great stuff interesting to learn that the stronger b6 and ib5 are (almost) interchangable.
Cheers for the support!
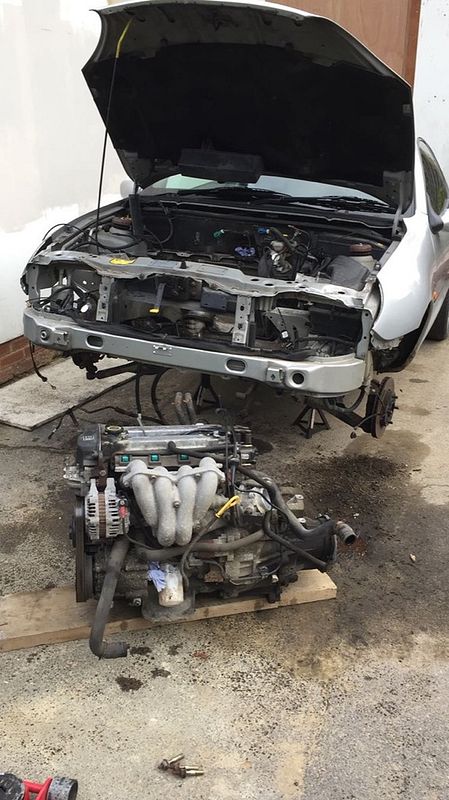
Ah, ok, here we go again, with some other stuff in the pipeline. Ben had a nice low mileage puma and had no use fof the engine so I bought it!
He was kind enough to do the compression test (cheers, mate!) and it showed really good health, as you can see:
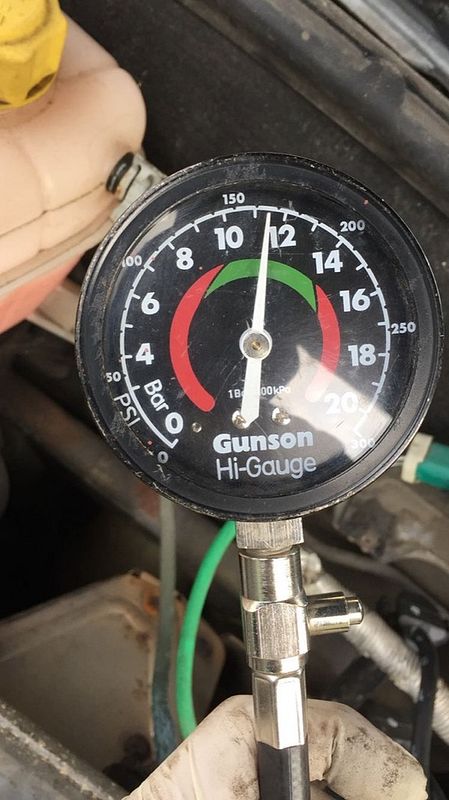
Ford says the starting pressure should be 12.4 bars but the engine should be warmed up to operating temperature first. This was measured after engine was sat for over a week so it is in excellent health.
A lorry picked it up, Ben and his brother were kind enough to help with the loading and few days later the pallet arrived...
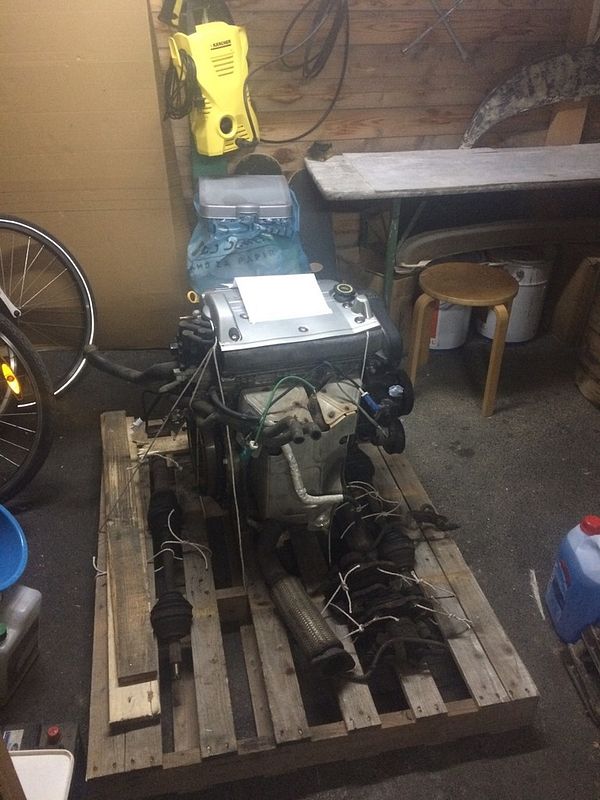
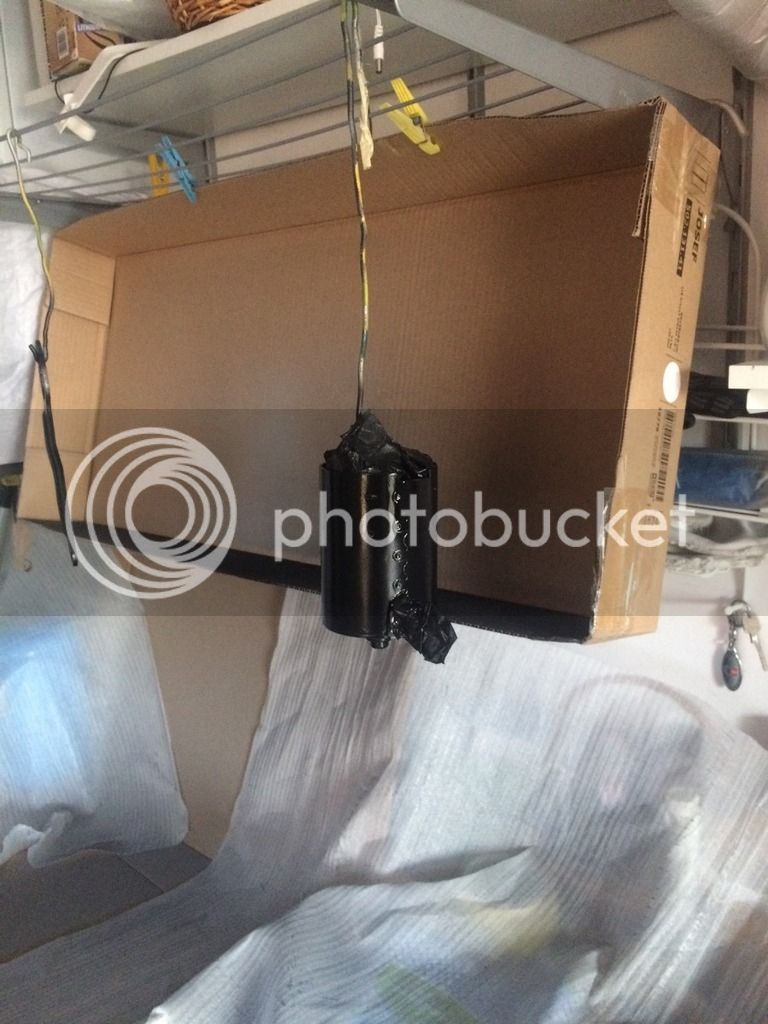
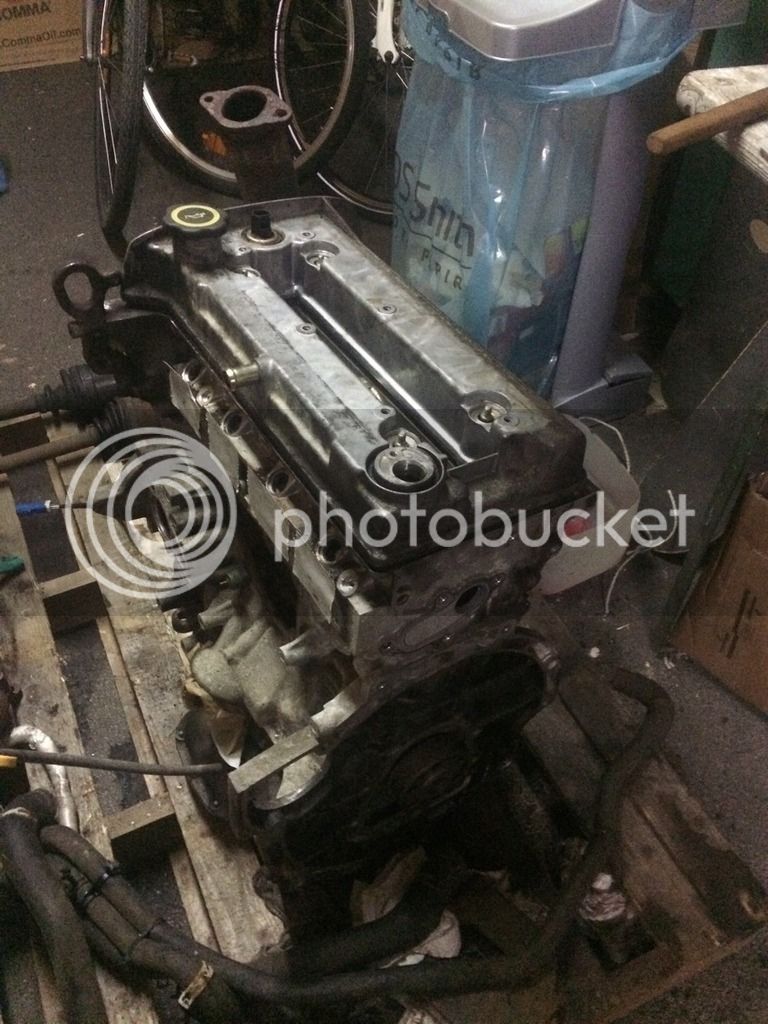
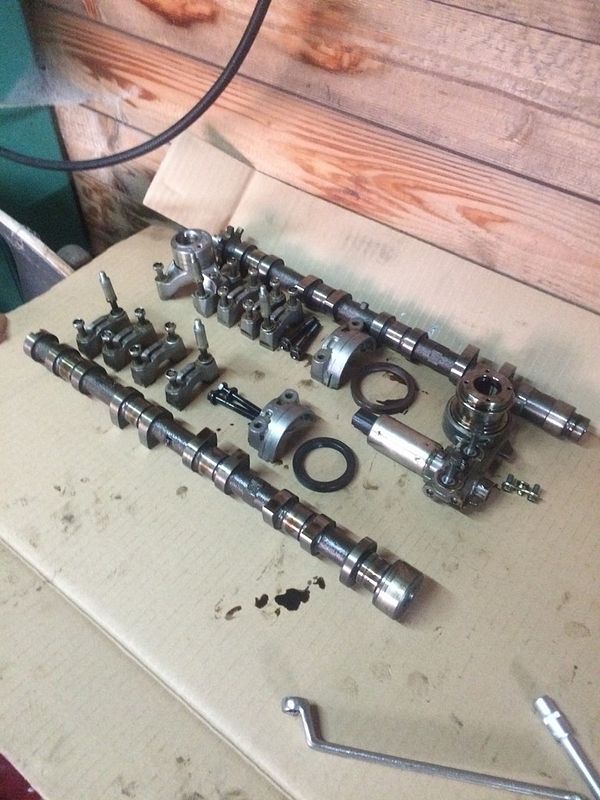
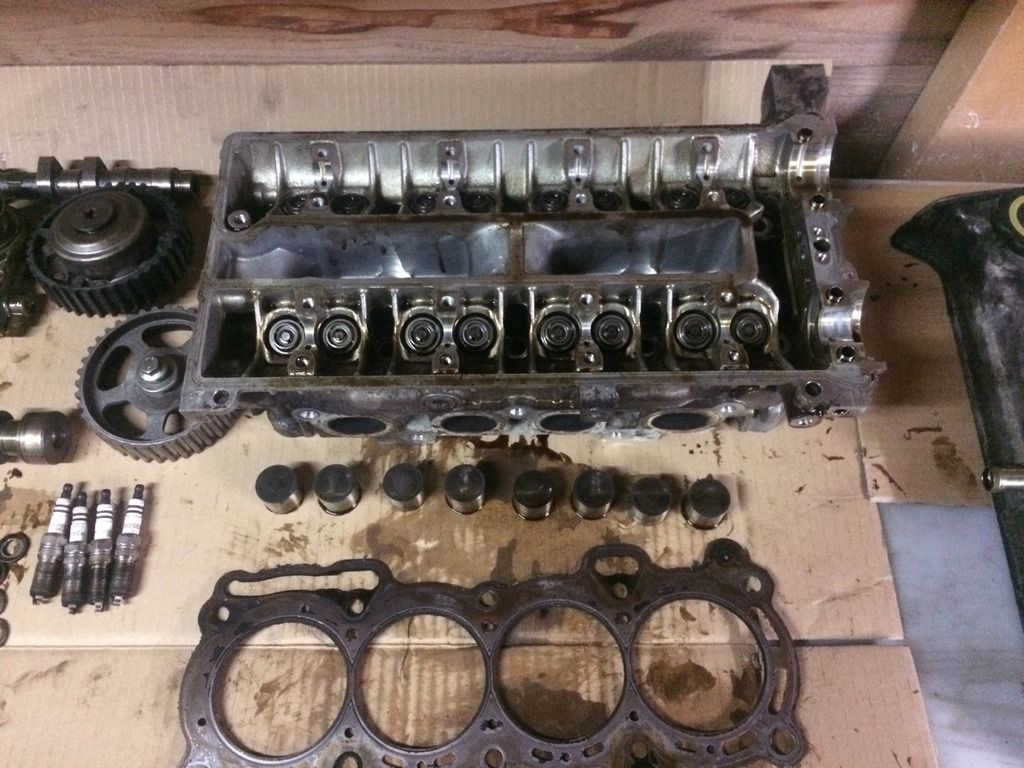
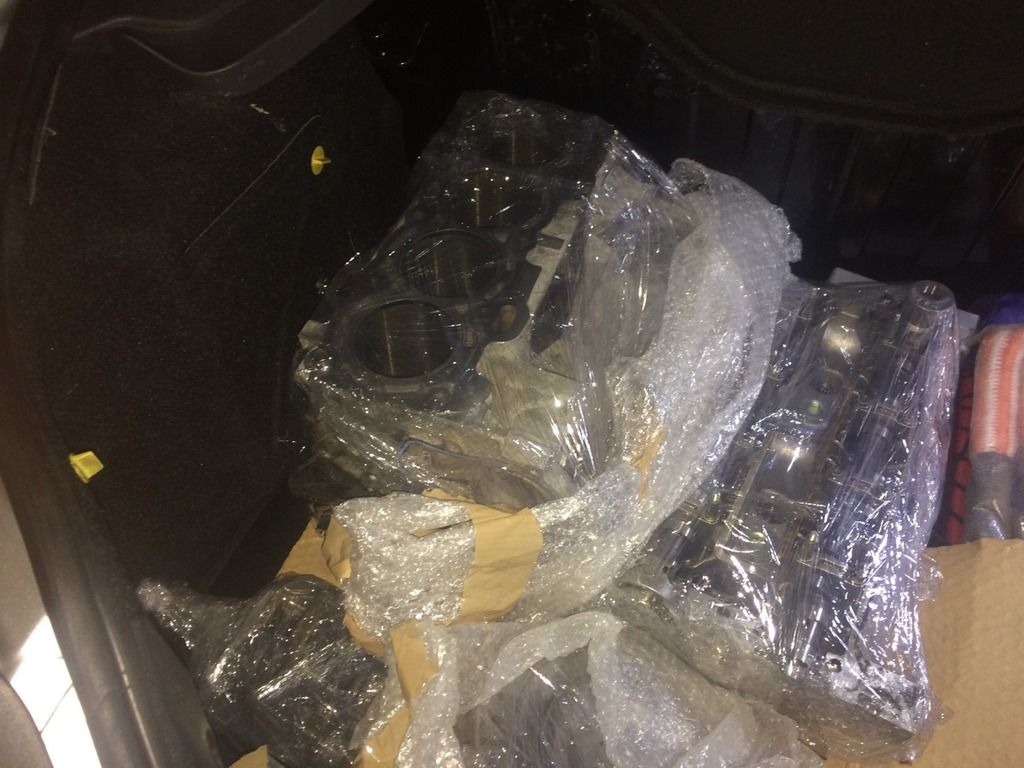
So, I set out to do the complete overhaul of the engine. I dismantled it completely as I wanted it to be as good as new.
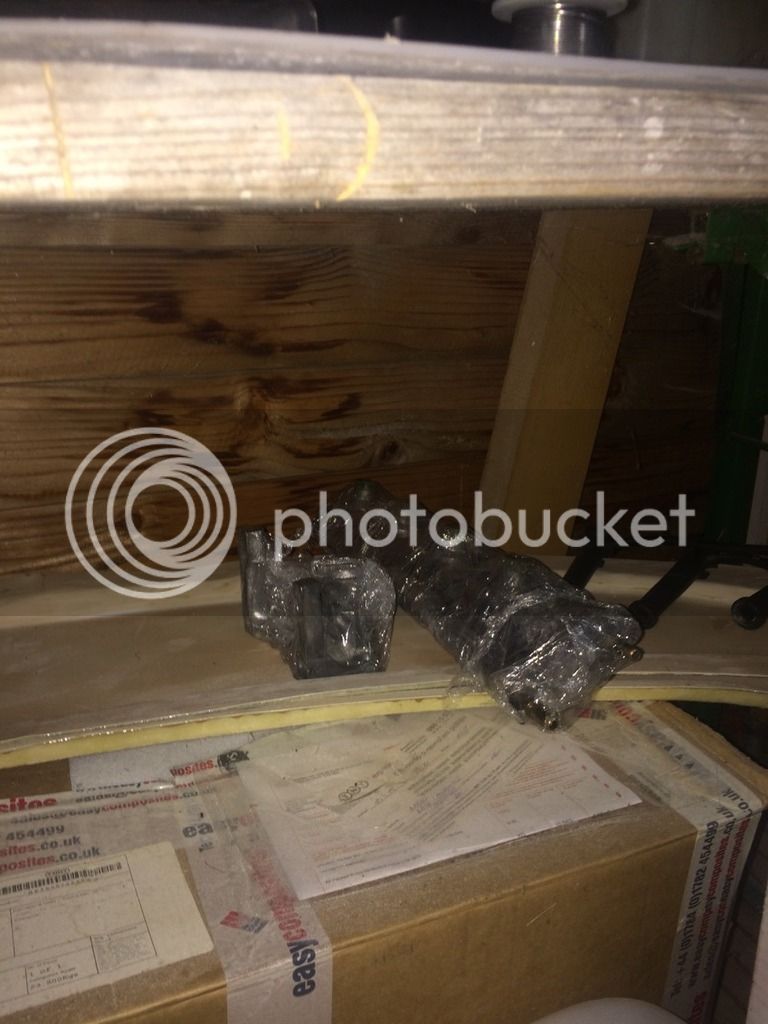
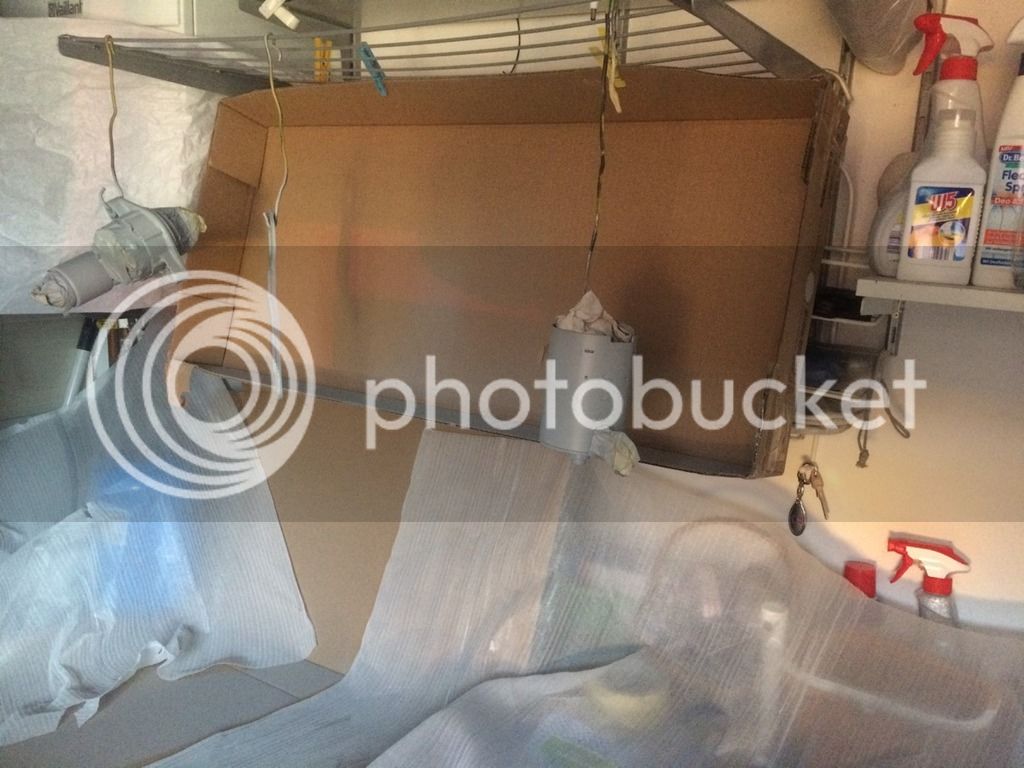
The parts that are cleaned and cleared for installing are wrapped up in foil and stored securely away
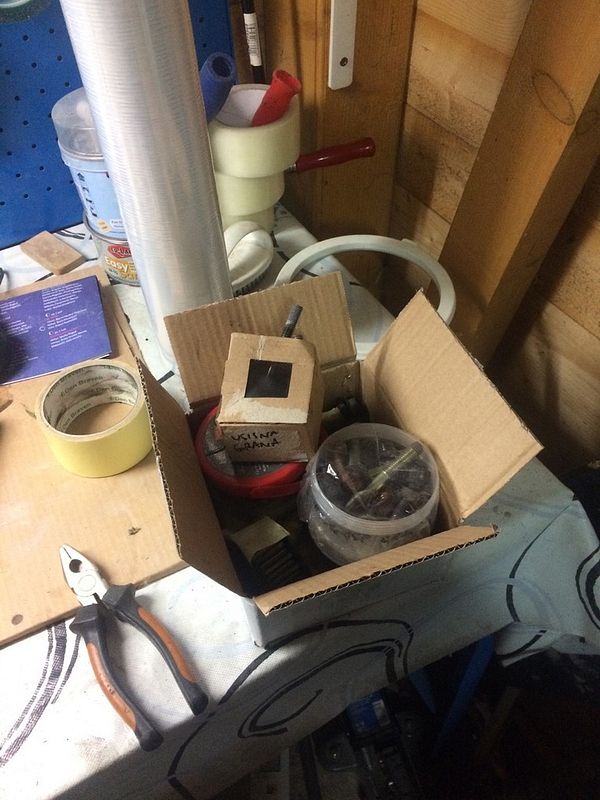
The bolts are grouped and signed not to mix them up or lose any
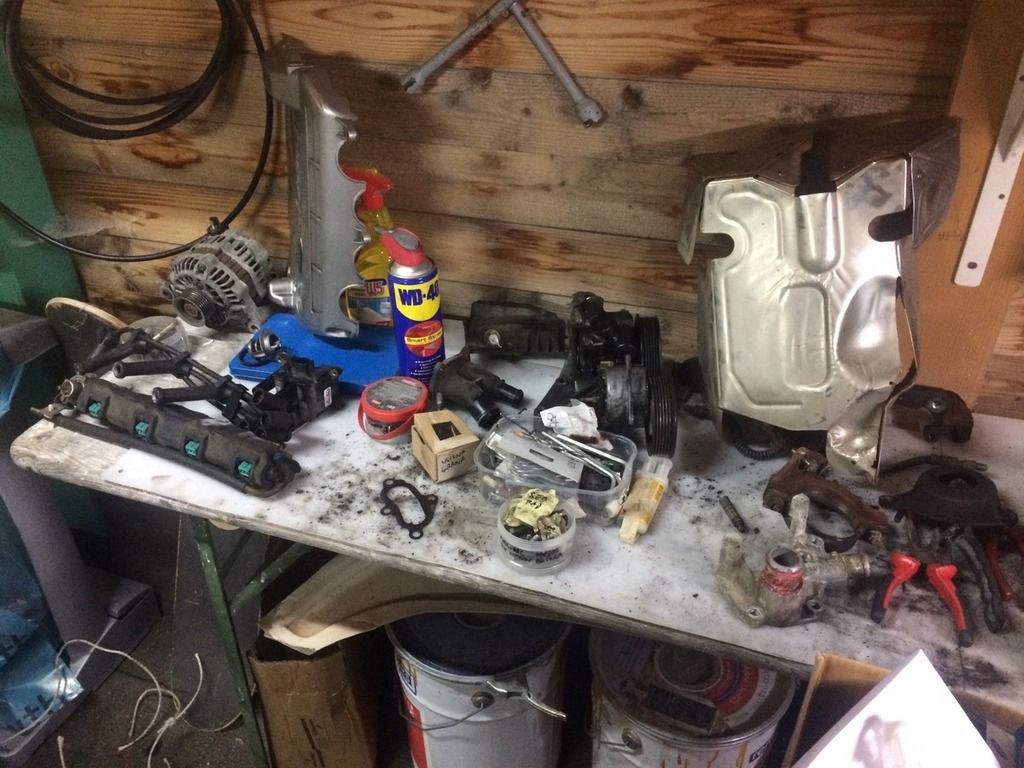
Lots of parts make a puma engine!
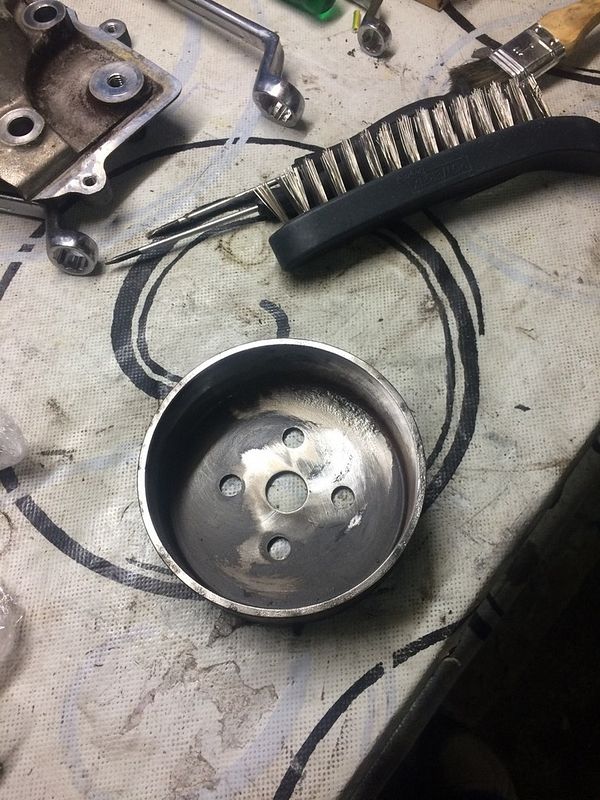
Fun fact: the water pump on the engine had metal impeller, the original replacement from Ford has a plastic one...
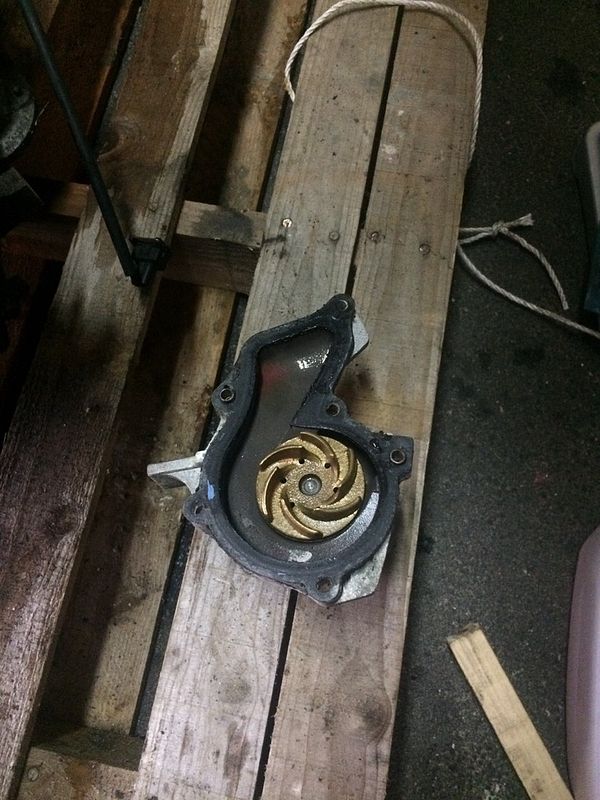
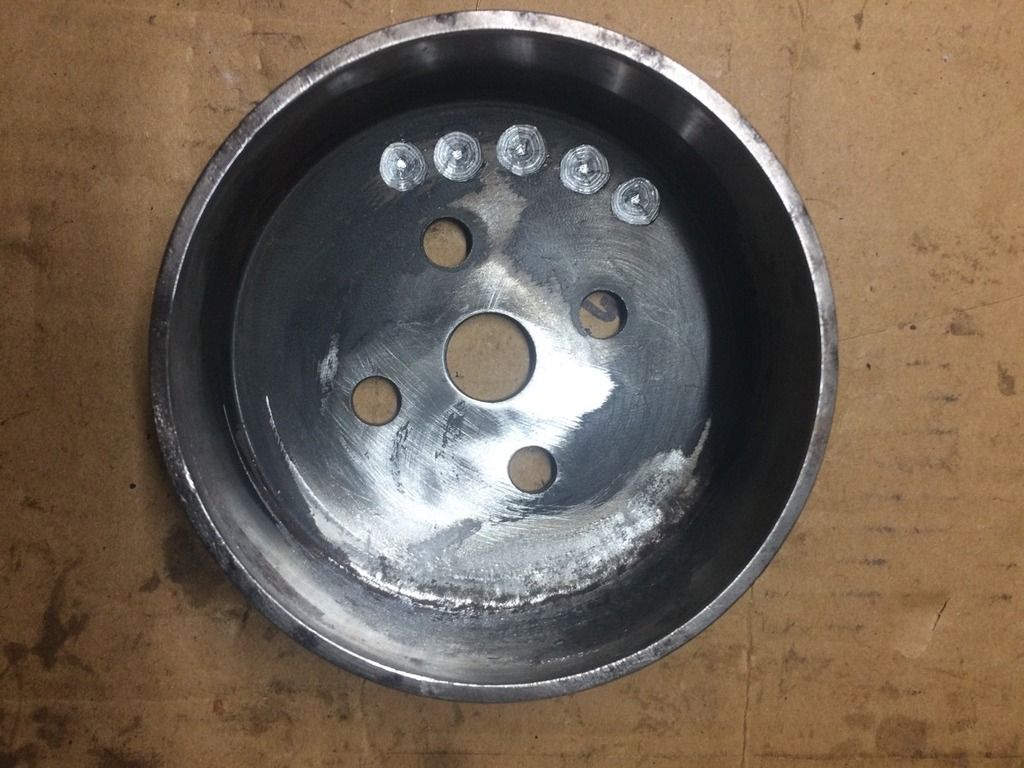
The water pump pulley was heavily corroded inside: a proof engine sat for a long time and some moisture condensed inside and ate into the metal. Had that filed away
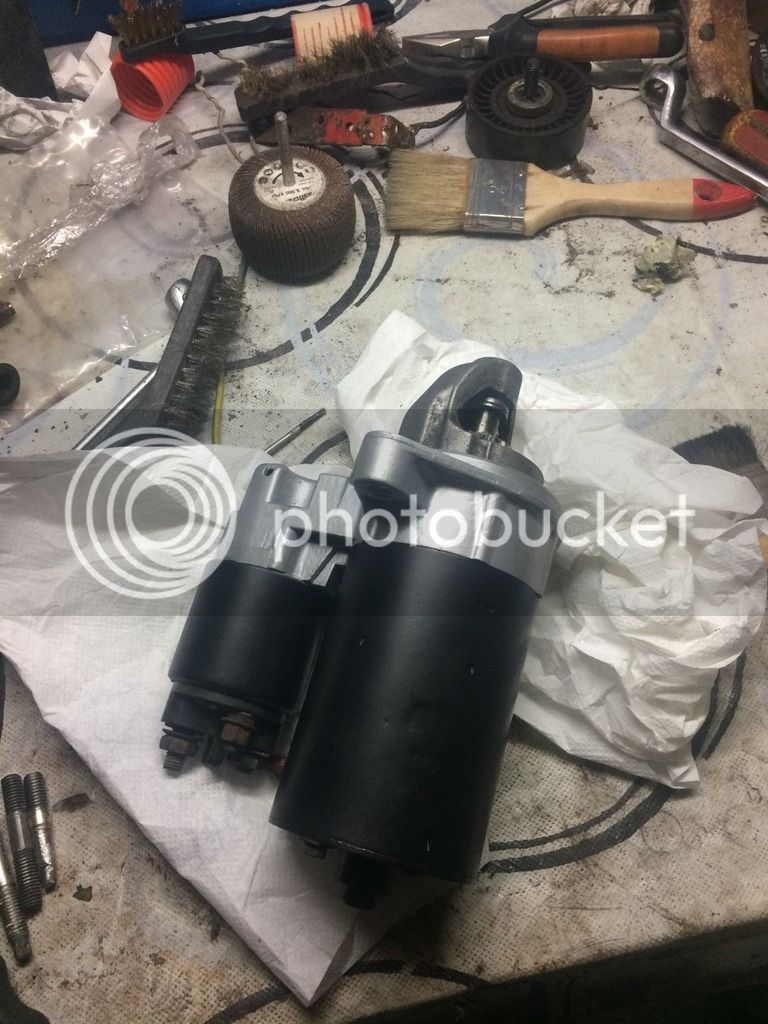
The starter works perfectly, but looked tired a bit...
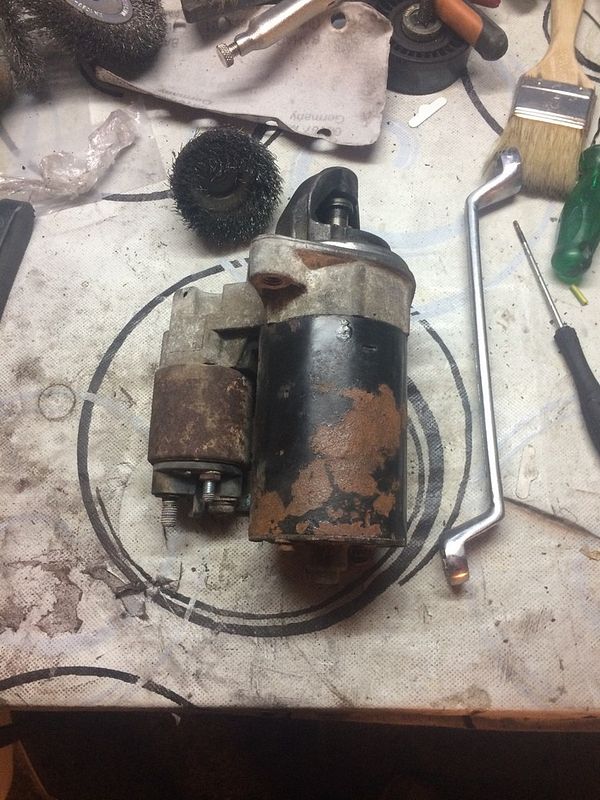
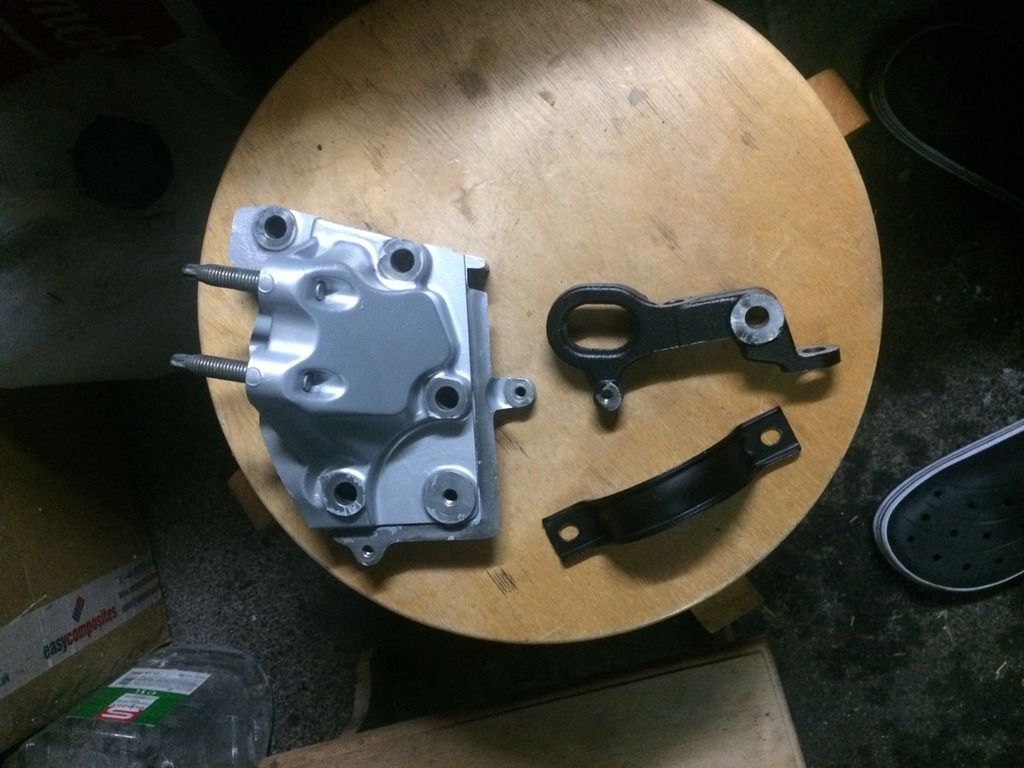
So did something about it as well as the lifting eyes
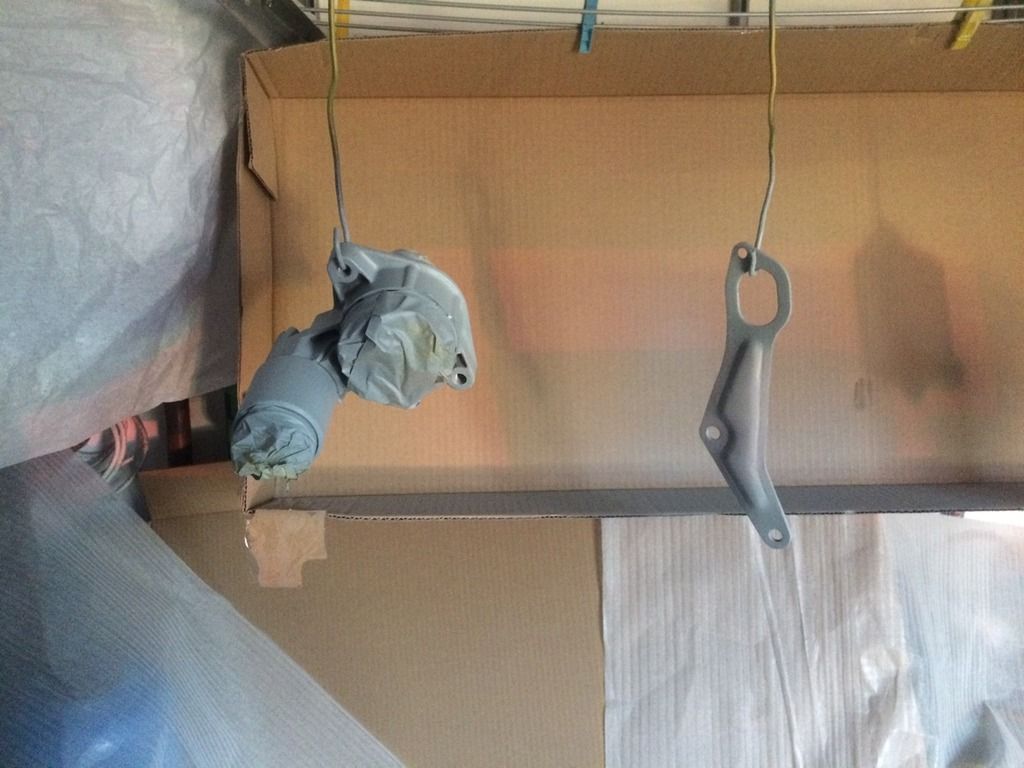
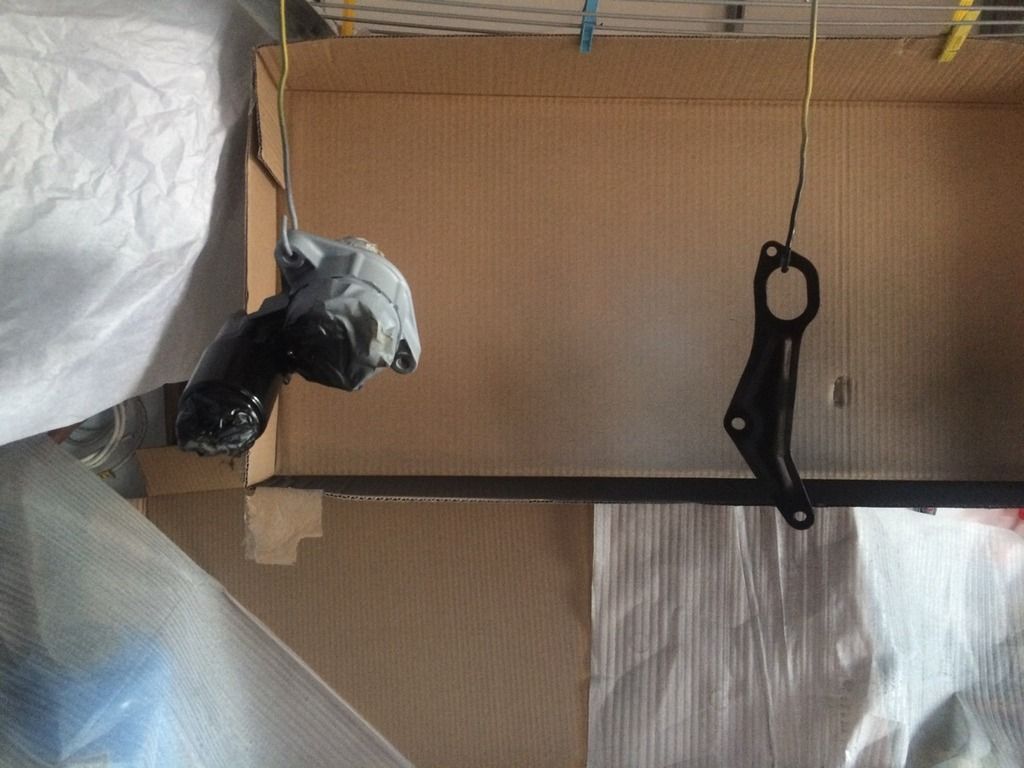
And the end product: cleaned and greased inside...
Also
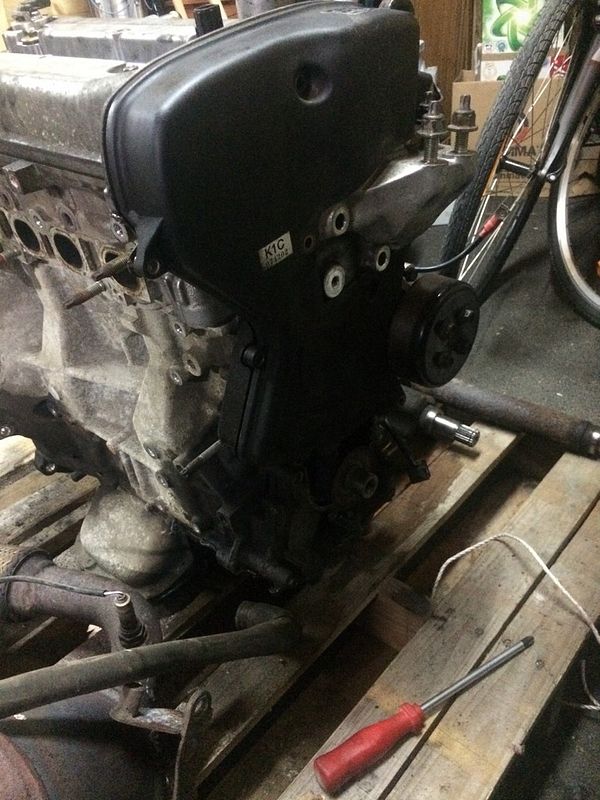
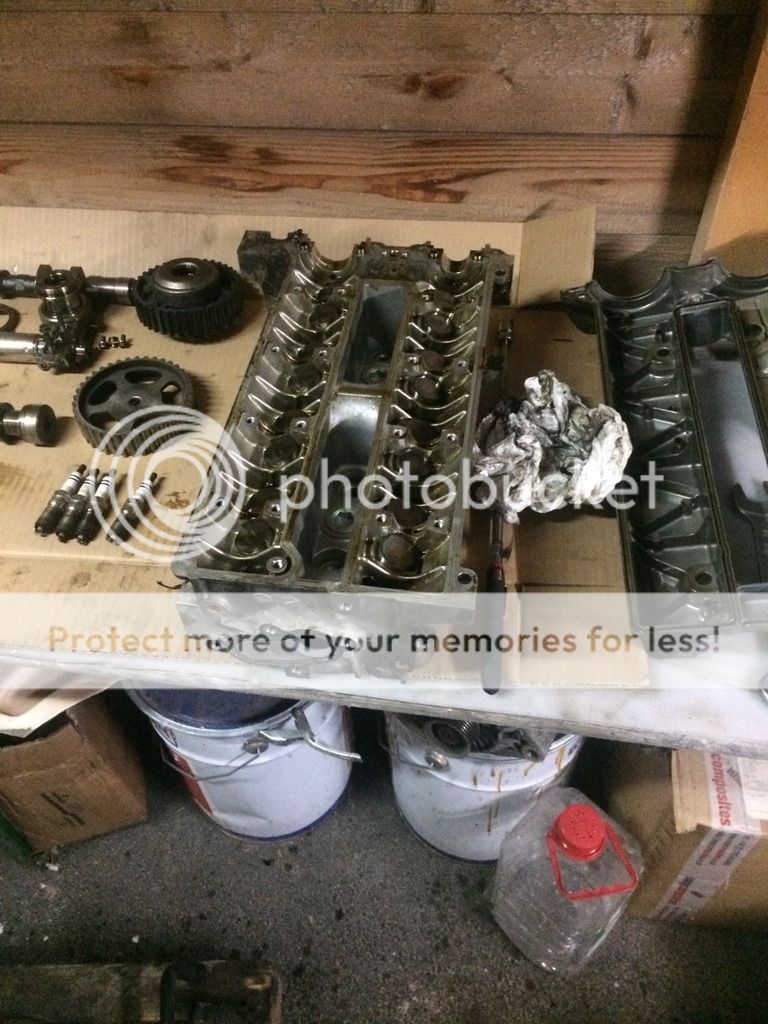
Continuing with the engine dissasembly...
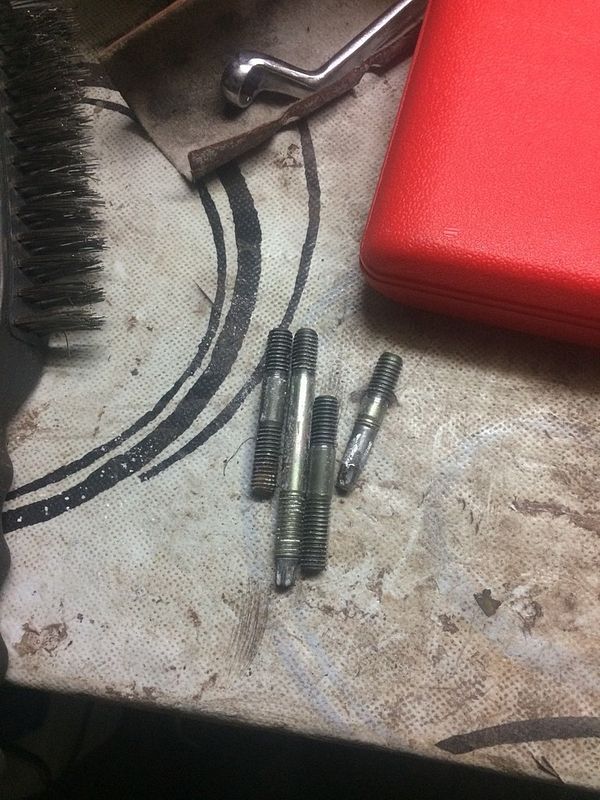
Few studs broke i.e. the torx head broke off...
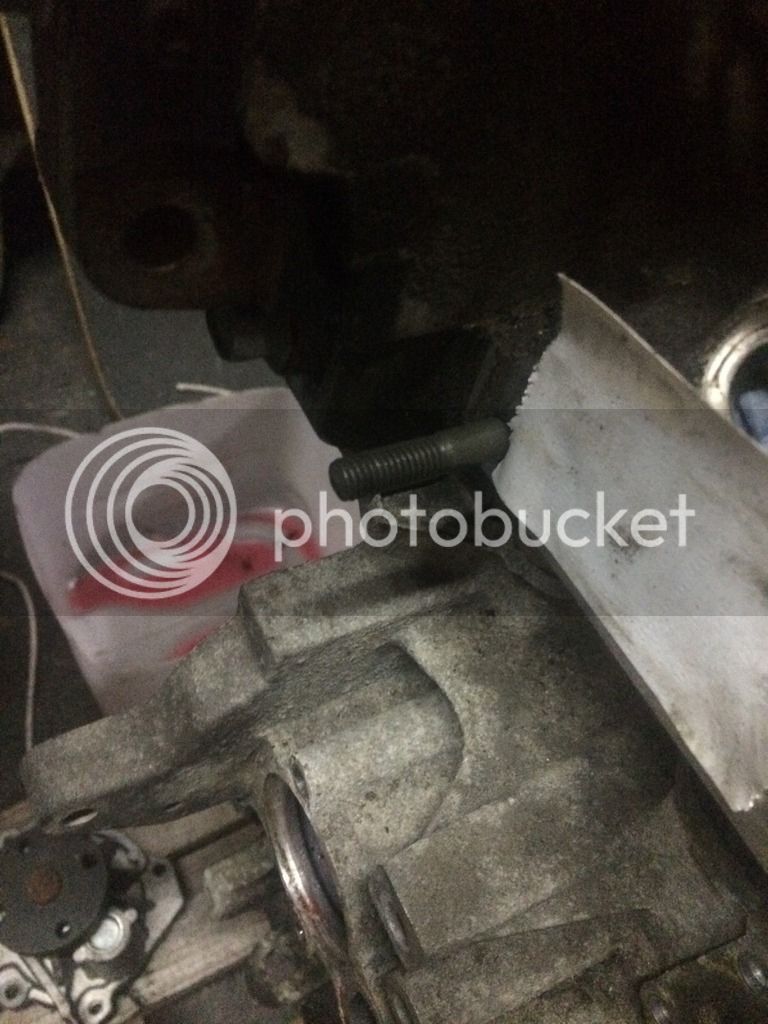
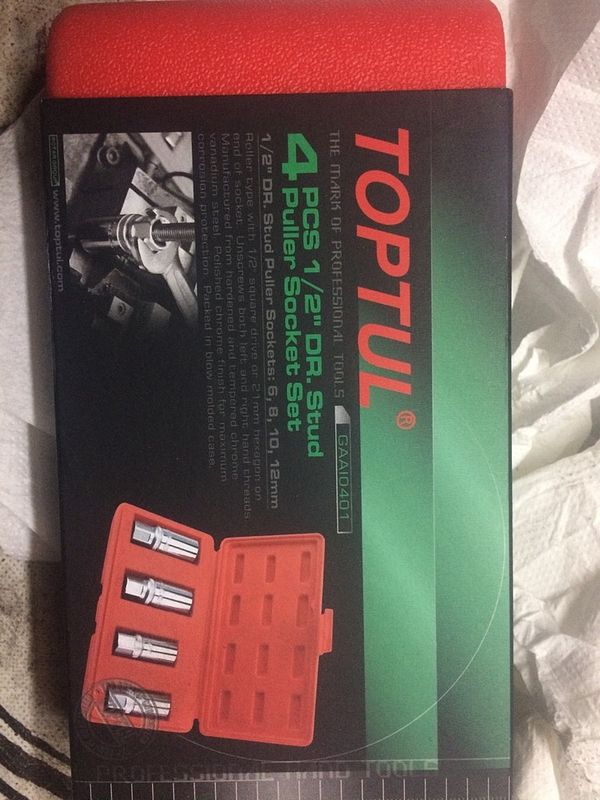
Used the two nut trick on some, but some just wouldn't go so got these which took them out with ease...
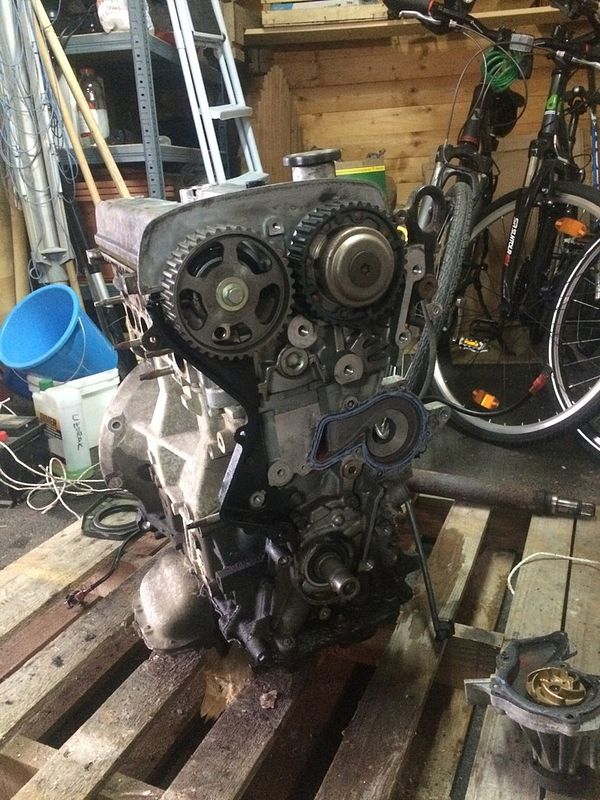
And the head is almost off
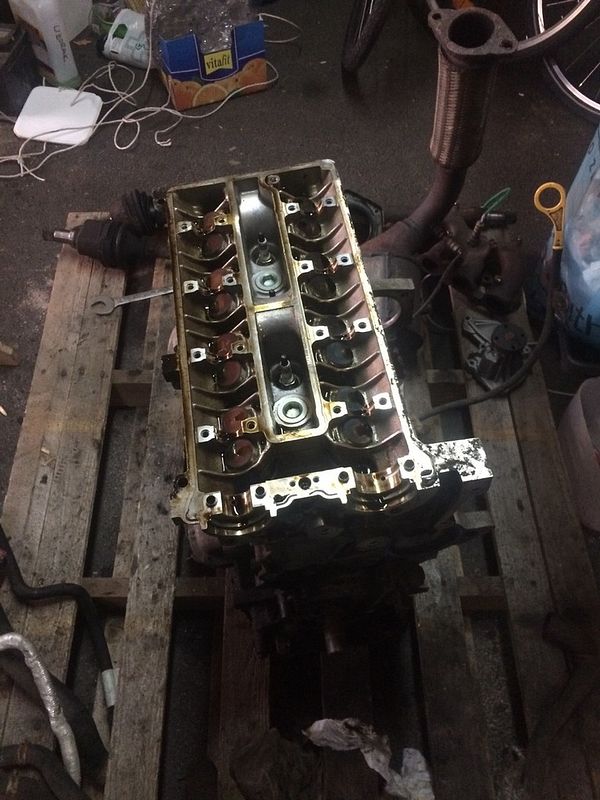
And finally...
The bottom end
The main bearings are as good as new. Nothing fancy here what Ford would like you to believe with that bullshit story of nonrepairability of bottom end etc....
If you need, Glyco does a set of main crankshaft bearings as they are the same for 1.6 and 1.7 engine.
It is 48 mm OD on crankshaft

The problematic ones are the big end bearings. Every part catalogue states the ones from 1.6 to fit, but they DON'T!
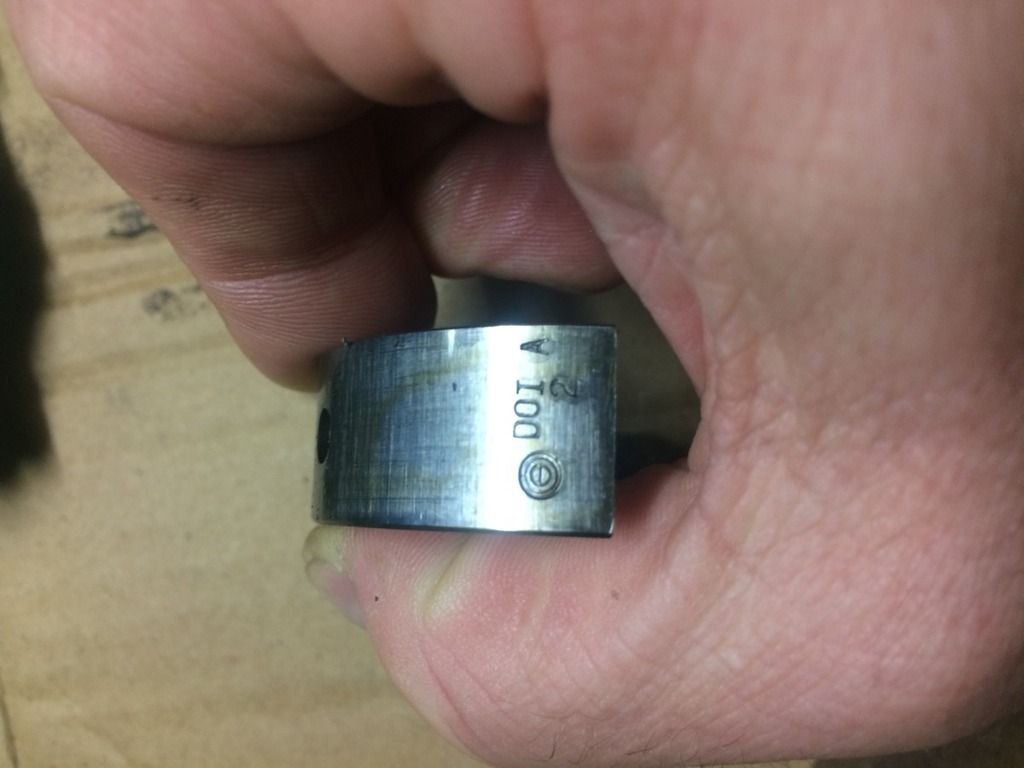
Although very low mileage engine, all 4 are marked like this.
They are not worn, nothing to be felt under finger, but have these markings. My guess is that was the frst startup of the engine and some oil starvation that occured until the oil pump built enough pressure and got the oil through the engine.
I would bet my life that these bearings are also made by Glyco, but unsure; perhaps someone here can recognise the logo?
And the OD of bigend journal on cranshaft is nominally 42 mm
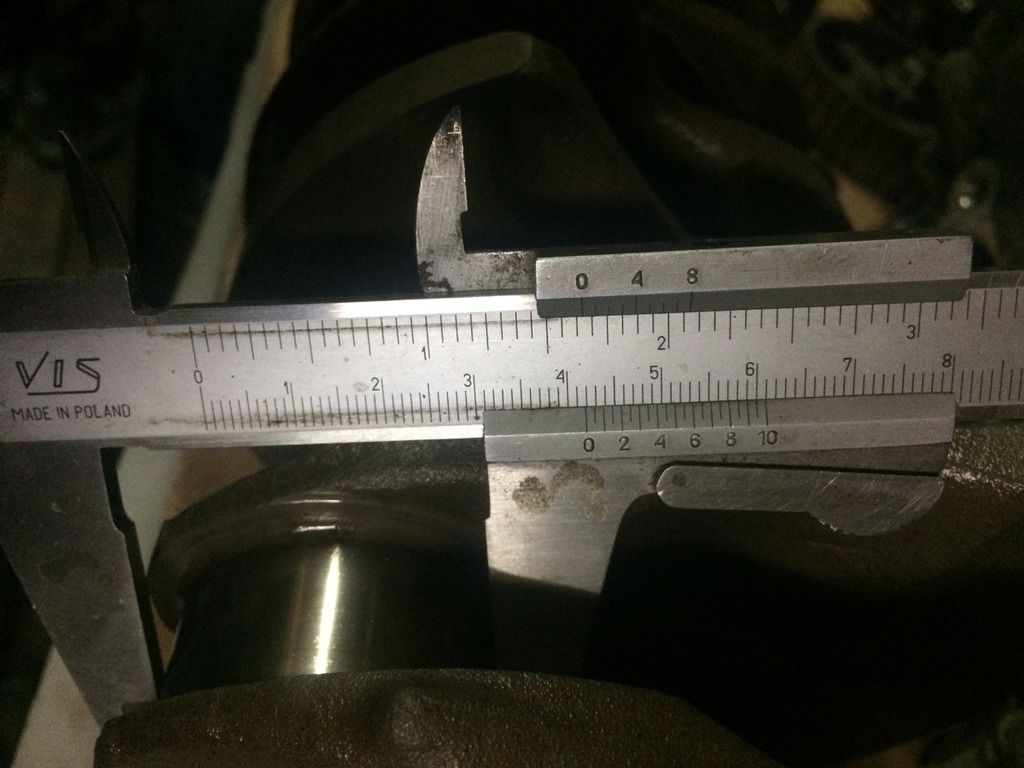
Nominal dimension per Ford should be 41.980 mm and it is exactly that!
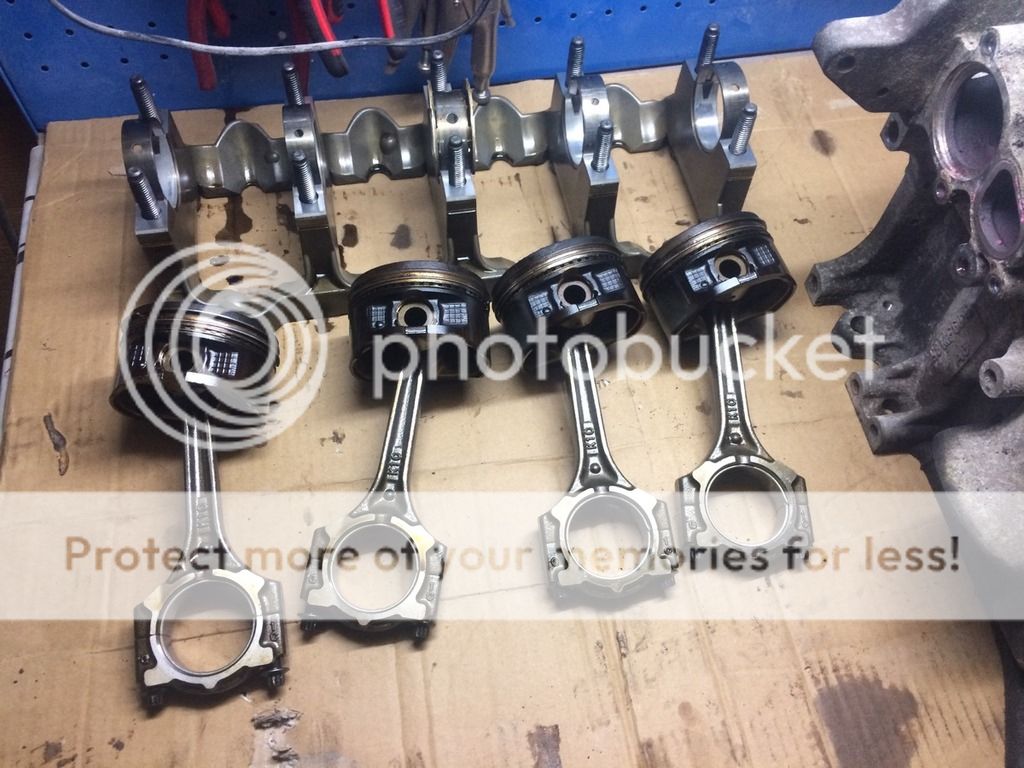
The crankshaft is out; a real beauty!
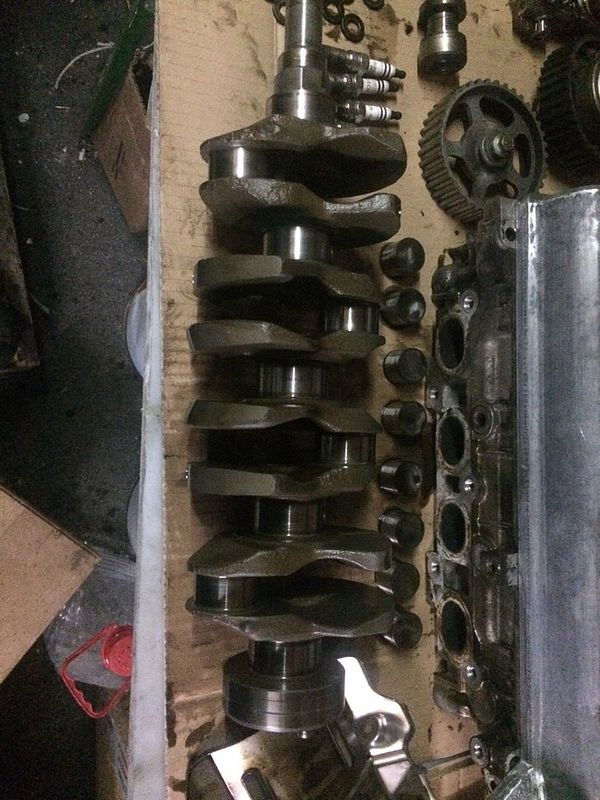
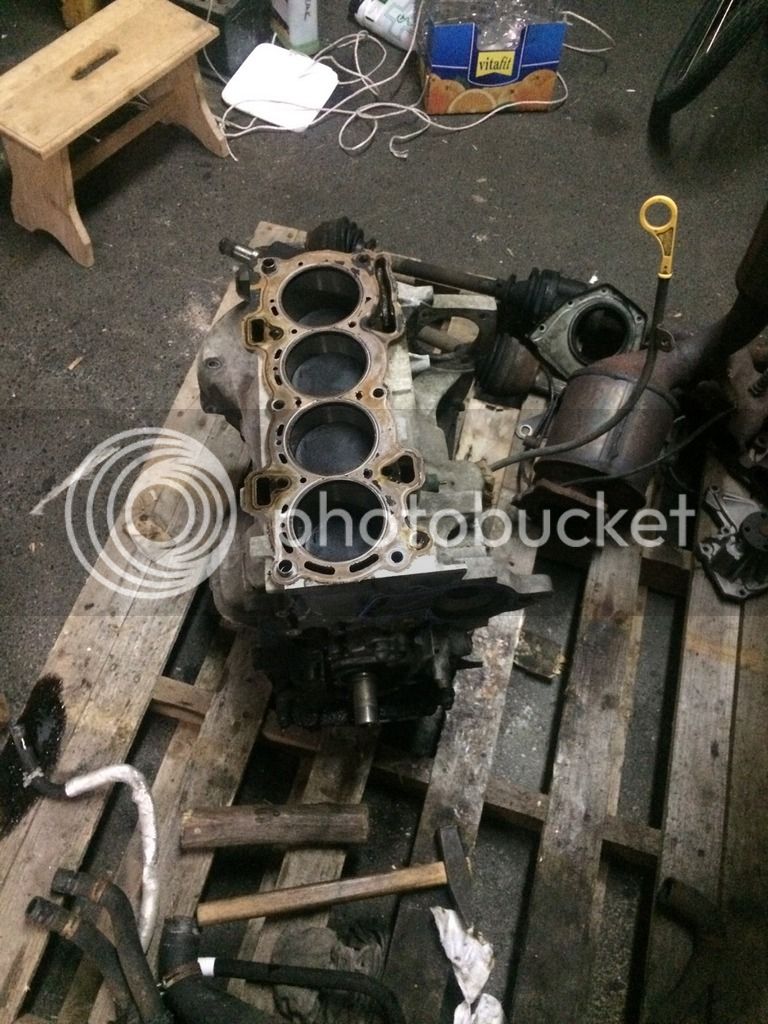
The bores are perfect
The piston set
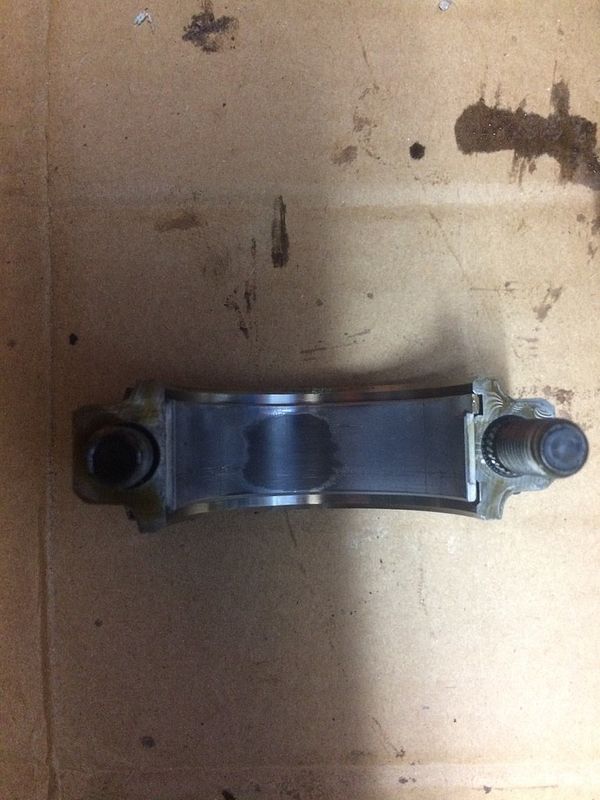
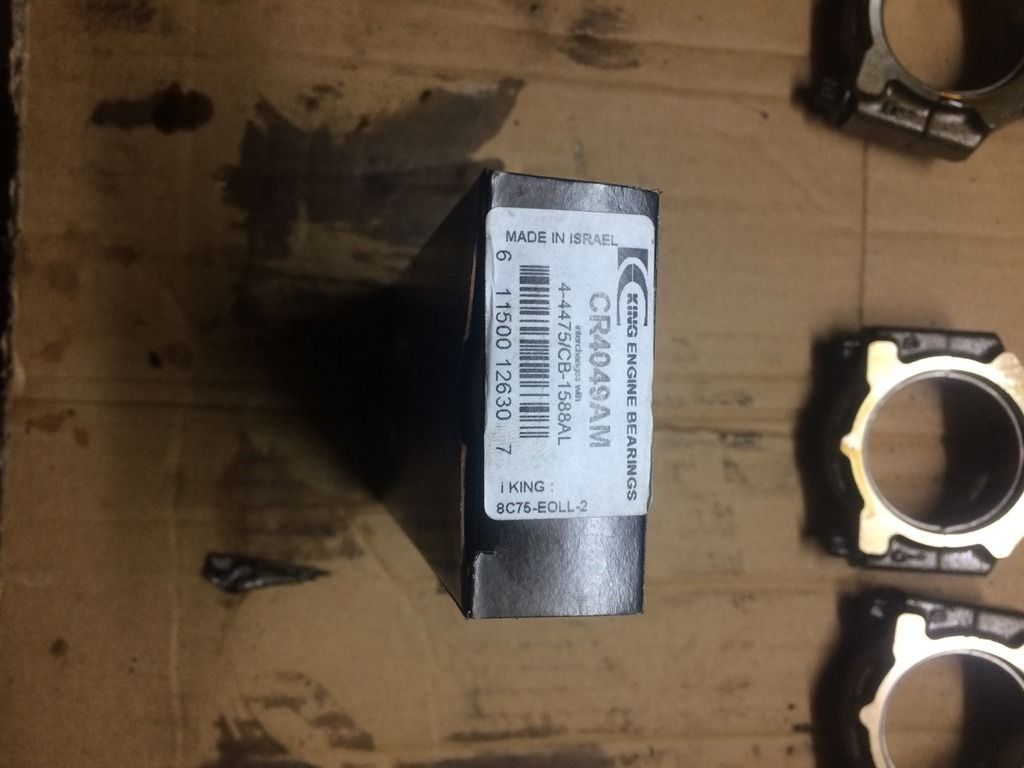
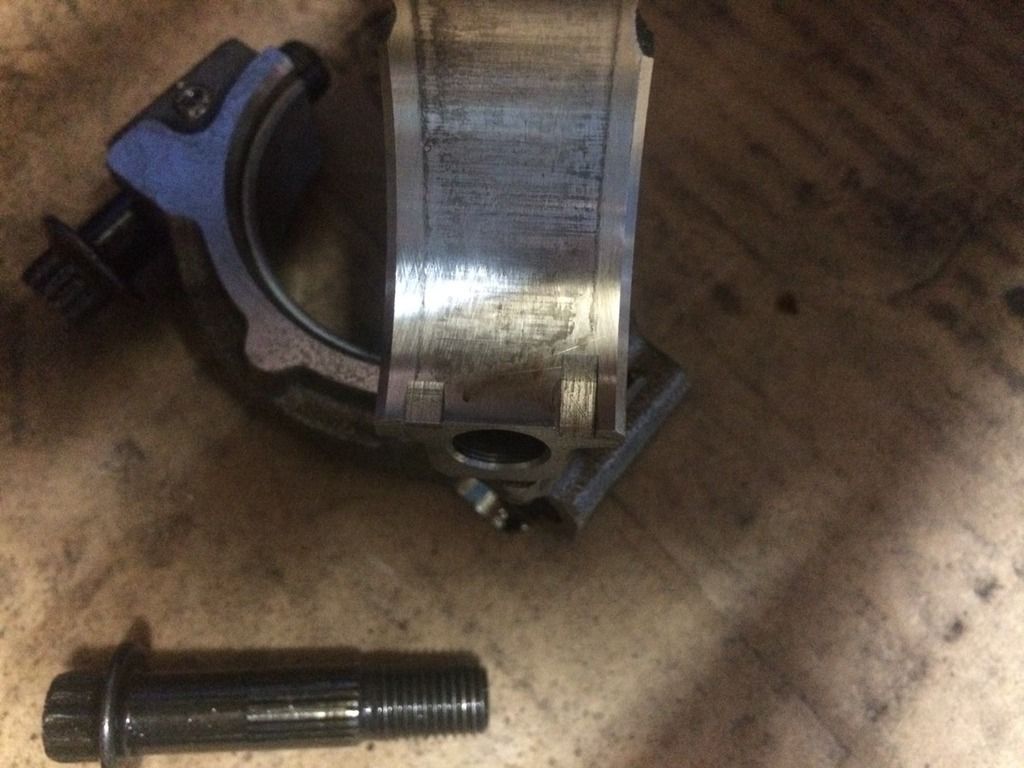
For the big end there is a solution. You need bearings for mitsubishi G13 (G15 engine) at 15.9 mm width. They are nominally 42/45 mm and fit in nicely. The only difference is the location lug; on mitsubishi bearings it is on the right, originals have them on left.
BUT, Yamaha did it's job nicely and left a space on big end on the right as well!
Have a look here:
There is original bearing still in. You need to file away about 0.1 mm on the replacement bearings and they fit in like a hand in a glove.
This is the replacement set inside big end. You can see the notches on the right as well as the hole which originals don't have.
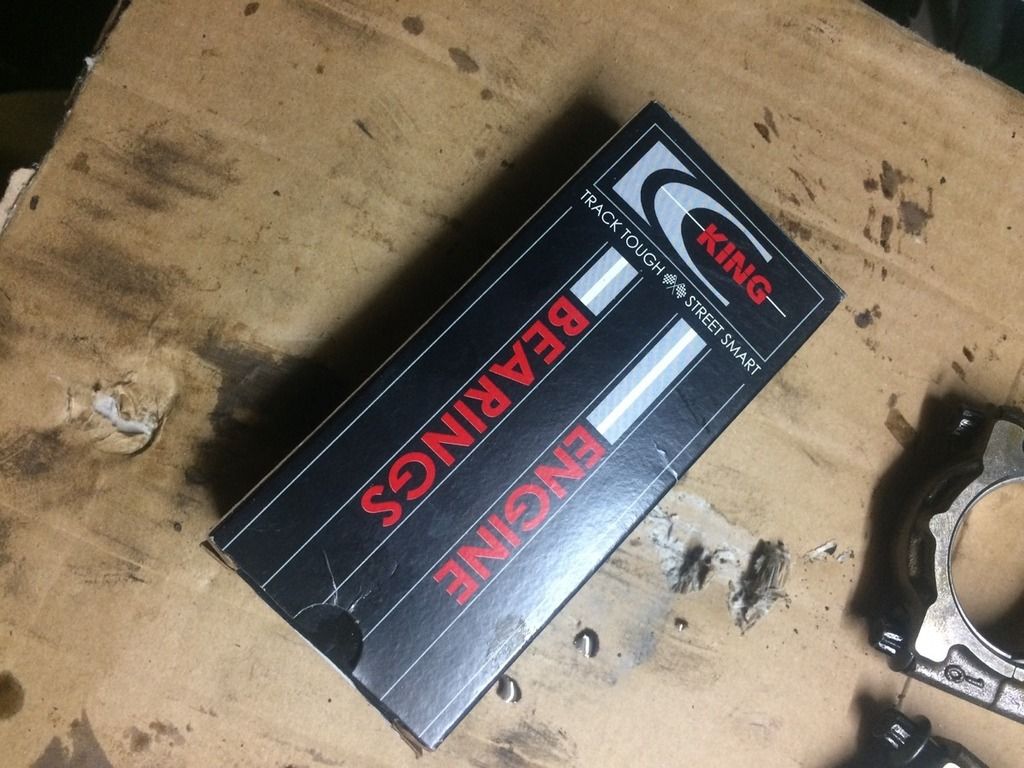
This is the set you need:
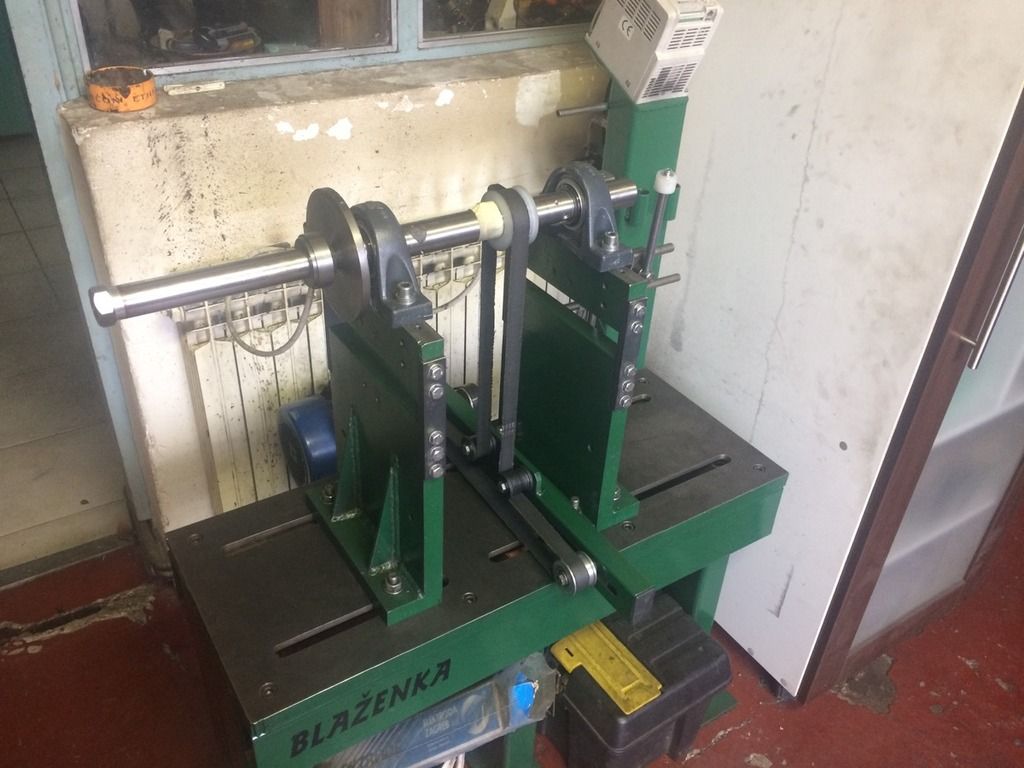
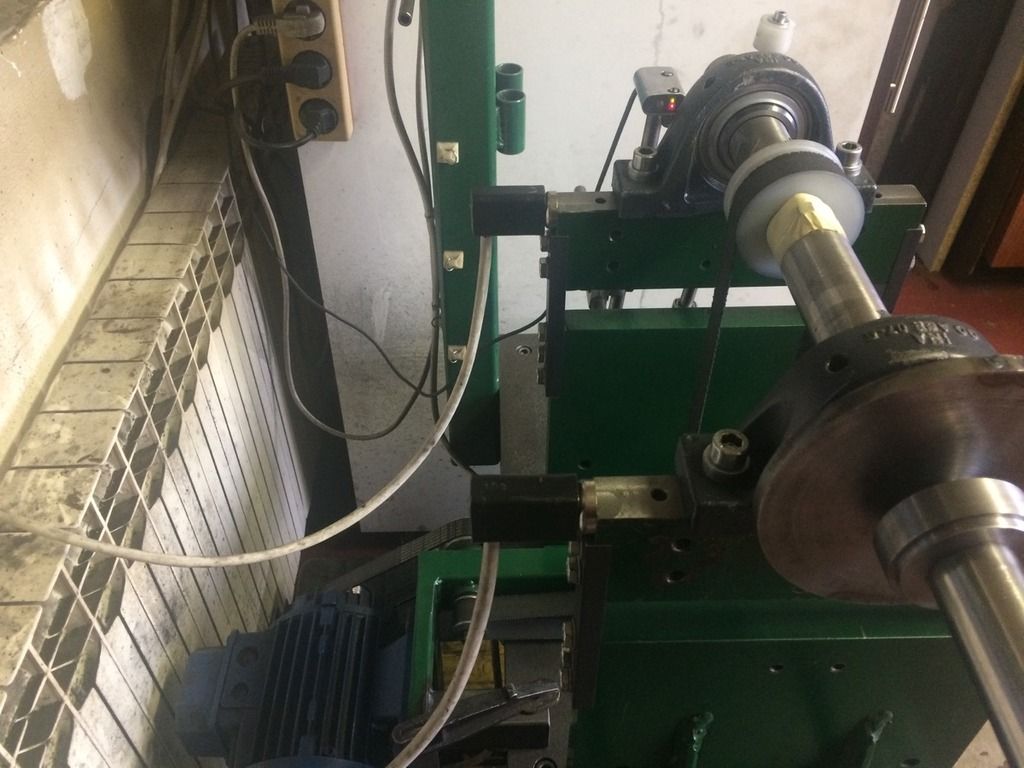
All the things wrapped up. The Head and the block are off for machining to clean the surface for the head gasket, and crankshaft, flywheel and the water pulley are off for dynamic balancing.
This is the machine which was built by a guy doing the balance work; he made it him self
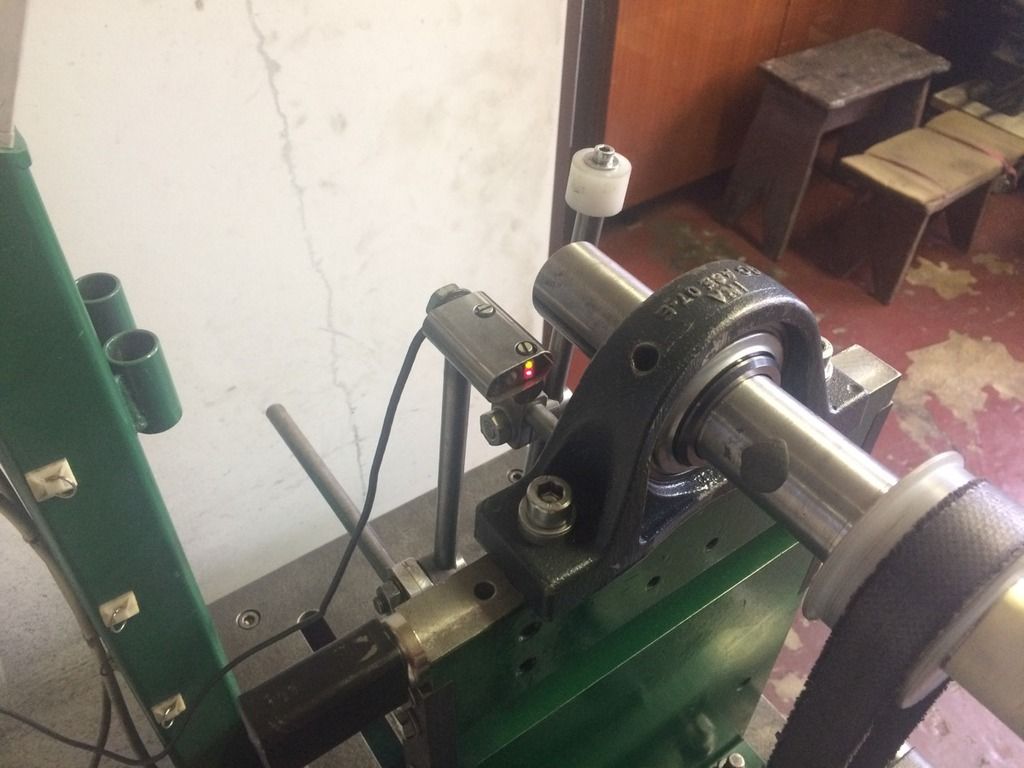
The sensors are at the back
And the results
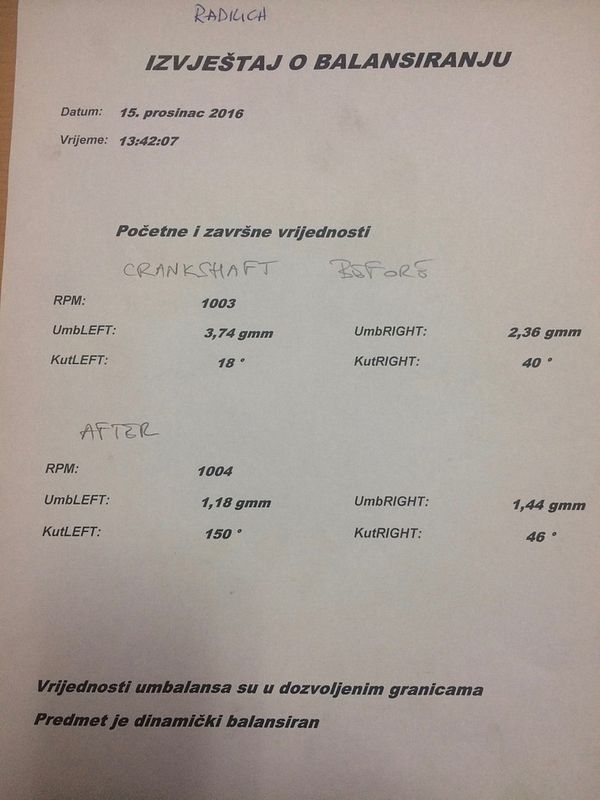
Crankshaft is very well made, the guy says most probably the best one he ever saw from a car. It is on par with motocycle crankshafts. Still, he improved it and now is good enough for 12.000 rpm.
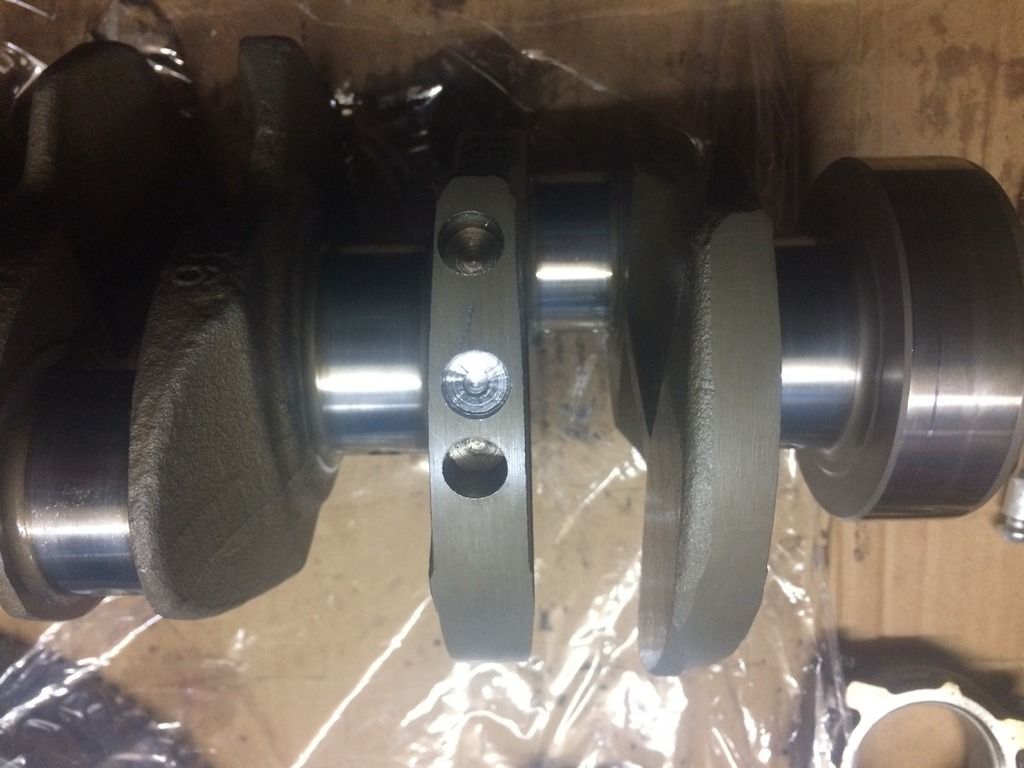
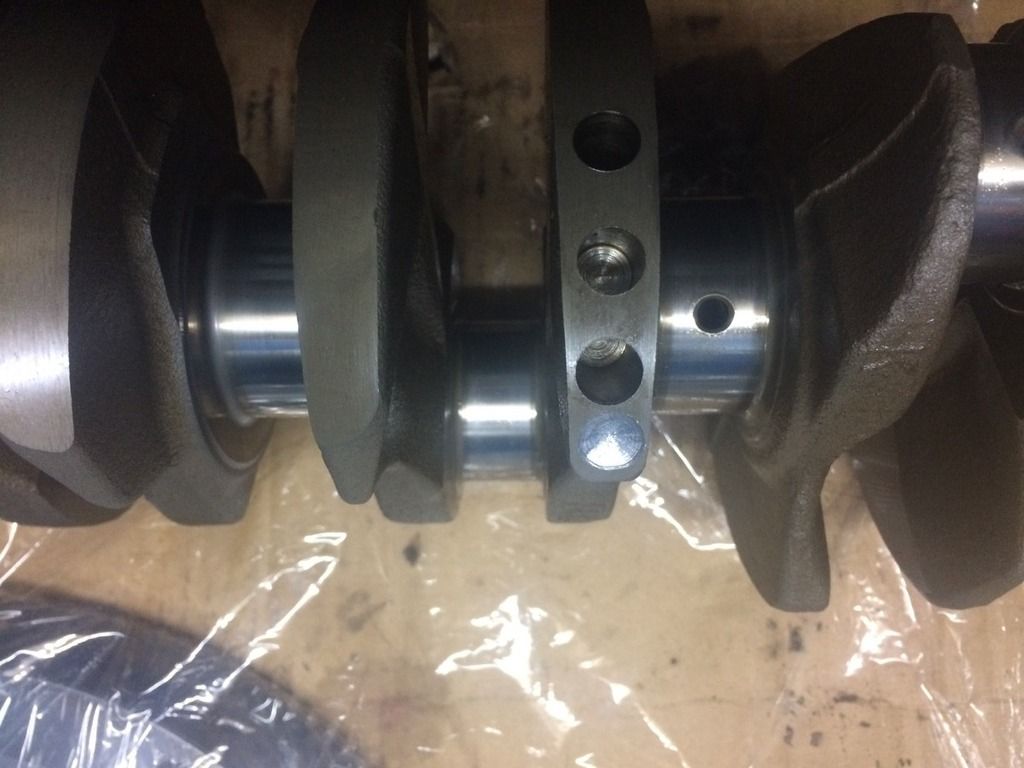
Two shiney drillings are the new ones, the rest are ex factory.
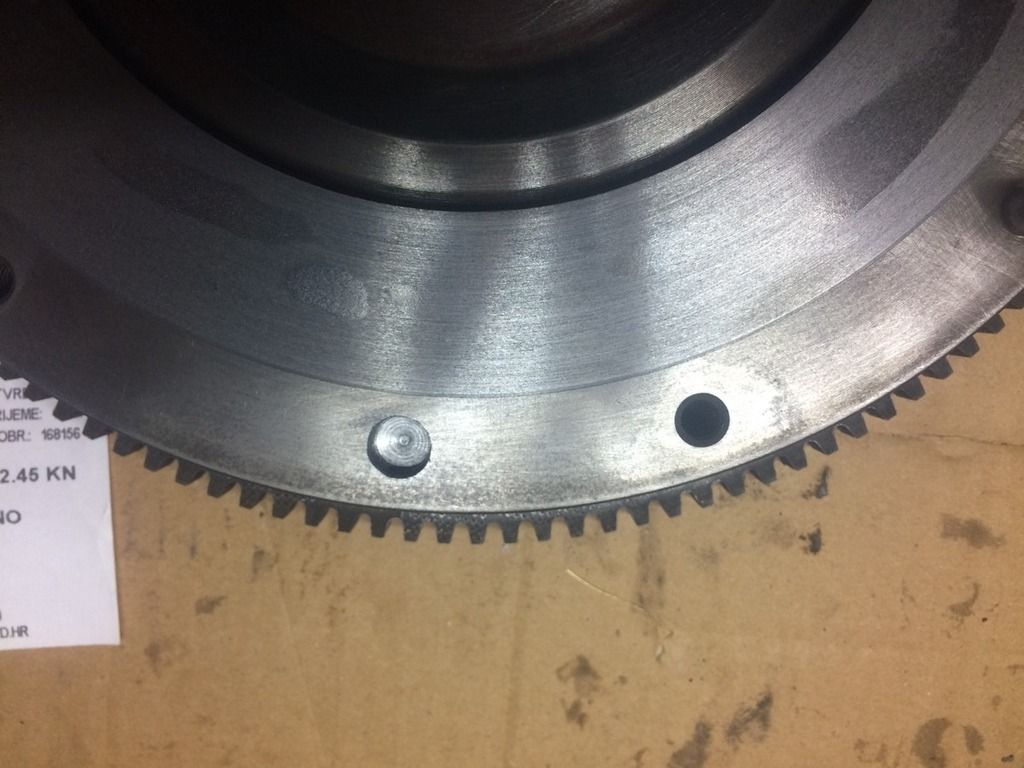
The flywheel was rather badly (in)balanced.
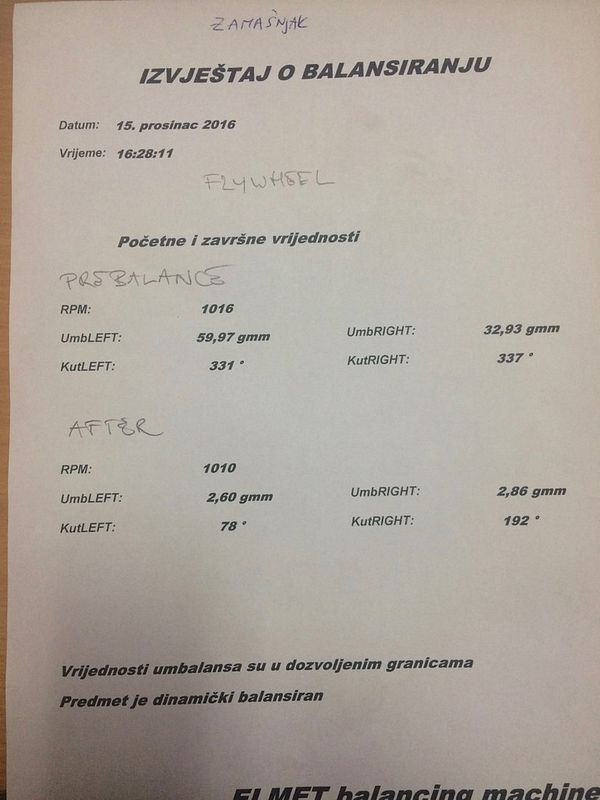
Here the problem is the OD which is big so the each gram counts for much bigger force.
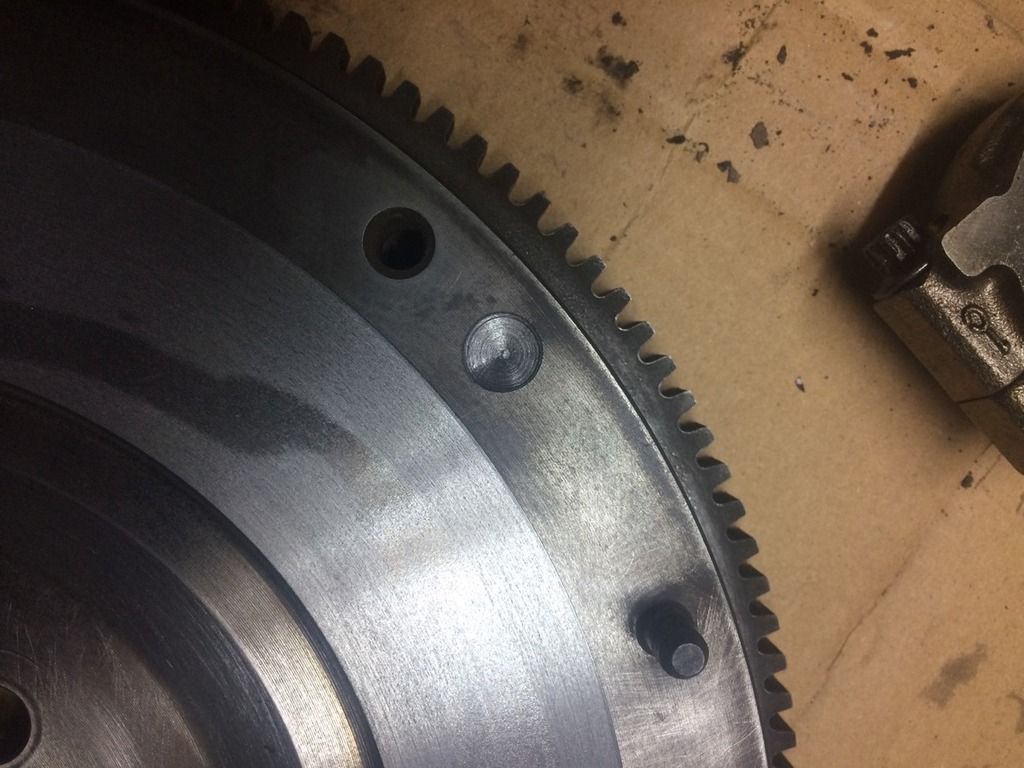
And the waterpump pulley was bad. After I filed away the rust, it was inbalanced so had it balanced as well to avoid straining the waterpump bearing...
What next? I should be collecting the block and head from machining on Monday. The head will be completed with gap to camshaft set at 0.2 mm for inlet and 0.3 mm for the exhaust.
Still undecided which big end bearings to use. Wait for some plastigauge to arrive to measure the radial gap and then will decide.
The engine is equipped with FRP camshafts, will get the FRP replica exhaust and FRP map... Now you know what I have been doing for the past 6 months or so... The new(ish) engine and the B6 gearbox should make a nice puma, I would think :wink:
Ah, ok, here we go again, with some other stuff in the pipeline. Ben had a nice low mileage puma and had no use fof the engine so I bought it!

He was kind enough to do the compression test (cheers, mate!) and it showed really good health, as you can see:

Ford says the starting pressure should be 12.4 bars but the engine should be warmed up to operating temperature first. This was measured after engine was sat for over a week so it is in excellent health.
A lorry picked it up, Ben and his brother were kind enough to help with the loading and few days later the pallet arrived...

So, I set out to do the complete overhaul of the engine. I dismantled it completely as I wanted it to be as good as new.


The parts that are cleaned and cleared for installing are wrapped up in foil and stored securely away

The bolts are grouped and signed not to mix them up or lose any

Lots of parts make a puma engine!

Fun fact: the water pump on the engine had metal impeller, the original replacement from Ford has a plastic one...

The water pump pulley was heavily corroded inside: a proof engine sat for a long time and some moisture condensed inside and ate into the metal. Had that filed away

The starter works perfectly, but looked tired a bit...

So did something about it as well as the lifting eyes


And the end product: cleaned and greased inside...

Also

Continuing with the engine dissasembly...

Few studs broke i.e. the torx head broke off...

Used the two nut trick on some, but some just wouldn't go so got these which took them out with ease...


And the head is almost off


And finally...

The bottom end


The main bearings are as good as new. Nothing fancy here what Ford would like you to believe with that bullshit story of nonrepairability of bottom end etc....


If you need, Glyco does a set of main crankshaft bearings as they are the same for 1.6 and 1.7 engine.
It is 48 mm OD on crankshaft

The problematic ones are the big end bearings. Every part catalogue states the ones from 1.6 to fit, but they DON'T!
Although very low mileage engine, all 4 are marked like this.

They are not worn, nothing to be felt under finger, but have these markings. My guess is that was the frst startup of the engine and some oil starvation that occured until the oil pump built enough pressure and got the oil through the engine.

I would bet my life that these bearings are also made by Glyco, but unsure; perhaps someone here can recognise the logo?

And the OD of bigend journal on cranshaft is nominally 42 mm

Nominal dimension per Ford should be 41.980 mm and it is exactly that!
The crankshaft is out; a real beauty!

The bores are perfect

The piston set

For the big end there is a solution. You need bearings for mitsubishi G13 (G15 engine) at 15.9 mm width. They are nominally 42/45 mm and fit in nicely. The only difference is the location lug; on mitsubishi bearings it is on the right, originals have them on left.
BUT, Yamaha did it's job nicely and left a space on big end on the right as well!
Have a look here:

There is original bearing still in. You need to file away about 0.1 mm on the replacement bearings and they fit in like a hand in a glove.

This is the replacement set inside big end. You can see the notches on the right as well as the hole which originals don't have.

This is the set you need:


All the things wrapped up. The Head and the block are off for machining to clean the surface for the head gasket, and crankshaft, flywheel and the water pulley are off for dynamic balancing.

This is the machine which was built by a guy doing the balance work; he made it him self

The sensors are at the back


And the results

Crankshaft is very well made, the guy says most probably the best one he ever saw from a car. It is on par with motocycle crankshafts. Still, he improved it and now is good enough for 12.000 rpm.


Two shiney drillings are the new ones, the rest are ex factory.
The flywheel was rather badly (in)balanced.

Here the problem is the OD which is big so the each gram counts for much bigger force.


And the waterpump pulley was bad. After I filed away the rust, it was inbalanced so had it balanced as well to avoid straining the waterpump bearing...

What next? I should be collecting the block and head from machining on Monday. The head will be completed with gap to camshaft set at 0.2 mm for inlet and 0.3 mm for the exhaust.
Still undecided which big end bearings to use. Wait for some plastigauge to arrive to measure the radial gap and then will decide.
The engine is equipped with FRP camshafts, will get the FRP replica exhaust and FRP map... Now you know what I have been doing for the past 6 months or so... The new(ish) engine and the B6 gearbox should make a nice puma, I would think :wink:
tuonokid
Active member
Doubly awesome Sinisa!!! Good to know all the factual stuff rather than odd bits of rubbish off the internet.
Barry
Barry
XAF
Active member
- Joined
- Apr 8, 2012
- Messages
- 1,056
Gobsmacked!! Amazing Sinisa, having just had the top end of mine rebuilt this is amazing info. I left the bottom end alone due to the lack of parts. The bearing shells were only available as part of the piston kit. Obviously they are now NLA, and expensive even if you could get hold of them.
I do actually have a set of brand new Ford piston rings (stupidly expensive!) but really wanted some shells "just in case" for the future so this is great help!
Can't wait until it's all back together and running. Which headgasket set / valve stem seals are you using?
I do actually have a set of brand new Ford piston rings (stupidly expensive!) but really wanted some shells "just in case" for the future so this is great help!
Can't wait until it's all back together and running. Which headgasket set / valve stem seals are you using?
ElDude at Allison Automotive
Active member
Awesome work. . Gearbox looks a nightmare. .
:lol:
:lol:
McCloud 85
Member
- Joined
- May 13, 2015
- Messages
- 160
The lorry that picked that engine up was enormous!! Don't think there's been anything as large down my road!
Glad it got to you safely, you're doing some great work.
Glad it got to you safely, you're doing some great work.
XAF said:[post]359020[/post]
I do actually have a set of brand new Ford piston rings (stupidly expensive!) but really wanted some shells "just in case" for the future so this is great help!
Which headgasket set / valve stem seals are you using?
Tghe head gasket set from Ford is unobtainable anymore. I had previously bought the inlet and outlet gaskets (when I plan on doing something I buy a piece per month until I get everything I need to disperse costs a bit) and then wanted the head gasket set as it was cheper than head gasket alone with something, don't remember what it was. Then contacted an aquitance working for a parts store and he misunderstood me and odredered complete head gasket set which was not expensive and cointained event the valvle stem seals and the head bolts. It arrived and it is Ajusa packed. He told me that elring is most probably inside, just was repacked by Ajusa. This is so low volume engine that noone had economic interest to produce the parts on its own so they are all just trading the same parts in diffetent packages, I guess.
I also do have a set of piston rings just in case, but won't be using them on this rebuild as they are not needed
ElDude at Allison Automotive said:[post]359021[/post] Awesome work. . Gearbox looks a nightmare. .
:lol:
You are reading it wrong: this is a good challenge
And when it works out, it will transform the car to a grandtourer should be needed with true motorway capabilities :wink:
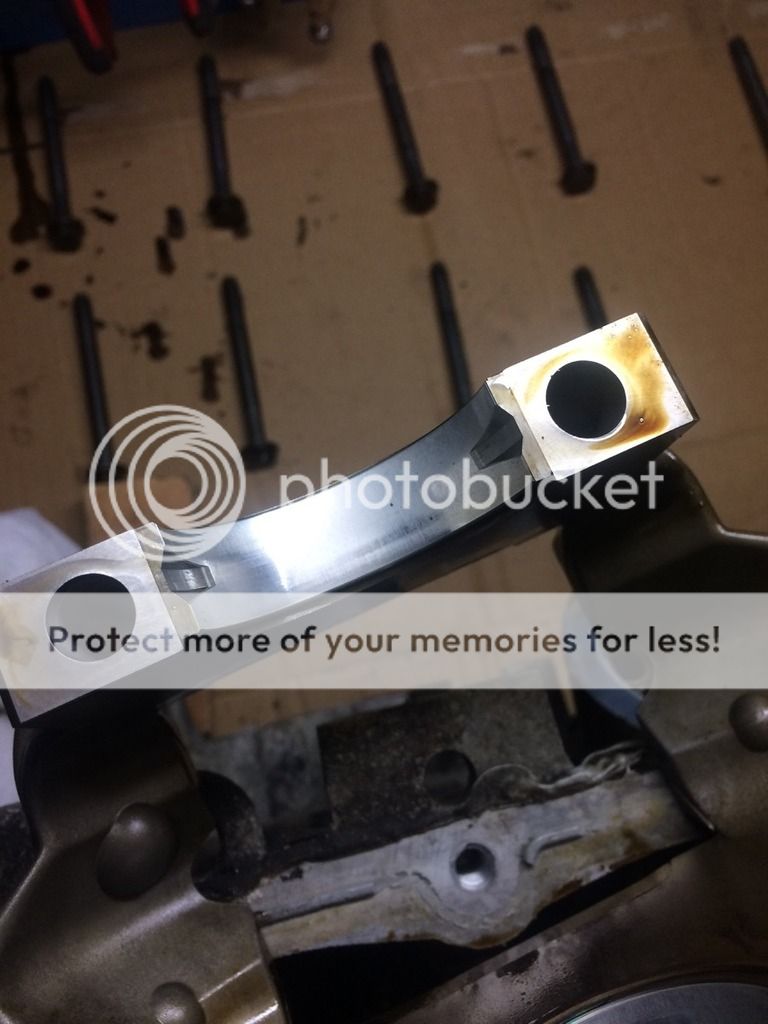
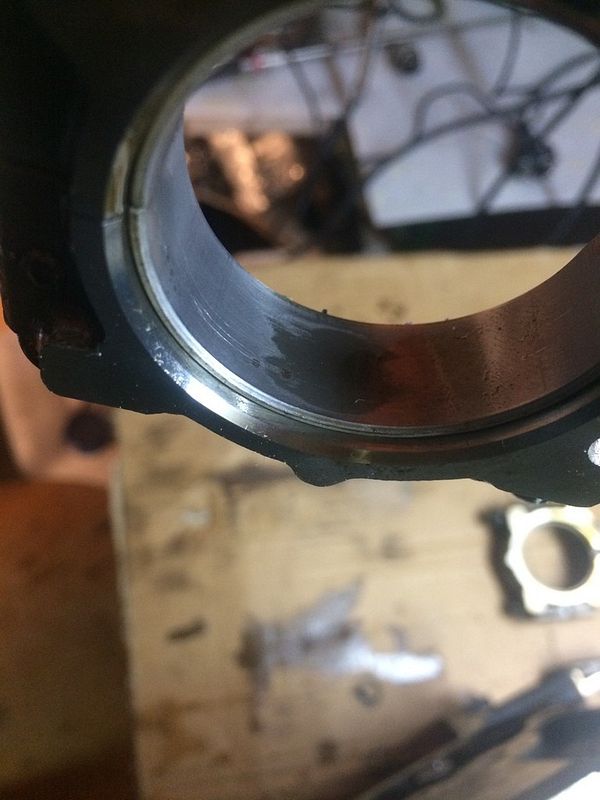
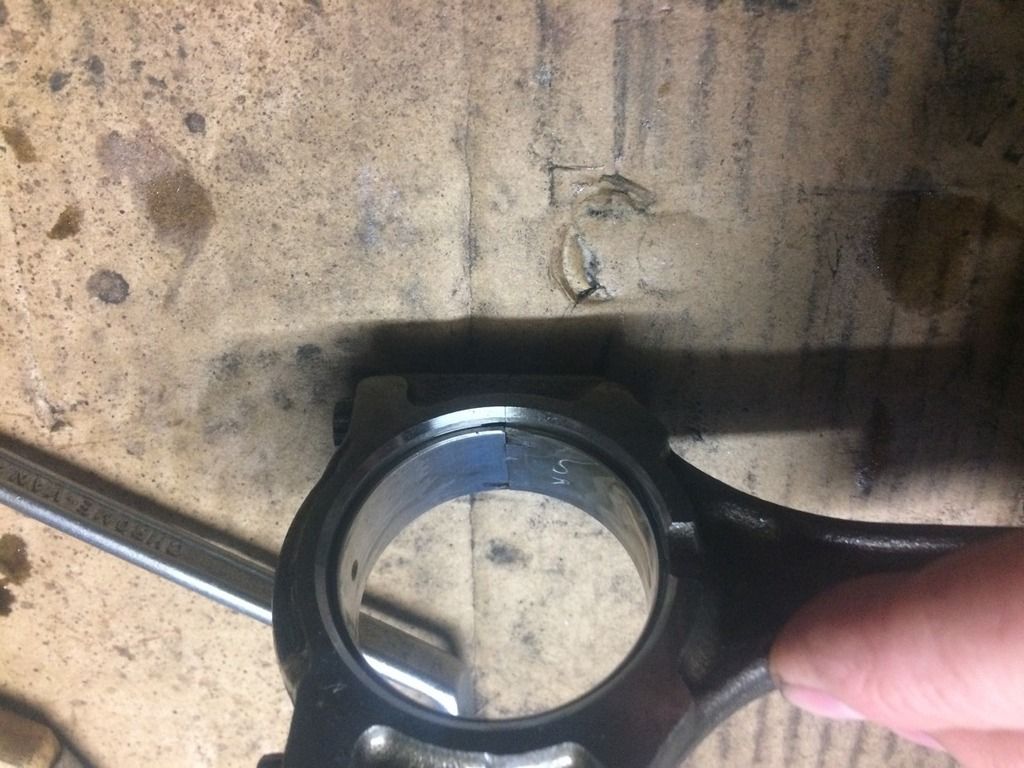
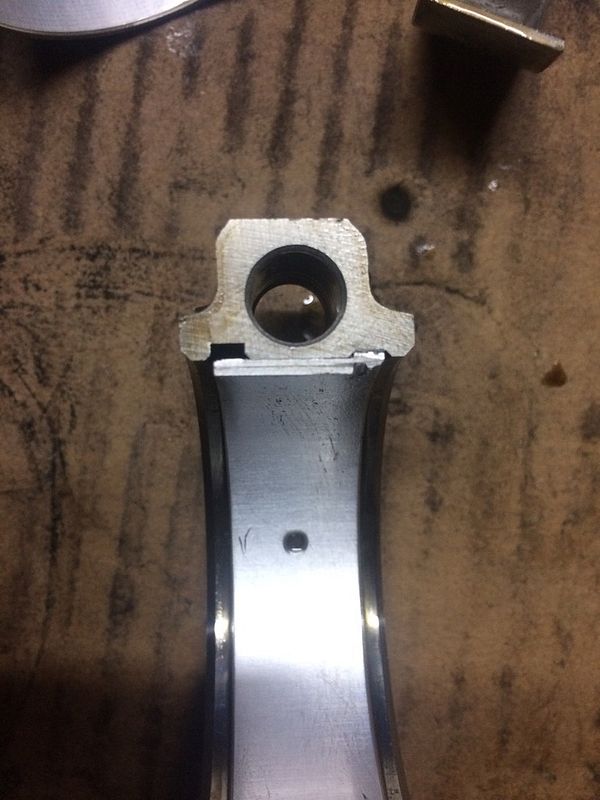
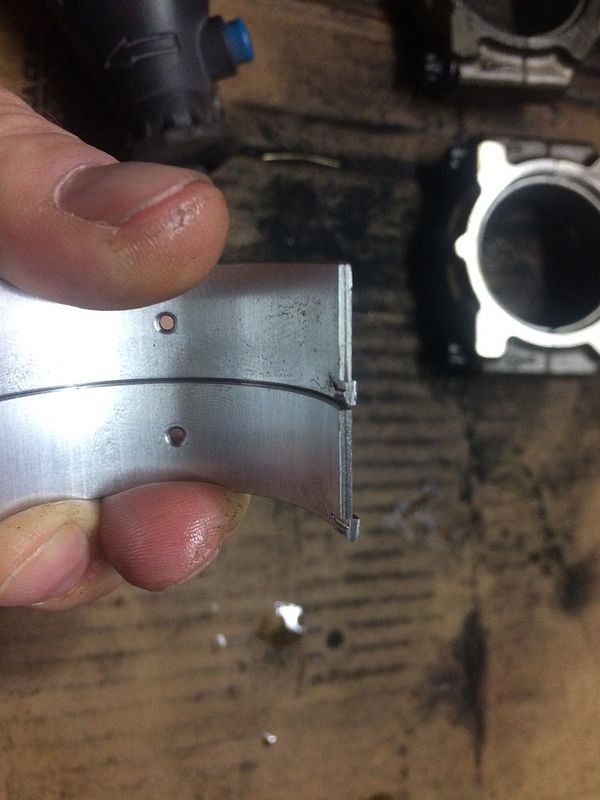
Because there are interested people I have taken some more images to show the situation with the big end and its bearings.
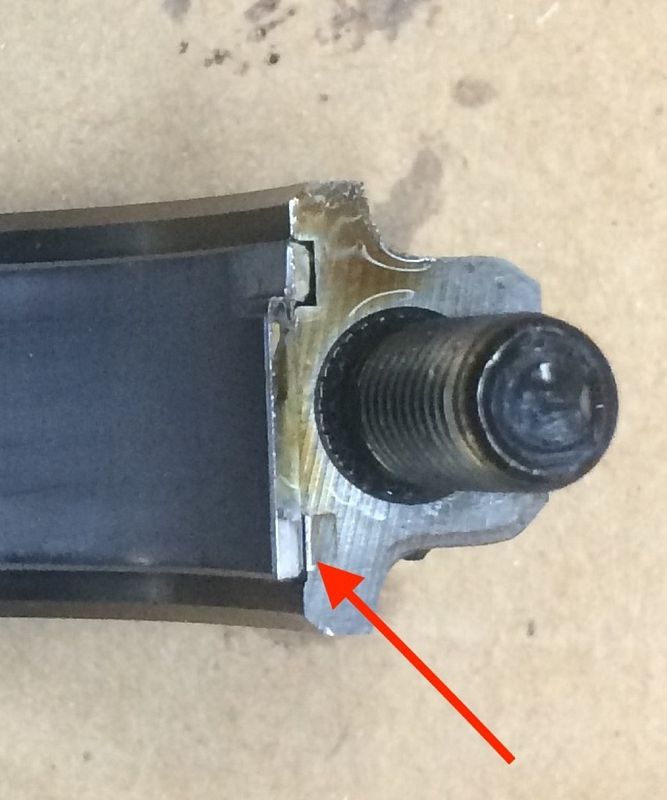
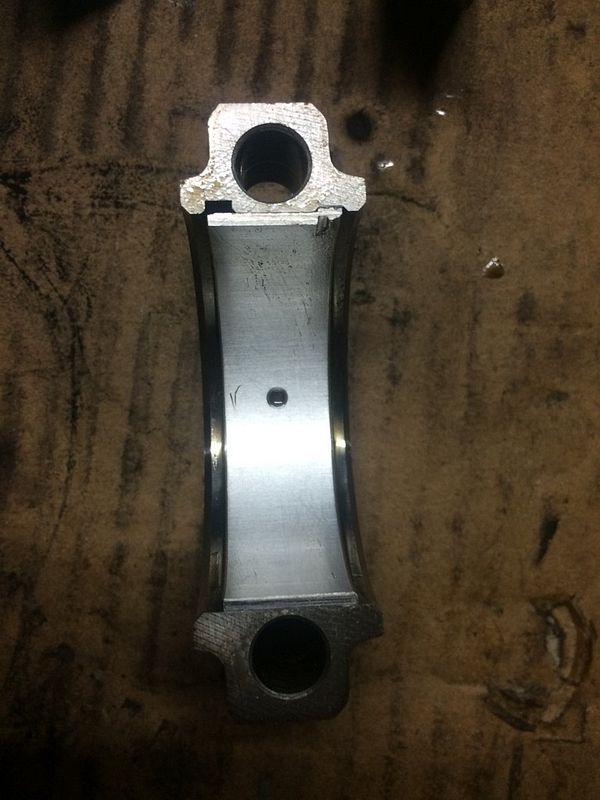
The big end with bearing in (the upper half)
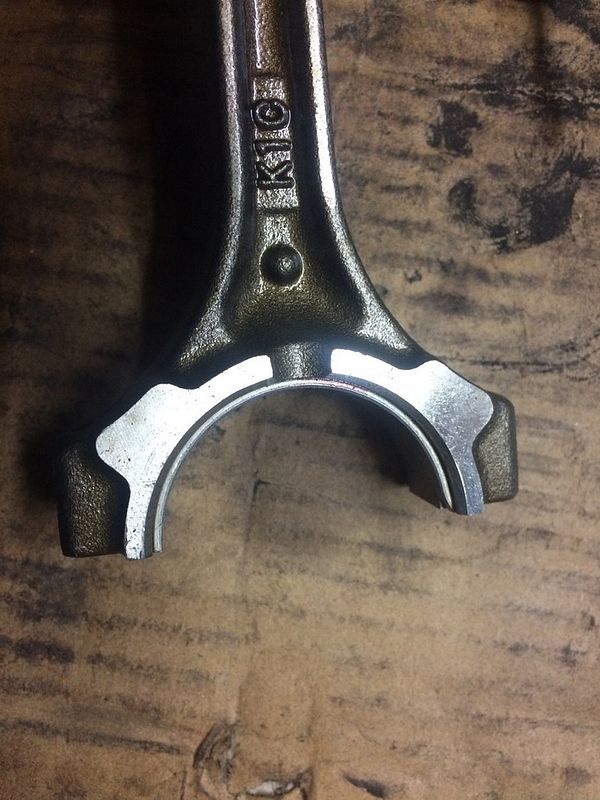
The big end without bearing clearly showing it can take the right and left location lugged bearing
Granted, the original uses the bigger one, but beggars can't be choosers!
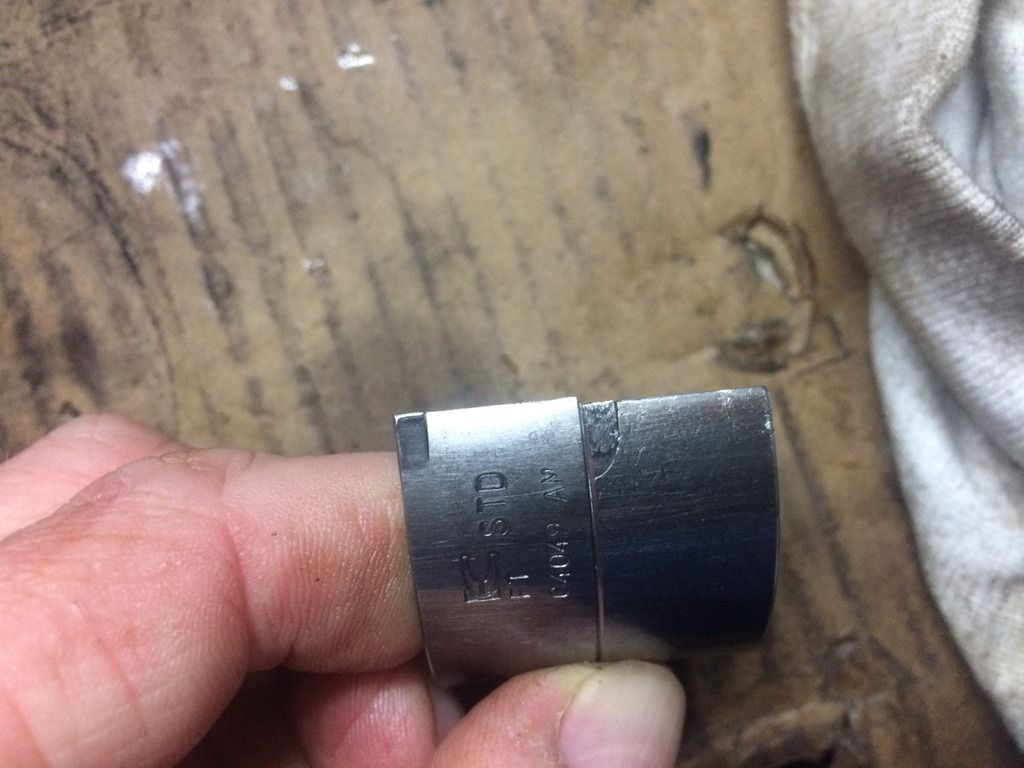
The original bearing
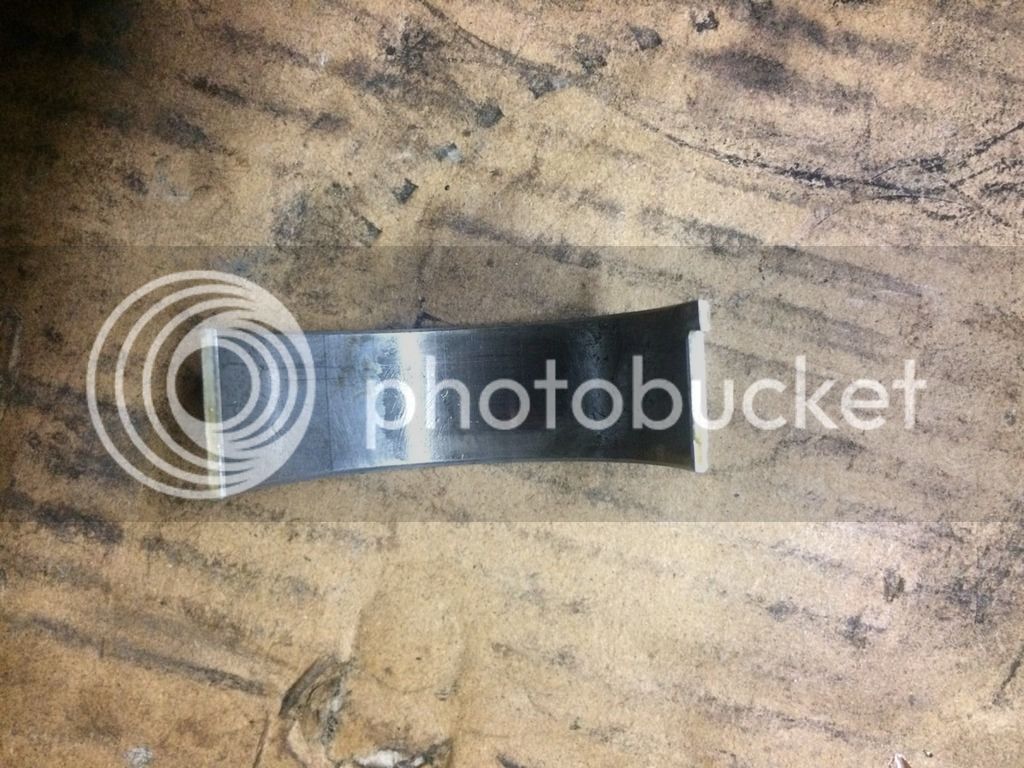
And this is the part that annoys me the most! It is colour coded, red as you can see
This is what Ford (TIS) says about it in engine spec
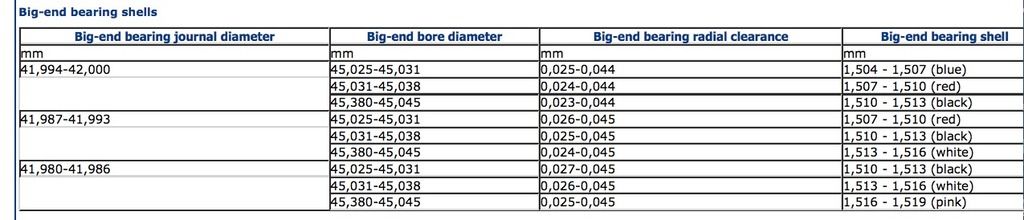
So in design phase the engine was normally constructed to be overhauled at one point in time, it even has forseen different bearing specifications coded by colour as is the norm across the industry. Only at later stage some decided there would be more money to be made by selling complete bottom end instead of just bearings! Same goes for the piston rings; they are also classed in five dimensions only to never be released in sale as such. The blue oval can be a real son of a b...ch when it wants to... and then urban legends of unrepaireability of the engine started circulating.
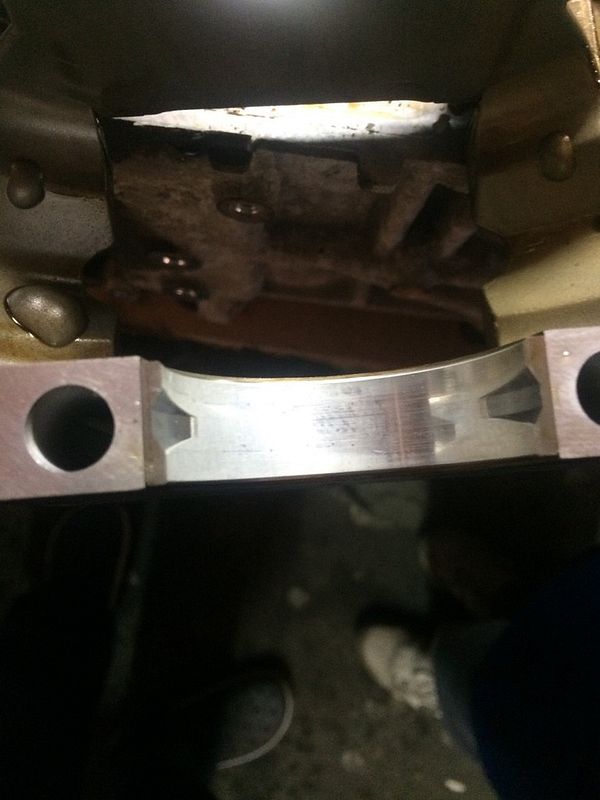
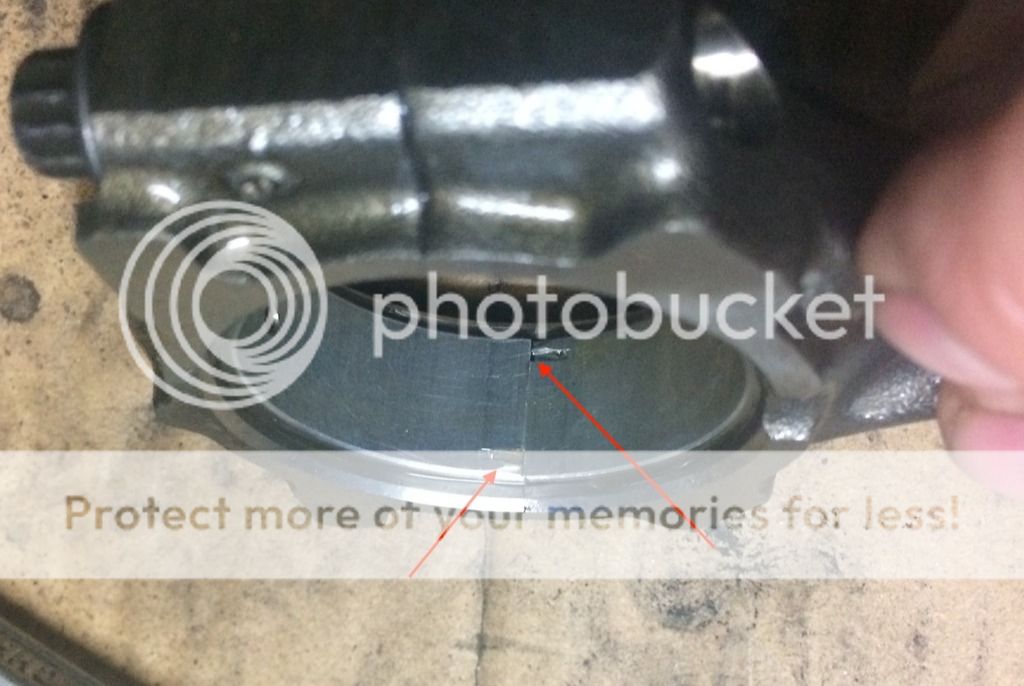
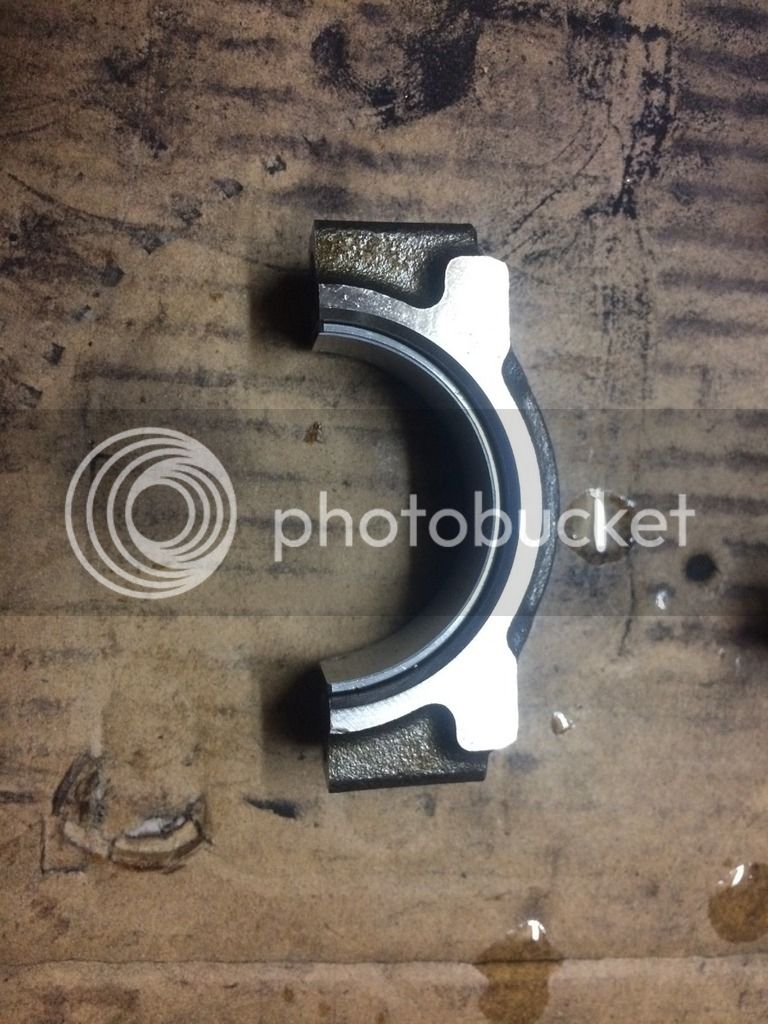
The king bearing in place
In detail the locating lug doing it's business
Sideways
The original again showing the red colour code on the bottom part as well (there goes down the drain theory I read somewhere about the tight tolerances and 8 different classes of upper bearings and 6 for the bottom).
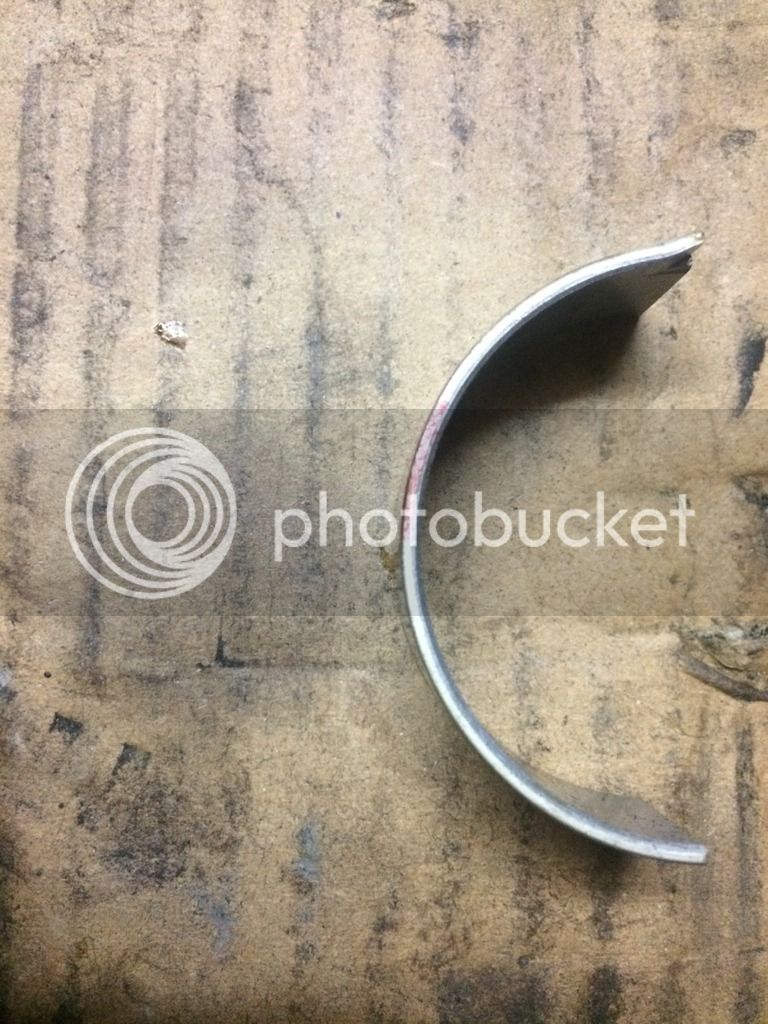
OK, what needs fileing?
This is comparison of an as it came in the box King bearing to the left and the modified to the right. Hardly noticeable difference
You just need to take about 0.1 mm at the top of the location lug
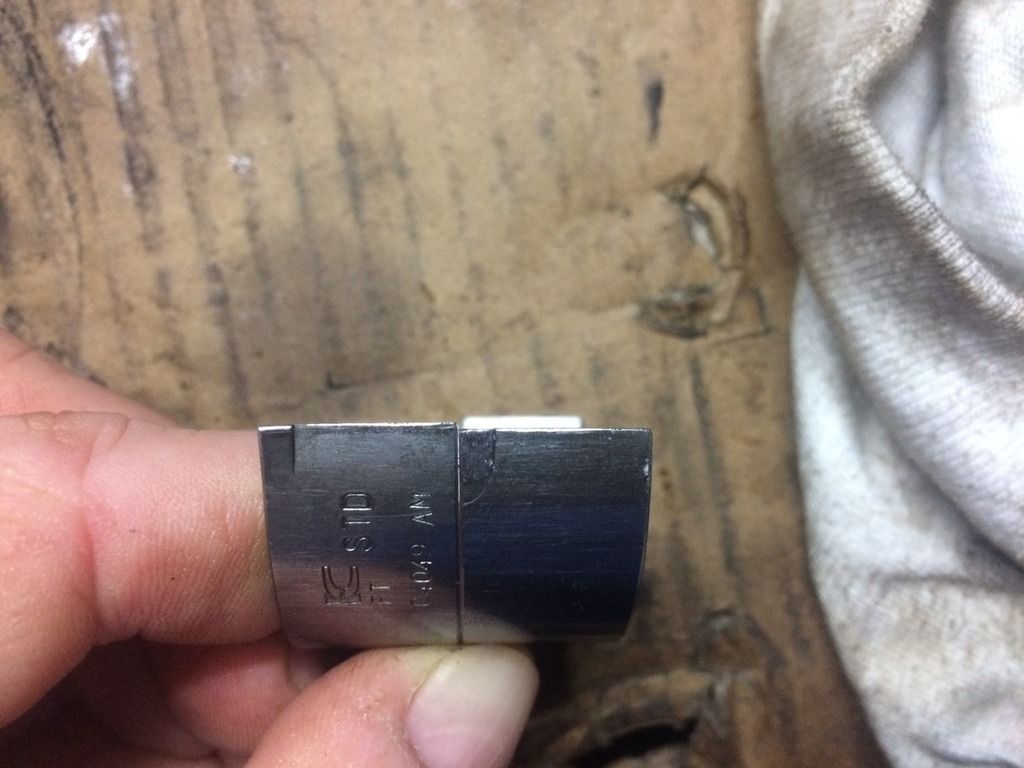
It is still there, as this picture proves
After that I went on to check the weight of piston-conrod combinations. I have to say that this engine is really a credit to its creators and designers. All four piston-conrod combos fall within 1-1.5 grams of tolerance! Really excellent and that is why the main bearings are as good as new and I guess never will need replacing
Ok, the measuring itself was not of the exactest kind (if I can use that word like that?) but it proved the engineering excellence
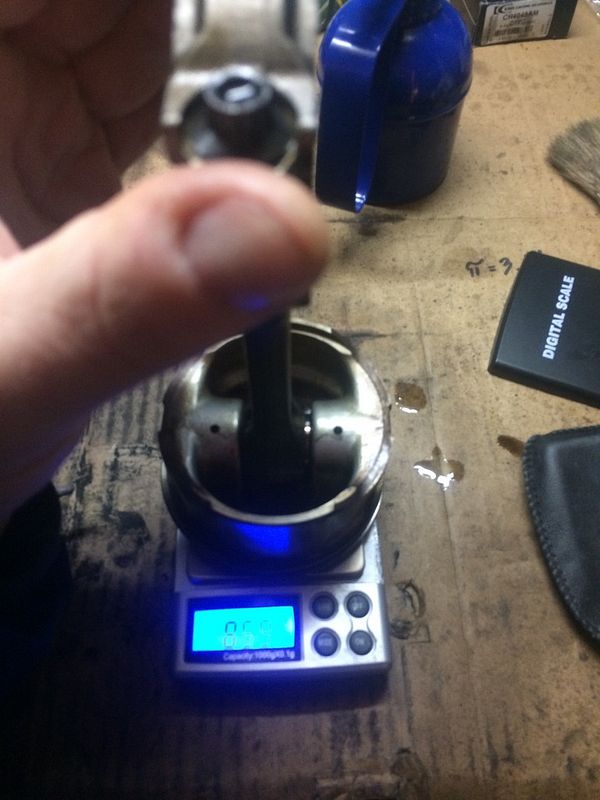
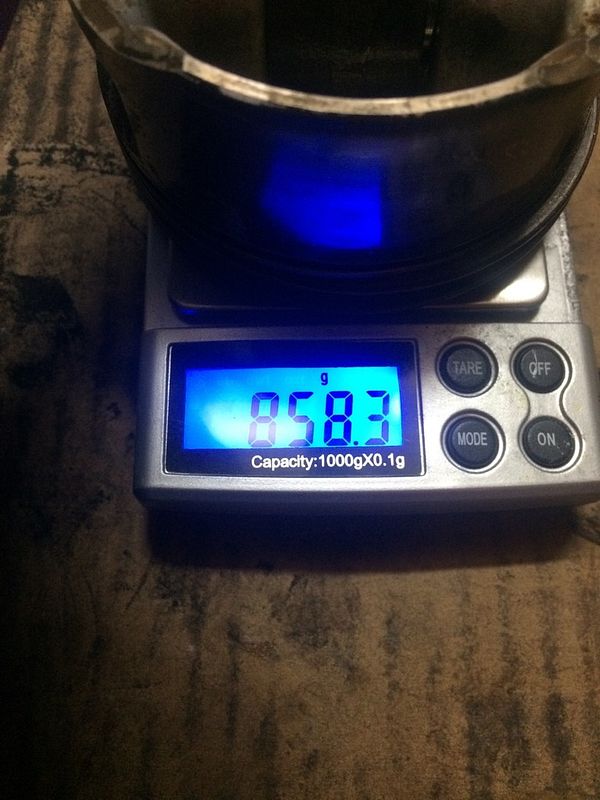
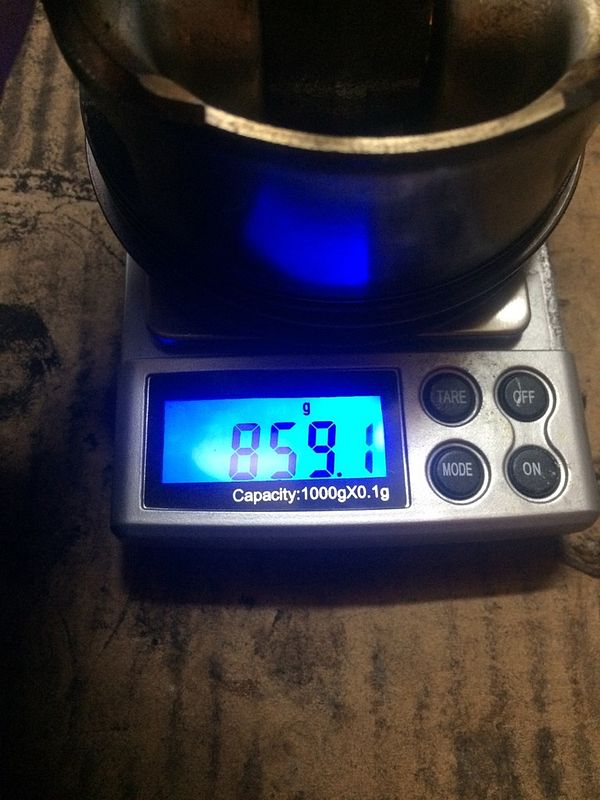

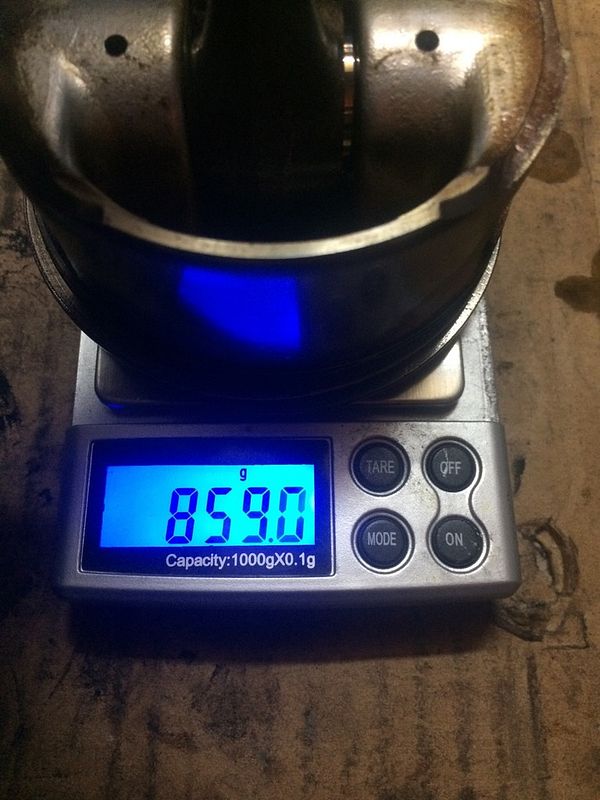
I weighted complete piston-conrod combos with rings, bearings and bolts; everything that moves
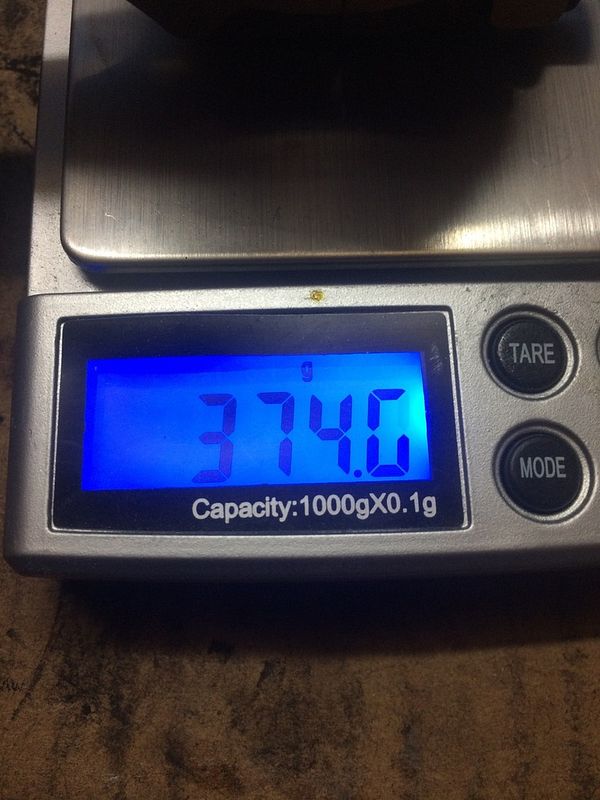
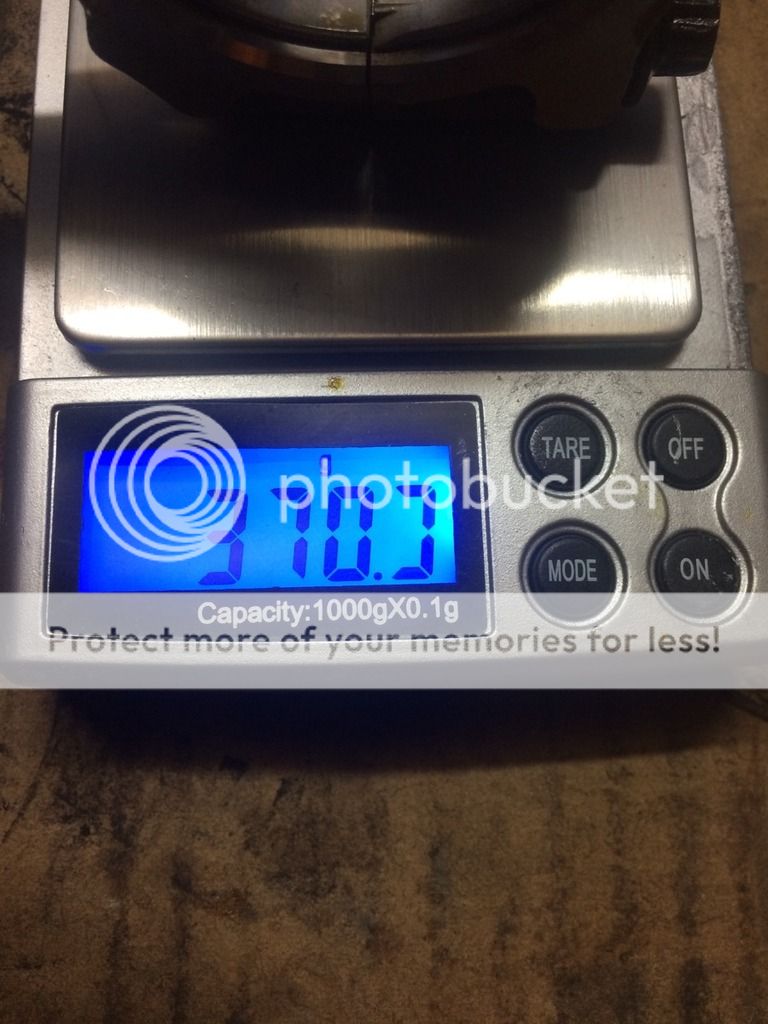
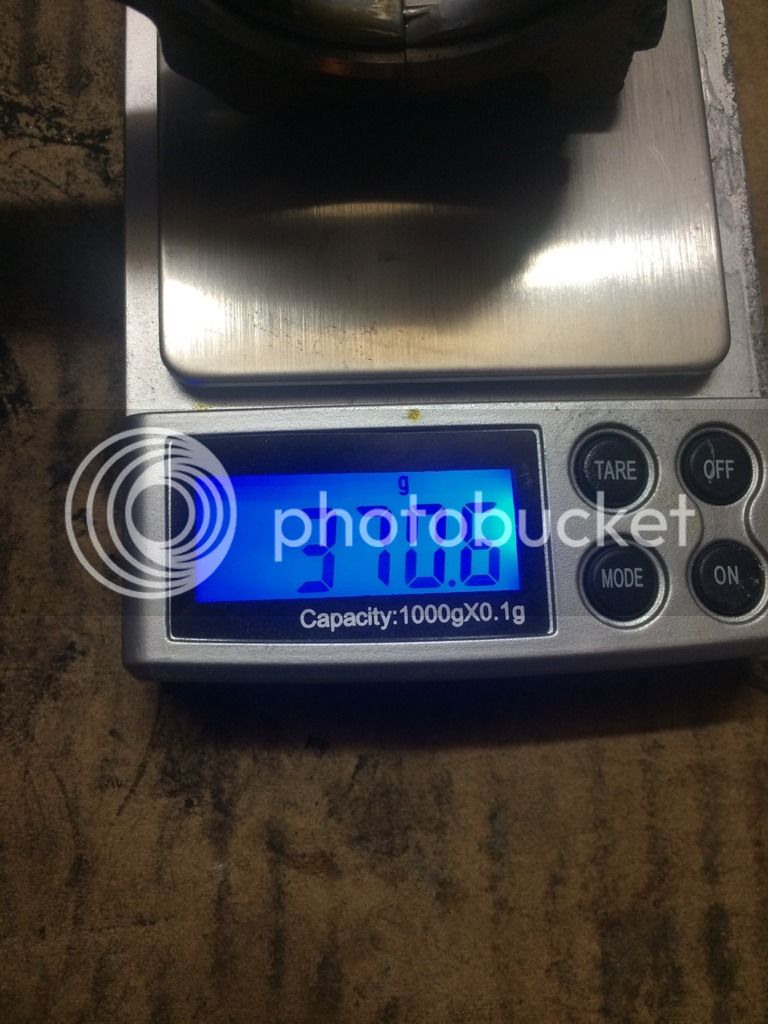
Then tried to weight just the big end, but that was not done correctly. I sat the piston on the table and let the big end rest on the scale, but for that to work the conrod should be horizontal and in mine setup it wasn't so the results are not conclusive. Still, I believe that it is also within a gram or so... Will do it properly when the weather warms up a bit, it was -7C this morning and still is at least -5C and my garage is not heated so....
Anyway, some of the values I got which are, I stress again, not correct, true values

The big end with bearing in (the upper half)

The big end without bearing clearly showing it can take the right and left location lugged bearing

Granted, the original uses the bigger one, but beggars can't be choosers!
The original bearing

And this is the part that annoys me the most! It is colour coded, red as you can see

This is what Ford (TIS) says about it in engine spec

So in design phase the engine was normally constructed to be overhauled at one point in time, it even has forseen different bearing specifications coded by colour as is the norm across the industry. Only at later stage some decided there would be more money to be made by selling complete bottom end instead of just bearings! Same goes for the piston rings; they are also classed in five dimensions only to never be released in sale as such. The blue oval can be a real son of a b...ch when it wants to... and then urban legends of unrepaireability of the engine started circulating.
The king bearing in place

In detail the locating lug doing it's business

Sideways

The original again showing the red colour code on the bottom part as well (there goes down the drain theory I read somewhere about the tight tolerances and 8 different classes of upper bearings and 6 for the bottom).
OK, what needs fileing?

This is comparison of an as it came in the box King bearing to the left and the modified to the right. Hardly noticeable difference
You just need to take about 0.1 mm at the top of the location lug

It is still there, as this picture proves

After that I went on to check the weight of piston-conrod combinations. I have to say that this engine is really a credit to its creators and designers. All four piston-conrod combos fall within 1-1.5 grams of tolerance! Really excellent and that is why the main bearings are as good as new and I guess never will need replacing
Ok, the measuring itself was not of the exactest kind (if I can use that word like that?) but it proved the engineering excellence


I weighted complete piston-conrod combos with rings, bearings and bolts; everything that moves
Then tried to weight just the big end, but that was not done correctly. I sat the piston on the table and let the big end rest on the scale, but for that to work the conrod should be horizontal and in mine setup it wasn't so the results are not conclusive. Still, I believe that it is also within a gram or so... Will do it properly when the weather warms up a bit, it was -7C this morning and still is at least -5C and my garage is not heated so....
Anyway, some of the values I got which are, I stress again, not correct, true values


What happened today... It was a pickup time for some thingies......
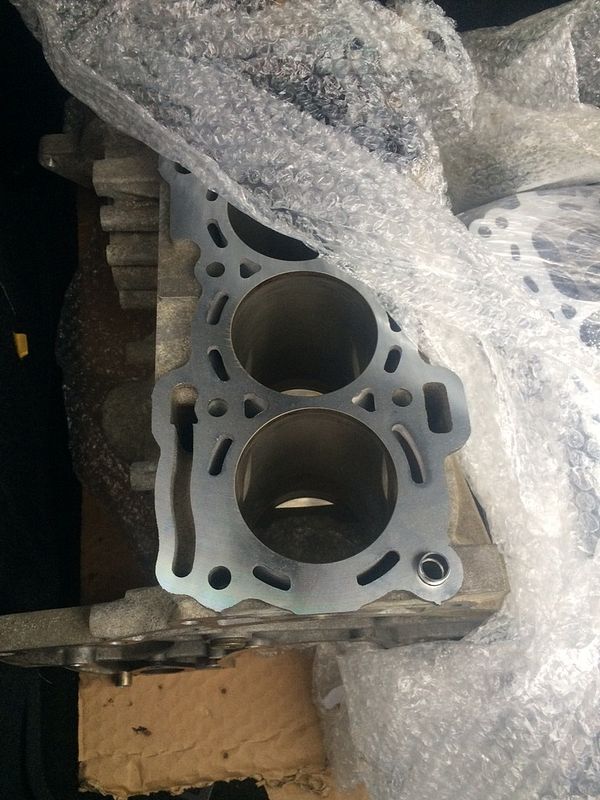
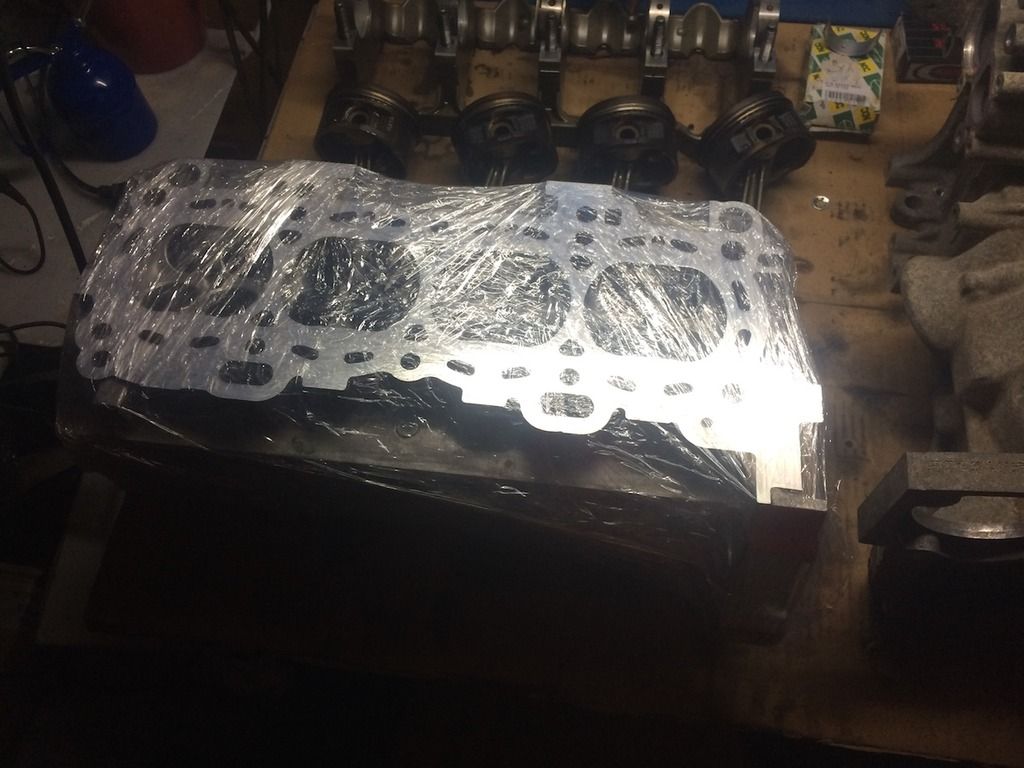
The engine block and the head were machined to be able to take on the head gasket in proper way. Also, the head was completely reworked, cleaned, the valve stem seals replaced and the gap to camshafts was set as should be. So the head is ready for the install, wrapped up and waiting
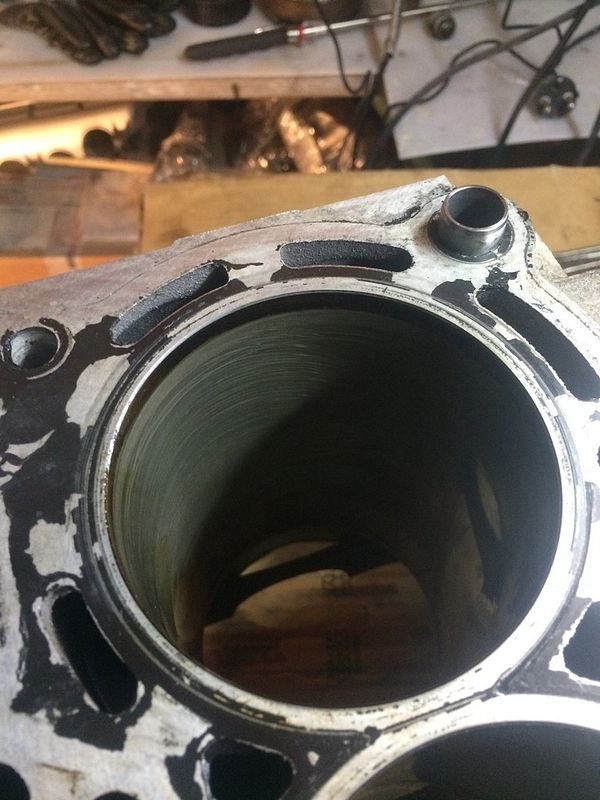
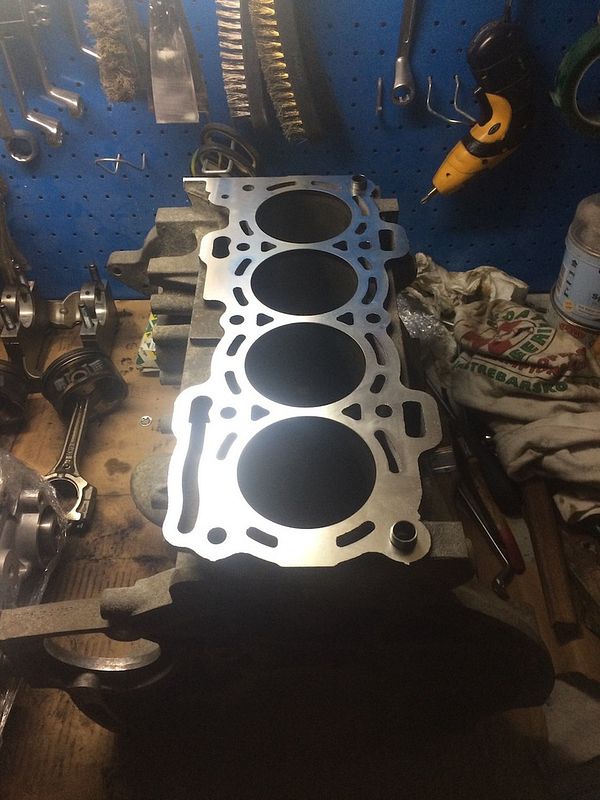
The engine block needs proper wash; not only from outside, but more importantly from inside to clean all the metal from machining, but the mating surface is shiney and even as it should be...!
I am still waiting for the deliveries of conrod bolts (went for Ford originals which are bargain at Burton power (less than 2 GBP each) and plastigauge to determine the radial gap of old and new big end bearings.
I am still missing the oil pump gasket but that is about it, I guess. Also have to wash and clean properly the sump....

The engine block and the head were machined to be able to take on the head gasket in proper way. Also, the head was completely reworked, cleaned, the valve stem seals replaced and the gap to camshafts was set as should be. So the head is ready for the install, wrapped up and waiting

The engine block needs proper wash; not only from outside, but more importantly from inside to clean all the metal from machining, but the mating surface is shiney and even as it should be...!

I am still waiting for the deliveries of conrod bolts (went for Ford originals which are bargain at Burton power (less than 2 GBP each) and plastigauge to determine the radial gap of old and new big end bearings.
I am still missing the oil pump gasket but that is about it, I guess. Also have to wash and clean properly the sump....