The "If I can do it, you can" thread...

ProjectPuma

Help Support ProjectPuma:

This site may earn a commission from merchant affiliate links, including eBay, Amazon, and others.
Hi Greg,

I agree with above, just drill the hubs. Also I don't think anyone has realised but you couldn't turn down the bolt to fit the hub and the carrier because the M12 part of the bolt would need to go through the M10 hole in the hub first.

Just drill the hub :wink: Cast iron isn't as hard as you'd think, just use a little WD40 if nothing else to help drill. It took me about 5 minutes to do both when I did mine. Not a bad idea though as Barry suggests of going up in stages, so I would go 10mm to make sure the hole is clear, 10.5, 11, 11.5 and finally 12. If you find it struggle to get the bolt through I wouldn't go any bigger than 12.5, somewhere in between would be better if possible.

P.S. great update too :thumbs: great job on the callipers, that Bilt Hamber stuff looks amazing!
 
Aha Ben ten out of ten well done mate. It just shows how much memory I've lost over the last 3 years :grin:
 
moondustka said:
Hi Greg,

I agree with above, just drill the hubs. Also I don't think anyone has realised but you couldn't turn down the bolt to fit the hub and the carrier because the M12 part of the bolt would need to go through the M10 hole in the hub first...
P.S. great update too :thumbs: great job on the callipers, that Bilt Hamber stuff looks amazing!

Ah!! So the head of the bolt isn't/can't be face on, it's basically reversed?!* Well, that's that then... hub drilling it is! Mind, learnt all sorts about bolts in researching it the last day... always an upside :eek:k: Cheers for that info Ben, and the thumbs up for the update. :grin: Yeah the Bilt Hamber surprised me, good stuff for when you can just soak the parts in a tub... they do a gel version as well for more difficult to reach stuff, might try it when derusting the bodywork. You any closer to the big reveal yet with yours :?:

EDIT: Now I've looked, I see what you mean...mental note to self, do a visual inspection before coming up with a "bright" idea :oops:
 
Right then, Puma caliper now really sticking, so tomorrow is B Day!

Assuming it not hammering down, and I can get it sorted by 2.30 so I can watch the rugby, the brakes will be tackled... let's hope they not as tough as the Fijians! :)

Will have to use Ben's method of going straight in with the 12mm & WD40 as that's all I've got here... let's hope it works as well for me as it did him... fingers crossed! :wink:
 
Hi Greg
Just a few things before you start tomorrow as there's no going back once you start.
Check the bleed nipples will come out.
Check the bleed nipples re-seal (tighten them back up put a tube over them and see if you can blow into the caliper)
Check that the connection steel pipe to rubber can be released and turned around (you may need this to relieve tension in the rubber pipe once the caliper is on)
Once started don't turn on the ignition or start the car until the brakes are fully bled or the ABS unit may need purging
Make sure you've got a bottle of DOT4 brake fluid
Double check the weather forecast :grin:
Barry
 
Cheers for the tips Barry, much appreciated :eek:k:

Have it covered as below:
tuonokid said:
Hi Greg
Just a few things before you start tomorrow as there's no going back once you start.
Check the bleed nipples will come out. Got new stainless ones for the ST170 calipers ready to go :)
Check the bleed nipples re-seal (tighten them back up put a tube over them and see if you can blow into the caliper) Seem fine
Check that the connection steel pipe to rubber can be released and turned around (you may need this to relieve tension in the rubber pipe once the caliper is on) Will do
Once started don't turn on the ignition or start the car until the brakes are fully bled or the ABS unit may need purging Great tip, wasn't aware of that as wasn't in the guide :eek:k:
Make sure you've got a bottle of DOT4 brake fluid 5.1 waiting to go
Double check the weather forecast :grin: Quite, it's already changed from when I first looked, Sat was meant to be clear but may be better Sunday now? We shall see :wink:

If it is raining tomorrow then I might instead pop along to HSS to see if they do the appropriate bits (to go up in stages) if I hire one of their drills? Oh, and just enjoy the rugby, hopefully!
 
Greg, get down to screwfix (other tool merchants are available) and get a set in a metal case for less than a tenner!

They don't have to be fancy drill bits, just normal HSS. Also if you use a cordless drill, only use speed setting 1 with a firm, even pressure :)
 
moondustka said:
Greg, get down to screwfix (other tool merchants are available) and get a set in a metal case for less than a tenner!
They don't have to be fancy drill bits, just normal HSS. Also if you use a cordless drill, only use speed setting 1 with a firm, even pressure :)

Cheers for tip Ben, :eek:k: Did just that, set of 25 HSS going up to 13mm in half mm increments- for £12! Not bad. Got some cutting oil too... only thing that didn't go well was the weather...

001 by G Whizz, on Flickr

With all that hail and rain, discretion definitely got the better part of valour... so enjoying England putting on over a point a minute v. Fiji at present. :grin:
 
moondustka said:
Hi Greg...It took me about 5 minutes to do both when I did mine...

...well, took me a just a tiny bit longer... :)

So, after yesterday's (Saturday) "Phoney War", early doors I checked my gear (basically the necessary parts and tools... and a rather vital two layers of thermals), wrote a note to my missus, took some deep breaths, girded my loins and started whistling "It's a long way to Tipperary"...yes I was going over the top! (Or that might be just the write-up) :wink:

For jobs like this I always take the car over to me mams as they have a gated driveway and we don't, so I loaded it all up and was ready and raring to go... only I wasn't, three hours and one upside down house later, I finally found the Puma's frikkin' locking wheel nut key!

By now it was 2 o'clock and with the light going by 4 I realised it would be more than a little foolhardy to head over and start then... priding myself on being not a little foolhardy but a LOT, I carried on regardless.

For the practical details on the 300mm brake conversion simply follow Steve's excellent guide here: http://www.projectpuma.com/viewtopic.php?t=7991

For fellow novices (or those with nothing better to do) I'll be adding my own impractical details and comments about following it (mines with ST170 callipers not Mondeo for the eagle-eyed) and possibly even the odd helpful pointer. :grin:

For a job that had already not started well, before it even started in fact, when it did actually start... it carried on in exactly the same fashion.

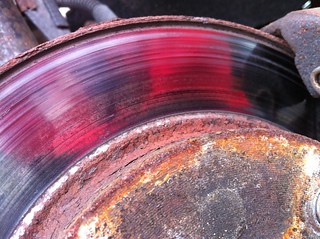
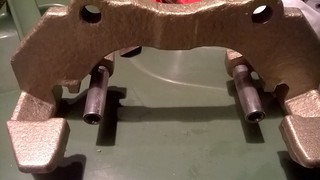
So, car jacked up, axle stands in place, wheels off... no problem... first calliper bolt to undo, problem - found it was rounded off and not willing to play nice... hmmm. This perhaps was not surprising given that my brakes by this stage looked like this...

001 by G Whizz, on Flickr

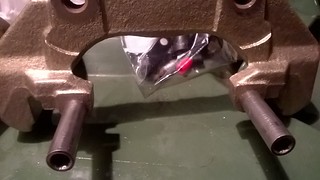
The discs had more lip than a gang of 14-year-old schoolgirls...

004 by G Whizz, on Flickr

So, with the 13mm socket doing nothing but spinning and 12mm too small to go on I went rooting through my stuff and found a few old imperials knocking about so I tried one (1/2 inch IIRC), smacked it on and then used a breaker bar... sorted!

This little glitch did give me my first note to add to Steve's guide though... in the guide he does one side then the other, I'd suggest doing the strip down prep' for both sides first, as if you've completed one side and then find a real problem on the other you may come unstuck? As it turns out, three of my calliper carrier bolts were rounded off but they succumbed eventually to the same smack on method above.

My second little tip, use a bungee wrapped through the spring rather than a cable tie to secure the calliper, it gives you a bit more flexibility if you then need to move it around...
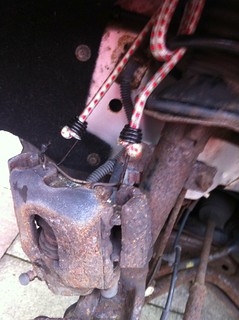
006 by G Whizz, on Flickr

Now it was time to get all Laurence Olivier in Marathon Man... and as Jaques Royale, Jim's French cousin, would say, "Cinq minutes, mon cul!" :lol: Took me over an hour when going up in half mm increments,10.5-12mm.

This was probably because I was being very careful but dear novice a nice slow speed is better than rushing it (don't put a lot of pressure on the drill either) as it keeps the holes nice and straight and would probably keep ol' Olly happy as this way it is definitely "safe"... as when it does snag on the cast metal (which it will) you get to keep your thumbs, rather than a drill whipping round breaking them.

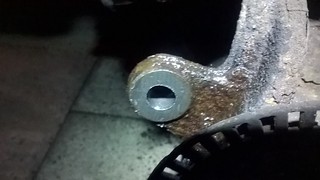
WP_20161120_16_58_03_Pro by G Whizz, on Flickr

I also lost the light as I finally started to drill it so that probably didn't help either. I does love a head torch, though sadly it did nothing for the cold.

So, now I had both sides drilled, a wish I'd worn three layers of thermals and a need to get things sorted quickly... however, being a novice, little gets done quickly. The important thing is to carry on regardless I find. As they say, you learn by your mistakes... which means I'm learning a lot a present...for example, let's play spot the difference... with this:

WP_20161120_18_29_39_Pro by G Whizz, on Flickr

and this:

WP_20161120_18_29_59_Pro by G Whizz, on Flickr

Yup, the bottom one is the way the sliders should be. I blame it on brain freeze as I was now rather numb.

I eventually got the calliper, carrier and pads assembled together (if you get a bit confused you can refer to the calliper/carrier still on the Puma for reference) but struggled for some time trying to get the calliper spring in... there was a brief warming glow of satisfaction when it finally clicked into place... this soon turned to cold fury though as I hadn't yet slipped the assembly over the disc and then had devil's own job trying to get them on. This is another point for novices following the guide above... DON'T put the spring on to your calliper assembly until AFTER you have slid it over the disc and got the bolts in... otherwise the calliper/carrier won't slip over the disc.

Another little pointer, in the guide it mentions being quick to get the old calliper off and the new one on because of brake fluid leaking but doing this helps I think:

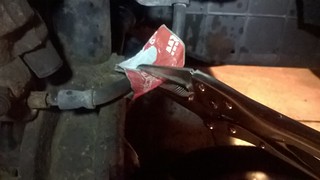
WP_20161120_17_37_37_Pro by G Whizz, on Flickr

Didn't leak and so no hassle when attaching the new calliper to the brake cable. Make sure your hose is not so old and brittle that it would crack (if it is it needs changing) and don't forget to use something on the jaws of the grips to prevent them cutting the hose.

So, one side complete...

By this stage though it was 8pm and everything was covered in frost, including my nose... I pondered and (factoring in the 30 mins to tidy up) decided that while Tipperary might be a long way, this job is now officially longer as I'll have to finish it tomorrow... so I called time, and the missus for a lift home. Before I go though you can compare the old with the new...
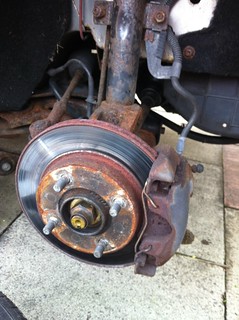
002 by G Whizz, on Flickr 
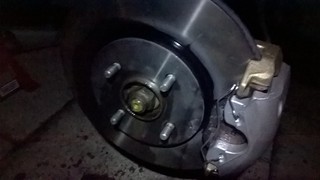
WP_20161120_20_24_15_Pro by G Whizz, on Flickr

Nice huh?
Mañana muchachos :)
 
Hi Greg
Time to invest in some Hex sockets rather than bi hex sockets. 6 sides rather than 12 sides. If there's a problem with the bolt they will snap it off rather than rounding off the head.
Barry
 
tuonokid said:
[post]358325[/post] Hi Greg
Time to invest in some Hex sockets rather than bi hex sockets. 6 sides rather than 12 sides. If there's a problem with the bolt they will snap it off rather than rounding off the head.
Barry

Wasn't me Guv'... they were already rounded Barry, also had a nice layer of rust to round off some more I found :) Mine are a mixed bag, mainly from lending a set and then having to get another when only half of it came back, :evil:
 
Hi Greg
Time to get yourself to a good autojumble and buy some good tools, even the rounded off bolts will usually come off with a good set of hex sockets. That's all I've used now for the last 15-20 years and it's rare I've been defeated. The next step is to buy a bottle of oxy and a bottle of acetylene with a welding torch and you could dismantle the blackpool tower :grin:
 
It was a long time ago I drilled my hubs, I suspect my 5 minutes could well have been 15, or 50 by the time I'd done both sides :lol:

Good job on getting the bolts off. I had to grind the head off one of mine on the silver Puma then split the hub to get the stud out because of the tone ring! That set me.back nearly 3 hours! :evil: weirdly with some WD40 and a pair of mole grips it came out after that.

By the way, when you get the rear disc setup (which should come to you today at the latest, you'll need to take the pads out and wind the callipers back in as I was pulling the handbrake levers to get the worst of the fluid out.

Ben
 
moondustka said:
[post]358330[/post] It was a long time ago I drilled my hubs, I suspect my 5 minutes could well have been 15, or 50 by the time I'd done both sides :lol:

Good job on getting the bolts off. I had to grind the head off one of mine on the silver Puma then split the hub to get the stud out because of the tone ring! That set me.back nearly 3 hours! :evil: weirdly with some WD40 and a pair of mole grips it came out after that.

By the way, when you get the rear disc setup (which should come to you today at the latest, you'll need to take the pads out and wind the callipers back in as I was pulling the handbrake levers to get the worst of the fluid out.

Ben

Hi Ben,
Now you tells me :lol:

No grinding needed thankfully... but annoyingly think I might need a new brake hose, went to finish the job today and all went swimmingly (very nearly literally given the amount of rain, was chucking down!) until bleeding the driver's calliper (the other went fine) and then found just couldn't do it , despite pumping away on the pedal... which was rock hard... thinking maybe the hose has collapsed, had considered replacing them before but thought they looked OK, looks like will have to do one at least now at any rate.

RE. winding back the rears... are they a screw type then? Does that mean they need a specific tool to do it or will they just wind back? (EDIT: No worries, checked it out. :eek:k: )
 
Hi Greg
Just a thought and I might be completely wrong but you know how I said the hose brackets off the strut may need extending to suit the bigger discs? Are you sure the bracket where it clamps the hose is not distorting the hose and causing a blockage now? Even if it's not you'll probably have a better idea what I was on about now.
Barry


It's probably not the cause as I just remembered I'd had to sort mine out as I'd lowered it by 40mm. I think the end of the bracket on yours is sufficiently far enough away from the caliper for it not to be a problem.
 
tuonokid said:
[post]358353[/post] Hi Greg
Just a thought and I might be completely wrong but you know how I said the hose brackets off the strut may need extending to suit the bigger discs? Are you sure the bracket where it clamps the hose is not distorting the hose and causing a blockage now? Even if it's not you'll probably have a better idea what I was on about now.
Barry

Hi Barry, will double-check :eek:k: Not entirely sure it is the hose but pedal hard and not bleeding so all I can think of given that I could easily bleed the other one (didn't even need to twist that one either to fit the calliper whereas did need to with the one that now playing up) which led me to think it not the MC. Does the MC have a bleed valve out of interest, if so anyone know where?

EDIT: Just had a thought, this is the same side that had the old sticking calliper, could that be indicative of an MC problem after all if just one side gone faulty?
 
Hi Greg
No bleed valve on the M/C but I seem to remember a few weeks ago someone on here had the same problem which ended up being a blocked hose or bleed nipple. I don't think it will be an M/C problem as those usually end up with a soft pedal.
Barry
 

Latest posts

Back
Top