You are using an out of date browser. It may not display this or other websites correctly.
You should upgrade or use an alternative browser.
You should upgrade or use an alternative browser.
JASAPP
- Thread starter Wild E. Coyote
- Start date
Help Support ProjectPuma:
This site may earn a commission from merchant affiliate
links, including eBay, Amazon, and others.
Getrag officially communicates 285 Nm as the torque capacity for that gearbox.
http://www.getrag.com/media/products/manualshift/6mtt250/6MTT250~1.pdf
http://www.getrag.com/media/products/manualshift/6mtt250/6MTT250~1.pdf
I didn't know it was a Getrag one. Is IB5 also Getrag?
Probably it has a rather large margin of safety as st180s with remap+exhaust+intercooler typically have 230+bhp and circa 350Nm.
I think the same was truth about st150 where the ib5+ gearbox was supposed to not have great strength but the rotrex powered st150s had 300+ bhp. (although because of the rotrex not a lot of torque).
tuonokid
Active member
It's the torque that kills gearboxes but don't forget engineers will quote safety margins of typically will take 1.5 of stated in most engineering projects.
Barry
Barry
Yes, it is also a Getrag in a sense Getrag developed the Improved version (hence I).siju said:[post]360879[/post] I didn't know it was a Getrag one. Is IB5 also Getrag?
Probably it has a rather large margin of safety as st180s with remap+exhaust+intercooler typically have 230+bhp and circa 350Nm.
I think the same was truth about st150 where the ib5+ gearbox was supposed to not have great strength but the rotrex powered st150s had 300+ bhp. (although because of the rotrex not a lot of torque).
Regarding the ST150 gearbox, Erroll managd to break one with his monser puma :wink:
Today finished the brake job on JASAPP. After refurbishing front calipers finally today found time and motivation to complete the job.
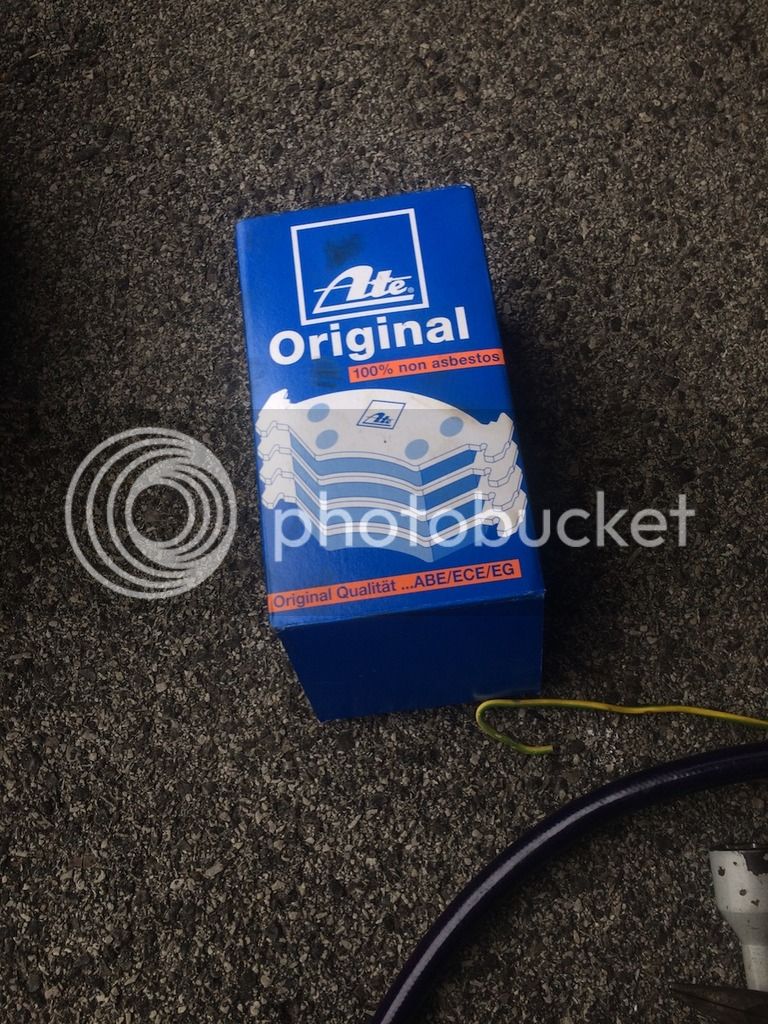
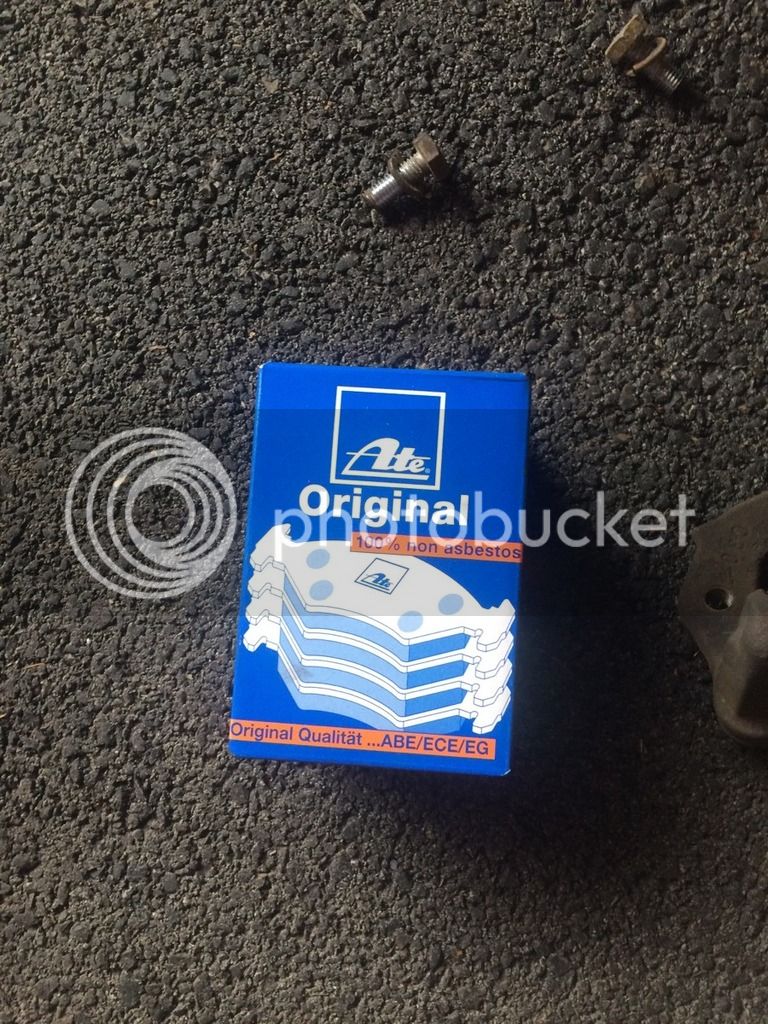
So replaced the pads all round. Went for Ate
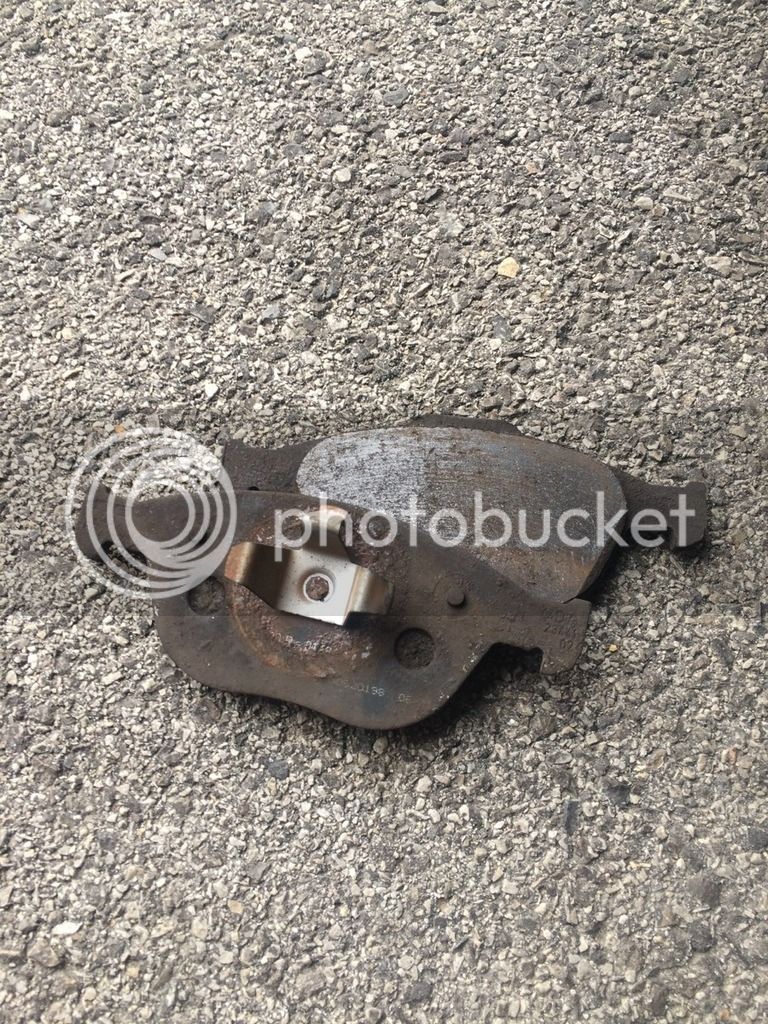
The old ones were really worn
Finally....
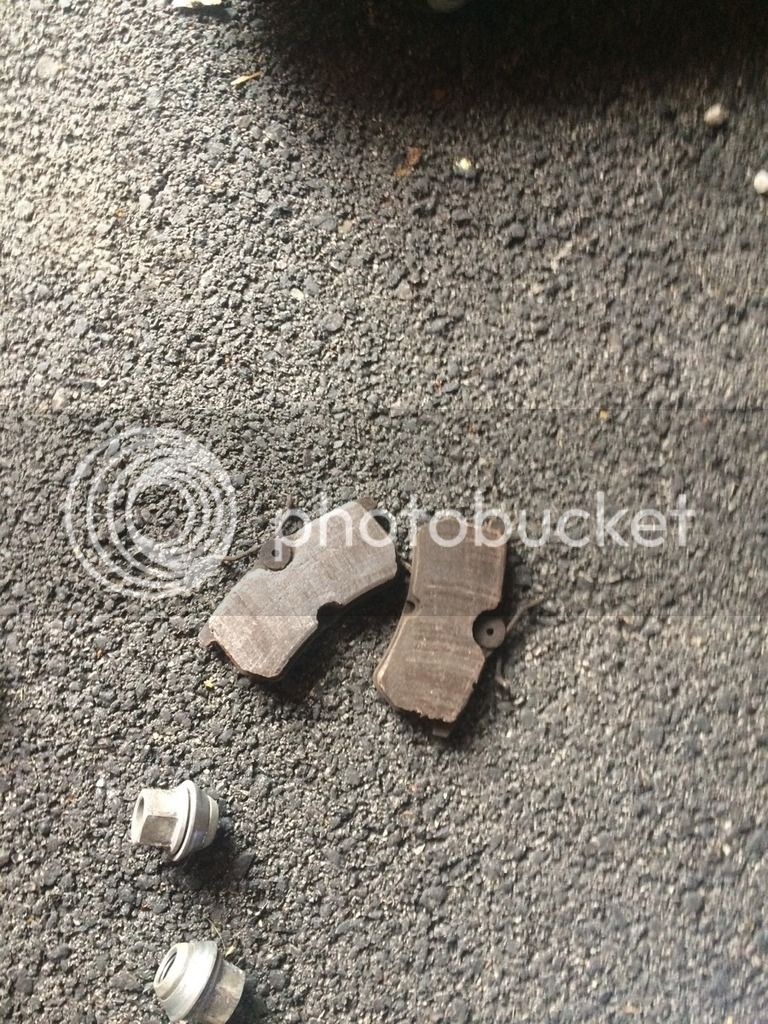
While at it, did the same at rear brakes. When did the disc conversion bought the rear disc brake setup used on eBay and it came with pads that had plenty of life in them so left them for time being. And so the time went and I didn't like them: they were noisey (tsmeeeeeeeeeeeeeeeeeeeeee) and had tendetion for sticking to discs.
So, off they went...!
Instead of them went for Ate again
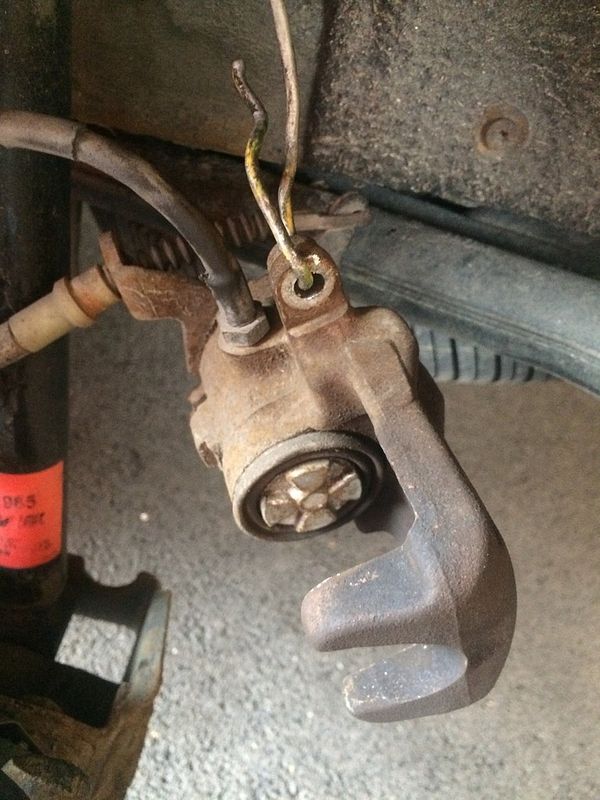
The rear calipers have in them mechanism for handbrake and you need special tool to get them in. You need to push them in and turn them at the same time. Unfortunately, the image is shaken a bit. Apologies for that

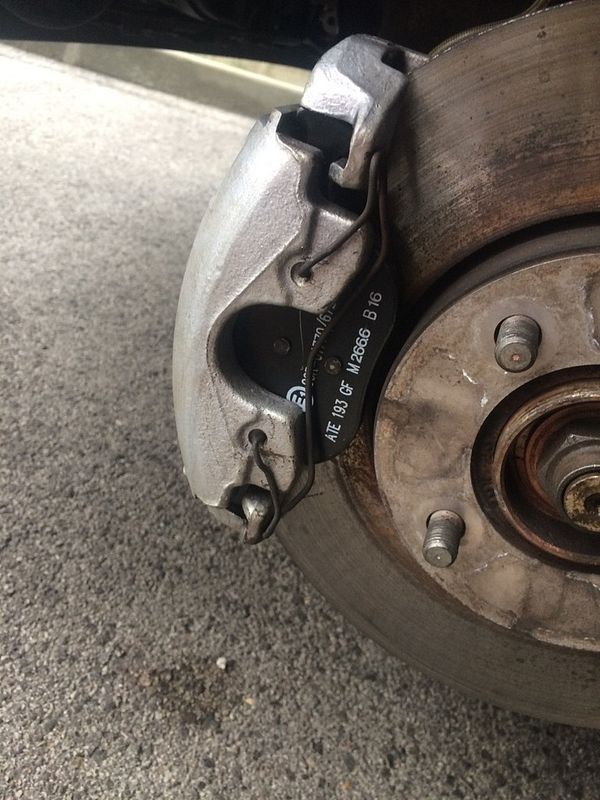
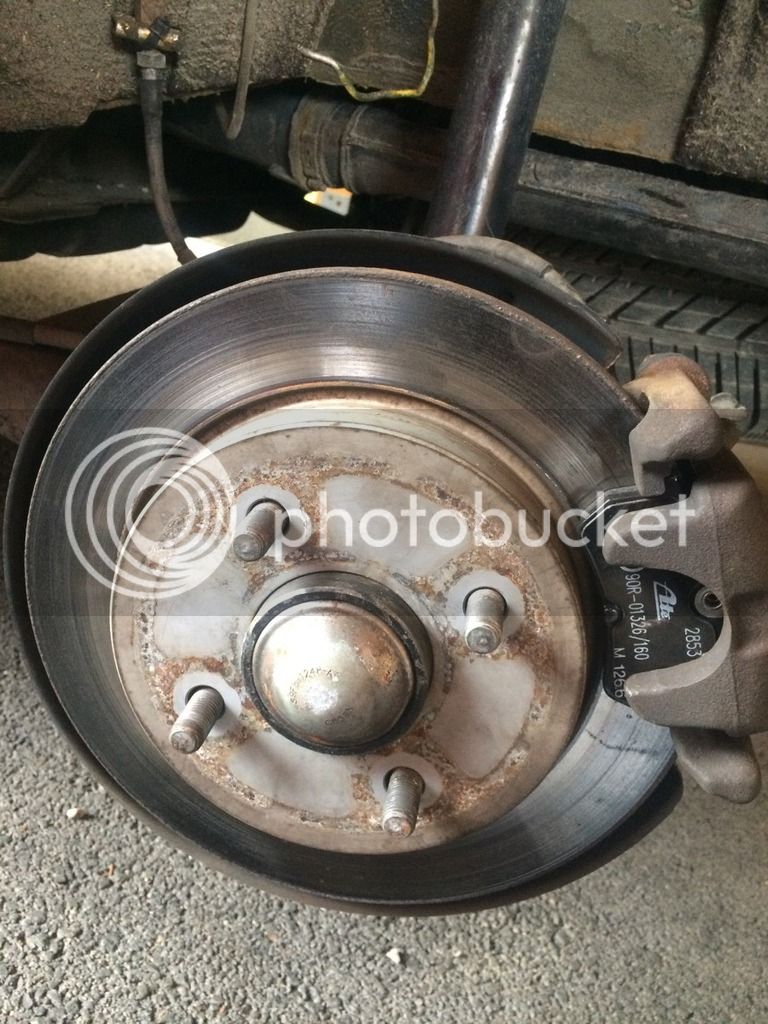
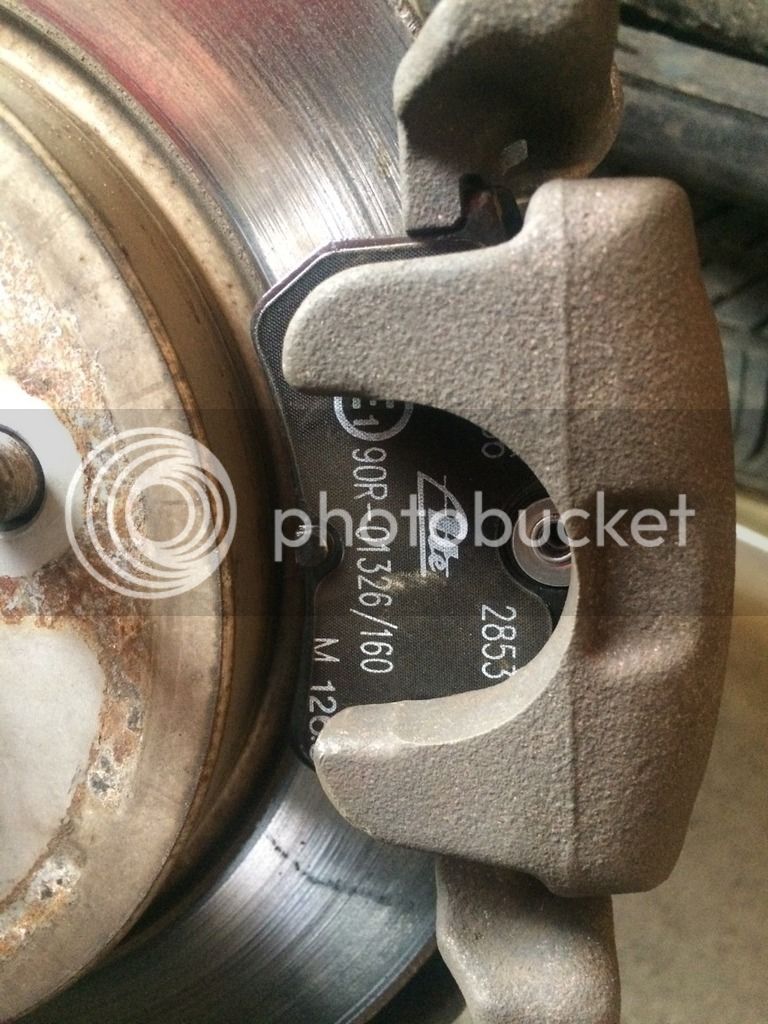
The caliper in and ready for the pads to be installed
And finally
But, it wasn't over until it was over! Went for a short test drive and the rear right caliper was seizing. So, dismantled everything again and sure thing, found that one guiding pin was seized like welded. No movement at all! So, after some effort finally pulled it out, cleaned and greased with silicone grease. Then cheked the other caliper and found that both pins were almost seized so did the same.
After putting everything together went again for short test drive and gave it few gentle brakings. Then pumped up the pedal few times to get the rear pistons in their position.
After that aplied hand brake to engage the mechanism and now brakes work like charm! The hand brake is the best it ever was since the rear brake conversion. And on test drive no noise while grinding to halt so happy times!
So replaced the pads all round. Went for Ate

The old ones were really worn

Finally....

While at it, did the same at rear brakes. When did the disc conversion bought the rear disc brake setup used on eBay and it came with pads that had plenty of life in them so left them for time being. And so the time went and I didn't like them: they were noisey (tsmeeeeeeeeeeeeeeeeeeeeee) and had tendetion for sticking to discs.
So, off they went...!

Instead of them went for Ate again

The rear calipers have in them mechanism for handbrake and you need special tool to get them in. You need to push them in and turn them at the same time. Unfortunately, the image is shaken a bit. Apologies for that

The caliper in and ready for the pads to be installed

And finally


But, it wasn't over until it was over! Went for a short test drive and the rear right caliper was seizing. So, dismantled everything again and sure thing, found that one guiding pin was seized like welded. No movement at all! So, after some effort finally pulled it out, cleaned and greased with silicone grease. Then cheked the other caliper and found that both pins were almost seized so did the same.
After putting everything together went again for short test drive and gave it few gentle brakings. Then pumped up the pedal few times to get the rear pistons in their position.
After that aplied hand brake to engage the mechanism and now brakes work like charm! The hand brake is the best it ever was since the rear brake conversion. And on test drive no noise while grinding to halt so happy times!
drmotorsport
Member
fascinating stuff with the gearbox replacement - will be bookmarking this ")
Brian'
Member
Awesome work once again, Sinisa!
RICHARD MANSFIELD2
Active member
Hi Well done.
Whilst on the subject of front brake calipers. When I did the Mini's if I had a stubborn piston I would use a bleed nipple without the spring and ball bearing (drill it out) and pump the piston out with a grease gun, worked every time.
Regards,
Richard.
Whilst on the subject of front brake calipers. When I did the Mini's if I had a stubborn piston I would use a bleed nipple without the spring and ball bearing (drill it out) and pump the piston out with a grease gun, worked every time.
Regards,
Richard.
Cheers for the idea, a nice one! Hopefully I will never need it, but good to know.
:thumbs:
:thumbs:
Hi guys, some smallish update(s).
First regarding the pads. Now I am almost 100% certain that inside Ford box is Ate. They behave exactly the same. Nice stopping power, no noise at all, rather soft and producing dust. The discs are not wearing down at all, the pads are. For everyday usage I think they are just about the best they could be, but ask for rather regular alloy cleaning. So that conludes the brakes.
Now, moving onto derusting. On advice from here, got myself a bottle of this magic powder.
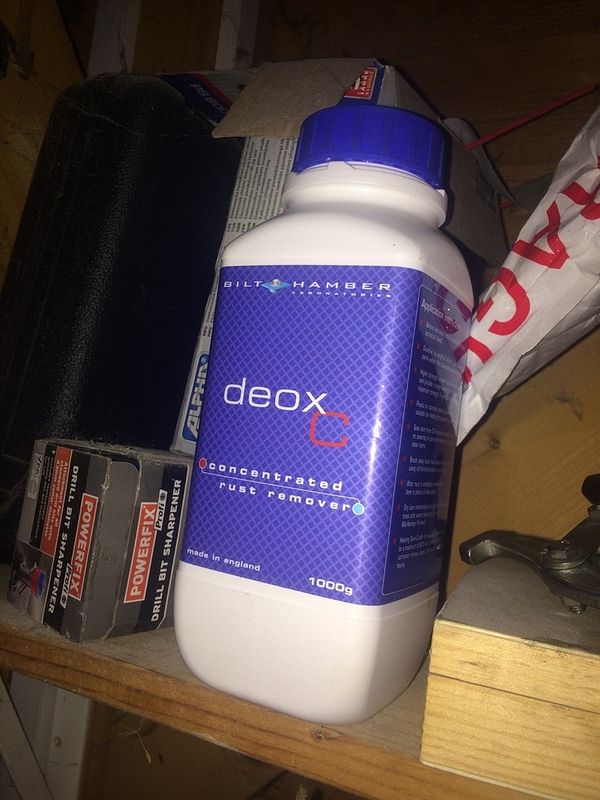
You dissolve it in water, prefferably hot (the hotter the better, so it says on the sticker adding that if you have submerged heater it speeds up process dramatically, end of quote) and just put in the things you want derusting.
Unfortuntaley, haven't taken images of the sump bolts before, but I guess all of you can imagine how they looked. If you can't, take a look under your car; we are all in the same boat there).
Anyway, put the bolts in a cup of deoxC for about 20 minutes
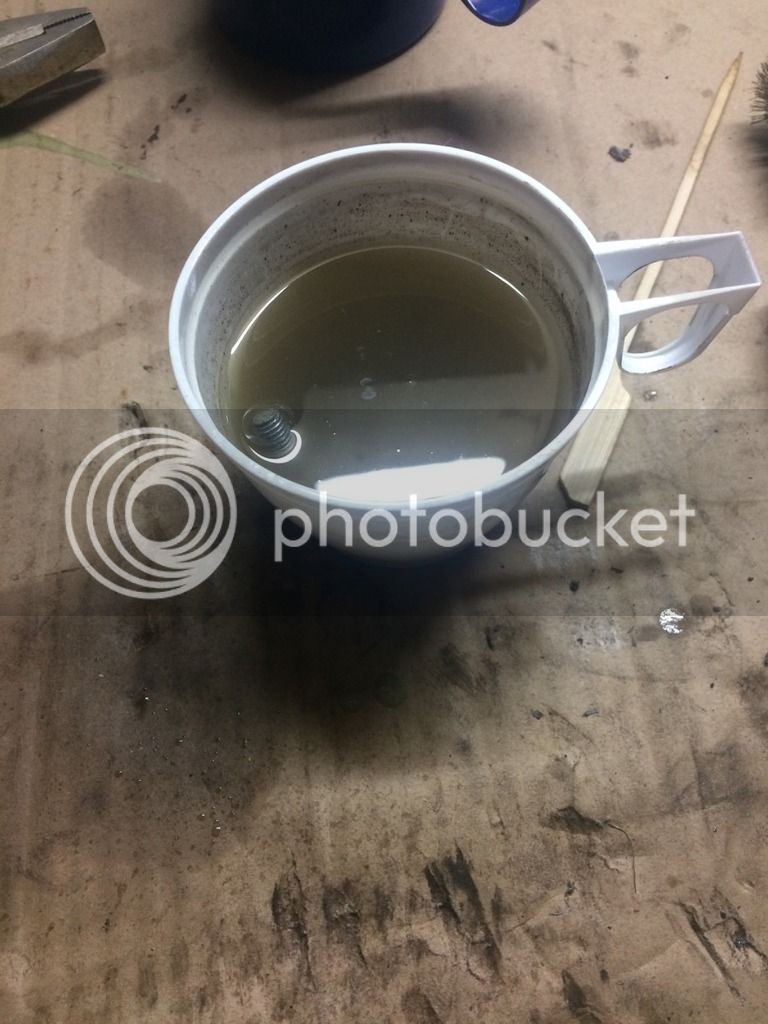
Sure thing, it sturts bubbling after a minute or so and the liquid gets darker by minute.
After 20 minutes the results:
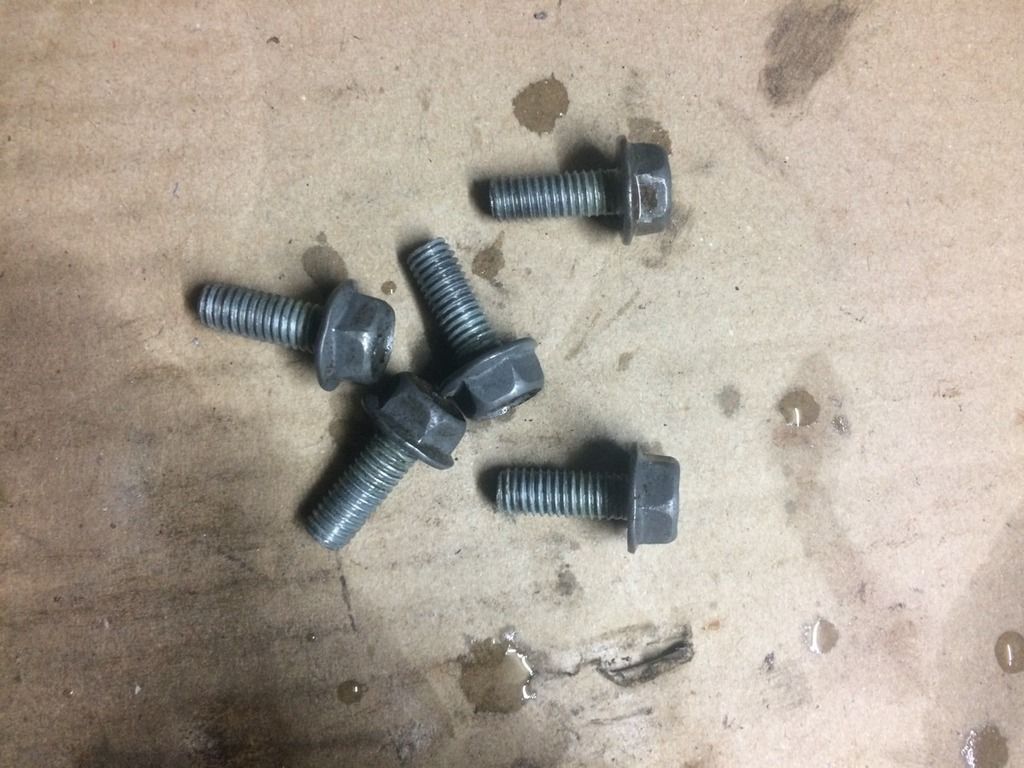
I used some old toothbursh just to clean them and they look incredibly new(ish). Cleaned them with brake cleaner and then sprayed WD40 and that was it. This stuff really is amazing!
(on a sidenote: Ford really didn't spare on sealant for the sump as all the bolts were full of it and had to run them all through some tap to clean the threads)
Thah conludes derusting. Someone here mentioned idea of pool big enough to put the shell in it: a really tempting idea!
Onto the engine. As you know, I found which big end gearings fit in, but all of them location lugs on the right side, and original bearings have it on the left. First thought of adapting the bearing to fit in the big end as it is, but couldn't persuade myself it is safe to file away a part of location lug as that could lead to bearing spinning and dislodging from the big end of the conrod. So having had a look at the other overhaul of 1.7 engine in FRP section went to one of our best machining companies specialized in engines, brought the conrods and the Glyco bearings and explained what was the problem. It turned out it wasn't a problem at all, as they are used to it and did it in 5 minutes while I was waiting. The price: 5 GBP! Not kidding,5 GBP!
They advised, and I see the logic, to do it on the other side of conrod to keep the original intact; if I ever get somehow original shells, they can be put in without problems.
So, they did it like this. Simple grinding that anyone can do at home with a dremel, I suppose. No need for big machining center, or anything.
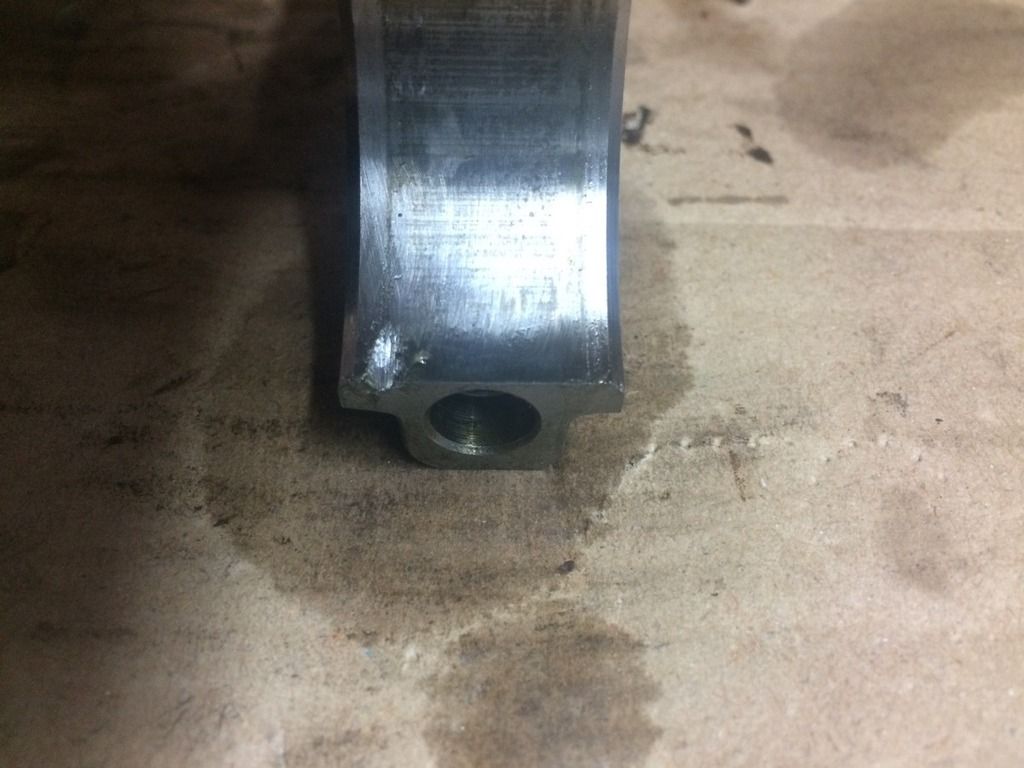
The other side is kept as it was
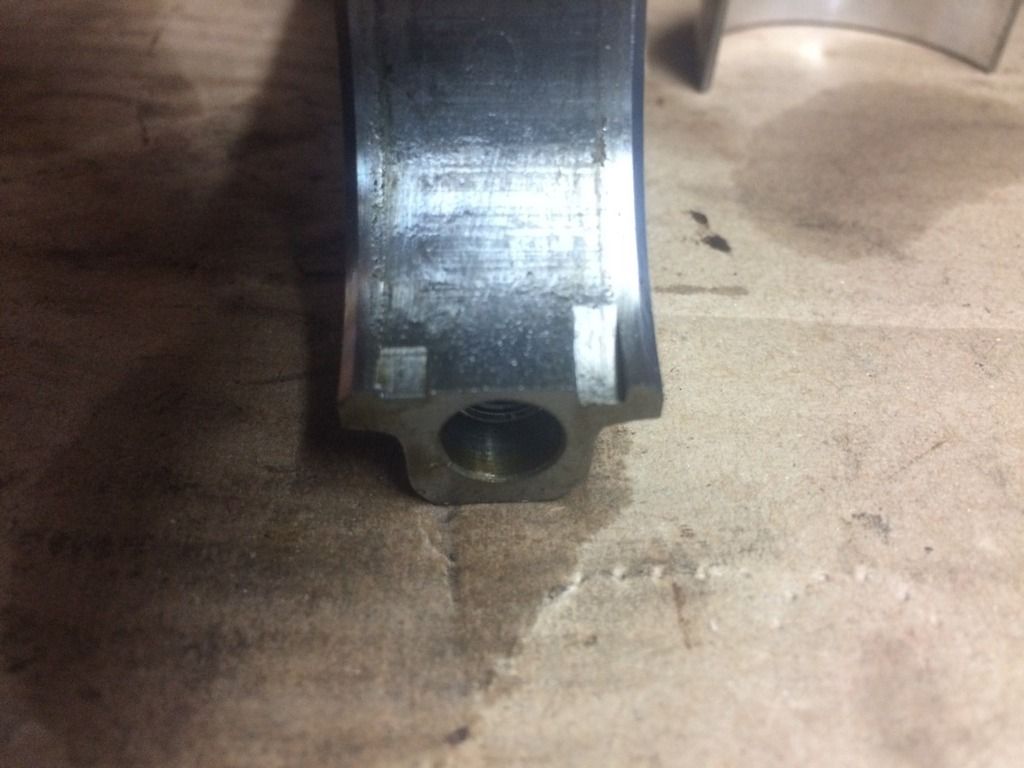
And the conrod side
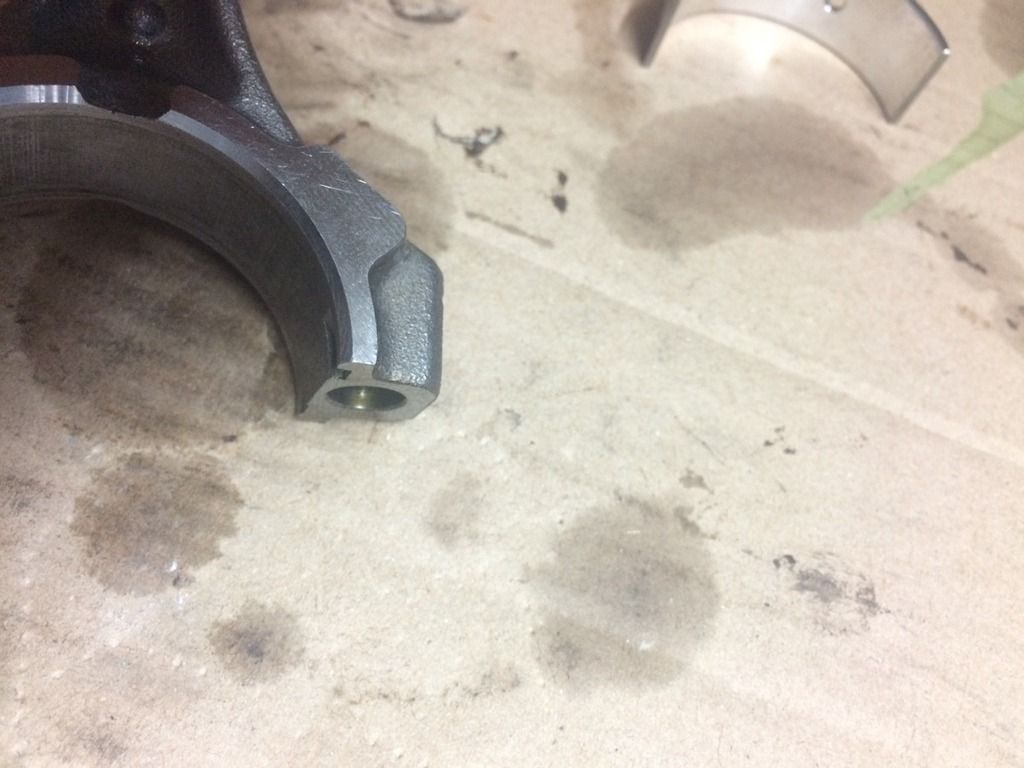
This was all done using Glyco aftermarket set of standard size bearings. I have them, but still don't know what is the radial clearance as I, most annoyingly, don't have a 12 sided 8 socket to be able to torque down the conrod bolts properly and to check it with plastigauge!
But, a friend of mine is working at Suzuki and he had a look through their system (the bearings for Suzuki 1.3 engine are EXACT match in OD/ID and width (16 mm) and, this is important stuff, you can get them in 5 classes as is norm!

I am still waiting on his return information for the guidance on the usage of the bearings (which is to be used for which journal OD) and that negates the need for machining the crankshaft to make it suitable for the aftermarket bearings as is the norm.
When I get the information, I will post it here. You can already see from that screen capture that the engine in question is from Jimny (also Liana and Swift). That makes service of bottom end not only doable (drop dead you bean counters at Ford and your greed) but a matter of routine work.
And finally some more investigation on gearbox swap (IB5 for B6). I have to apologise for chasing few projects in paralel as that makes following rather problematic, I suppose, but as do it on weekends only, I have to do few things at the same time!
I don't like the idea of putting the ST180 gearstick in puma interiror as it simply doesn't fit (esthetically). So I got myslef a gearstick handle from focus ST170. Similar styling, aluminum.
Firstly, the shaft of gearshifter is the same in OD and the thread is the same. The ST170 gearstick handle screws nicely on the shifter shaft :grin:
The gearstick handle I got from eBay was used and worn a bit and had one rather visible scratch. Took some sand paper with intention of clearing it and started with 180 thinking that would go up until making it nice and shiney. But, during th initial sanding realized it looked aces in this scratched look and just kept on like that!
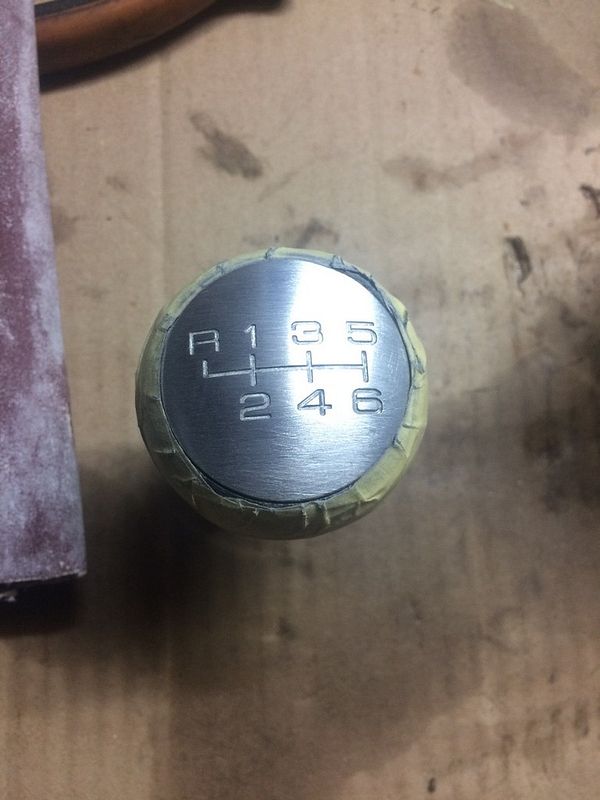
Out of garage on daylight
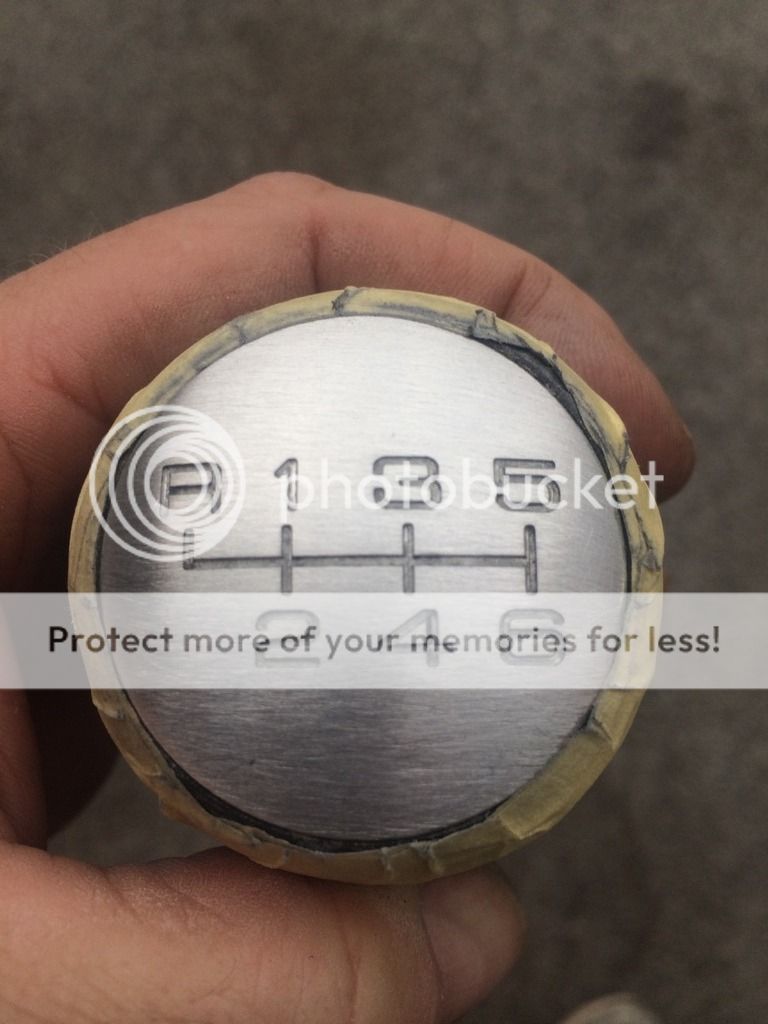
And on the shifter stick
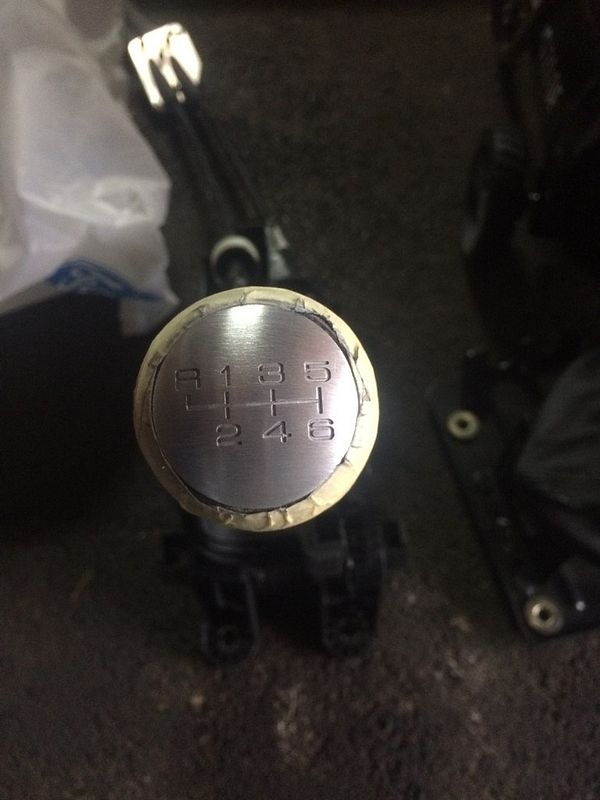
If you wonder why I just don't put on the ball from puma, it is the reverse mechanism. IB5 uses reverse down on the right, below 5th gear, on B6 it is front, left to the 1st gear.
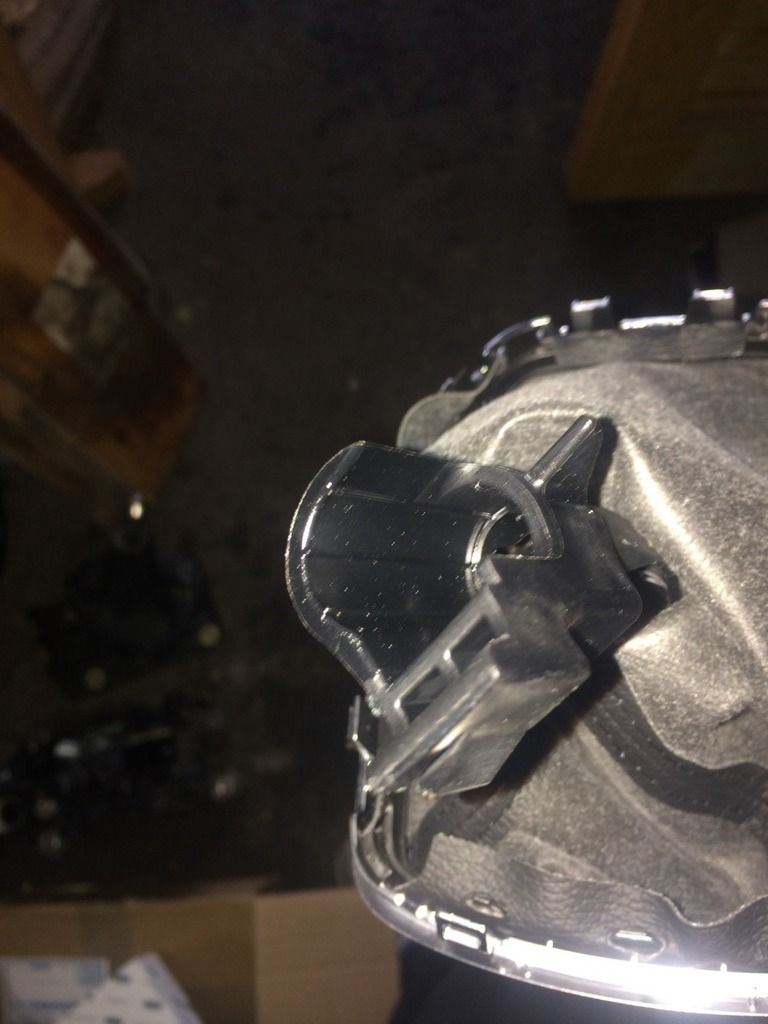
So the markings would be wrong (lesser problem, not functional, but that would bother me) and the gearshifter uses a brake for accidental engaging reverse. It is simple plastic part that is connected to the ring you pull up when selecting reverse. That enables the stick to go further to the left and that engages reverse on one of the cables. All of that is part of the gaitor (image taken from below)
The ST170 is to long, but has the lower part of the shaft taht I don't need so will machine it off.
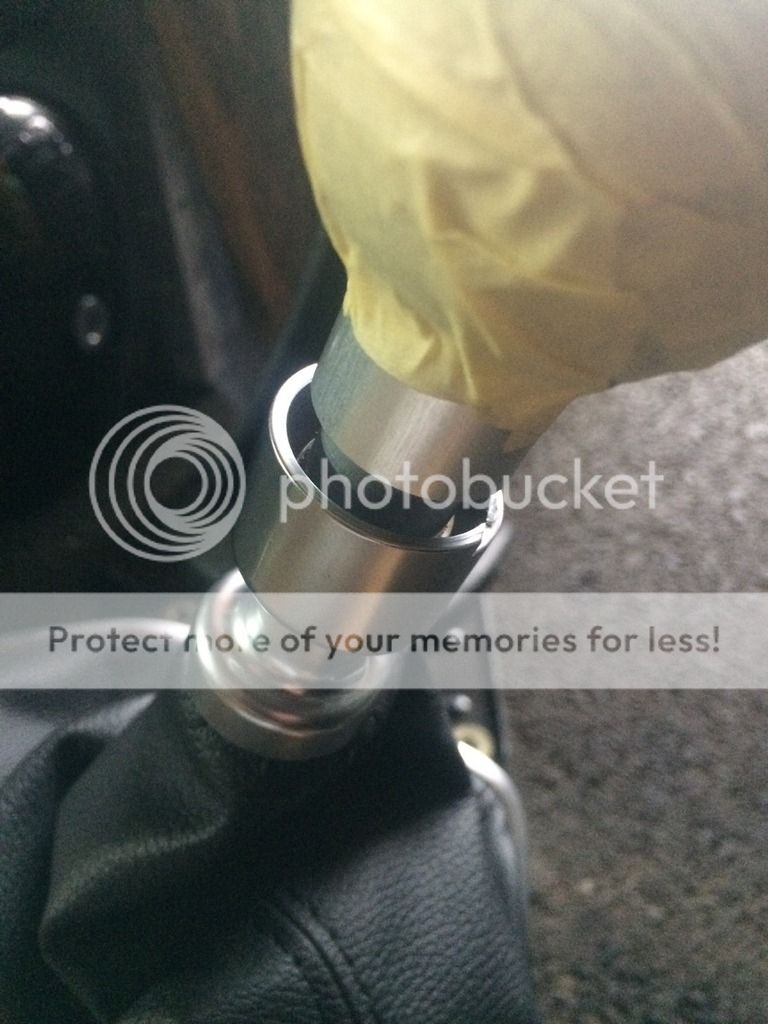
Then the lower ring will be able to go up and enable selection of the reverse. Will see how that goes; if it doesn't work out as intended, might even make a complete new shifter to the required spec, or, alternatively, take only the required part of reverse brake and connect it to the gearstick handle...
On a different note, had a look at driveshafts and compared the puma and ST180 ones.
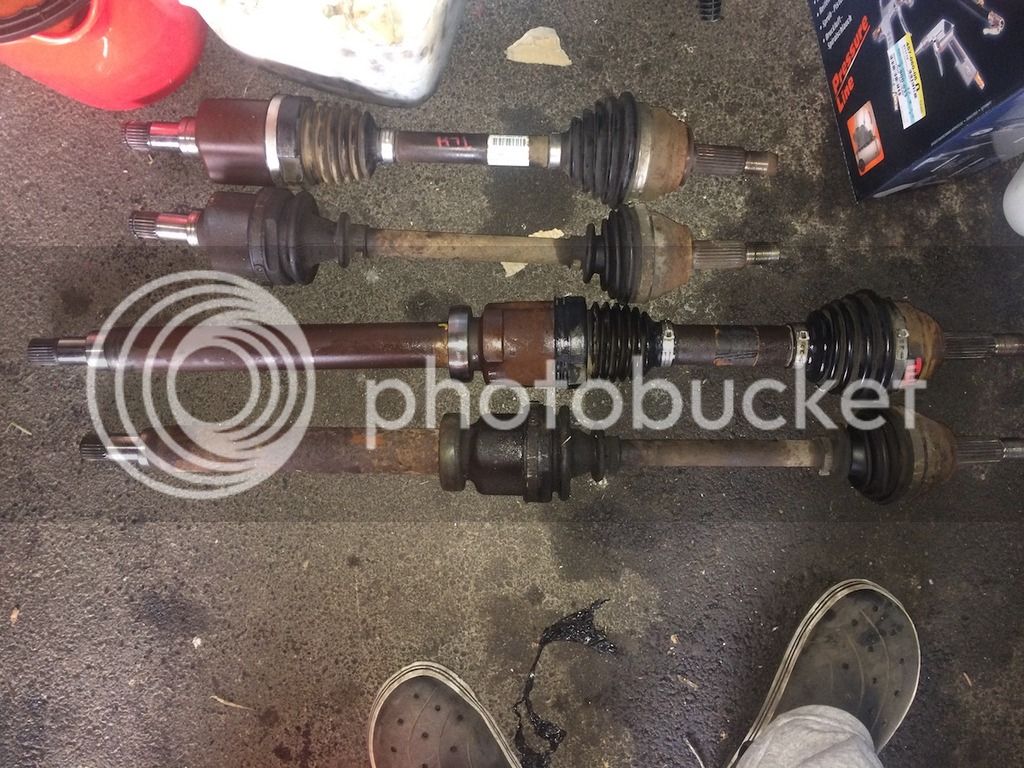
The outer shafts look almost identical in length, but the intermedite shaft is longer. I suspect that the diff in B6 gearbox is further to the left (looking ahead) than in IB5 which has 5th gear and reverse AFTER diff and that it should fit (as the 1.6 ecoboost is same cylinder spacing as in all sigma engines making the block equal in length. When I finally put together the (re)new(ed) engine, will bolt provsionally the B6 gearbox and check the situation regardind the intermediate shaft. I think that will check out fine, but the other, short driveshaft, will most probably be to long by the same ammount as the intermediate is longer comparing to the regular puma shaft. That might be good news for FRP owners as the shafts might be spot on for their cars
First regarding the pads. Now I am almost 100% certain that inside Ford box is Ate. They behave exactly the same. Nice stopping power, no noise at all, rather soft and producing dust. The discs are not wearing down at all, the pads are. For everyday usage I think they are just about the best they could be, but ask for rather regular alloy cleaning. So that conludes the brakes.
Now, moving onto derusting. On advice from here, got myself a bottle of this magic powder.

You dissolve it in water, prefferably hot (the hotter the better, so it says on the sticker adding that if you have submerged heater it speeds up process dramatically, end of quote) and just put in the things you want derusting.
Unfortuntaley, haven't taken images of the sump bolts before, but I guess all of you can imagine how they looked. If you can't, take a look under your car; we are all in the same boat there).
Anyway, put the bolts in a cup of deoxC for about 20 minutes

Sure thing, it sturts bubbling after a minute or so and the liquid gets darker by minute.
After 20 minutes the results:

I used some old toothbursh just to clean them and they look incredibly new(ish). Cleaned them with brake cleaner and then sprayed WD40 and that was it. This stuff really is amazing!
(on a sidenote: Ford really didn't spare on sealant for the sump as all the bolts were full of it and had to run them all through some tap to clean the threads)
Thah conludes derusting. Someone here mentioned idea of pool big enough to put the shell in it: a really tempting idea!
Onto the engine. As you know, I found which big end gearings fit in, but all of them location lugs on the right side, and original bearings have it on the left. First thought of adapting the bearing to fit in the big end as it is, but couldn't persuade myself it is safe to file away a part of location lug as that could lead to bearing spinning and dislodging from the big end of the conrod. So having had a look at the other overhaul of 1.7 engine in FRP section went to one of our best machining companies specialized in engines, brought the conrods and the Glyco bearings and explained what was the problem. It turned out it wasn't a problem at all, as they are used to it and did it in 5 minutes while I was waiting. The price: 5 GBP! Not kidding,5 GBP!
They advised, and I see the logic, to do it on the other side of conrod to keep the original intact; if I ever get somehow original shells, they can be put in without problems.
So, they did it like this. Simple grinding that anyone can do at home with a dremel, I suppose. No need for big machining center, or anything.

The other side is kept as it was

And the conrod side

This was all done using Glyco aftermarket set of standard size bearings. I have them, but still don't know what is the radial clearance as I, most annoyingly, don't have a 12 sided 8 socket to be able to torque down the conrod bolts properly and to check it with plastigauge!
But, a friend of mine is working at Suzuki and he had a look through their system (the bearings for Suzuki 1.3 engine are EXACT match in OD/ID and width (16 mm) and, this is important stuff, you can get them in 5 classes as is norm!

I am still waiting on his return information for the guidance on the usage of the bearings (which is to be used for which journal OD) and that negates the need for machining the crankshaft to make it suitable for the aftermarket bearings as is the norm.
When I get the information, I will post it here. You can already see from that screen capture that the engine in question is from Jimny (also Liana and Swift). That makes service of bottom end not only doable (drop dead you bean counters at Ford and your greed) but a matter of routine work.
And finally some more investigation on gearbox swap (IB5 for B6). I have to apologise for chasing few projects in paralel as that makes following rather problematic, I suppose, but as do it on weekends only, I have to do few things at the same time!
I don't like the idea of putting the ST180 gearstick in puma interiror as it simply doesn't fit (esthetically). So I got myslef a gearstick handle from focus ST170. Similar styling, aluminum.
Firstly, the shaft of gearshifter is the same in OD and the thread is the same. The ST170 gearstick handle screws nicely on the shifter shaft :grin:
The gearstick handle I got from eBay was used and worn a bit and had one rather visible scratch. Took some sand paper with intention of clearing it and started with 180 thinking that would go up until making it nice and shiney. But, during th initial sanding realized it looked aces in this scratched look and just kept on like that!

Out of garage on daylight

And on the shifter stick

If you wonder why I just don't put on the ball from puma, it is the reverse mechanism. IB5 uses reverse down on the right, below 5th gear, on B6 it is front, left to the 1st gear.
So the markings would be wrong (lesser problem, not functional, but that would bother me) and the gearshifter uses a brake for accidental engaging reverse. It is simple plastic part that is connected to the ring you pull up when selecting reverse. That enables the stick to go further to the left and that engages reverse on one of the cables. All of that is part of the gaitor (image taken from below)

The ST170 is to long, but has the lower part of the shaft taht I don't need so will machine it off.

Then the lower ring will be able to go up and enable selection of the reverse. Will see how that goes; if it doesn't work out as intended, might even make a complete new shifter to the required spec, or, alternatively, take only the required part of reverse brake and connect it to the gearstick handle...
On a different note, had a look at driveshafts and compared the puma and ST180 ones.

The outer shafts look almost identical in length, but the intermedite shaft is longer. I suspect that the diff in B6 gearbox is further to the left (looking ahead) than in IB5 which has 5th gear and reverse AFTER diff and that it should fit (as the 1.6 ecoboost is same cylinder spacing as in all sigma engines making the block equal in length. When I finally put together the (re)new(ed) engine, will bolt provsionally the B6 gearbox and check the situation regardind the intermediate shaft. I think that will check out fine, but the other, short driveshaft, will most probably be to long by the same ammount as the intermediate is longer comparing to the regular puma shaft. That might be good news for FRP owners as the shafts might be spot on for their cars
Hi Sinisa,
Always in awe of the level of skill involved here.... which makes me all the more tickled pink you've given the Deox C a go too! I'm still looking for a neighbour with a pool to drop the shell in :wink: but Bilt do a gel version of the powder which you can coat surfaces in if you need it?
Cheers,
Greg.
tuonokid
Active member
Awesome Sinisa, can't wait till you get the gearbox up and running in the car.
Barry
Barry
g-whizz said:[post]361290[/post] Hi Sinisa,
Always in awe of the level of skill involved here.... which makes me all the more tickled pink you've given the Deox C a go too! I'm still looking for a neighbour with a pool to drop the shell in :wink: but Bilt do a gel version of the powder which you can coat surfaces in if you need it?
Cheers,
Greg.
Yes, I discovered there was a gel version as well, but I couldn't get it shipped here as it is classed as chemical shipment that is dangerous. I am more than satisfied with the water solution for the time being!
Cheers for the tip, Greg!
Did some investigation on my engine. The bearings from Suzuki are OK-ish, but the problem is the starting dimensions. Suzuki did his crankshaft at 42.000 mm flat. Ford did his at 41.985 mm. The other thing is that Suzuki shell is 1.49 mm thick, Ford did shell at 1.505 or more. So the gap is to big. It is just on limit, or sligthly over it.
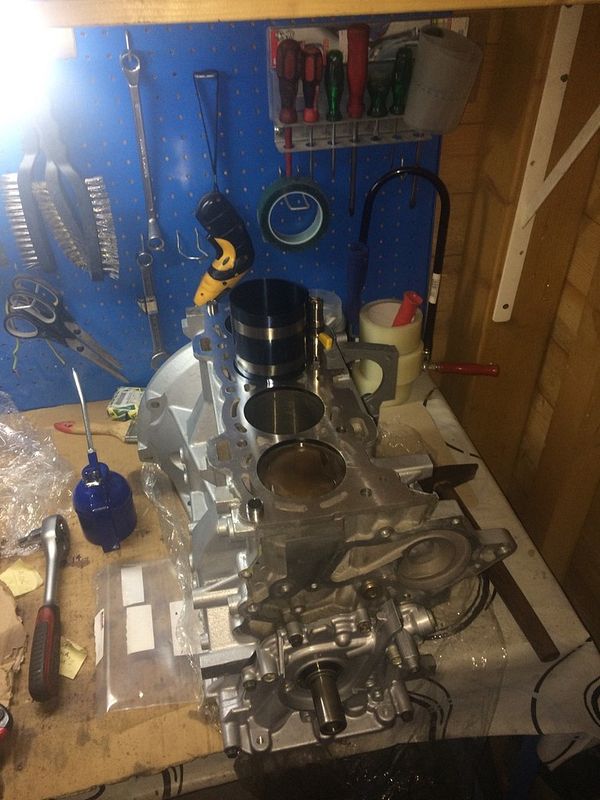
So put the pistons back in the block.
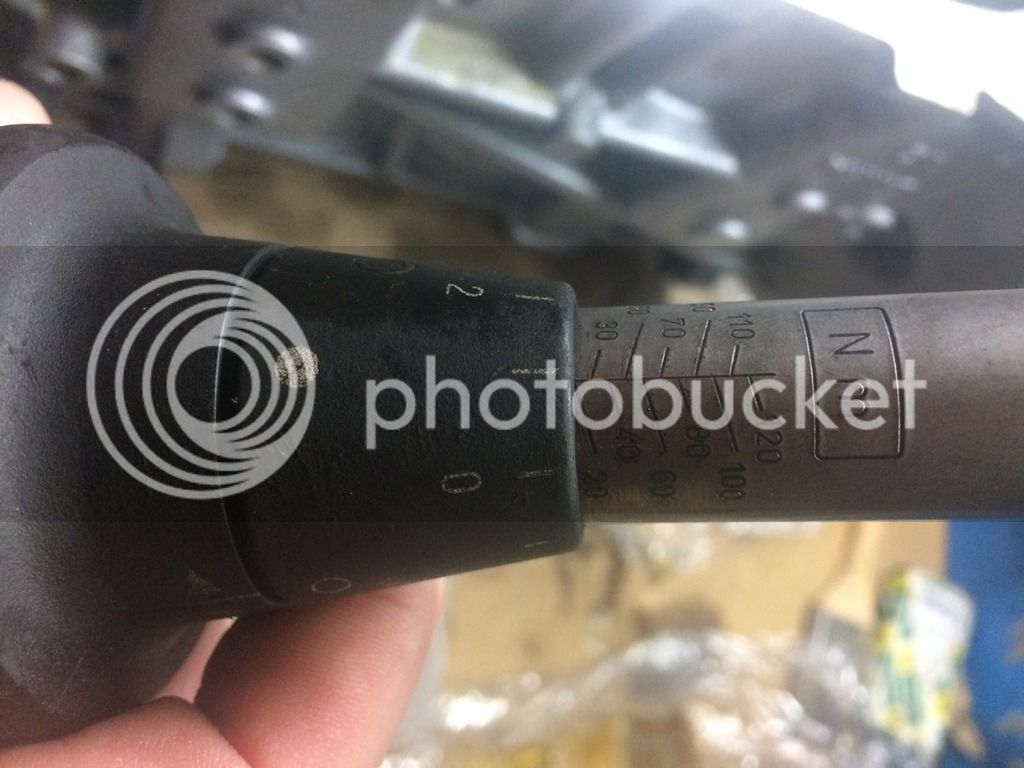
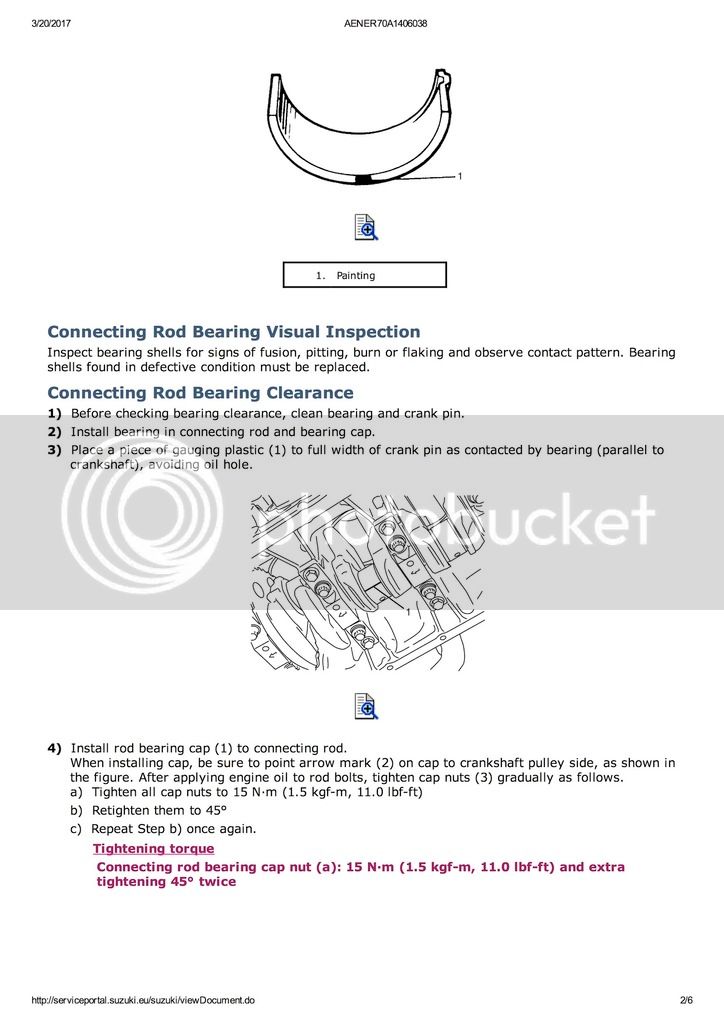
Torqued the big ends to 21 Nm and then added 45 degrees as Ford said it should be done
Prior to that put in the plastigauge.
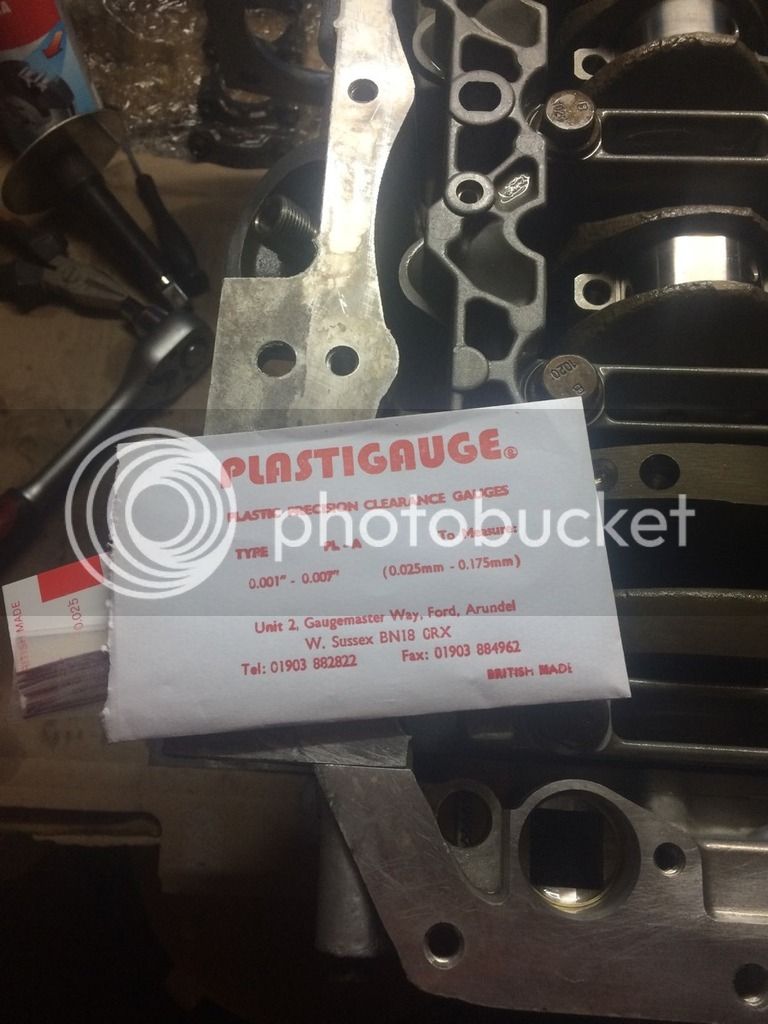
It is very simple and very effective system for measuring the gap
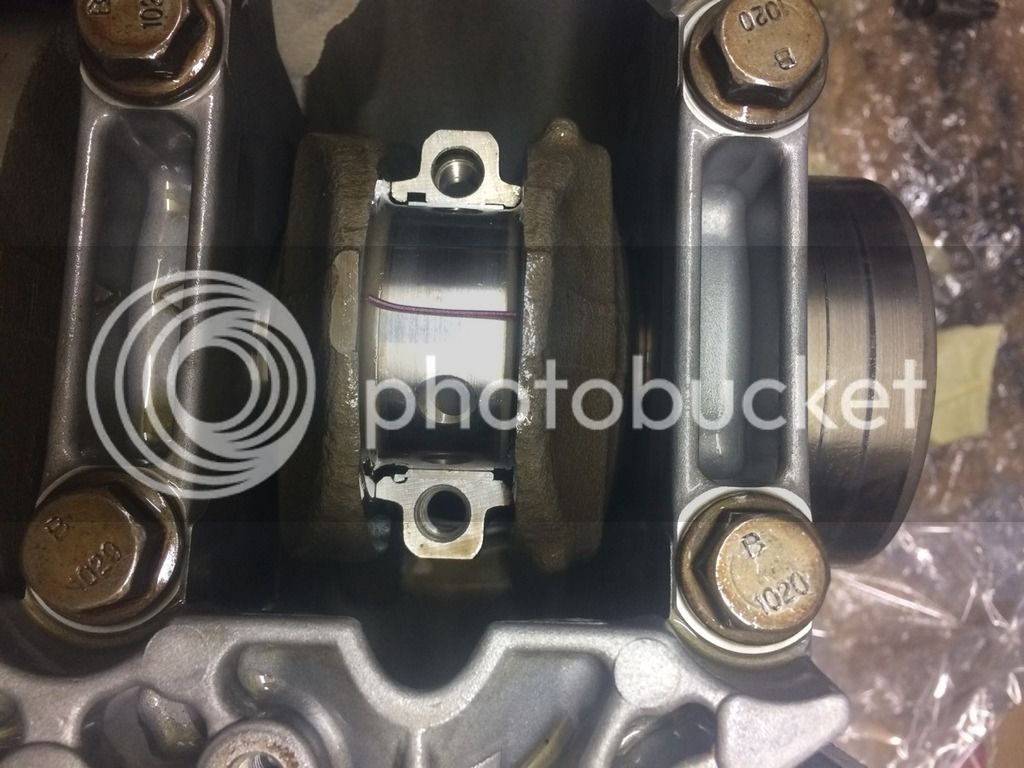
After torquing it to the spec, dismantled it and had a look at the marking.
It leaves the marking from the vax that gets squashed in. The larger the imprint, less of a gap there is. In the package is also the measuring for a readout.
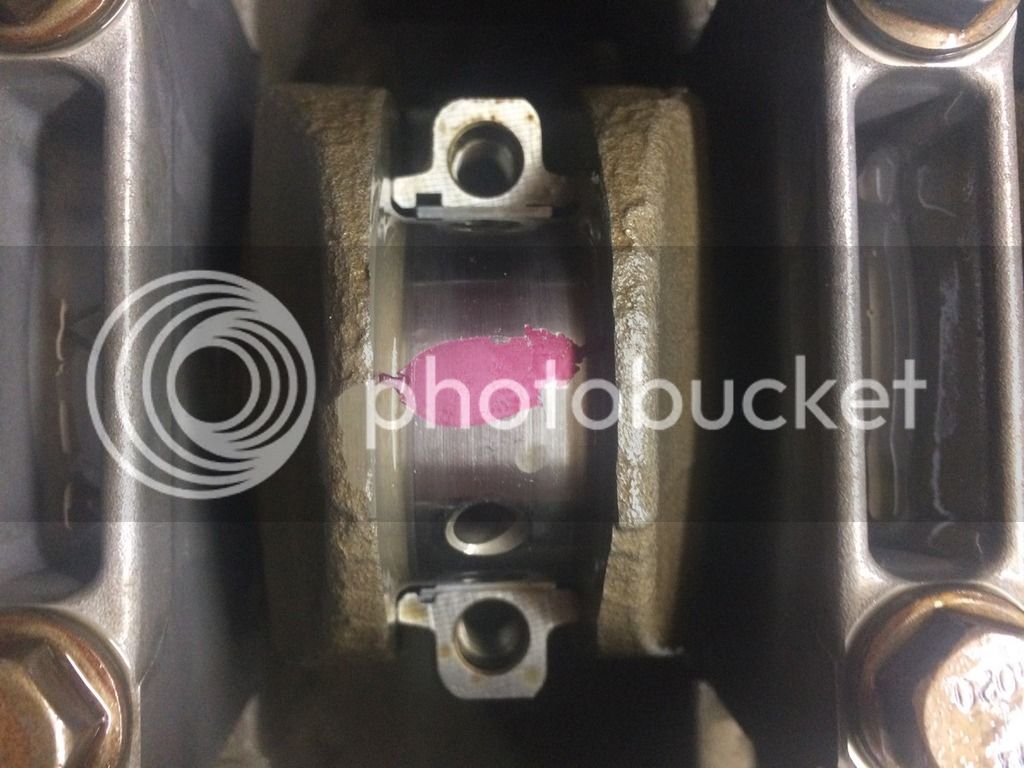

All the big ends have a gap of 0.05 mm or slighlty more. That means I need +0.25 sized bearings and then it would be spot on 0.025 mm as is the specified by Ford (0.023 - 0.045 mm).
So the engine will have to be apart for a few more days, but when reassembled it will be spot on

So put the pistons back in the block.
Torqued the big ends to 21 Nm and then added 45 degrees as Ford said it should be done

Prior to that put in the plastigauge.

It is very simple and very effective system for measuring the gap

After torquing it to the spec, dismantled it and had a look at the marking.
It leaves the marking from the vax that gets squashed in. The larger the imprint, less of a gap there is. In the package is also the measuring for a readout.


All the big ends have a gap of 0.05 mm or slighlty more. That means I need +0.25 sized bearings and then it would be spot on 0.025 mm as is the specified by Ford (0.023 - 0.045 mm).
So the engine will have to be apart for a few more days, but when reassembled it will be spot on
Dear all,
I am very pleased to inform you all that I have discovered AND TRIED the complete solution that makes bottom end of our beloved 1.7 engine completely serviceable! So it goes like this: the main bearings will last over 500.000 kms no problem if you regularly change oil. That is so thanks to the engine being so well built and balanced (as said previously, all piston conrod combos are within 1 gram). If they fail, Glyco does the main bearings for 1.6 engine and they are the same.
The problem is the big end. Or, it WAS. As I have already posted, the bearings for Mitsubishi G13/G15 4G12 engine do fit. However, they are wide 17.3 mm, puma bearings are wide 16 mm. In it self it shouldn't be a problem but still is not exactly the same.
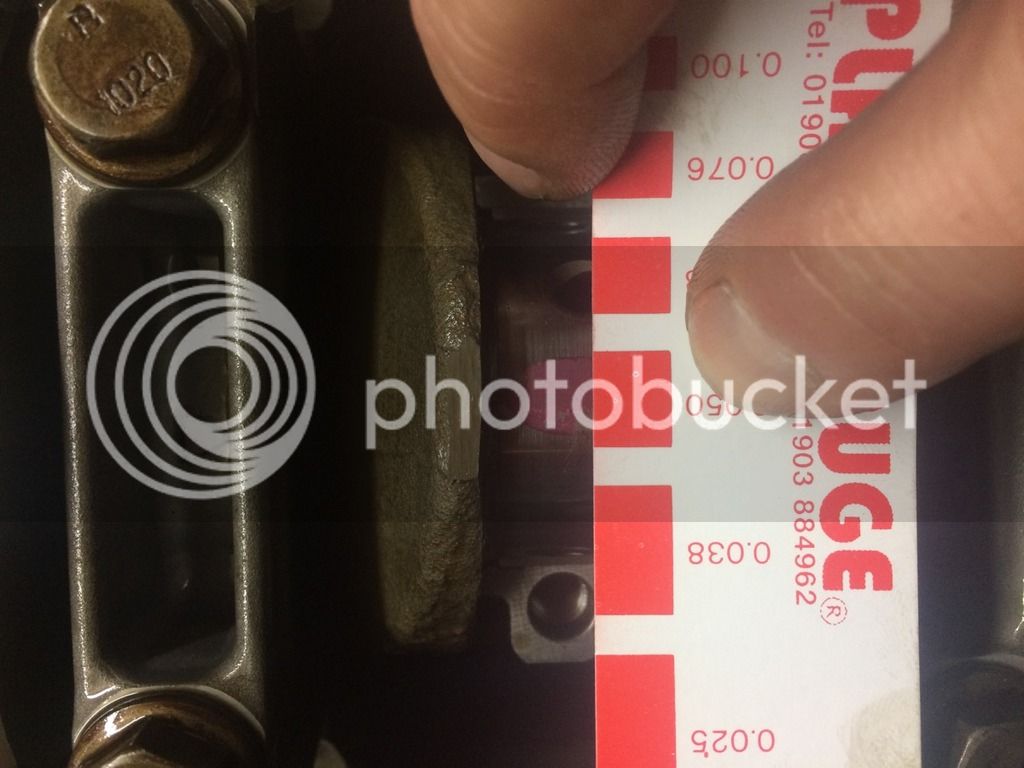
So I did some digging around and found out that bearings from suzuki ignis/swift are exactly the same at 42/45 mm x 16 mm. Now it gets interesting: I did try the Glyco bearings for that engine above and the gap was to big. Ford says the radial gap should be between .023 and 0.045 mm and you can see images above that it is slightly over .05 mm. Most probably the engine would operate fine, but since I want this engine to be as good as new, didn't want put together something that wasn't within specs.
A very good friend of mine is working at Suzuki so I asked him for the specs for the engine and he was kind enough to send me the service file.
And here it is:
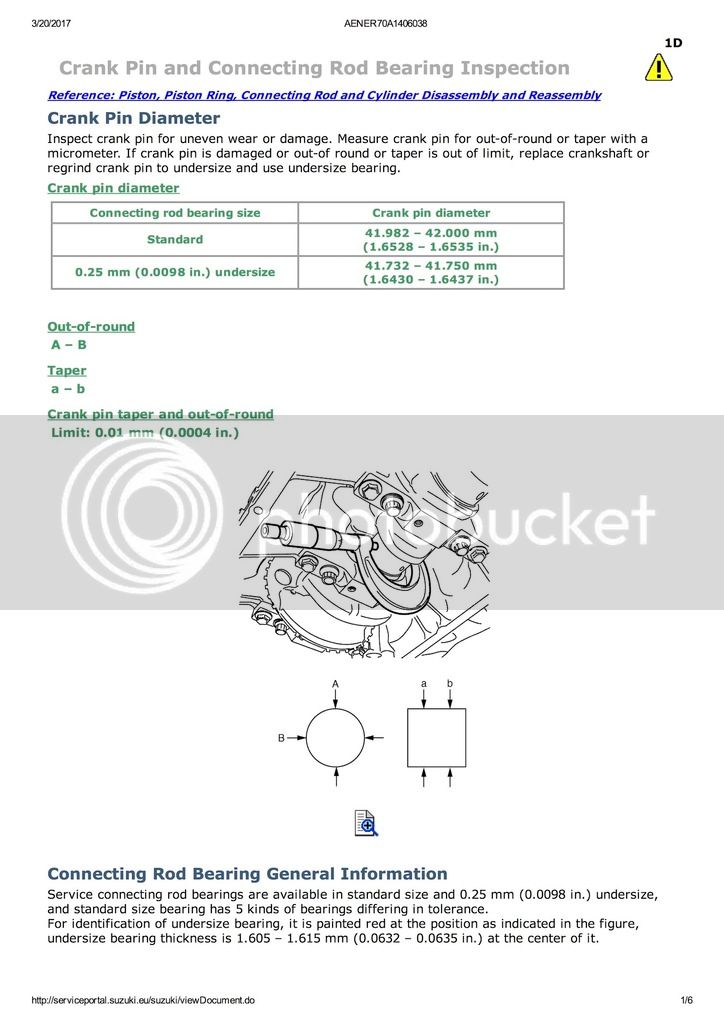
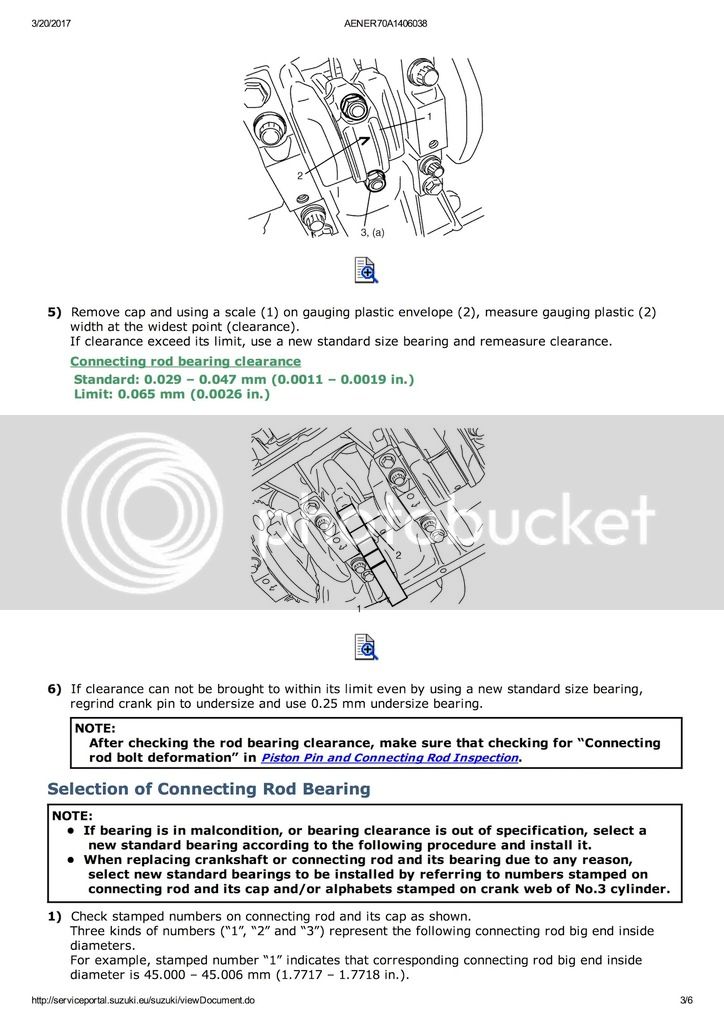

It is worth noting that Suzuki did his engine to similar standard as Yamaha did Sigma for Ford: The clearance (gap) is .029 - .049 mm on Suzuki engine. However, Suzuki got its crankshaft at 42.000 mm dead, where as Ford (Yamaha) did it at 41.99 to 41.985 mm. Hence the nominal bearings are a bit to thin as my previous images prove.However, Suzuki is kind enough to offer the bearings in five classes of thickness.The service information gives the procedure of selecting the proper bearing colour depending on the bigend/shaft diameter but since we are ging to adapt it for our engine we can only rely on the dimensions.
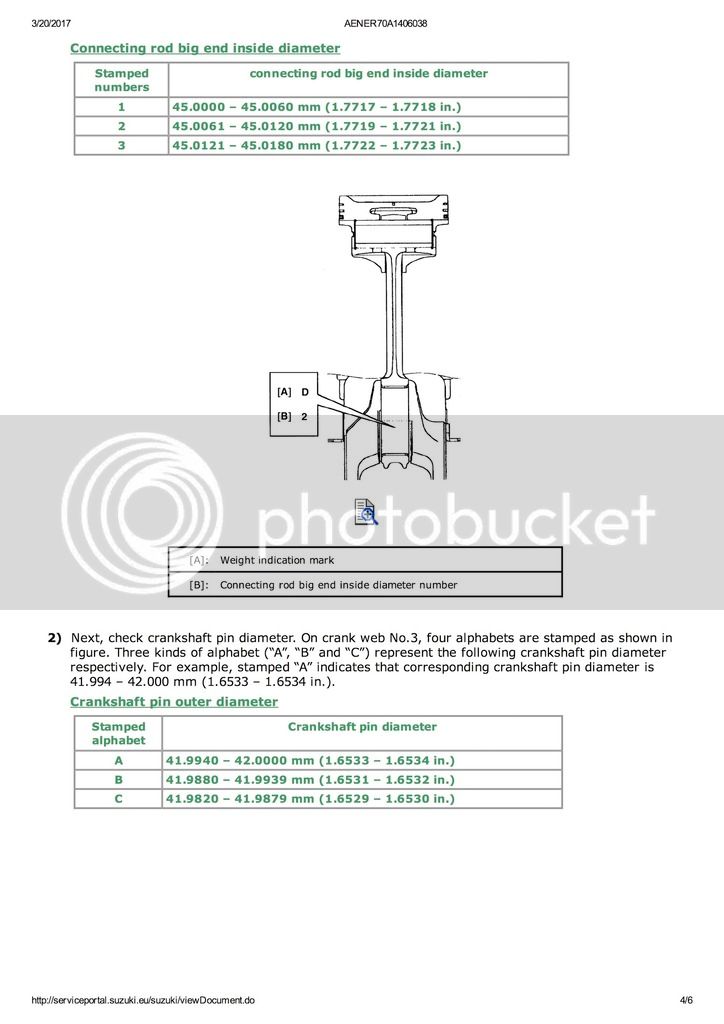
Ford states that big end diameter is from 45.025-45.045 mm what puts us right away in the class 3 of big end for Suzuki as it is more then Suzuki even offered for its engines (note how tight tolerances are on Suzuki engine!).
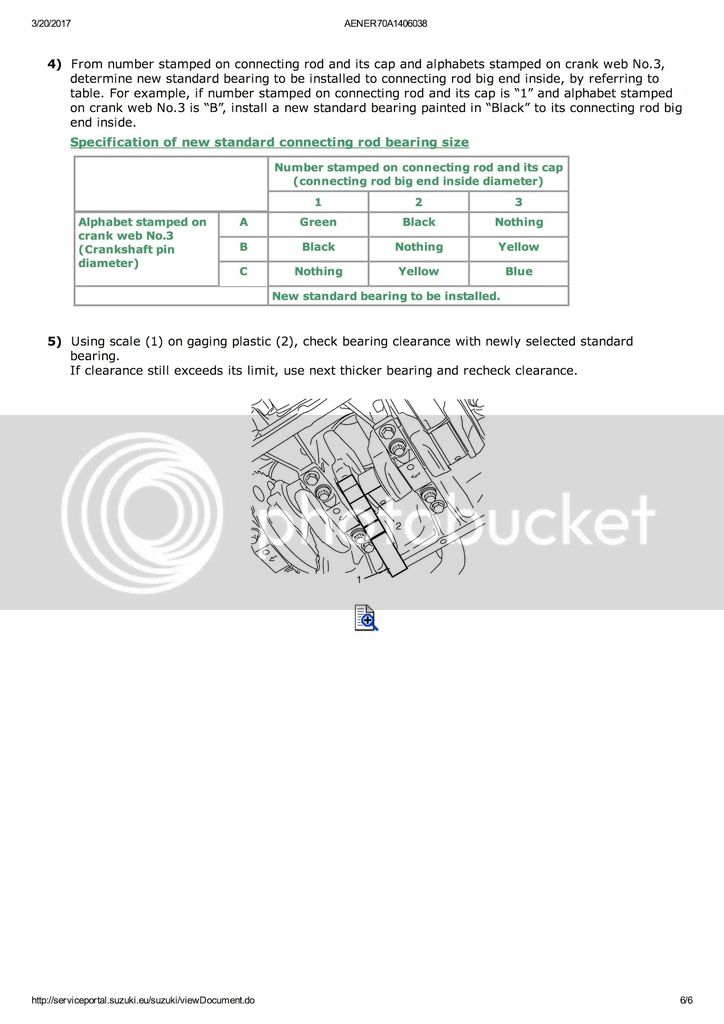
When taken into account the big end and shaft diameter of 41.985 mm it gives us the combo of C3 in the table and selecting the thickest bearing coded in blue colour.
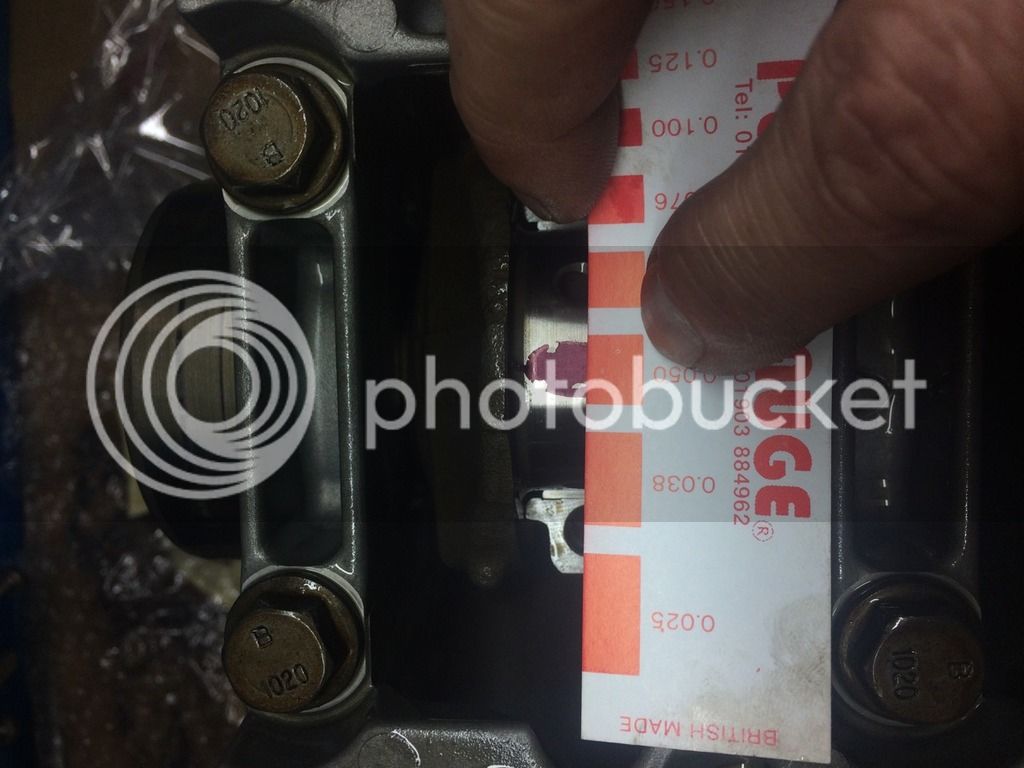
This is what you need
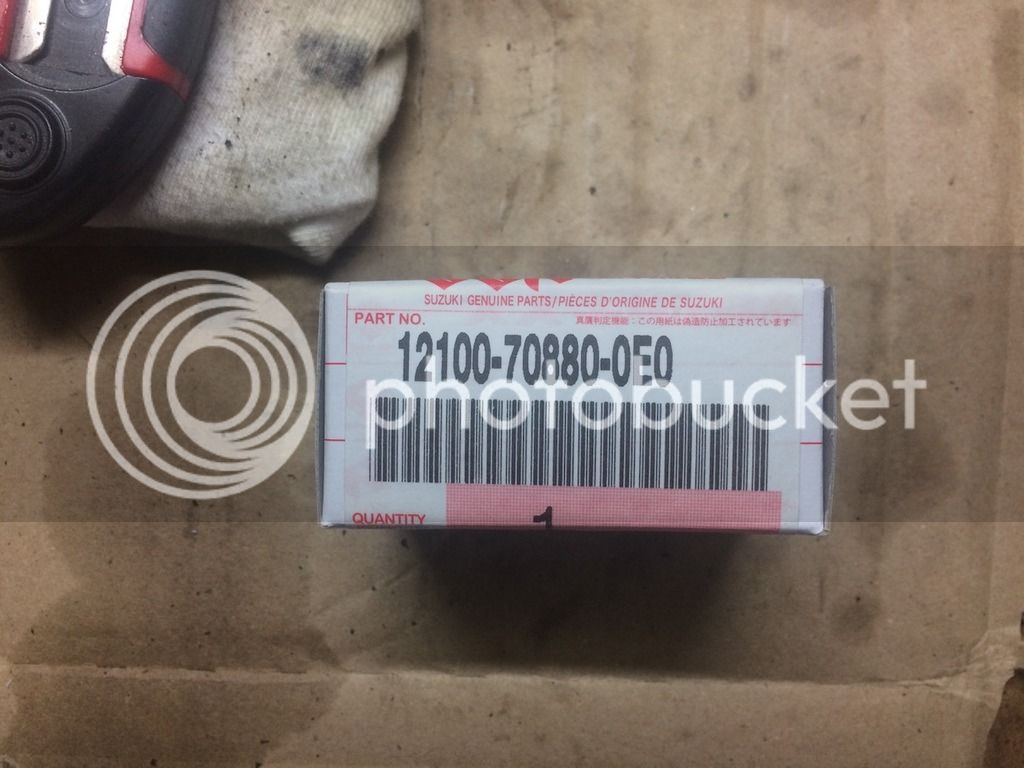
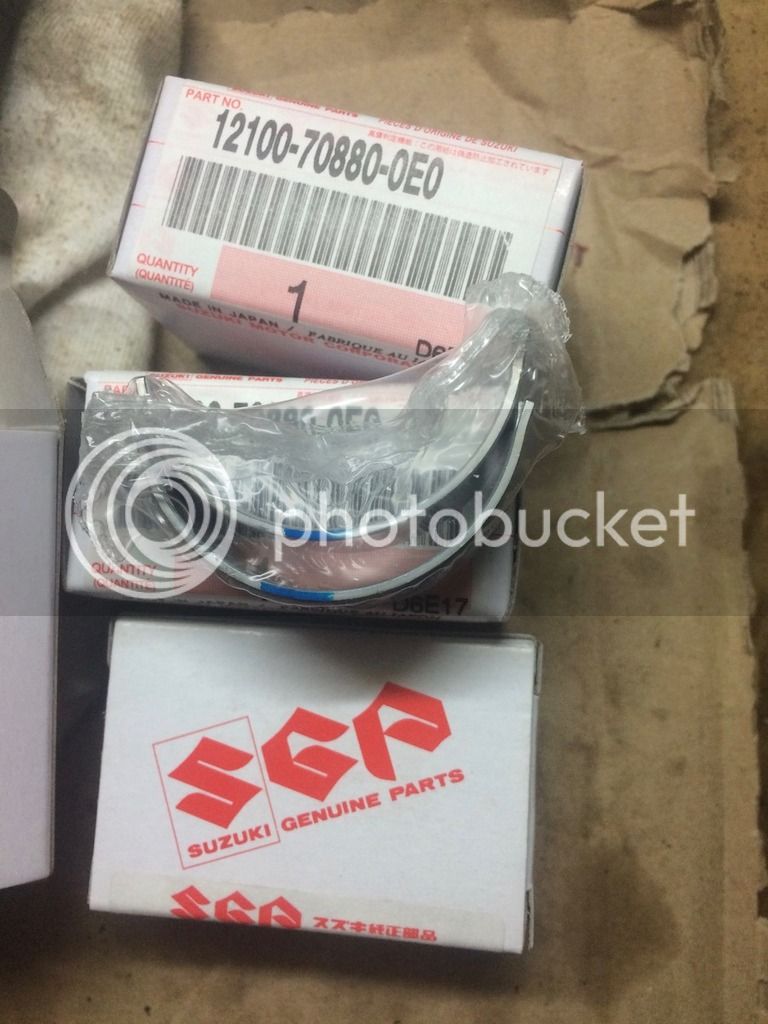
Tried it on my 4th cylinder big end which was the worst in terms of radial gap and this is the result:
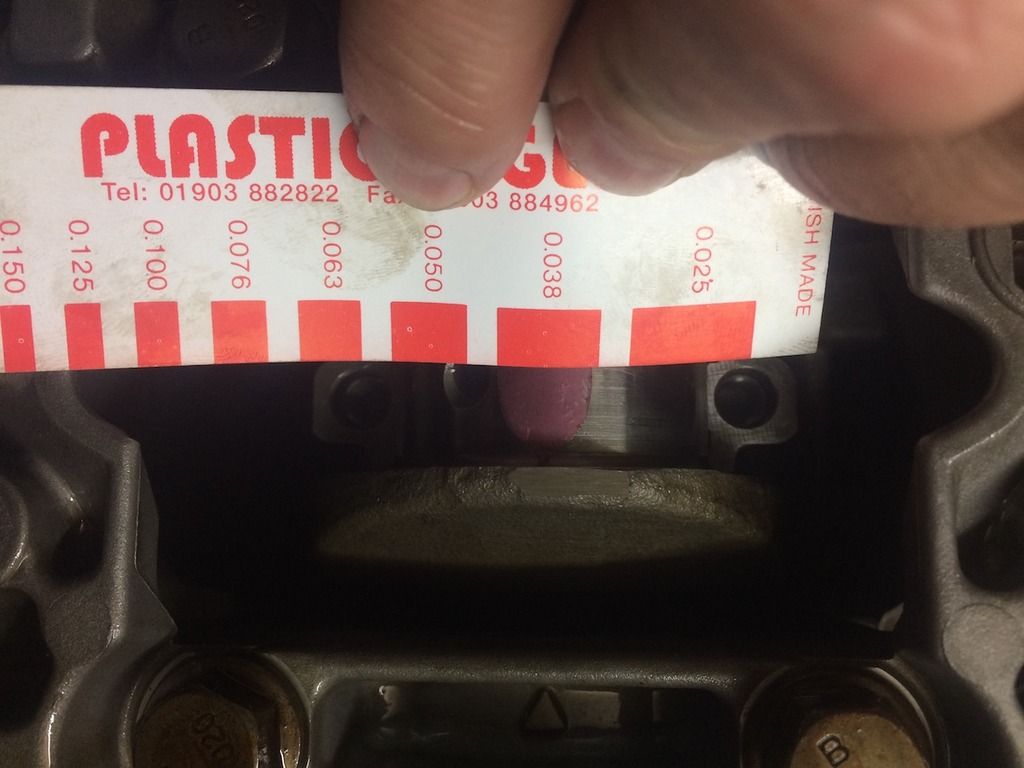
The gap is now .038 mm what sits nicely in the spec of the engine.
So, my advice for the bearing selection would be as follows: if your bearings in the engine are either red or black in colour code, you should go for the blue suzuki bearings and that would work fine and bring the gap back to the specs.
That makes bottom end of 1.7 engine normally serviceable and could save few of these brilliant engines I hope...
I am very pleased to inform you all that I have discovered AND TRIED the complete solution that makes bottom end of our beloved 1.7 engine completely serviceable! So it goes like this: the main bearings will last over 500.000 kms no problem if you regularly change oil. That is so thanks to the engine being so well built and balanced (as said previously, all piston conrod combos are within 1 gram). If they fail, Glyco does the main bearings for 1.6 engine and they are the same.
The problem is the big end. Or, it WAS. As I have already posted, the bearings for Mitsubishi G13/G15 4G12 engine do fit. However, they are wide 17.3 mm, puma bearings are wide 16 mm. In it self it shouldn't be a problem but still is not exactly the same.
So I did some digging around and found out that bearings from suzuki ignis/swift are exactly the same at 42/45 mm x 16 mm. Now it gets interesting: I did try the Glyco bearings for that engine above and the gap was to big. Ford says the radial gap should be between .023 and 0.045 mm and you can see images above that it is slightly over .05 mm. Most probably the engine would operate fine, but since I want this engine to be as good as new, didn't want put together something that wasn't within specs.
A very good friend of mine is working at Suzuki so I asked him for the specs for the engine and he was kind enough to send me the service file.
And here it is:


It is worth noting that Suzuki did his engine to similar standard as Yamaha did Sigma for Ford: The clearance (gap) is .029 - .049 mm on Suzuki engine. However, Suzuki got its crankshaft at 42.000 mm dead, where as Ford (Yamaha) did it at 41.99 to 41.985 mm. Hence the nominal bearings are a bit to thin as my previous images prove.However, Suzuki is kind enough to offer the bearings in five classes of thickness.The service information gives the procedure of selecting the proper bearing colour depending on the bigend/shaft diameter but since we are ging to adapt it for our engine we can only rely on the dimensions.
Ford states that big end diameter is from 45.025-45.045 mm what puts us right away in the class 3 of big end for Suzuki as it is more then Suzuki even offered for its engines (note how tight tolerances are on Suzuki engine!).
When taken into account the big end and shaft diameter of 41.985 mm it gives us the combo of C3 in the table and selecting the thickest bearing coded in blue colour.
This is what you need


Tried it on my 4th cylinder big end which was the worst in terms of radial gap and this is the result:

The gap is now .038 mm what sits nicely in the spec of the engine.
So, my advice for the bearing selection would be as follows: if your bearings in the engine are either red or black in colour code, you should go for the blue suzuki bearings and that would work fine and bring the gap back to the specs.
That makes bottom end of 1.7 engine normally serviceable and could save few of these brilliant engines I hope...
Brian'
Member
Awesome information detective Sinisa! :grin: