You are using an out of date browser. It may not display this or other websites correctly.
You should upgrade or use an alternative browser.
You should upgrade or use an alternative browser.
My Puma 1.7, more than a year on (A works in progress)
- Thread starter tuonokid
- Start date
Help Support ProjectPuma:
This site may earn a commission from merchant affiliate
links, including eBay, Amazon, and others.
tuonokid
Active member
Hi Rob
40 grit's way too rough, I've read start with 400 to take the coating off. There is also a protective vinyl coating you can get from 3M I think but it's expensive.
40 grit's way too rough, I've read start with 400 to take the coating off. There is also a protective vinyl coating you can get from 3M I think but it's expensive.
I would start with 600. It is not scratched or something, no need to butcher it more than needed
Brian'
Member
What Sinisa said, start with 600 and work your way up. I did mine and used 600 - 800 - 1000 - 2000. After that I gave them a layer of 2K Clear coat.Wild E. Coyote said:[post]361793[/post] I would start with 600. It is not scratched or something, no need to butcher it more than needed
tuonokid
Active member
Cheers Guys, I hope Robs got the message otherwise he'll have no lenses left. :-(
tuonokid
Active member
I missed the smiley, derr 
tuonokid
Active member
and would you really like Puma light lenses dark tinting?
Oops, didn't clock the 'tint' bit.
How about this instead?
http://www.ebay.co.uk/itm/like/162232658554?chn=ps&adgroupid=39613511478&rlsatarget=aud-295856144804%3Apla-279121813641&abcId=923836&adtype=pla&merchantid=109775236&poi=&googleloc=1007188&device=c&campaignid=737386489&crdt=0
or
http://www.ebay.co.uk/itm/30-x-100cm-Clear-Headlight-Tinting-Film-Protection-Vinyl-Tint-FREE-SQUEEGEE-/252659046182?_trksid=p2385738.m2548.l4275 ?
tuonokid
Active member
Ayup Rob
The first one's from Hong Kong and the second one is just clear vinyl which you've probably already got. Brian's already said that he used clear coat but didn't say whether he used an adhesion promoter or not. I'll practice on the spare lens I have when I can actually get to it and hopefully get a result
The first one's from Hong Kong and the second one is just clear vinyl which you've probably already got. Brian's already said that he used clear coat but didn't say whether he used an adhesion promoter or not. I'll practice on the spare lens I have when I can actually get to it and hopefully get a result
tuonokid
Active member
How do you know Rob?
tuonokid
Active member
Hi Rob
Ooh that sounds bad, did you use adhesion promoter? It sounds like a lot of people have used clear coat without any problems but it does make me wonder why the polishing kit I bought contains a protector that you just wipe on with a cloth.
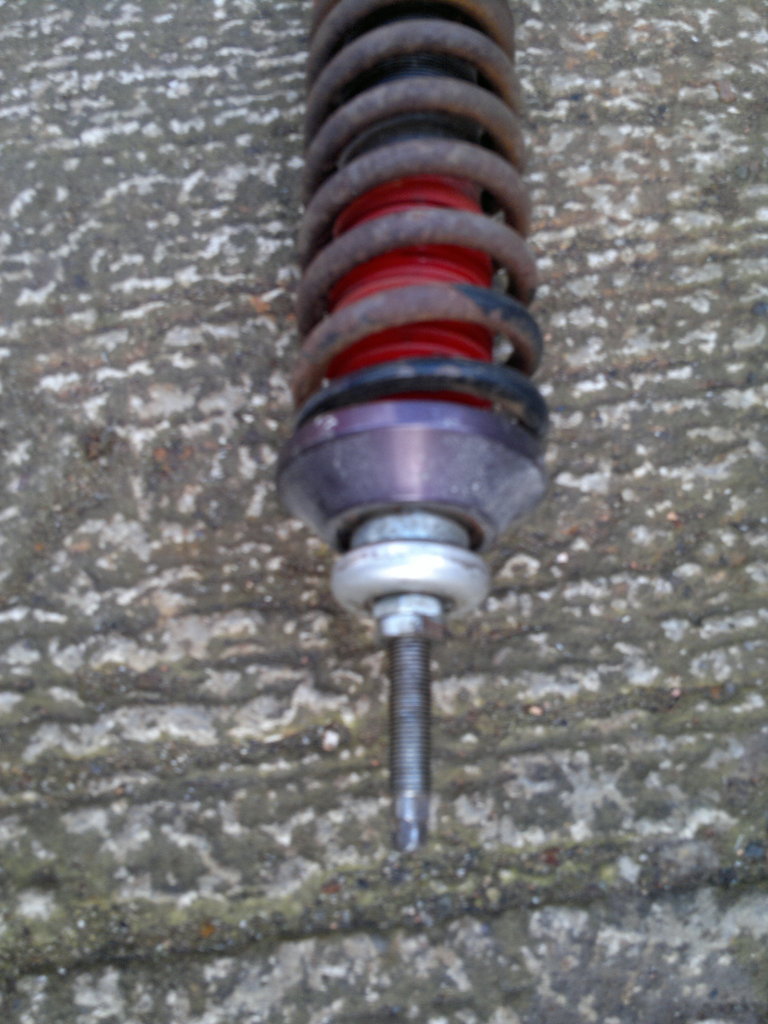
Well after noticing the horrible grindy sound on my steering that first raised it's head on the way to the MOT was still persisting at low speeds I decided to strip down the front suspension today. I also needed to raise the coilovers as far as I can get them as the new higher profile tyres I'm getting will be at least 10mm nearer the bottom of the inner wing rails so for now I raised the first leg up to 57mm height on the thread.
 050420173213_zpstzhchgmd by barry wilson, on Flickr
There's not much more to go now with these coilovers as the total ammount of thread adjustment is 75mm the collar is 23mm and the thread showing below it is 57mm so at the top of the collar it's already 5mm above the thread.
 050420173214_zpsfzwrix45 by barry wilson, on Flickr
I found the culprit for the grinding noise I think. One of the strut bearings feels a bit lumpy and dry when put under load so I'll have to put another bearing on off my standard struts.
I also put two clicks of firmer damping on the adjusters whilst I was at it.
Just been out in the Puma tonight (Sat) and it's still groaning from the pass side so it looks like I'll have to order up another one now.
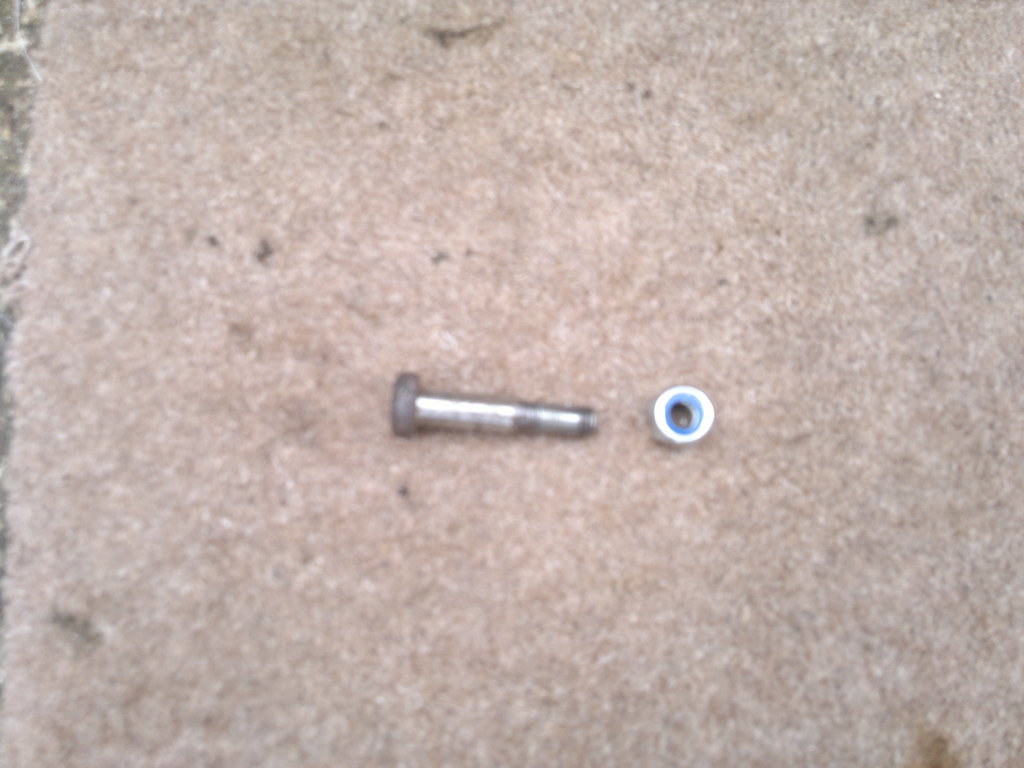
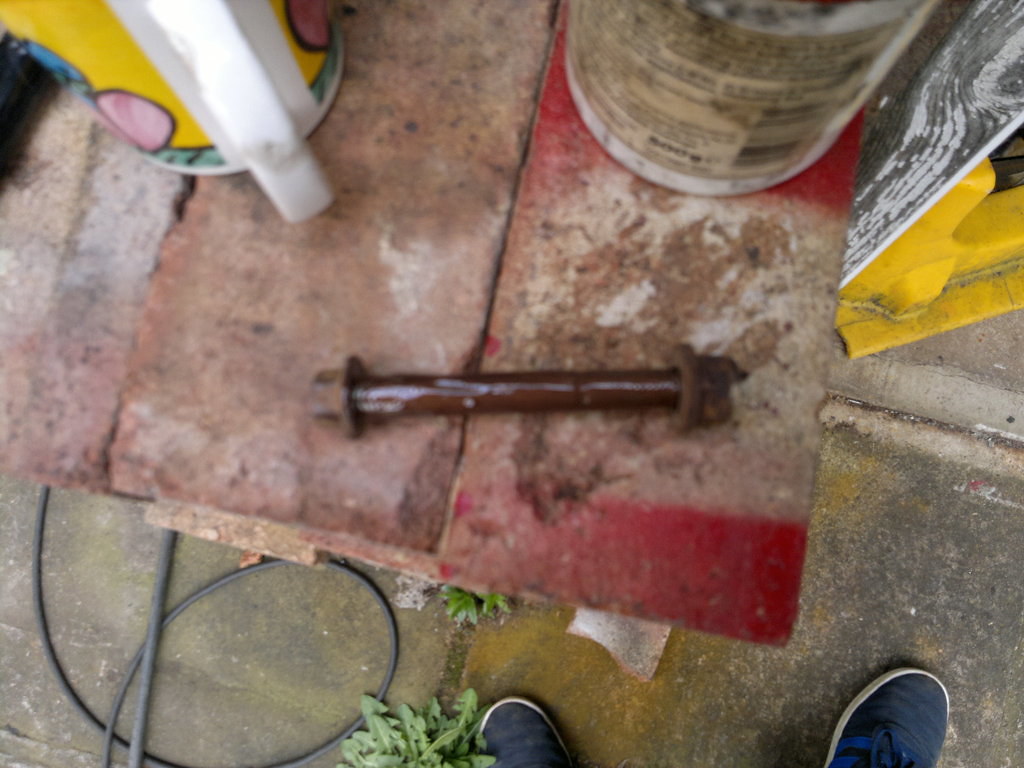
The good thing about all this is at the same time as I was doing the struts I did the groundwork for replacing the wishbones and I got every bolt out apart from the front right wishbone bolt.
 060420173216_zpsnmb4vp22 by barry wilson, on Flickr
These bolts always seize in on small fords it's the bottom ball joint locking nut so when it's got out it needs a clean of it's mounting hole in the knuckle with either a roll of 40 grade sandpaper or a wire brush in a drill and then liberally coating along it's length with copperslip.
 060420173217_zpsideeylgk by barry wilson, on Flickr
Similarly the wishbone bolts need a good coating of copperslip otherwise they might seize onto the steel inner sleeve of the bush, as one of mine has.
 060420173219_zpssltvw3so by barry wilson, on Flickr
Last of all before I put it back on the ground I couldn't get the bottom plastic fitting to work on the mudflap so I fastened a rivnut in the wing and use a s/s M5 bolt. Then I noticed a piece of the standard rubberised underseal had come of the floor strengthener (to the right of the rivnut) and I could see rot underneath. This is an area I'd not touched before so I'll have to have a look next week and see how bad it is but, thankfully, it's on a panel that's still available from Ford so even if it's totally knackered it's not a major problem.
Ooh that sounds bad, did you use adhesion promoter? It sounds like a lot of people have used clear coat without any problems but it does make me wonder why the polishing kit I bought contains a protector that you just wipe on with a cloth.
Well after noticing the horrible grindy sound on my steering that first raised it's head on the way to the MOT was still persisting at low speeds I decided to strip down the front suspension today. I also needed to raise the coilovers as far as I can get them as the new higher profile tyres I'm getting will be at least 10mm nearer the bottom of the inner wing rails so for now I raised the first leg up to 57mm height on the thread.
050420173213_zpstzhchgmd by barry wilson, on FlickrThere's not much more to go now with these coilovers as the total ammount of thread adjustment is 75mm the collar is 23mm and the thread showing below it is 57mm so at the top of the collar it's already 5mm above the thread.
050420173214_zpsfzwrix45 by barry wilson, on FlickrI found the culprit for the grinding noise I think. One of the strut bearings feels a bit lumpy and dry when put under load so I'll have to put another bearing on off my standard struts.
I also put two clicks of firmer damping on the adjusters whilst I was at it.
Just been out in the Puma tonight (Sat) and it's still groaning from the pass side so it looks like I'll have to order up another one now.
The good thing about all this is at the same time as I was doing the struts I did the groundwork for replacing the wishbones and I got every bolt out apart from the front right wishbone bolt.
060420173216_zpsnmb4vp22 by barry wilson, on FlickrThese bolts always seize in on small fords it's the bottom ball joint locking nut so when it's got out it needs a clean of it's mounting hole in the knuckle with either a roll of 40 grade sandpaper or a wire brush in a drill and then liberally coating along it's length with copperslip.
060420173217_zpsideeylgk by barry wilson, on FlickrSimilarly the wishbone bolts need a good coating of copperslip otherwise they might seize onto the steel inner sleeve of the bush, as one of mine has.
060420173219_zpssltvw3so by barry wilson, on FlickrLast of all before I put it back on the ground I couldn't get the bottom plastic fitting to work on the mudflap so I fastened a rivnut in the wing and use a s/s M5 bolt. Then I noticed a piece of the standard rubberised underseal had come of the floor strengthener (to the right of the rivnut) and I could see rot underneath. This is an area I'd not touched before so I'll have to have a look next week and see how bad it is but, thankfully, it's on a panel that's still available from Ford so even if it's totally knackered it's not a major problem.
Brian'
Member
I thoroughly cleaned it with wax and grease remover that I bought at the paint store. Painted the lenses with 2K Clear coat via a spray gun. Though you can also buy 2K Clear coat in cans. 2K Clear coat is really scratch and stonechip resistant. Haven't had a problem with it for the past 2 years.tuonokid said:[post]361819[/post] Ayup Rob
The first one's from Hong Kong and the second one is just clear vinyl which you've probably already got. Brian's already said that he used clear coat but didn't say whether he used an adhesion promoter or not. I'll practice on the spare lens I have when I can actually get to it and hopefully get a result
tuonokid
Active member
Hi Brian
Thanks for replying on here. I'm surprised you managed to clearcoat the headlamps without an adhesion promoter as when I did the rear foglights they just ended up going like hammerite until I used the adhesion promoter but it's good to hear that they've lasted.
Thanks for replying on here. I'm surprised you managed to clearcoat the headlamps without an adhesion promoter as when I did the rear foglights they just ended up going like hammerite until I used the adhesion promoter but it's good to hear that they've lasted.
tuonokid
Active member
Back to work on the Anglia today but whilst my son was doing some grinding down on the Anglia I took the oppertunity to take off my dodgy cat on the Puma so I could get the dimensions off it to make a new one.
I found these flanges with pipe stubs pre-welded on which will make life much easier as I don't (yet) have a TIG
http://www.ebay.co.uk/itm/57mm-2-25-Exhaust-Flanges-Repair-Joint-with-Gasket-Bolts-Pipe-Repair-Section-/281653495849?hash=item4193db4829:g-QAAOSwBLlVIS55
Then I'd already found this on Ebay.
http://www.ebay.co.uk/itm/2-25-57mm-Magnaflow-Universal-High-Flow-Sports-Catalytic-200-Cell-Cat-59955-/261577688434?hash=item3ce73ec572:goAAOSwEeFVCGa4
So I found the firm selling the stubs off ebay and paid by card but also requested the pipes swagging so that they fit over the 57mm O/D pipes on the cat so when it all arrives I can mount it on the car, tack weld it and then take it off the car to finish welding it.
I also need to buy a exhaust manifold gasket as I need to heat wrap the manifold but I have the wrap and stainless ties already.
I found these flanges with pipe stubs pre-welded on which will make life much easier as I don't (yet) have a TIG
http://www.ebay.co.uk/itm/57mm-2-25-Exhaust-Flanges-Repair-Joint-with-Gasket-Bolts-Pipe-Repair-Section-/281653495849?hash=item4193db4829:g
-QAAOSwBLlVIS55Then I'd already found this on Ebay.
http://www.ebay.co.uk/itm/2-25-57mm-Magnaflow-Universal-High-Flow-Sports-Catalytic-200-Cell-Cat-59955-/261577688434?hash=item3ce73ec572:g
oAAOSwEeFVCGa4So I found the firm selling the stubs off ebay and paid by card but also requested the pipes swagging so that they fit over the 57mm O/D pipes on the cat so when it all arrives I can mount it on the car, tack weld it and then take it off the car to finish welding it.
I also need to buy a exhaust manifold gasket as I need to heat wrap the manifold but I have the wrap and stainless ties already.
tuonokid said:[post]362263[/post]I also need to buy a exhaust manifold gasket as I need to heat wrap the manifold but I have the wrap and stainless ties already.
Have you thought of actually putting the original heat shield on it? I am still not convinced about the heat wrapping the mild steel tubes in the long run....?
tuonokid
Active member
Hi Sinisa
I tried to get the existing shields on but because of the layout of the four branch there just wasn't room. The manifold does have the stud layout for the top shields but the reason I want to heat wrap it is because it's slowly cooking the plastic cover around the base of the steering column. Oh, and the four branch is made out of stainless steel rather than mild steel.
I tried to get the existing shields on but because of the layout of the four branch there just wasn't room. The manifold does have the stud layout for the top shields but the reason I want to heat wrap it is because it's slowly cooking the plastic cover around the base of the steering column. Oh, and the four branch is made out of stainless steel rather than mild steel.
Similar threads
- Replies
- 1
- Views
- 877
Vehicle For Sale
2002 Ford Puma 1.7 Thunder
- Replies
- 0
- Views
- 894