Home made carbon bonnet

ProjectPuma

Help Support ProjectPuma:

This site may earn a commission from merchant affiliate links, including eBay, Amazon, and others.

warrenpenalver

Active member
Joined
Feb 18, 2008
Messages
1,687
Location
Stoke on Trent/ dole que!
You dont need to have fancy workshops if you are determined enough to make some carbon parts for your car.

All this was done in my lounge.

Lay up the carbon in the top skin mould:
20120601_175424.jpg

20120601_190529.jpg

used 2 layers of carbon with a foam core.

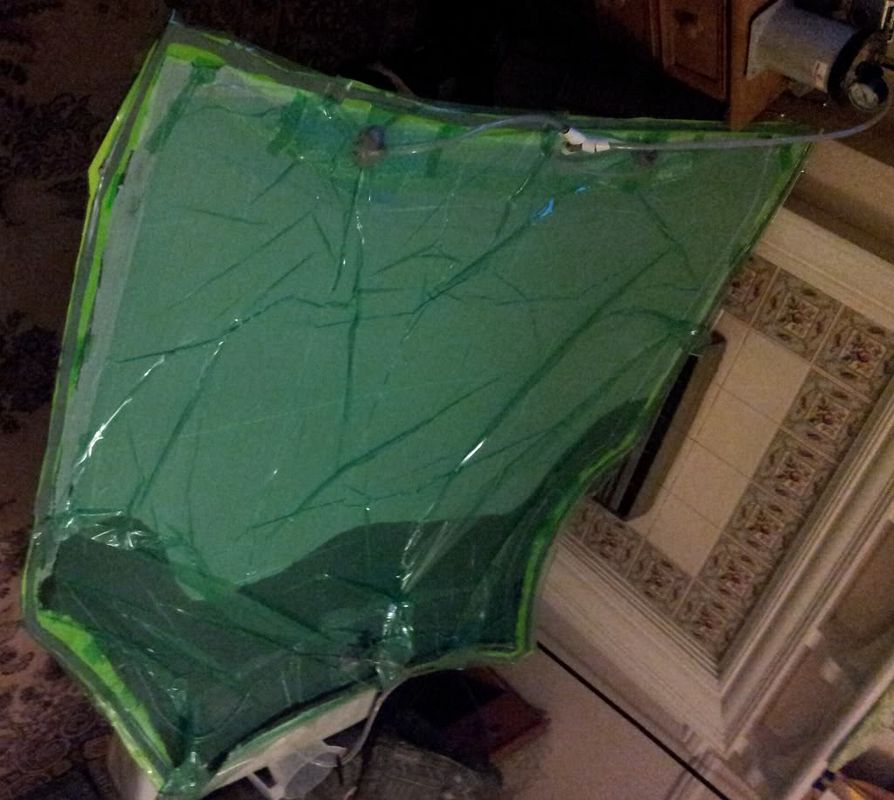
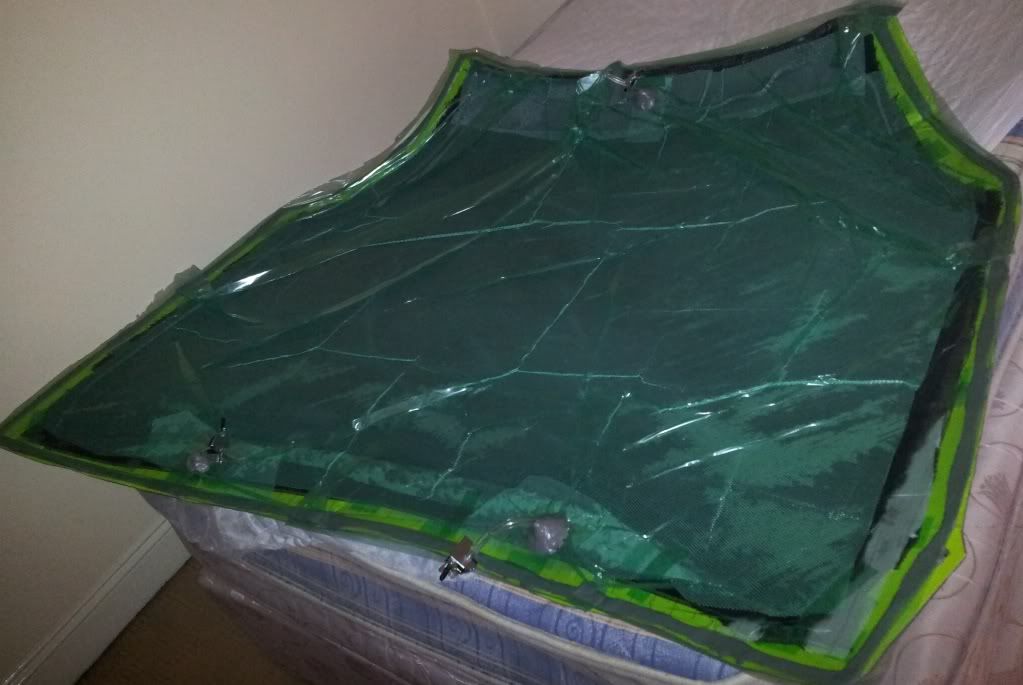
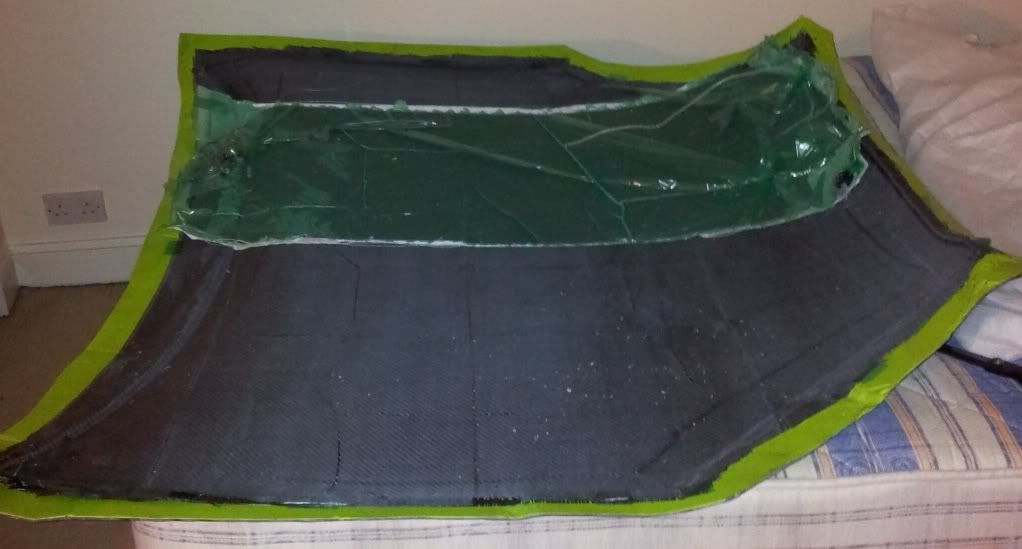
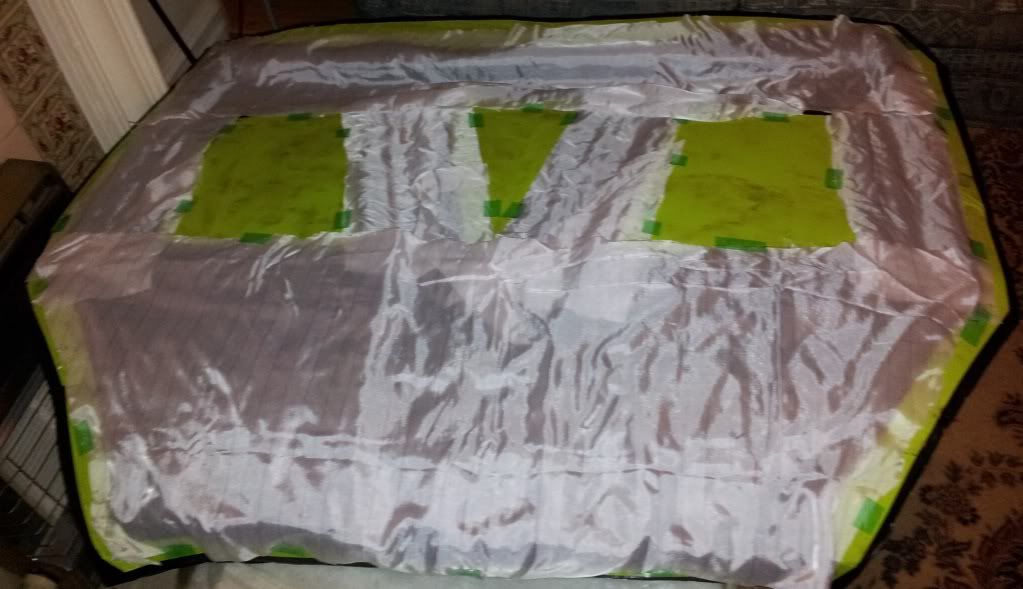
Bag it up and start to infuse:
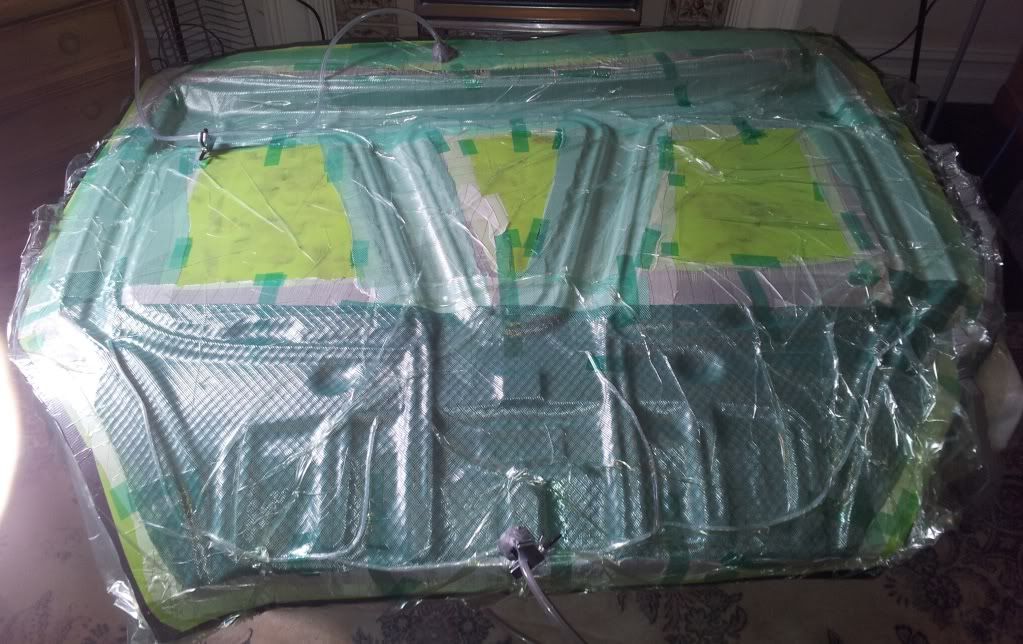
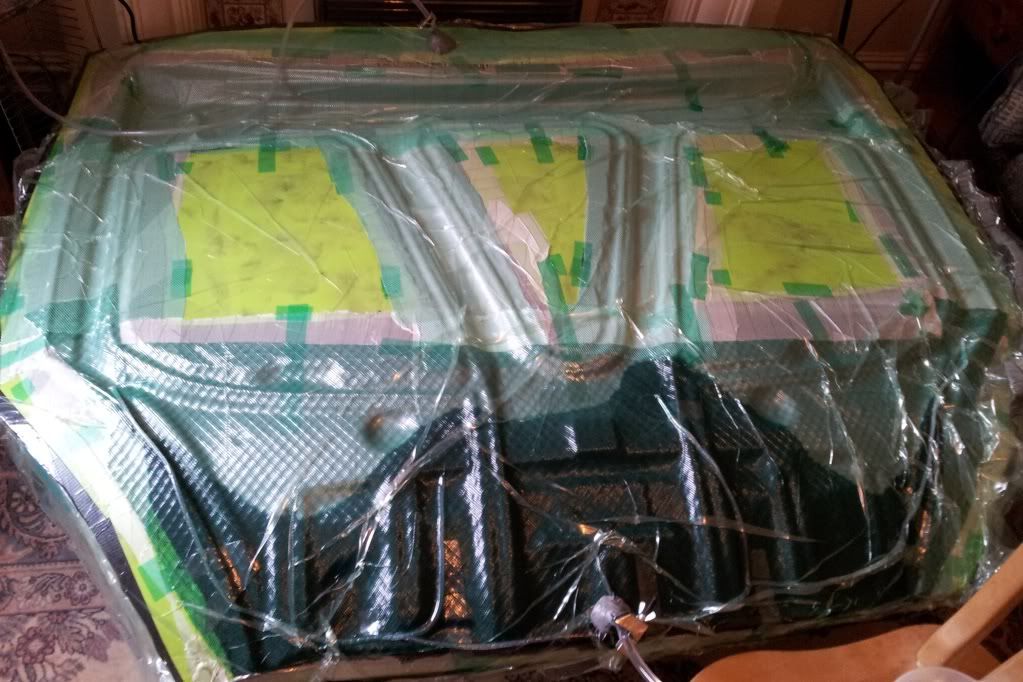
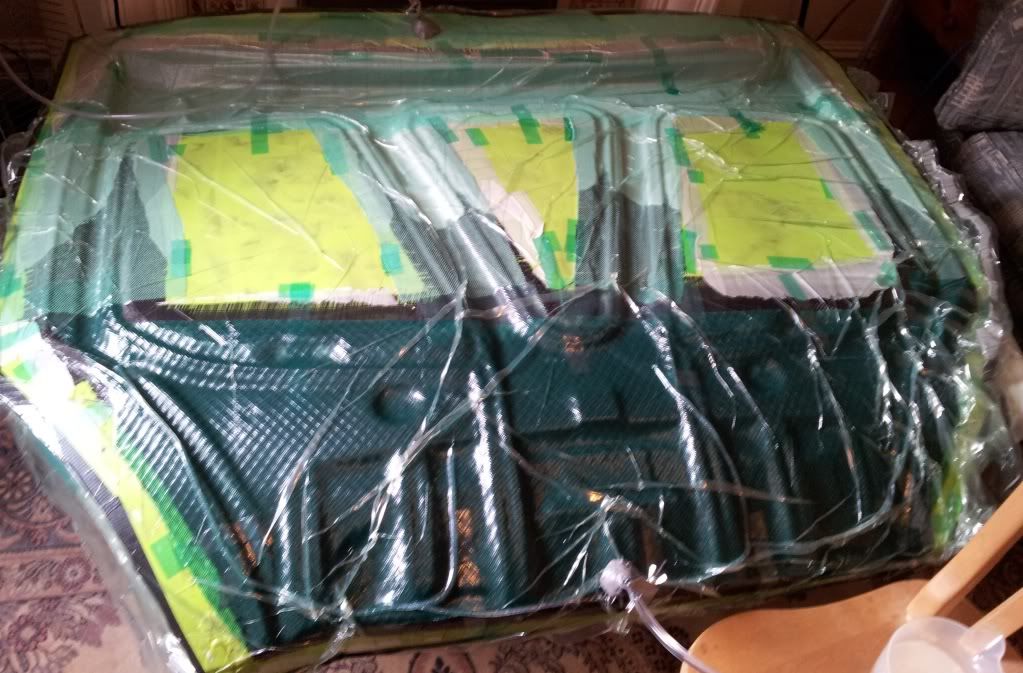
20120602_023335.jpg


all done:
20120602_124258.jpg


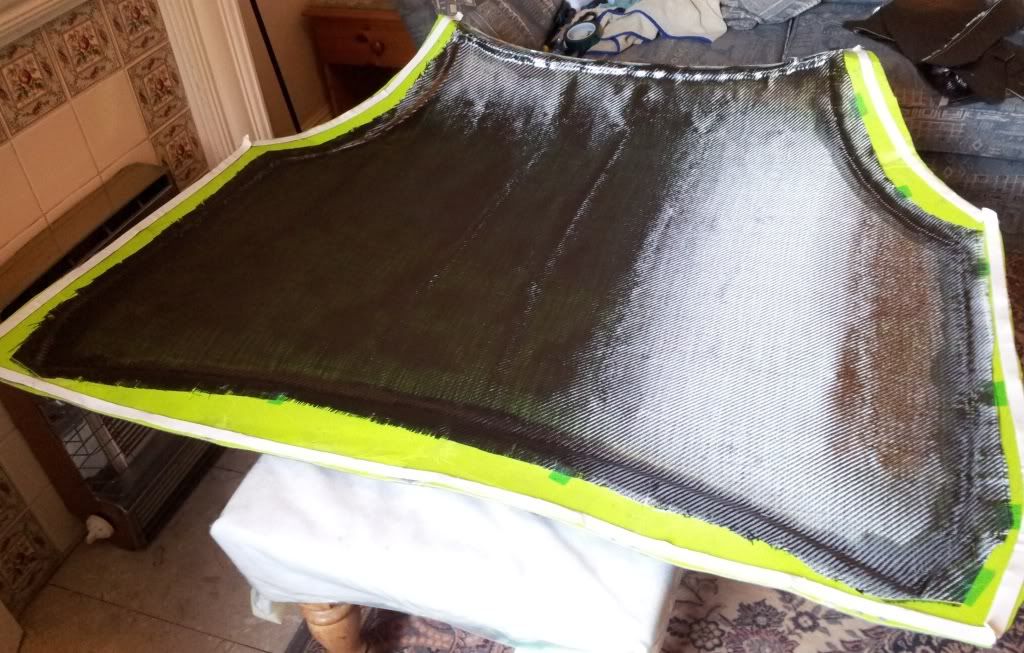
debag and take off the peel ply and mesh:
20120603_202819.jpg


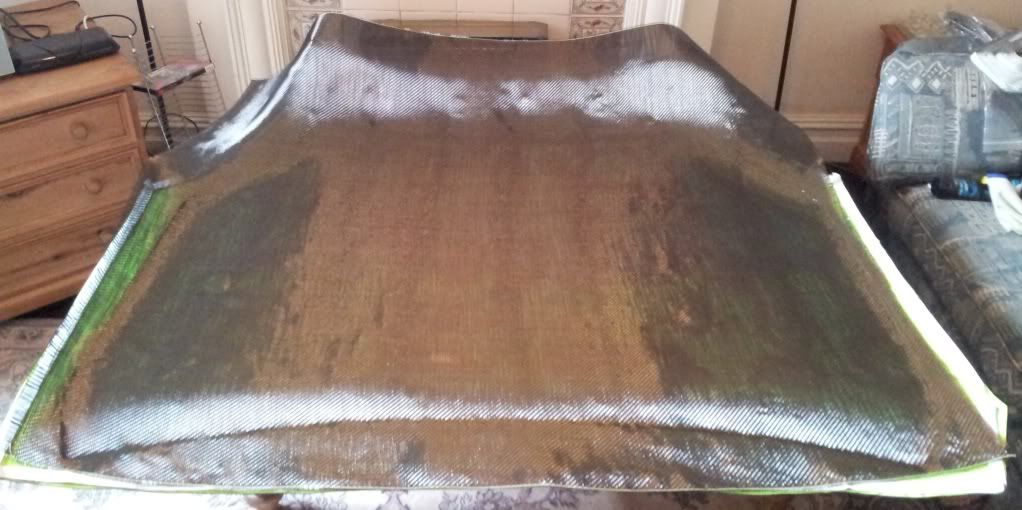
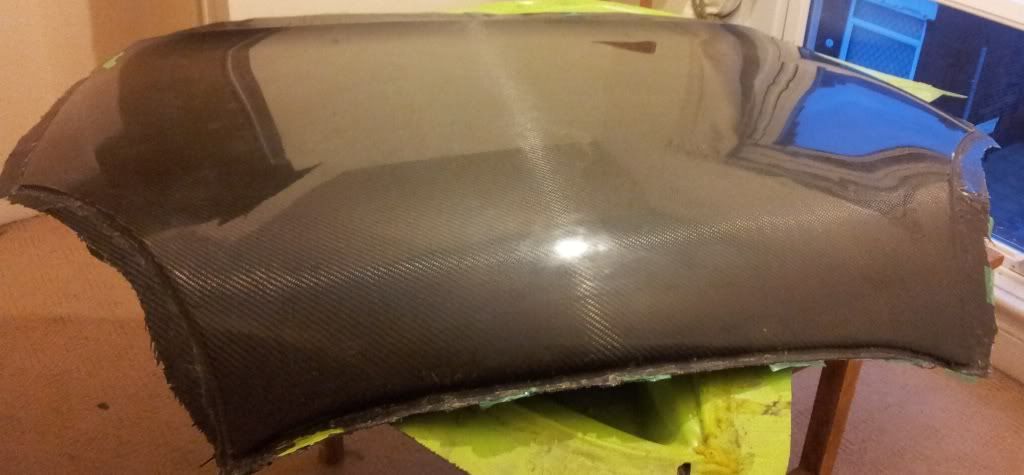
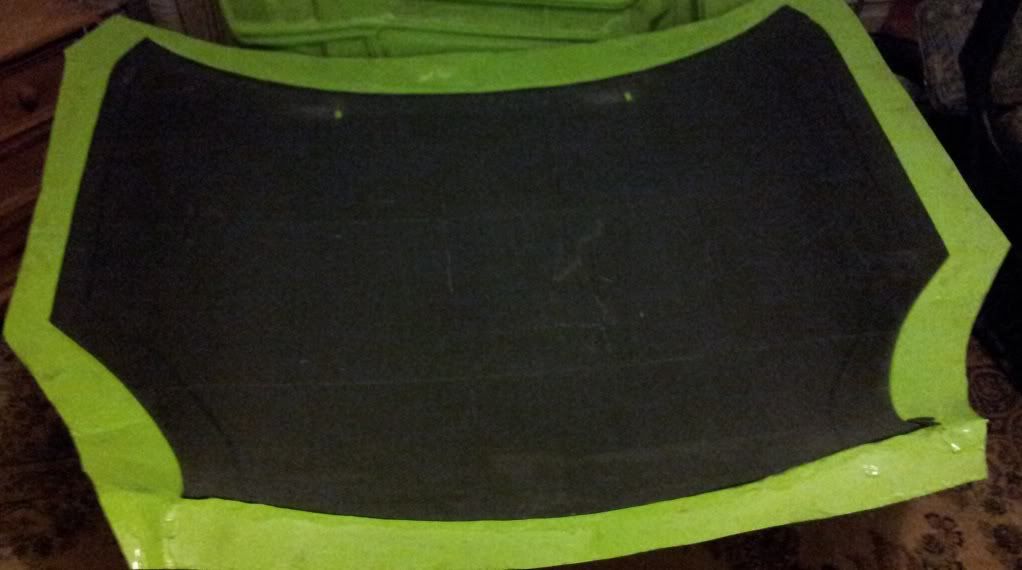
Pull it out the mould and see the finished top skin:
20120603_212601.jpg


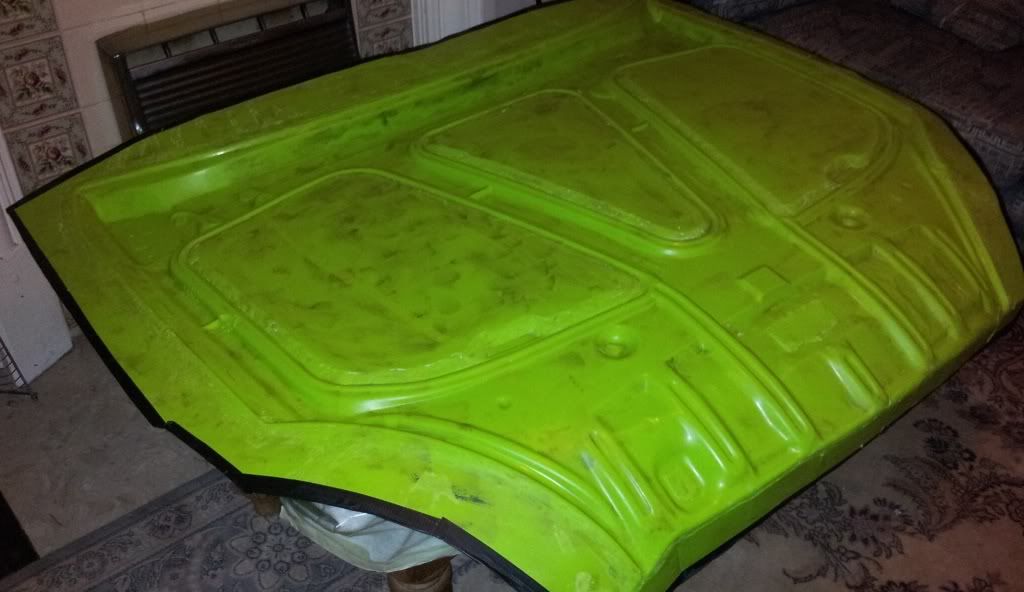
get your inner frame mould prepped:
20120622_015205.jpg


Lay in the carbon:
20120627_003511.jpg

added 2 layers of kevlar in and around the hinge area to prevent it coming to pieces in a crash

Add the peel ply, mesh and bag it up:
20120627_023527.jpg

20120627_070713.jpg


And infuse the part:
20120627_083316.jpg

20120627_083655.jpg


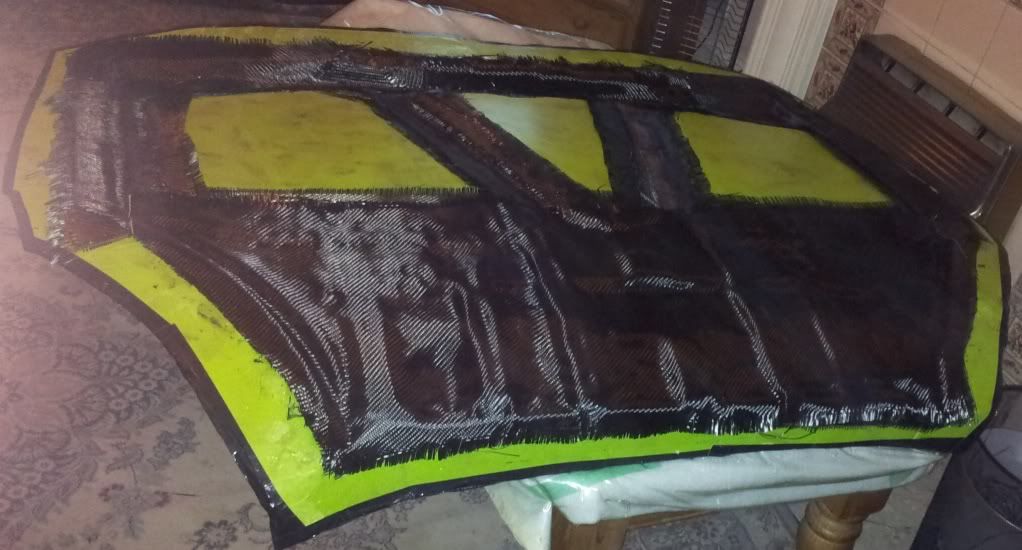
debag it and strip off the peel ply:
20120628_154548.jpg

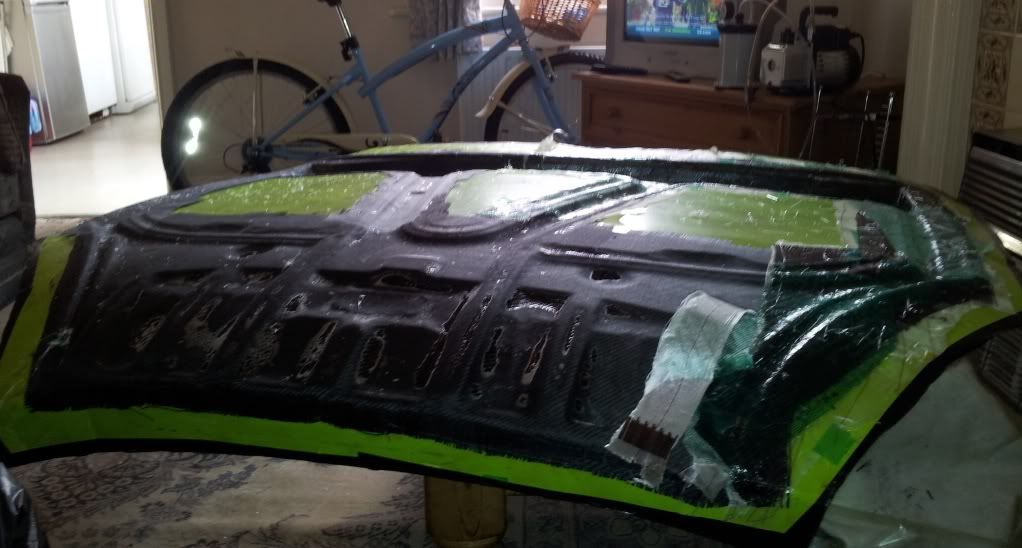
the frame popped out of the mould while tugging off the peel ply!

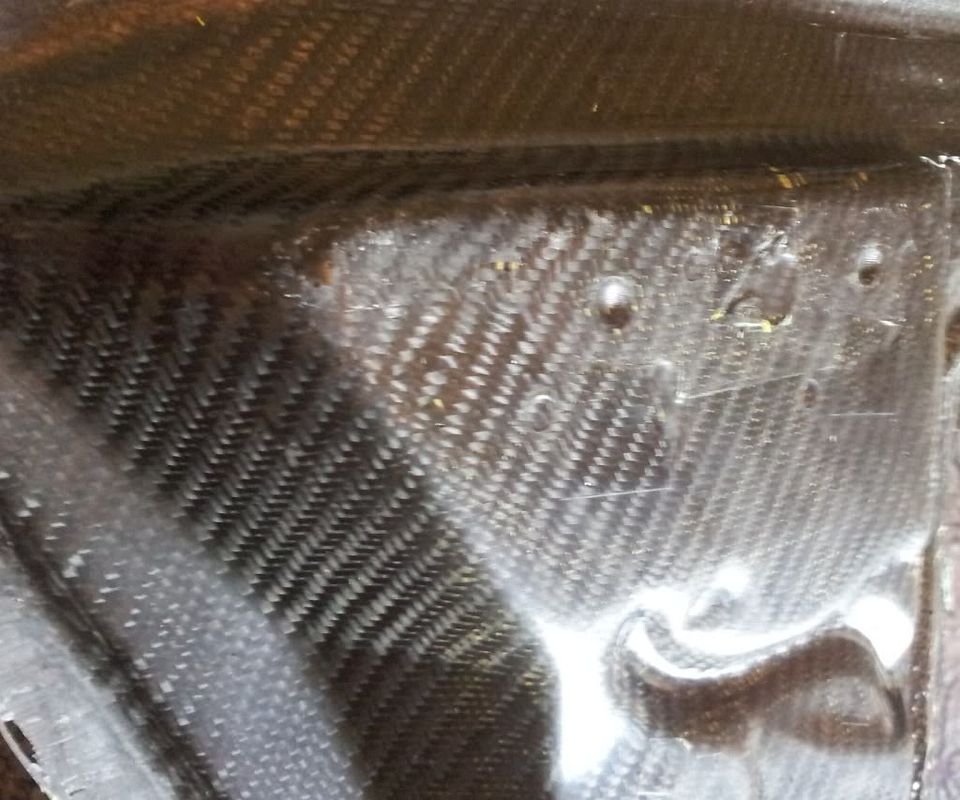
Detail in the hard to do corners came out good.
20120628_163106.jpg

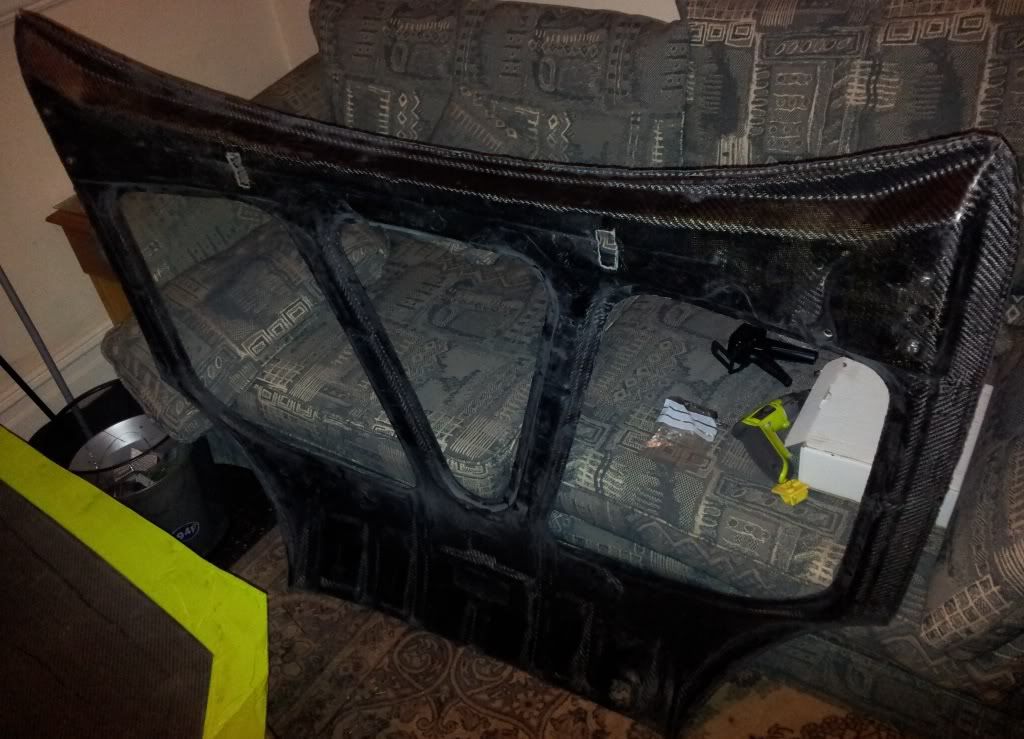
bonded in the captive nuts for the hinges.

Trim both parts and lay the top skin back in the mould:
20120629_013854.jpg

20120629_013829.jpg


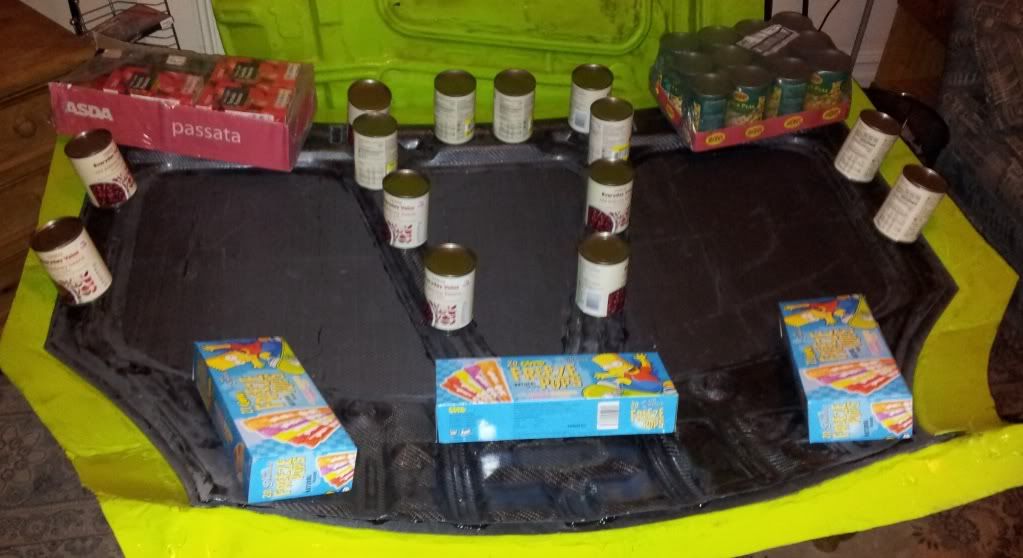
bond together the top part and inner frame using polyurethane adhesive, then use conveniently found weights from the kitchen to press the two parts together.
20120629_020924.jpg

Doing it in the top skin bonnet means the bonnet maintains the correct shape and you dont get any warping.

And the finished bonnet.
20120629_132639.jpg

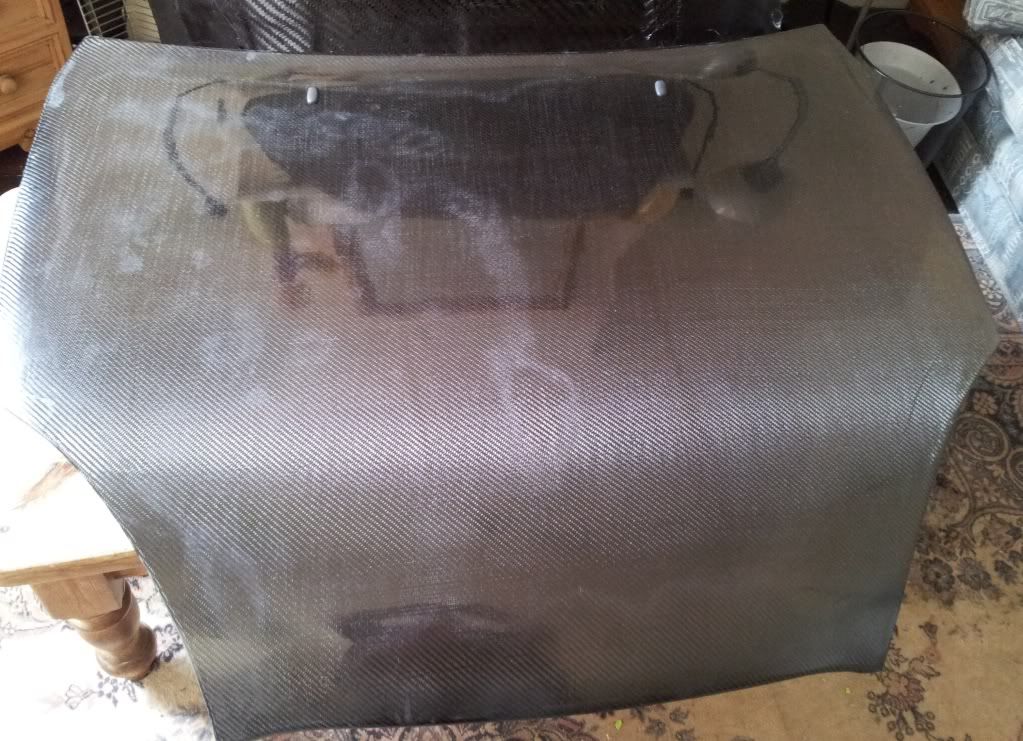
Preferably take photos where you wont get wierd reflections!!!

Final part came in at 4kg.
 
£380 of which £220 alone was the carbon fabric and £70 of which was resins.

moulds are made same as with any fibreglass or similar mould making. You need a tooling gelcoat for the smooth surface then back it up with fibreglass or similar as a reinforcement.
 
Looks the nuts mate, any chance of showing all the kit needed to do it e.g. pumps, and vacuums etc
would love to have a go at this, is there any cheap mcgiver diy setup that can be put together?
 
the only fancy kit is the vacuum pump. Its all in my other thread. The rest is just vacuum bagging materials.

You cant really do a mcgyver on it sadly. You might be lucky and pick up a cheap second hand pump but thats a risk and even the cheap chinese ones are risky and often dont hold a high enough vacuum for a good surface finish.

Its not worth saving money on cheap bagging materials either. if you buy a cheap bagging film and it bursts, then youve just ruined almost £300 worth of materials!!!

Even wetlay isnt that cheap either as it takes considerable amount of experience/skill to get a air free/pinhole free surface finish plus it produces heavier more resin rich componants.
 
Just did a bit of searching on the net and it would appear that a fridge compressor can be used, might give a call to my friend meady who I used to work with at hotpoint, he is a refrigeration specialist for them so should be able to get me a nice chunky compressor (if he does not think it will work then I will have to save up the pennies and do it properly lol)
where do you buy the bagging materials? have you got prices etc or a supplier website?
I'm going to search for your thread to see if the answers are already there, just being a bit lazy lol
 
Good work! Just out of interest, I have one of the performance trim carbon bonnets, the outer skin has started to craze and the inner frame has, cracked in a few places and has some of the resin has flakes off leaving the bare carbon exposed, can this be repaired? I think it's caused from the under bonnet temps
 
The first one wasnt for my car but for a race car, so you will have to wait until they fit it.

d170sam said:
Good work! Just out of interest, I have one of the performance trim carbon bonnets, the outer skin has started to craze and the inner frame has, cracked in a few places and has some of the resin has flakes off leaving the bare carbon exposed, can this be repaired? I think it's caused from the under bonnet temps

fallen off flakes can be filled in and sanded smooth again. Crazing will need sanding back and recoating to try and hide it.

If its over the exhaust area then id say its almost certainly heat related. Put some heat sheilding stuff on it. It might also be something to do with the cheaper resins they used.
 
Your thread makes it look so easy!! It took me weeks to get my bonnet to a decent finish, and it still has trapped air inside! Yours has come out the mould looking ready to fit!! Good write up.
 
PumaNoob said:
Your thread makes it look so easy!! It took me weeks to get my bonnet to a decent finish, and it still has trapped air inside! Yours has come out the mould looking ready to fit!! Good write up.
You used wetlay didnt you?? requires a lot of skill to avoid air bubbles/pin holes.

resin infusion is easier in that sense. All the work is in the preparation rather than the actual lay up.

rallycraig said:
Would you be interested in making a fibreglass bonnet and boot lid?
I dont even have a boot mould yet lol. what a bonnet would cost depends on how you want it, frame or just plain skin, how many layers etc.
 
Yeah, wet lay up. It certainly does take a lot of skill, that I apparently don't have!! :lol: the issues I found were :

Resin viscosity, it was too thick, so it was harder to get the bubbles out
Getting the fabric to stay inside the contours
Time: the bonnet is such a large surface area, to wet out 5 layers of fabric with such a large surface area, before the resin starts going off, is a task on its own. I had minimal time to wet it all out, try and keep the contours inside the mould, & remove as many air bubbles as possible.

Its certainly possible, but by someone with a hell of a lot more experience then I have.
 

Latest posts

Back
Top