Hi Sinisa
Not entirely but it's a lot better than what it was. I also have to be careful on full lock too as I have rubbing noises from the bigger tyres but I can live with that.
Hi Barry,
Got the tooling for the lambda sensor, used the ring spanner and my body weight to get it of, the soaking must have done the trick, did you have you use any special heat wrap on the wires, to protect them, ?
Hi Richard
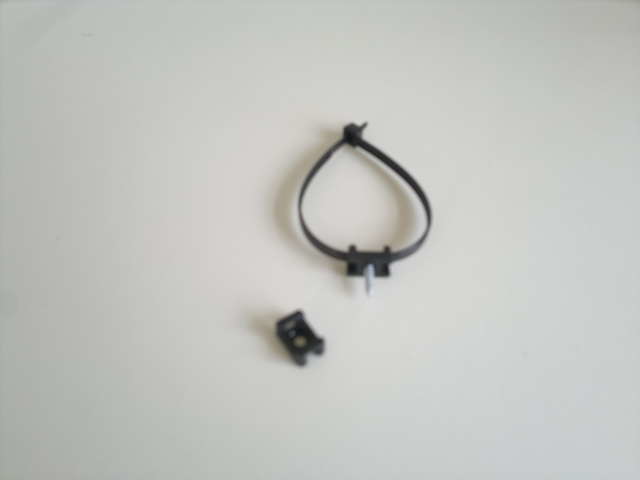
Glad to hear you cracked it . No I didn't use any heat proofing I just used split tubing and routed the cables well away from the exhaust. As there are no mounting points for the cables underneath I drilled the chassis rail and used a mounting that you can thread cable ties through so if I need to take off the lambdas I can just snip the ties and use another tie on re-assembly.
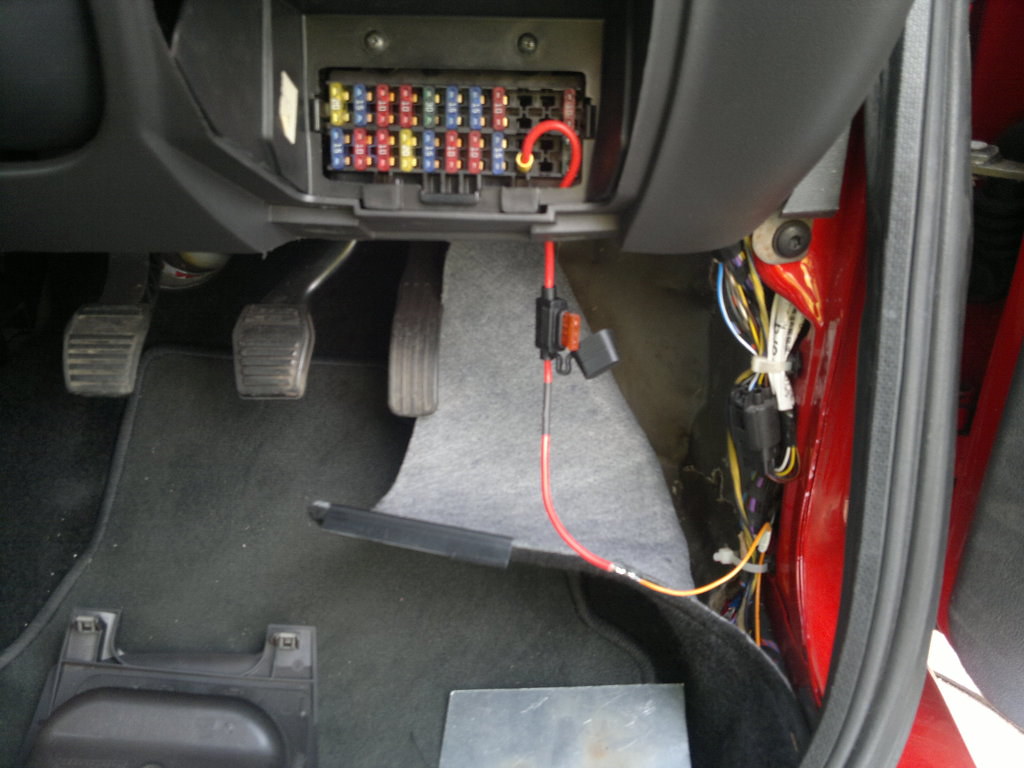
I finally managed to get the drivers electric Recaro seat working the other day and it was a lot easier than I thought. When I'd stripped the silver scrapper down I took the plugs and lead for the electric seat out of that and noticed that the live was fed from the cluster of permanently live red wires at the back of the fusebox. I thought that I might have to strip a wire to get a live feed but looking at my fuse box there was a spare single link within the fusebox so a single blade connector and a fused link later I had a live feed without butchering the harness....result.
Hi mate, just catching up, that's the manifold and inlet manifold done, still waiting for the welder to get back to me, however I'm going to start looking around for someone else, as I've done all I can for now. I'll keep you updated.
Hi Richard
I thought you would have had all the welding done by now but I'll say the same to you as I said before. If it's getting FRP rear wings get new sills fitted and there will be work needed on the inner sills that you just can't see until the old sills are cut off. Good luck with finding a good welder and get some photos up
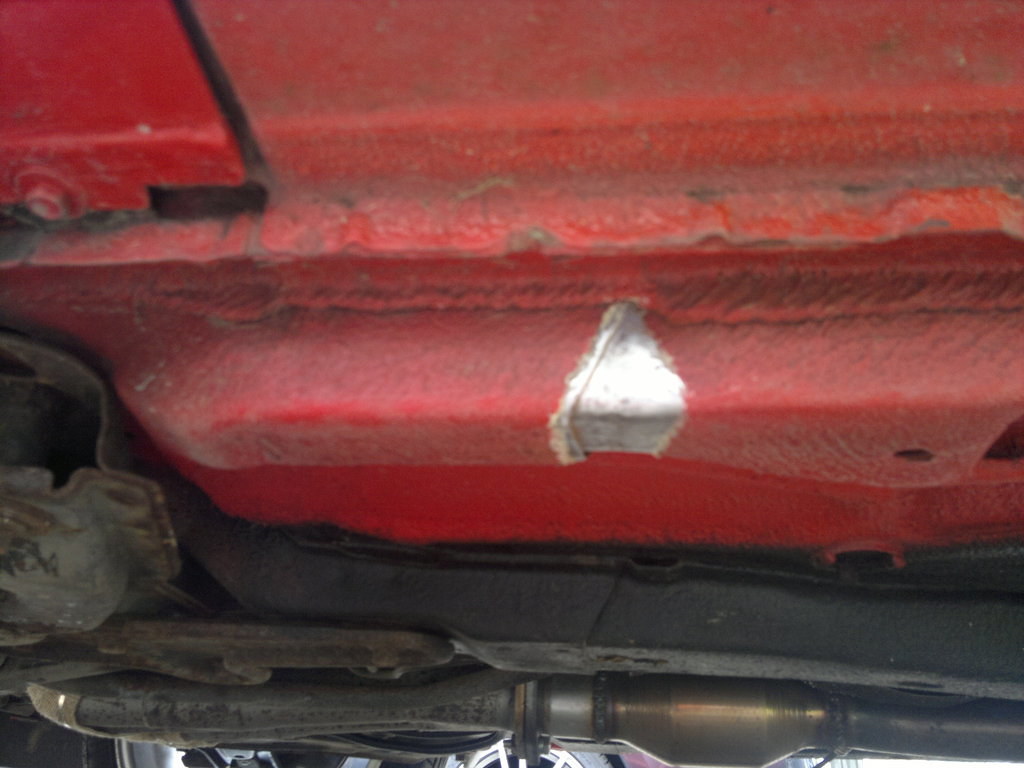
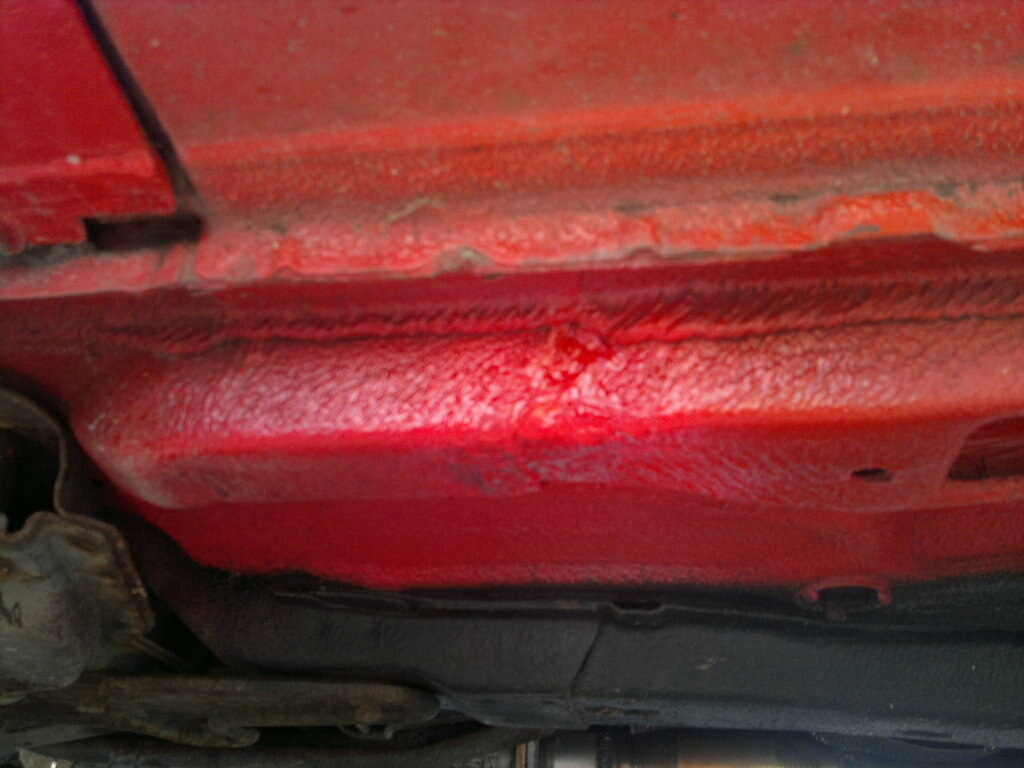
Well, not done much over the last three days as it's been too bloody hot but the other day I managed to clean up the area on the floor strengthener that I spotted about a month ago (the rubberised underseal had just cracked open to reveal rust).
It cleaned up a lot better than I thought it would as initially it looked like serious rot. I gave it the usual two coats of Jenolite as a test for rot and it ended up like this;
The black dots to be seen indicate the presence of rot and I think I could have ground them down more to get rid of the rot but the metal would have been too thin so I've ordered up a new Panel from Ford and done a repair which should last a couple of years. So that's 2 coats of etch primer, seam sealer, white primer and body colour to end up like this.
I have to use contact adhesive on it as the weather strip is so distorted out of shape anything that didn't stick straight away would have to be clamped along it's full length until the glue set.
Hi James
I did pass that info on to Rob but I'll refresh his memory tomorrow so thanks for that. As for the sealant, it's not rubberised and it's Wood Autos own brand but I can't tell you what it is as I've taped over it. I bought it for Andrews Ka to seal all the leaky joints but we didn't use it all but it goes off at the top of the tube so when I want to use it now I have to saw the top off and then tape it back up again. You're welcome to come through and take it home to use, just let me have what's left.
") . No I didn't use any heat proofing I just used split tubing and routed the cables well away from the exhaust. As there are no mounting points for the cables underneath I drilled the chassis rail and used a mounting that you can thread cable ties through so if I need to take off the lambdas I can just snip the ties and use another tie on re-assembly.
. No I didn't use any heat proofing I just used split tubing and routed the cables well away from the exhaust. As there are no mounting points for the cables underneath I drilled the chassis rail and used a mounting that you can thread cable ties through so if I need to take off the lambdas I can just snip the ties and use another tie on re-assembly.