My puma cossie - few bits and bobs. (Very picture heavy!)

ProjectPuma

Help Support ProjectPuma:

This site may earn a commission from merchant affiliate links, including eBay, Amazon, and others.
Warren you just keep doing so much to this cossie,atleast you got the mapping sorted out now, dont blow the gearbox during the leicester meet again :eek:k:
 
only a minor update really.

Been having a play with carbon fibre. Decided to make my own door handle inner surrounds in carbon.

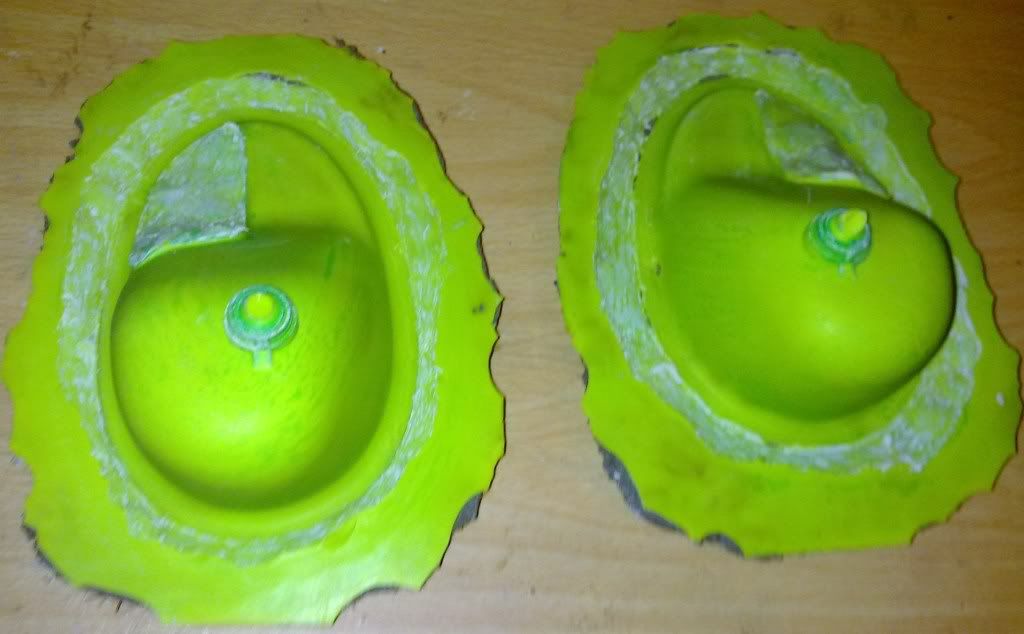
made moulds using original parts, gelcoat and mould putty (much easier and cleaner than fibreglass).
28012011328.jpg


you have to polish up the moulds then give them a good wax and a coat of PVA release agent.
02022011343.jpg

the slight bluey shine is the PVA.

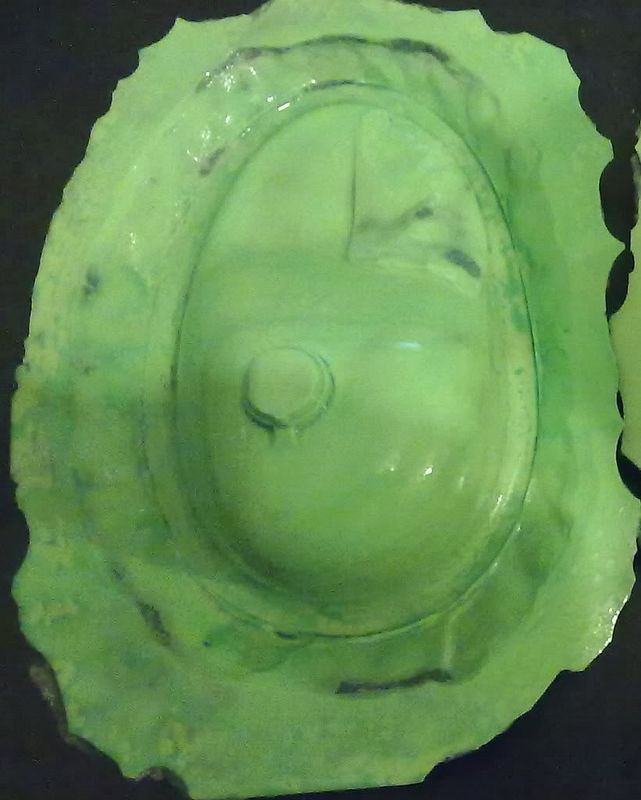
then its lay the clear gelcoat, let it go tacky and then the all important visible layer of carbon:
01022011335.jpg

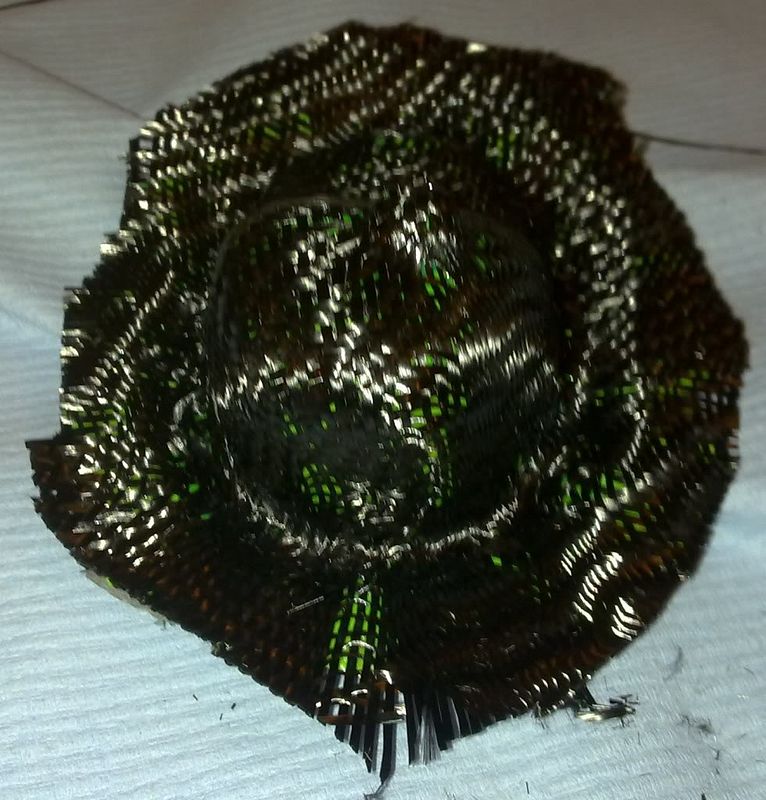
you can see how the weave is easily distorted. Considering its my first ever go, maybe i should have chosen a nice easy shape but we like a challenge!! doesnt look too bad so far.

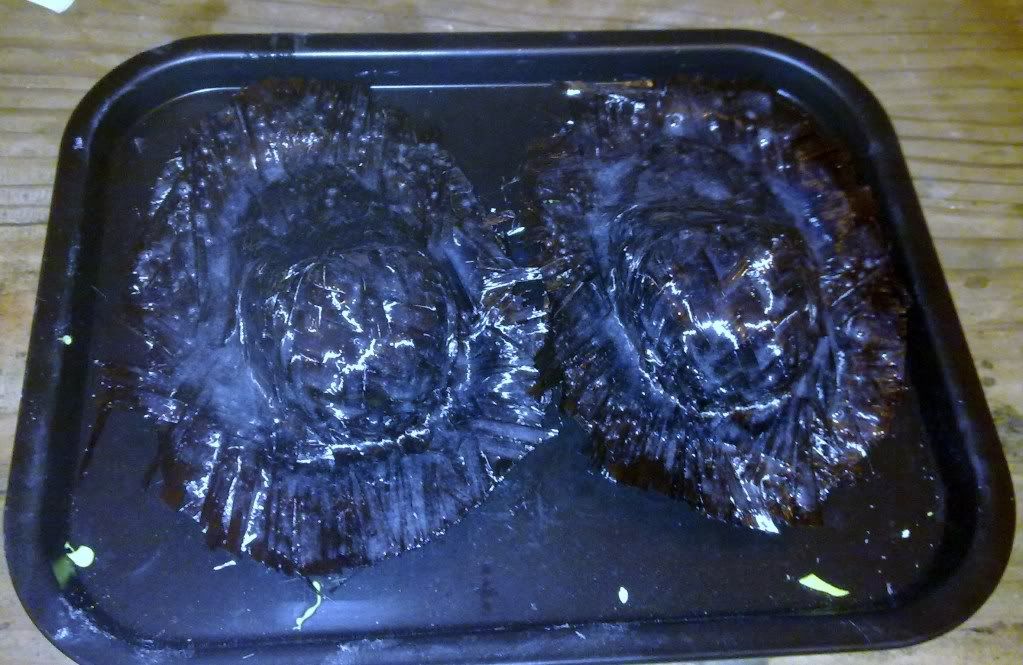
The extra layers are added wetting out each layer with resin:
01022011338.jpg

used a bit too much resin on the final layer. least you can sand it off!! you can see its too much as its slightly milky where too thick.

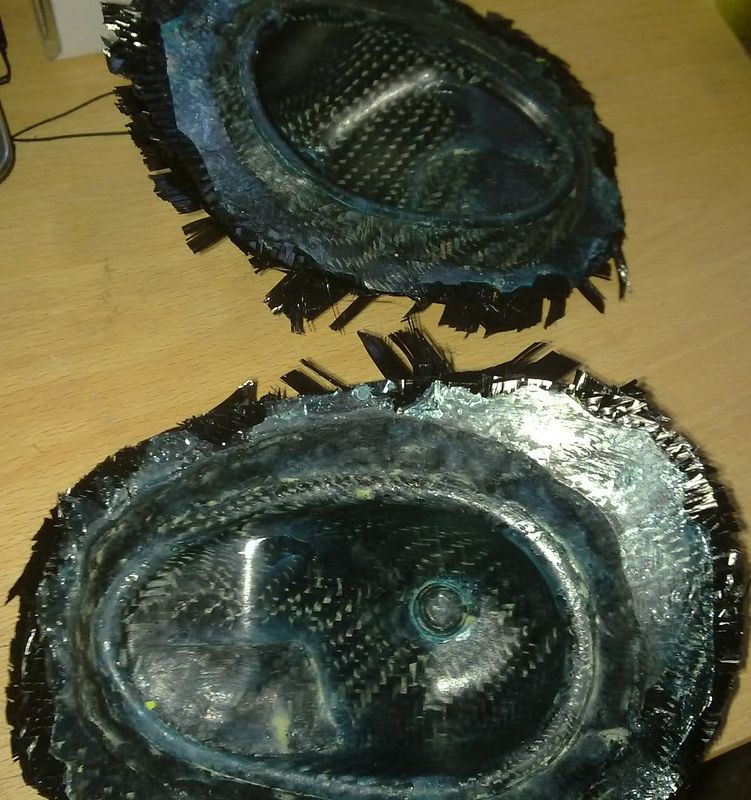
and after 24 hours setting i demoulded the part:
01022011339.jpg


fresh out the mould and still covered in PVA and wax and im quite impressed with the finish. few bubbles and voids around the edges but to be honest thats not surprising considering the moulds complexity. Just needs trimming and polishing up and all good to go!!

quite pleased for a first attempt!
 
Well ive decided to invest a bit further in carbon fibre equipment.

Ive bought some bits so i can do vacuum resin infusion.

Got the most important bit, the pump:
19022011382.jpg


resin catch pot and vacuum guage:
19022011380.jpg


tons of bagging stack consumables such as films, infusion mesh, tubes, sealing gum etc:
19022011381.jpg


Got plenty of carbon in stock. I intend to be using the cosmetic fancy 2x2 3k twill everyone likes only for the outer visible layer of parts with 12k 2x2 twill for the rest of the layers with kevlar as needed.

resin infusion is so much better than wetlay. no resin rich parts and much easier to get a good surface finish. Also the real reason is well done infused parts are only 20% heavier than pre-preg and 80% strength of pre-preg yet less than 1/3rd the cost and still several times stronger than the original metal panel. Certainly the best value way to do carbon parts.
 
My plan for the time being is to get extra bhp/ton by weight saving. So long term i will be stripping the interior out but for now im going to start by learning to fabricate lighter panels out of carbon fibre composites. My current panels are made of fibreglass reinforced with kevlar and are thick and heavy.

Luckily some parts i can get off the shelf and are cheaper to buy than make my own moulds etc but anything else i will make myself.

These are some weights from carbon panels people have done before so i know roughly how much i will save:

Part original weight carbon weight
bonnet 26kg 6kg
fr. bumper 10kg 2kg plus 1kg splitter
wings (ea.) 9kg 2.5kg
doors (ea.) 36kg 6kg with plastic window 13kg with electric window
roof 21kg 4kg
rear qtr (ea.) 11kg 3kg
tailgate 48kg 10kg with plastic window
rr bumper 10kg 4kg with diffuser set up

So thats saving 163kg and that's just the core exterior panels. There is loads of inner wing panels etc that can be cut out plus the weight saving from stripping interior. Various plastic trim panels can be remade in carbon too.

weight savings from stripping interior:

Front seats 20 based on lightweight replacements
Rear seats 10
Carpet 3
Headlining & spare wheel hanger 5.5
Parcel shelf & mats 4
Boot lining 2.5
Interior trim (various) 13.4
Front door cards 4 based on refitting carbon ones
Soft sound deadening (under carpets) 10.7
Rear quarter trims 4 based on refitting carbon ones
stereo, speakers and wiring 8.4 based on refitting intercom/headsets
Speaker boxes 2.5
Airbag module and harness 1.7
Self adhesive sound deadening 10.5
total 100kg

So thats a total of 263kg off the shell and that doesnt include various metal brakets and any further metal i cut off the shell.

Im planning from trimming metal off the shell to make fitting of a roll cage weight neutral.

so considering it weighs 1250kg now then i could get it just under a ton which would be nice. Long term i could go nuts and replace floors with alloy etc but no need at the moment. 380bhp per ton would make it a nice rapid car i reckon!!
 
If you can manufacture carbon fibre panels to a good standard, it might be worth selling some to recover cost of moulds and time. I for one would definately be interested in FRP Carbon front wings, and a bonnet, even just a bare skin that would need pins, as long as it dont flap about when your driving along the motorway! 380 per tonne would be great, 1250kg suprises me, as the 4 wheel drive system normally weighs a lot, and that cosworth engine isnt light!!
 
If you want to recover the some costs immediately I'll take some of those carbon handle inserts 
 
lol wait up on prices!! not made many puma specific parts just yet. Wont be making anything for sale until the summer. just dont have time.

Remember my arches and bumpers are S1600 so wider than FRP, so i wont be making FRP body panels unless someone paid for the moulds.

Speedfreak, 1250kg is about right when you consider an FRP is 1172kg.
 
iv gotta start weighing my 4wd bits...! reckon the back end wont add much weight at all considering im dumping the steel rear arm :)
so fingers crossed just propshaft and transfer box

really want frp carbon bumpers now iv seen the savings your gonna make on the s1600 parts...

nearly finished my carbon waterbottle....not pretty but iv learnt a lot about making moulds!
will be passing by you about 3ish 2mrw if your in?
 
its in the oven as we speak, not finished (or very pretty!)....if its dry i will bring it!!
 
first of all a small update on the car!

started having a wierd intermittant water leak a few weeks ago that gradually turned into a torrent!!

Finally traced it to a hose leaking. Its the water pump feed hose and surprise surprise its the only water hose on the car that isnt already silicone or aeroquiped.... further inspection shows that its the hardest water hose to change on cossie engines so i can see that as a bodge when a hose kit was fitted (which would have included the water pump hose.....) the builder decided he couldnt be bothered to do it properly and hence the old hose was left and bodged together to the braided hose on a joiner.

So yet another bodge on the car....

So ordered up a new silicone hose to replace it and had it fitted at a marks garage so big thanks to him. Nice and oily under a cosworth!! perfectly normal on most of them LOL
2011-07-16155528.jpg


old hose off and now you can see where it burst:
2011-07-27171952.jpg


The original hose was both too big and ancient and basically weak and disintegrating.
 
I have enjoyed reading your articles. It is well written. It looks like you spend a large amount of time and effort in writing the blog. I am appreciating your effort. .

interesting blog. It would be great if you can provide more details about it.

I actually enjoyed reading through this posting. Many thanks.
 
Back
Top