Restoration of FRP 477

ProjectPuma

Help Support ProjectPuma:

This site may earn a commission from merchant affiliate links, including eBay, Amazon, and others.
Ian G said:
If the pump still runs unplug the fuel cut off in the passenger footwell and put 12v to the middle pin, and run a pipe from the white plug on the fuel rail.

Hi Ian, is this with the ignition on or off??
 
Wild E. Coyote said:
If you put the 12V to the middle pin, it will start the pump the moment you give it 12V as it is direct voltage. So no ignition is needed

Awesome, many Christmas thanks Wild E!!
 
Yeah no ig. needed. Only just see that ABS sensor picture - can't see that being a Tickford job as the Escort rear ABS looms won't have been rare in 2000 as they are now.

Did do a bit of research on that to see if I could get them salvage but they are literally on a small number of the later Escorts so that's not looking promising.

Next job is to find any other applications with a straight connector and longer wire as that seems to be the only discriminating factor on the 96/97/98 age sensor looms so there might still be hope yet for OE parts that aren't hundreds of pounds.
 
Ian G said:
Yeah no ig. needed. Only just see that ABS sensor picture - can't see that being a Tickford job as the Escort rear ABS looms won't have been rare in 2000 as they are now.

Did do a bit of research on that to see if I could get them salvage but they are literally on a small number of the later Escorts so that's not looking promising.

Next job is to find any other applications with a straight connector and longer wire as that seems to be the only discriminating factor on the 96/97/98 age sensor looms so there might still be hope yet for OE parts that aren't hundreds of pounds.

Cheers Ian, star man. Is the Escort loom FINIS 1011582?
 
tuonokid said:
Hi James
If you can't get O/E Ford Intermotor 60020 is the part you want.
Barry

Awesome! Thanks Barry!
 
Wild E. Coyote said:
If they get stuck (i.e. welded by the rust) I made a small tool to push them out slowly. Works every time, never damaged a single one!

Having changed the sensor on my other standard Puma I kinda wish you'd have been a little closer! They were well and truly rusted in. I tried to fabricate a little wind up press for that one and it worked a treat on one side, not so much the other. I nearly fell over when the FRP ones literally fell out with a stab of the finger!
 
XAF said:
Cheers Paul. Yeah, on reflection you and Wild E are probably right, there are defo some 'interesting' modifications that Tickfords did, but this is just too much of a hatchet job!!

that's definitely the wrong loom.... someone else has tried to make the standard puma one fit

I doubt it will work without 'ticking' like the clappers if you try and re-fit it...

:cool:
 
Pushed mine out with a socket of the same diameter and very small hammer, how's the back moving along, just started simpler on 483, corrosion doesn't look as bad through. Petrol tank just finished, small amount of rust around the tank filler neck which I sand blasted of then it was subject to 5 coats of ZG 90 cold zink paint, the only issue I have up to yet is with the second to last section of heat shield. Tried to get one from ford but I'm too late no more left, so I'm resigned to the scrap yard search
 
Frp483 said:
[post]346254[/post] Pushed mine out with a socket of the same diameter and very small hammer, how's the back moving along, just started simpler on 483, corrosion doesn't look as bad through. Petrol tank just finished, small amount of rust around the tank filler neck which I sand blasted of then it was subject to 5 coats of ZG 90 cold zink paint, the only issue I have up to yet is with the second to last section of heat shield. Tried to get one from ford but I'm too late no more left, so I'm resigned to the scrap yard search

Well progress has been made, not all good! Updates to be posted soon......

As for the heat shield, the one over the crossmember? Yep, I'm told I got the last one. I've got a new clip if you find a shield though if you need one
 
So hello, it's been a while!! Turns out time is moving on and I've not done an awful lot. I have a deadline, it must be ready for June 25th for my wedding day. Our cake even has an FRP on the top, although I suspect that will be more solid than #477....

So, where are we at, well, all the suspension, brake lines, shields, tank etc are off and it's ready to be cleaned up. Despite getting good advice from many on here, I still managed to break the fuel line getting the tank out. Bugger.

I've decided to get the bottom soda blasted to do it properly, as well as saving a load of time on my back. It's probably a good job too as it's not at all pretty under there.


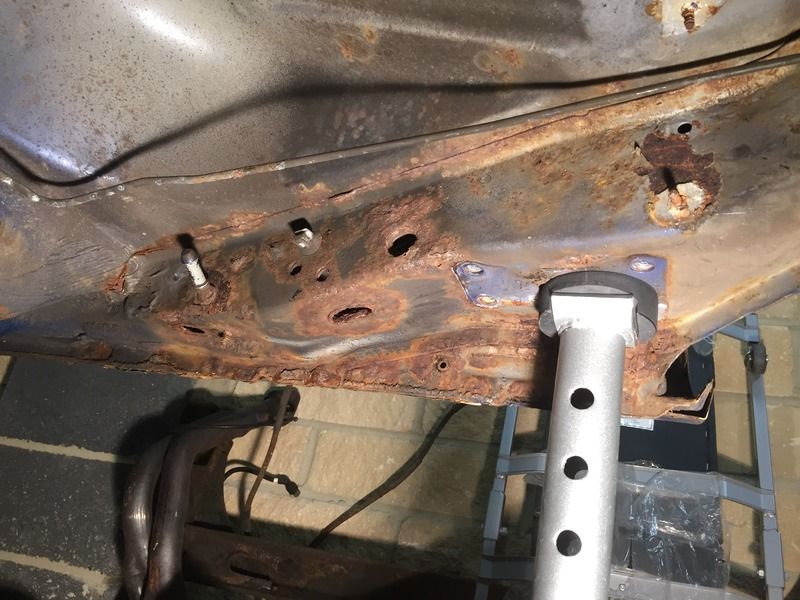
No holes on the floor, it just needs de-rusting and painting up, the drivers side quarter and sill, however, that's a different matter.


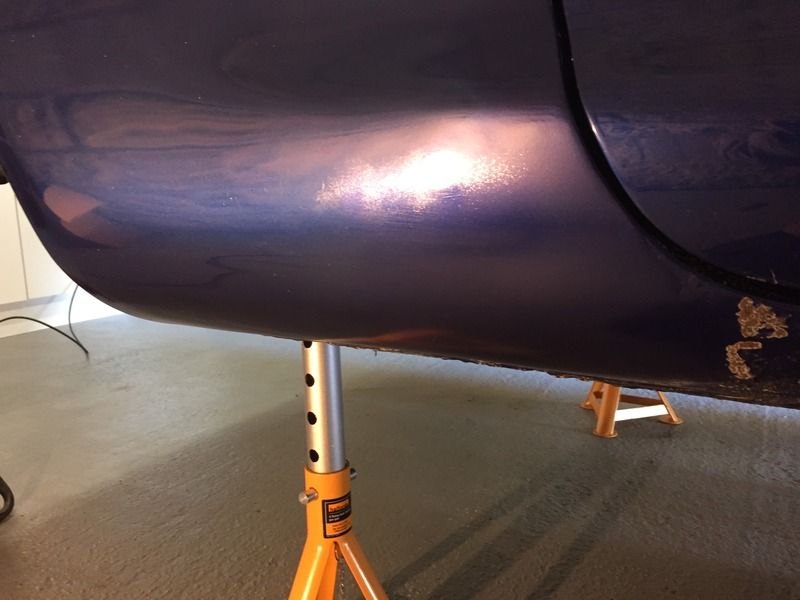
So, time to mask up and get cutting... This is before....


During...


After...


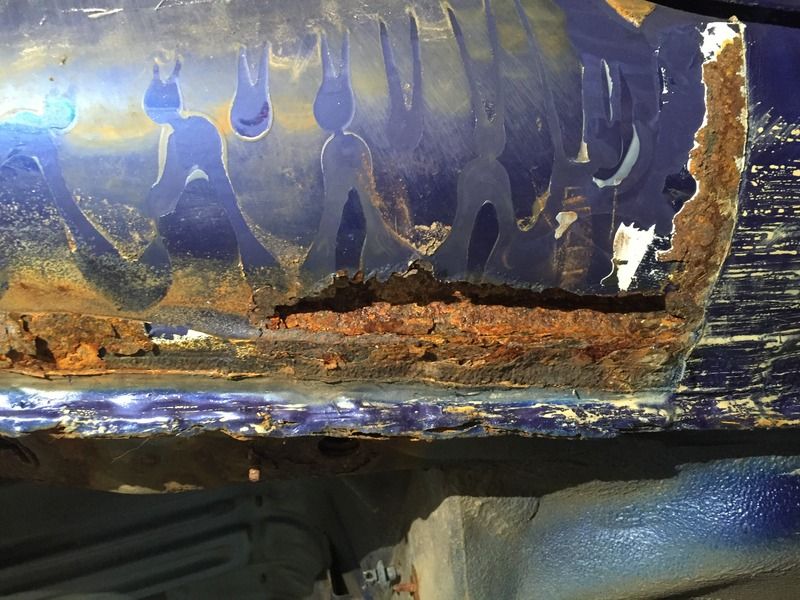
You've got to love the fine tolerances that Tickford worked to in massaging the original quarter... i.e. a big chuff off hammer. I'm almost not sure I want to put of the new Ex-pressed Steel sills on as if you're going to have to bash hell out of it to match the original it's a bit of a waste.

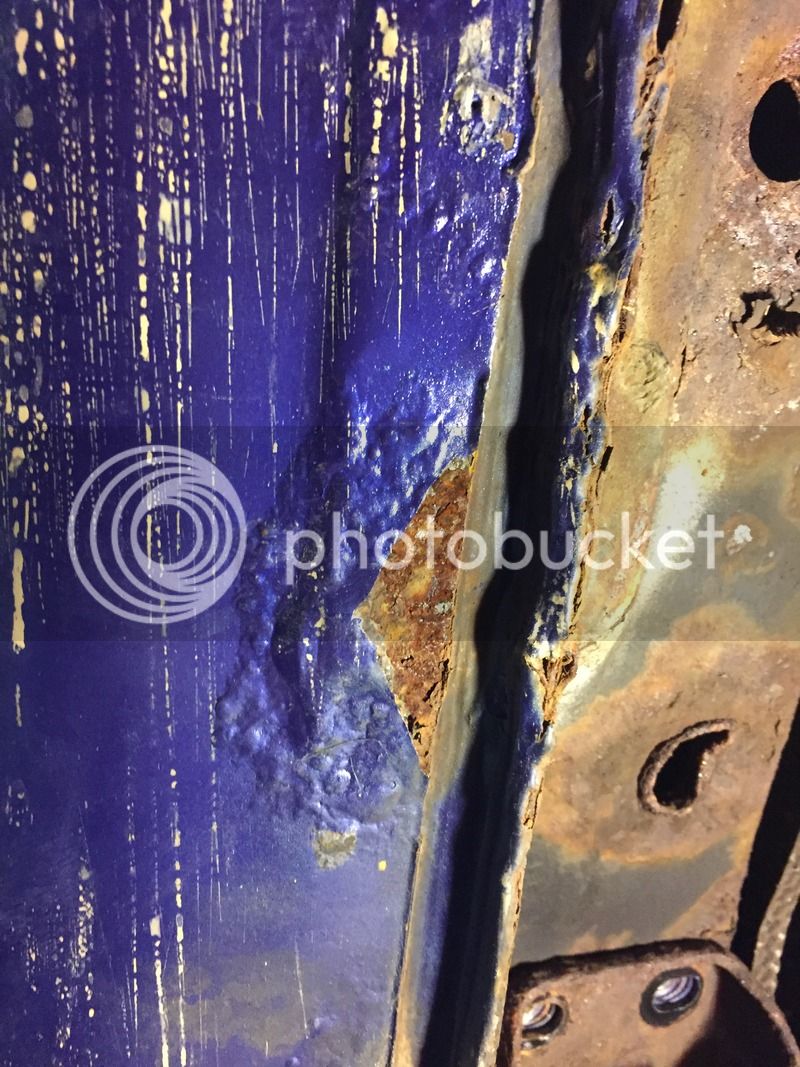
So, very little poking later we have this:


Looks bad, and is quite. The inner sill has gone too. Barry came round and suggested that instead of getting my Platinum sound system wired up I should maybe take the speaker box out and see what the inner was like. Not there was the answer as I guess the brown dust isn't a factory finish. By some miracle, however, you can still get them from Ford, so here you go:


Much better than trying to replicate the old panel as if it's as crusty as it looks and feels from above it will be a nightmare.

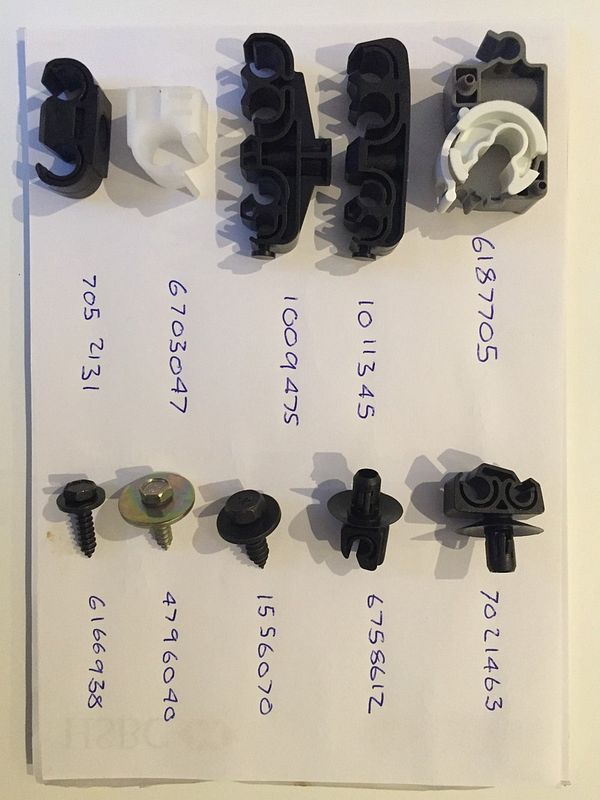
As part of my on going condition to spend the same as my mortgage each month on parts, I also spent a small fortune on clips for the underside. If you ever need to know the FINIS for clips, here you go:


So there we are, not a lot further forward but lots of work to do. Next step is to cut off the old sill to expose the inner sill, then put a slave axle on and get it down to the soda blasters. It's going to be etch primed at the same time so when it comes back at least I can crack on making it pretty and repairing the sill.
 
tuonokid said:
[post]347722[/post] Hi James
Have you contacted Ed to replicate the bottom of the panel?
Barry

Not yet Barry, I think the lower quarter may actually be saveable rather then create a new one. May give him the new quarter as reference and ask him to repair the old instead.
 
Bloomin' eck!
You have your work cut out there mate (pun intended) :)
Having that deadline could be a bit ambitious too. When you've got it stripped back as far as that you really need to be sure you do the job properly and not be tempted to rush it. It just goes to show you never really know what's lurking underneath.When I saw it, it didn't really look that bad.
The thing is, most of them are probably like this unless they have been regularly garaged and not driven in the rain.
And yours is a fairly low mileage one :?
Good luck with it.You have my respect.
Paul
 
748 said:
[post]347736[/post] Bloomin' eck, when I saw it, it didn't really look that bad, and yours is a fairly low mileage one

Tell me about it. My bodyshop man is coming out next week to have a look at the other stuff and if it's really horrible when I get the outer off I'll be getting them to do it!
 
Back
Top