I have replaced the alternator. I got one for a good price from EuroCarParts (RTX Alternator, Part No.: 401680802). They have a 25% off at the moment so about £55, bargain. I fitted it this morning which went pretty smoothly despite the lack of any manual. Didn't see any strange behaviour on a short drive afterwards in which I pushed the revs and had the fan on 4 and lights on.
I thought I would write a quick guide to the alternator change. This is what I did which worked for me, not necessarily how you should do it. This is for my 1.7 1999 Puma.
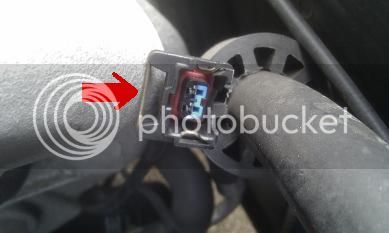
First off I removed the positive lead from the battery. Then I removed the positive lead from the alternator and the two wire connector as well (this required pushing the small wire clip in towards the connector housing, then comes off very easily (don't pull wire)).
Photo showing removed two-wire connector with retaining clip labelled:
Three bolts mount the alternator onto the engine block (two 15mm and one 13mm). The easiest one to access is at the very top and was loosened first but removed last. Next to loosen came the 10mm bolt which goes into a hole on the front of the alternator. It was tricky to reach but ok using a ratchet and extension. Then I loosened the other 13mm bolt that is at the bottom of the alternator using a ratchet (limited space for motion).
I removed the two harder to reach bolts by hand as then I was sure that I would be able to engage the bolts by hand when installing the new alternator.
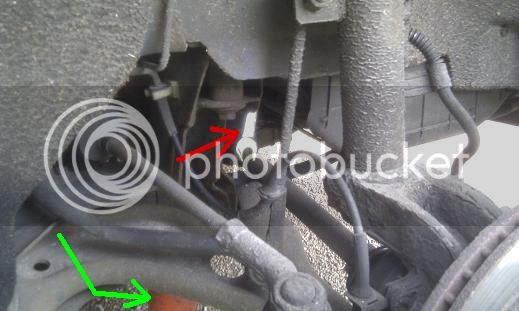
Next came the fun part. I couldn't find a diagram of the alternator/auxiliary pulley arrangement on Google, but could work out that it should have a tensioner. I figured it had to be the lower rear pulley on the basis of the fact that it had a bolt-head to engage on to loosen the belt tension. Access was a problem so I jacked up the front (nsf) and removed the wheel. This gave access for a 13mm ring spanner. Turning this anticlockwise loosened the belt and allowed it to be taken off the alternator pulley. The tensioner spring then held the spanner against the side of the hole I used for access which helped hold it on and avoid the tensioner having to be adjusted. I guess it is essential to not lose the tensioner at this point hence the importance of using a ring spanner.
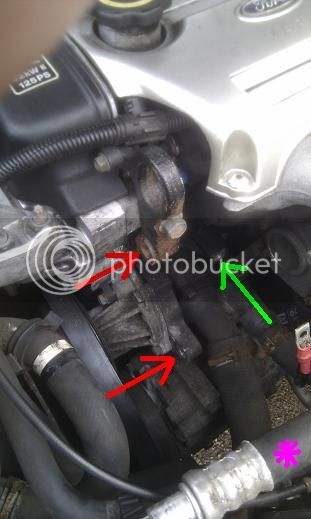
Photo showing the spanner on the belt tensioner pulley accessed through wheel arch (notice precautionary axle stand just incase, green arrow):
Removing the the three bolts didn't free the alternator as there are metal bushes that were gripping the mount at the top. I used a lever to gently loosen that and off it came.
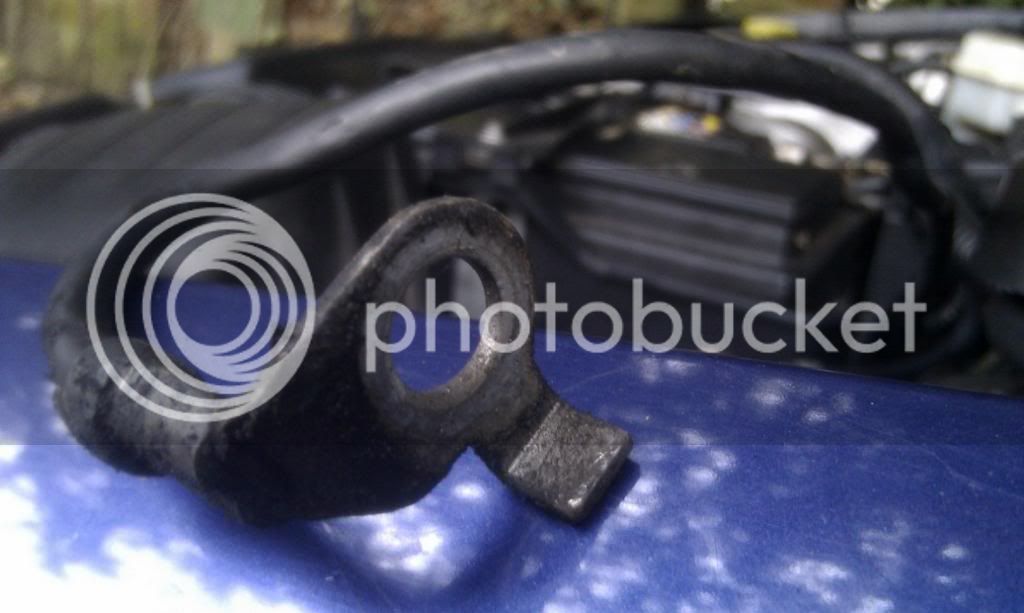
Photo showing alternator removed (15mm bolt positions shown by red arrows, 13mm by green):
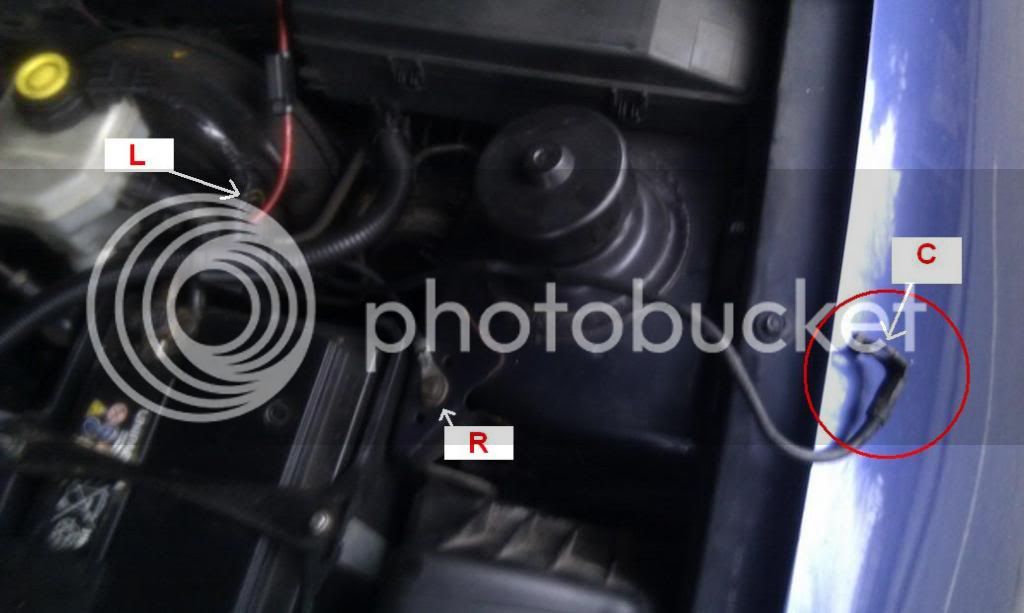
New alternator in, bolts finger tight and then belt back on by turning tensioner nut anticlockwise and slipping belt over the alternator pulley. Checked it was properly on each pulley I could see. I then ratchet tightened each bolt, starting with the front 13mm. Final tighten with tension taken off the belt. For the front 13mm bolt, the ratchet extension I was using resulted in it being easiest to feed the ratchet between the hose and front bulkhead whilst holding the socket and extension onto the bolt (hand passed through next to radiator).
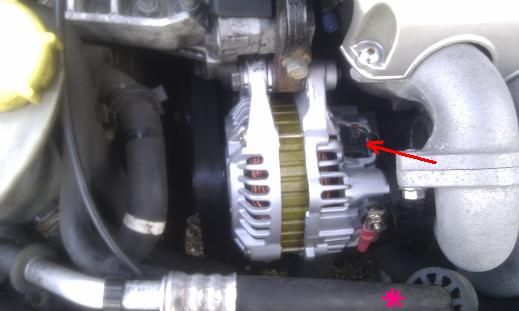
Photo showing new alternator in (red arrow pointing at two-wire connector clip, pink star showing hose in 13mm bolt comments):
Two-wire connector pushed on easily. Reattached the positive alternator lead and then the positive battery lead. Replaced the front wheel, not forgetting to remove the tensioner spanner, and job done.
Having done it once, I would now say it is a pretty straightforward job. Help was very useful when taking the tension off the belt and feeding it onto the puylley, but that is the only two person bit (other than good conversation and morale). The only difficulty is access. I needed to use a breaker bar on the lower 15mm bolt as it was so stiff but otherwise all good. The main way you could go wrong is by losing control of the tensioner or forgetting to remove that spanner when done. Very important to disconnect the battery positive lead (at the battery)!