- Joined
- Oct 3, 2007
- Messages
- 14,816
As you can never have too many photos, I thought I'd add a few as I've just replaced one.
Symptoms:
If your heating is stick on either hot or cold or even a bit sticky and intermittent, then you'll probably need a new Heater Control Valve (HCV) as it's quite a common failure on many Ford cars as it's a common part.
Some info:
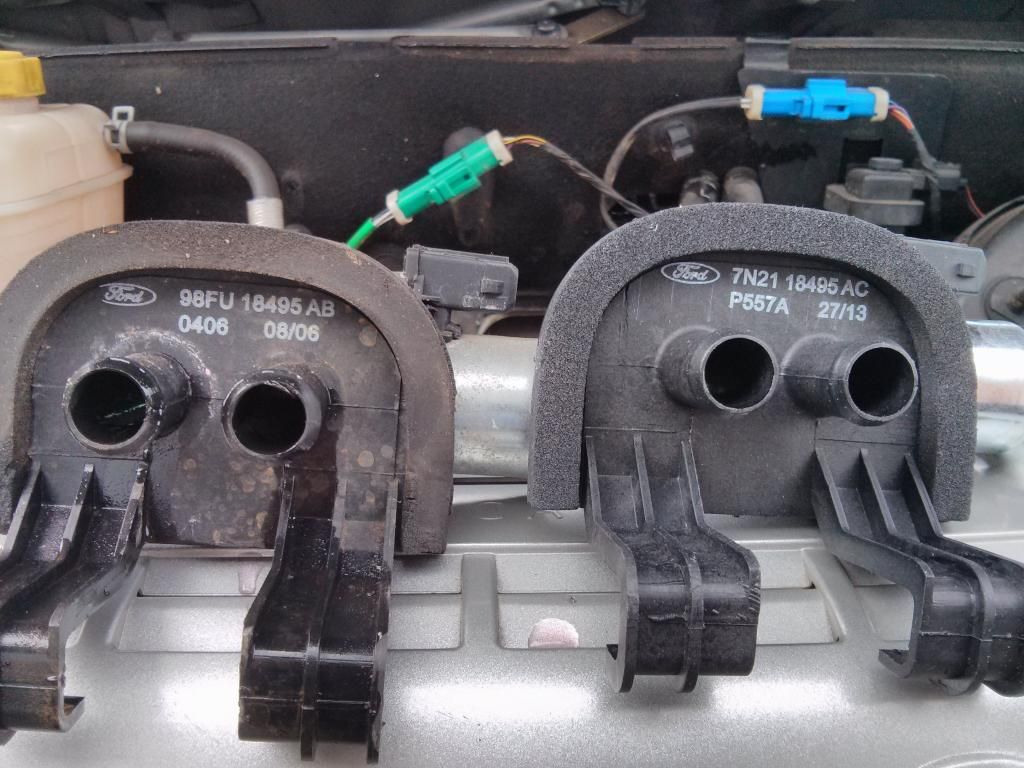
The original part number was: 98FU 18495 AB
The new (and improved?) one is: 7N21 18495 AC
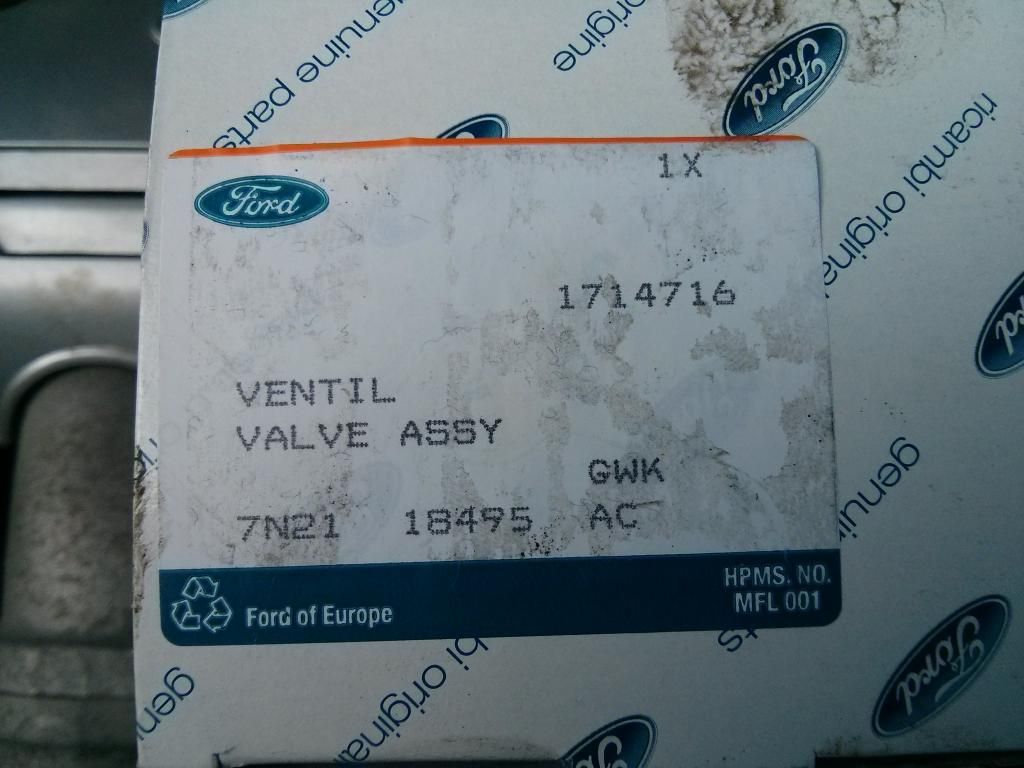
The FINIS* number is: 1714716
*Ford International Numeric Identification System
I'd recommend getting them from your local Ford parts desk for 2 reasons:
1. The ebay copies tend to be of poor quality and fail quite quickly
2. The Ford ones tend to last longer but if it does fail within a year, you'll get a replacement from Ford free of charge as new parts come with 12 months warranty.
They can be seen here side by side. You can also see the week / year dates on them. The one on the left being 8th week in 2006 and the new one being 27th week of 2013.
Box:
First make sure your car is cool as you don't really want hot coolant all over your hands when you do the replacement.
Fitting photos:
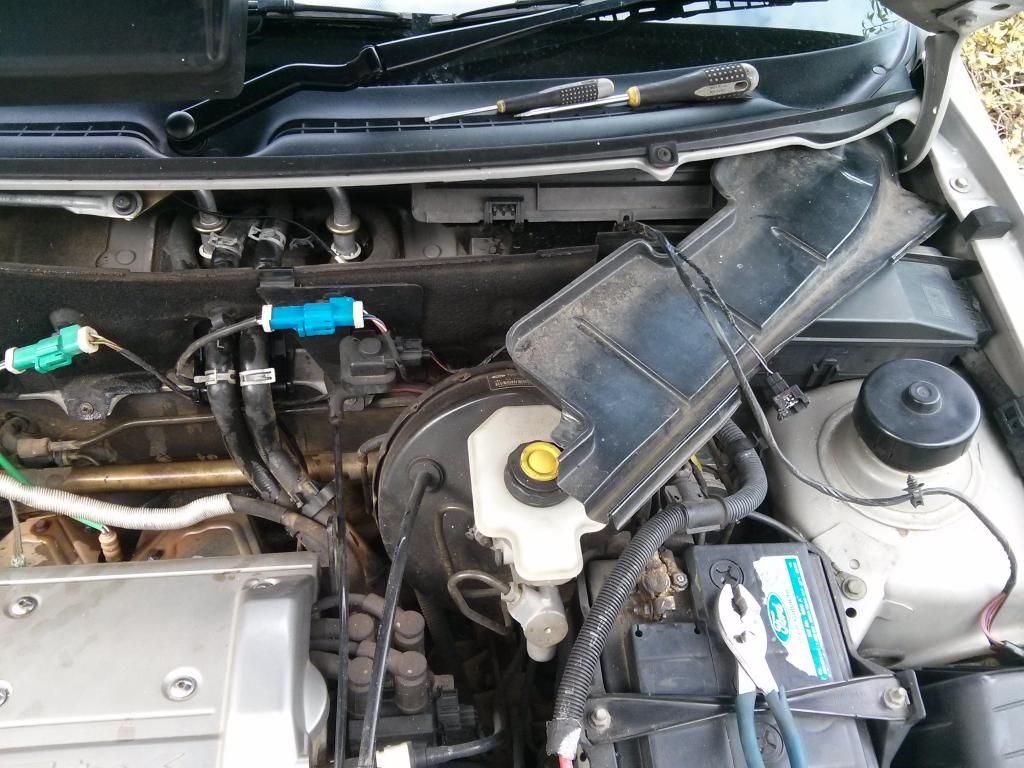
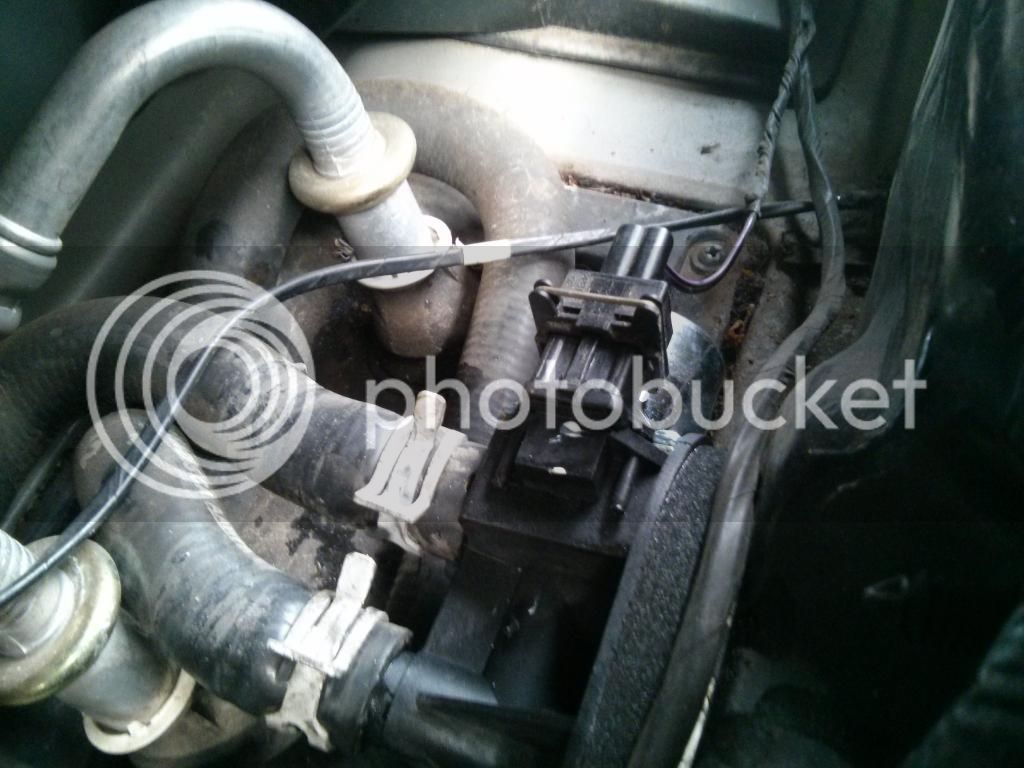
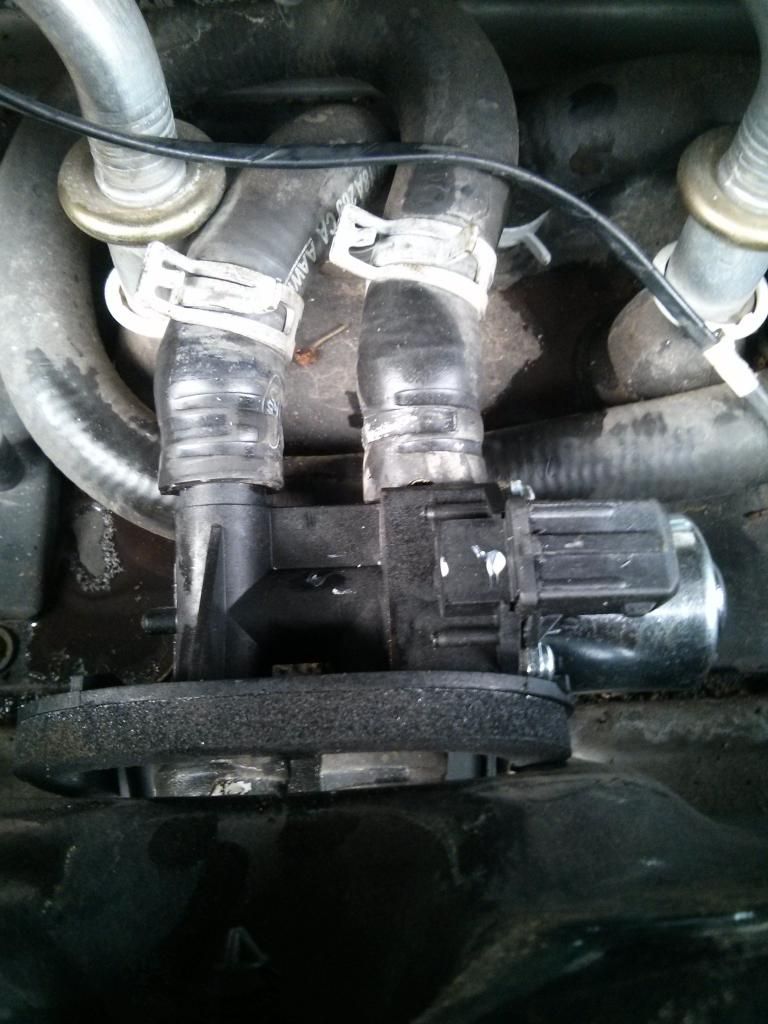
The HCV can be found in the middle of the bulkhead at the back of the engine bay. You'll see two pipes going into it from the engine side and 2 pipes coming out the back and going into the car to supply the heater matrix:
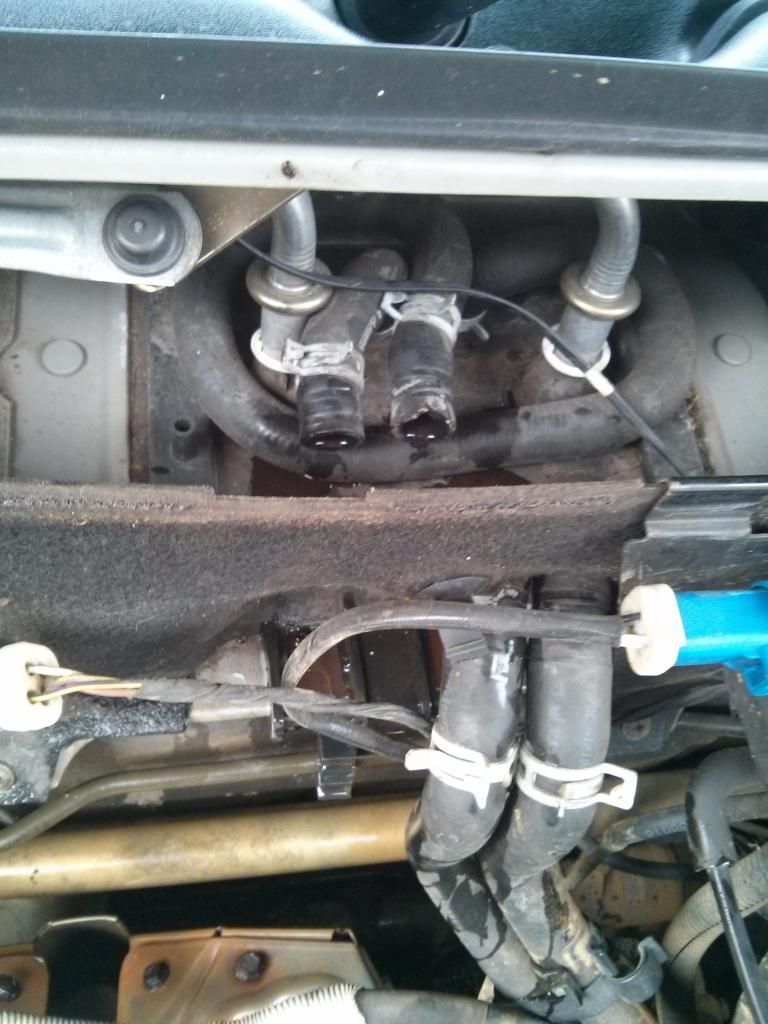
It's easier to remove the rubber seal that goes from left wing to right wing on the bulkhead and remove the plastic "leaf" shield if you have one on a later car:
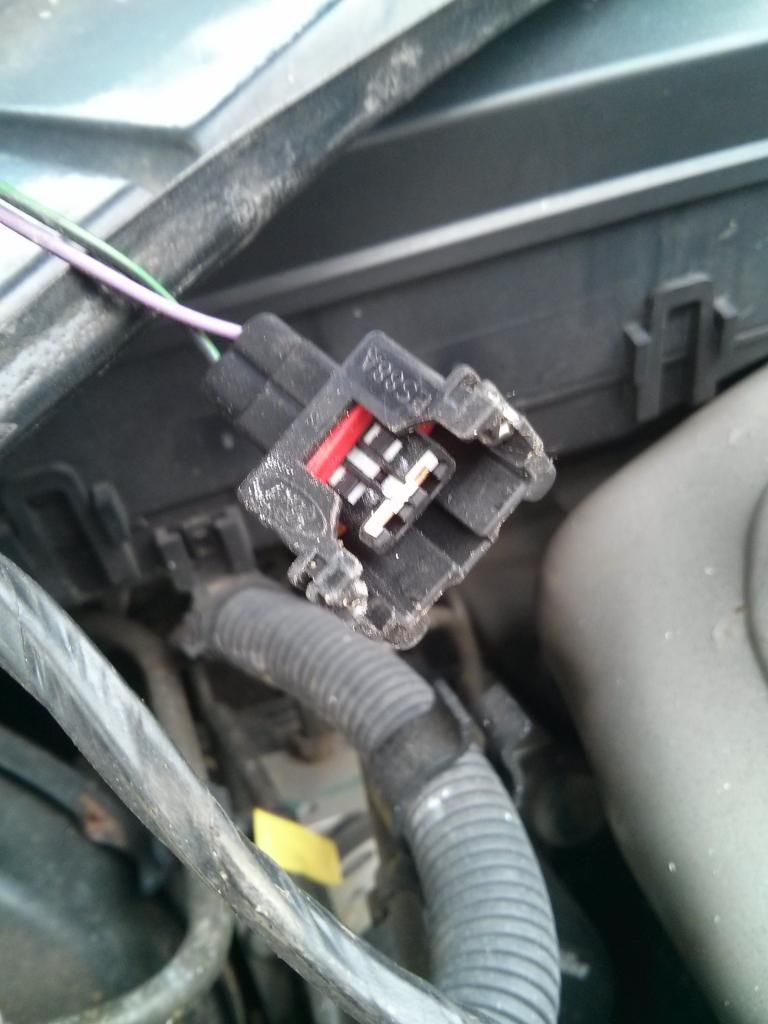
Remove the rubber "boot" over the right hand side (as you look from the front of the car) of the HCV to reveal the electrical connector. Then remove the electrical connector to the HCV (as seen above too next to the suspension strut)
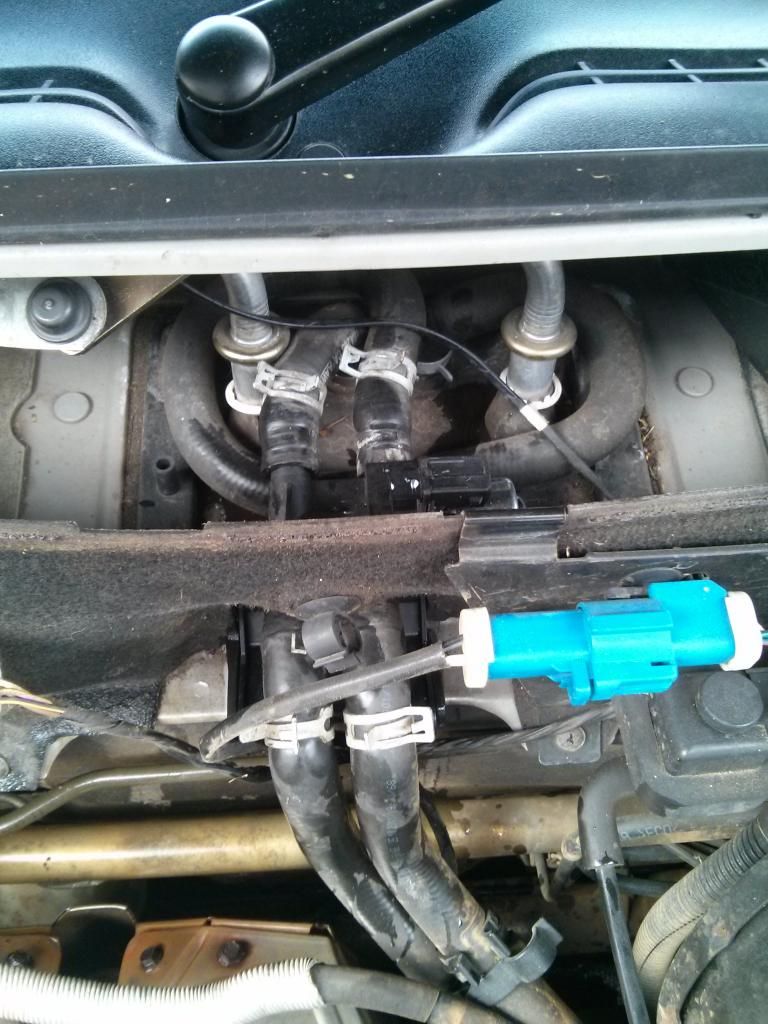
In place - just push down on the metal wire bar above it to release:
(You can see the two pipes coming out the back and going down into the heater matrix too)
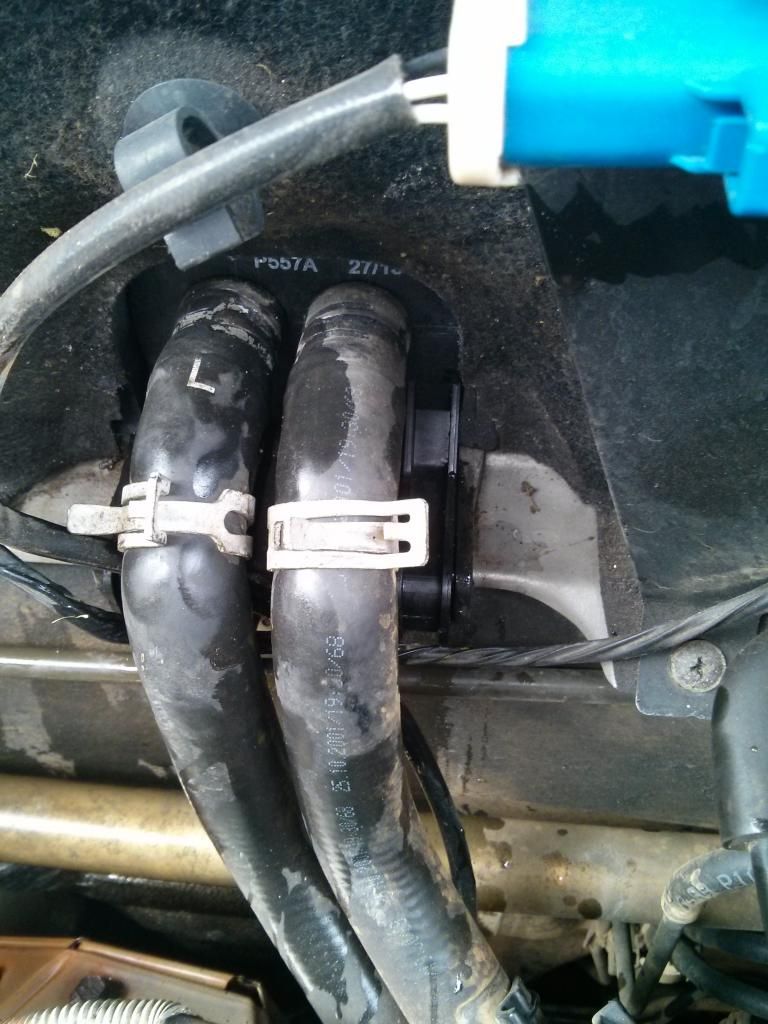
Next you need to use some pliers or similar to compress the retaining clamps and wiggle them away from the HCV towards the back and the front as shown:
Closer view on the engine side:
Closer view on the other side of the bulkhead:
With the retaining clamps out the way, you can wiggle the pipes away from the HCV and remove it out the other side of the bulkhead (not engine side). If the HCV has failed in a way that the pipes on the HCV have cracked and/or come away from the main body, you may need to fish the plack plastic part out from inside the pipe. A screwdriver or small allen key 90 degree part can help. Make sure you get it all out or else you might be doing all this again when your new HCV fails.
Removed:
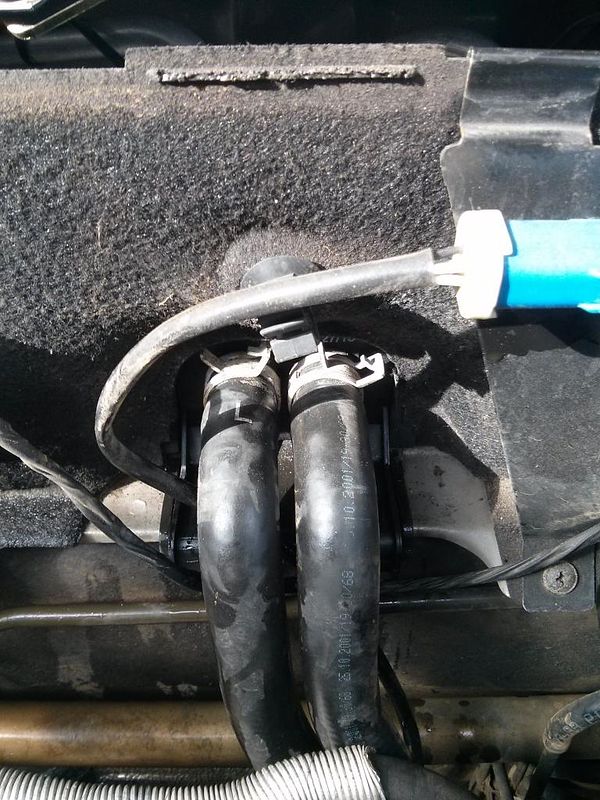
Install the new HCV into position - it isn't screwed in or retained in any way; the legs simply hook over the bulkhead floor and the pipes hold it in postion. (see the front bottom of them in the first picture)
Wiggle the pipes back into position on the new HCV and replace the retaining clamps to seal as seen in photos 2 and 4 above. Reconnect the electrical connection - making sure you hear the "click" of the wire either side - and replace the rubber boot above.
Refit the leaf tray (if you have one) and the rubber bulkhead strip. Then check your coolant level in the expansion tank to the left and ensure that it's still between the Max and Min as you may have lost some when replacing the HCV.
All that's left to do then is start the car and make sure you get hot and cold as you should. If you don't, then recheck you've fitted the electrical connector correctly.
It's advisable to run the car with the expansion tank lid off so any air locks can escape until the car gets up to temperature - with the car stationary of course.
Symptoms:
If your heating is stick on either hot or cold or even a bit sticky and intermittent, then you'll probably need a new Heater Control Valve (HCV) as it's quite a common failure on many Ford cars as it's a common part.
Some info:
The original part number was: 98FU 18495 AB
The new (and improved?) one is: 7N21 18495 AC
The FINIS* number is: 1714716
*Ford International Numeric Identification System
I'd recommend getting them from your local Ford parts desk for 2 reasons:
1. The ebay copies tend to be of poor quality and fail quite quickly
2. The Ford ones tend to last longer but if it does fail within a year, you'll get a replacement from Ford free of charge as new parts come with 12 months warranty.
They can be seen here side by side. You can also see the week / year dates on them. The one on the left being 8th week in 2006 and the new one being 27th week of 2013.
Box:
First make sure your car is cool as you don't really want hot coolant all over your hands when you do the replacement.
Fitting photos:
The HCV can be found in the middle of the bulkhead at the back of the engine bay. You'll see two pipes going into it from the engine side and 2 pipes coming out the back and going into the car to supply the heater matrix:
It's easier to remove the rubber seal that goes from left wing to right wing on the bulkhead and remove the plastic "leaf" shield if you have one on a later car:
Remove the rubber "boot" over the right hand side (as you look from the front of the car) of the HCV to reveal the electrical connector. Then remove the electrical connector to the HCV (as seen above too next to the suspension strut)
In place - just push down on the metal wire bar above it to release:
(You can see the two pipes coming out the back and going down into the heater matrix too)
Next you need to use some pliers or similar to compress the retaining clamps and wiggle them away from the HCV towards the back and the front as shown:
Closer view on the engine side:
Closer view on the other side of the bulkhead:
With the retaining clamps out the way, you can wiggle the pipes away from the HCV and remove it out the other side of the bulkhead (not engine side). If the HCV has failed in a way that the pipes on the HCV have cracked and/or come away from the main body, you may need to fish the plack plastic part out from inside the pipe. A screwdriver or small allen key 90 degree part can help. Make sure you get it all out or else you might be doing all this again when your new HCV fails.
Removed:
Install the new HCV into position - it isn't screwed in or retained in any way; the legs simply hook over the bulkhead floor and the pipes hold it in postion. (see the front bottom of them in the first picture)
Wiggle the pipes back into position on the new HCV and replace the retaining clamps to seal as seen in photos 2 and 4 above. Reconnect the electrical connection - making sure you hear the "click" of the wire either side - and replace the rubber boot above.
Refit the leaf tray (if you have one) and the rubber bulkhead strip. Then check your coolant level in the expansion tank to the left and ensure that it's still between the Max and Min as you may have lost some when replacing the HCV.
All that's left to do then is start the car and make sure you get hot and cold as you should. If you don't, then recheck you've fitted the electrical connector correctly.
It's advisable to run the car with the expansion tank lid off so any air locks can escape until the car gets up to temperature - with the car stationary of course.
 )
)