the gearbox and clutch swap;
always refer to a suitable haynes manual; just cos monkey here has done it a couple of times doesnt mean im doing it all perfectly!
in the beginning.....
jack up car, support with axle stands as high as possible using inner box sections of chassis legs
remove;
front wheels
battery and tray
air inlet pipe
radiator fan (gives more room) no tools needed!
starter motor; carefull of plastic connector block) and undo at alternator
cat/ disconnect exhaust after the manifold
torque link (rear engine mount)
gear link and support rod
rhd side drive shaft bearing support (behind engine)
lower ball joint / hub carrier bolts (this can be fun!) have new/ spares ready!(i have made my own replacement stainless bolts to stop corrosion...not a standard size so i had to machine down a bigger bolt)
use crow bar to push lower arms down & therefore disconnecting them from hub carriers. can also jack up hub / brake disc if helps
replace nyloc nuts on rebuild
use crowbar to lever out driveshafts from gearbox; careful of seals
catch oil....
remove lid of brake fluid reservoir, cover with plastic bag, replace lid
crimp hydraulic line (rubber section!!!) with maul grips...
pull off quick release clip & remove clip on hydraulic line into gearbox,
cover end with bag and seal with rubber band. no oil should leak...but prob will a bit!
haynes manual refers to a pressure valve. puma doesnt have one
support engine with jack
undo gearbox bolts, earth wires, ancillaries such as speedo drive etc
lower engine and gearbox at an angle so end of box is below chassis leg
wiggle gearbox and pull off....
at home & on my own i tend to place 'something soft' (usually me!!!) under the gearbox and let it drop under control onto chest / arm.... this is the non health & safety way!!! gearboxes weigh prob more than a person, are very hard and have sharp edges....and could easily crush a set of ribs...
use a spare jack, axle stand, engine hoist etc to lower it carefully; it weighs a hell of a lot and is bl**dy awkward to handle.
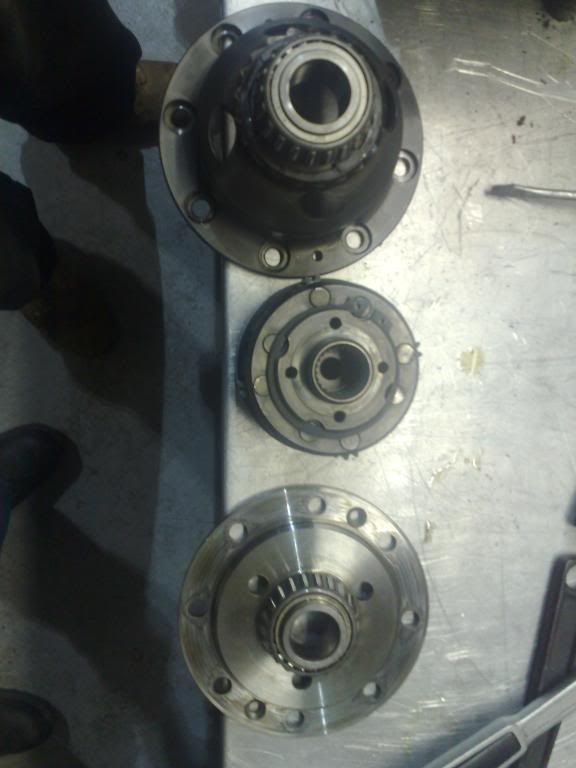
[albumimg]816[/albumimg]
drag out of the way (old skateboard is good)
if reusing the same gearbox then remove 3 bolts from clutch bearing 8mm, replace bearing; 10nm
BE CAREFULL NOT TO HANDLE THE BEARING; THEY CAN POP OFF!
use supplied grease on input shaft (the only shaft you can see) to coat the splines & stop it rusting to the clutch
remove clutch cover plate and friction plate by undoing 10mm bolts; keep in same orientation....
to do this either make a tool that can be bolted to the engine and that locks into the teeth on the flywheel (the bit the starter motor turns) or place the wrench etc ACROSS the flywheel and use sudden but controlled bursts....this places the energy INTO the bolt and not into turning the flywheel (if your spanner etc was OUTSIDE the flywheel)
[albumimg]817[/albumimg]
clean clutch with solvent; grease etc will kill the friction material...
place new clutch on...friction pad (black) must have thicker side of springs facing out; theres more room under the silver cover than there is against the solid flat flywheel!
with silver cover plate located (ish) on metal dowels locate a clutch centering tool into the centre of the friction plate (black). when it is in the centre tighten the cover plate (silver) like a road wheel; progressively doing opposite bolts....to ****nm
[albumimg]818[/albumimg]
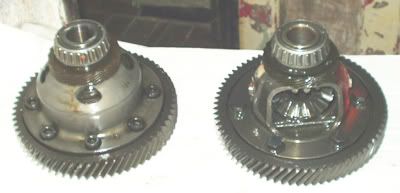
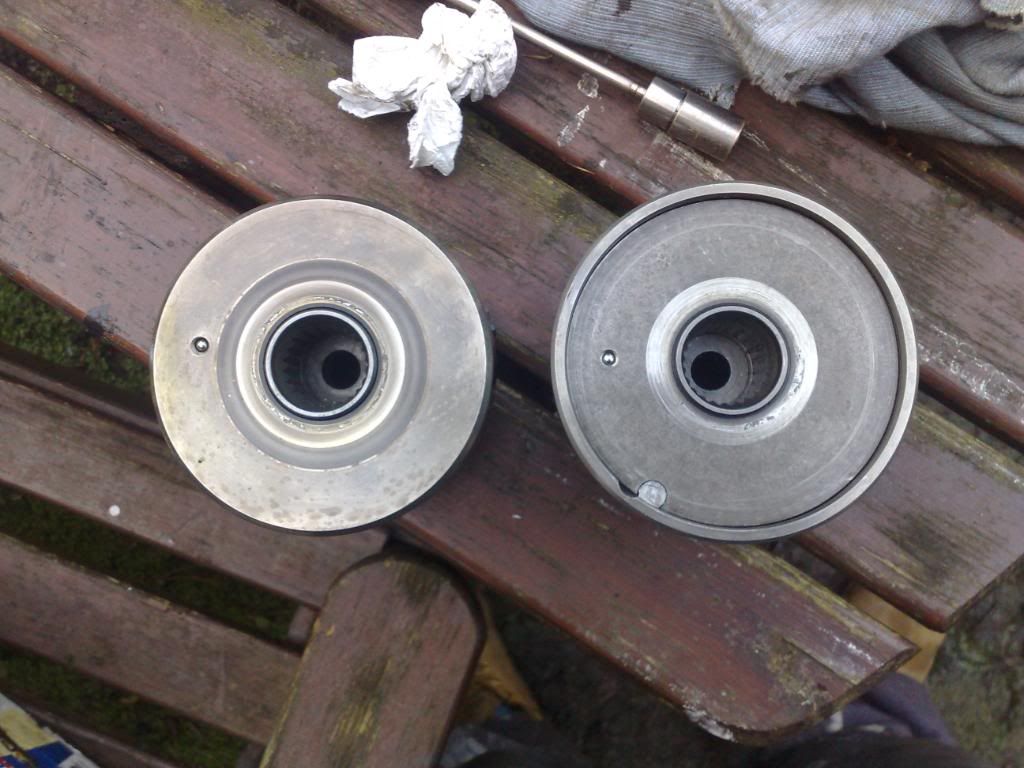
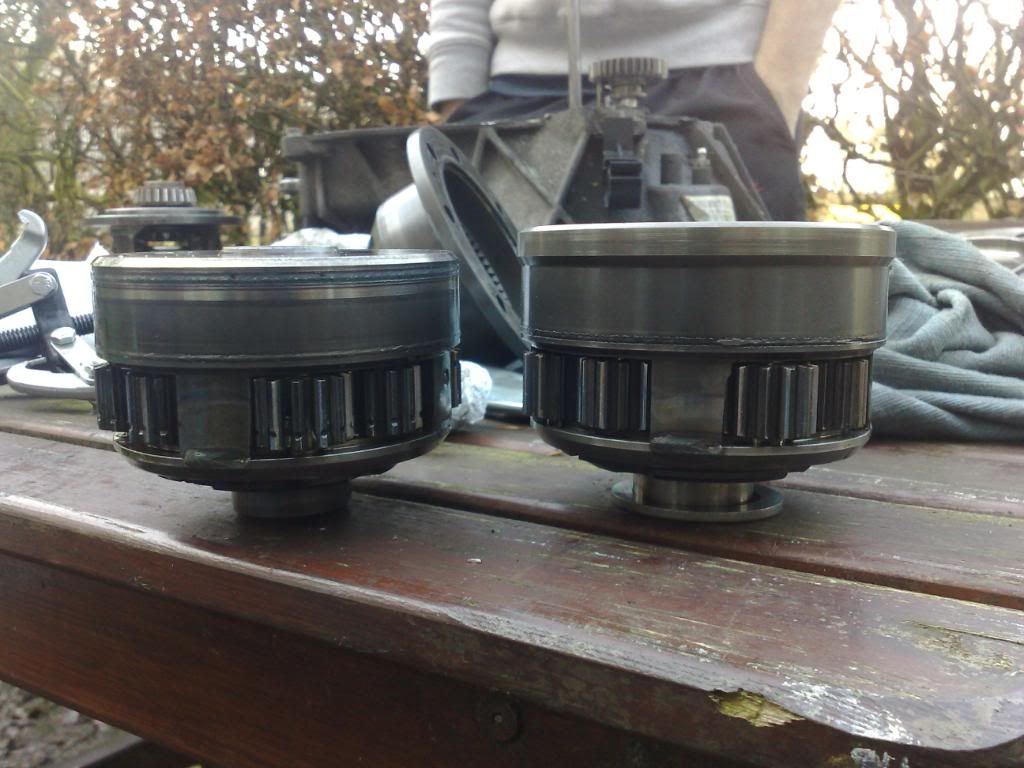
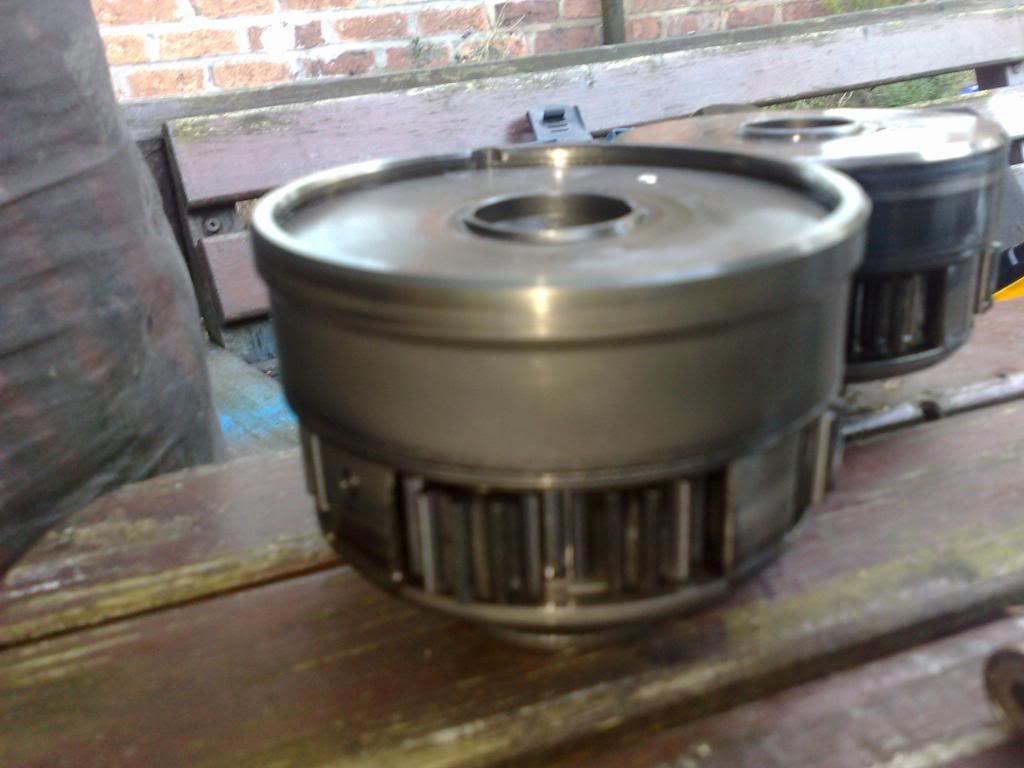
old & new(ish). its an frp box i have rebuilt with a quaife diff. all the steel items have either been painted or bolts etc have been replaced with stainless to stop corrosion issues. this is standard practice with most things i do...also the v naff plastic speedo drive has been replaced with a 1990s metal version; much tougher
also; look closely at the new clutch; you cant really see its much bigger but you can see that it is a lot 'thicker'...
replace gearbox and everything else as you took it apart....!
it will take some doing to lift the gearbox (thats hard enough!) and to locate it onto the dowels, get the input shaft to mate into the friction pad and get the bolt holes to line up & all whilst trying to hold the weight of the box with the diff (side off box / back of engine bay) not falling down & moving everything...its the heaviest part...
use a few long bolts and a friend to wiggle the little sod into position...
took me 3 lifts to get the sod into rough place with some longer bolts JUST holding it in place... then from the wheel arch give the end a dam good shove / wiggle to get it all to engage.
replace bolts etc
lift engine and gearbox fully into the engine bay...
this is fun! takes a lot of lift a bit, move the engine mount a bit, lower a bit, move.....etc etc...
undoing the engine mount to give some play helps
engage studs and use new nylocs
do up all bolts to fully place engine correctly...
replace ancillaries as removed.
bleed the hydraulic line with a pressure system (£15) and use a tyre at no more than 20psi to act as the pressure.... whilst that is working pump the pedal slowly a few times for good measure....
[albumimg]832[/albumimg]
replace transmission oil (75w90). i use an old section of garden hose thinned at one end & pushed hard into the fill plug (facing radiator; 8mm allen key) and a funnel. takes a long time to add 2.8L but id rather it hurt my arm than spill it; it bl**dy stinks!
check operation of clutch and gear linkage (adjust if needed)
at this point i bolt on the wheels and 'test drive' whilst the front end is still in the air...check all gears etc. BE CAREFUL; IF THE CAR FALLS OFF THE STANDS AT 70MPH IN 5TH.................!!!!!!!!!!!!!!!!!
if all is well lower the car and test drive properly.... remember to pump the brakes to make sure youv not disturbed anything.
thats about it... test anything youv removed...lights...fan (run engine til warm & ENSURE the fan comes on....), starter (er; engine starts!), alternator (no red lights on dash).......
oh and make sure all the earth wires are attached... i had to swap a starter at 5am on route to hols, left off an earth wire...called out rac....what a plonker i felt!!!! but could have caused an electrical fire.....
i am also replacing all low tensile bolts with stainless steel copies to reduce corrosion issues in the future....
")