JASAPP

ProjectPuma

Help Support ProjectPuma:

This site may earn a commission from merchant affiliate links, including eBay, Amazon, and others.
Yep, that was on Sunday at toll gate in Karlovac. The car was cool inside, but if I touched the window glass with my elbow it was HOT!

Thanks for positive comment, cheers. It just takes time to make it clean and tidy... (and some money, ok, but it is mainly time and effort)
 
Hi Sinisa
Another job well done. If I had the choice when I bought a car over here I would never bother with A/C but as far South as what you are it would be horrible not to have it in the summer.
Barry
 
Cheers, Barry!

But make no mistake, these are not normal temperatures. I am living on continent, not by the sea. In winter it can get as low as -20C and normally in summer should be low 30's tops. These are extremes. But yes, A/C is really a must here although I tend not to use if possible. It saps power... :'(
 
Another, rather embarassing update of a failure. Not of the car, but me. Tried to make my own CF splitter, but attempt failed at the mould production and about two weeks of effort (divided in half an hour - to one hour increments) went in the trash (what word do you use, guys? Litter, garbage or trash?).

Started with a 12 mm OSB board (according to the Wikipedia you refer to it as to the smartply) and cut it with jigsaw provisionally following the line of the rubber under the front bumper.


Wasn't satisfied with the first attempt as it was to boxy at outer sections


So tried to trim it down a bit


After I got to the satisfactory shape, sanded down edges and profiled them a bit, especially the attacking one


After that gelcoated the board (to be the splitter model for the mould) and sanded it down twice end recoated again to make it as smooth as possible.


Also applied some filler to some sections as needed to make it the best possible. As I was applying gelcoat with a brush, it wasn't as even as I would have liked, but in the end got there (sort of) after lots of filler and sanding.


That was the model in the final trial fit: a bit thick, but I thought it was shaped ok?


Satisfied with the outcome went on with the mould production. Used PVC boards as base (the resin doesn't stick to it) and put the splitter model on it after it was treated with a release agent. Started applying the GF mat and resin and it was advancing well as polyester resin hardens very quickly.


It was hot and disaster struck and I didn't notice it at the time. The heat warped the PVC board that was base and the resin started penetrating the newly grown space between the model and the PVC board.
The model got trapped in the mould and couldn't get it out. :'(


Tried cutting the excess resin, but in the end the model broke :'(

Epilog: I am building splitter V2.0 ATM. Slightly modified the shape, still is in very early stages of OSB board. Will get there, eventually. After all, Rome wasn't built in a day, either! :-(
 
Hi Sinisa
your temperature over there is maybe a bit warm for glassing at the moment. Also did you know that Richard Mansfield on here (I think) makes these.
Barry
 
Yes, I was using only 1% MEKP to counteract the high temps. And yes, I know Richard Mansfield is doing the splitters. But, they are big to be shipped and I would like to master the CF technique.
Plus, it is the satisfaction of doing something yourself; I am sure you of all the people understand that... :wink:
 
Wild E. Coyote said:
Hi everybody,

After some thinking and encouraged by my good friend Pumanoob, I have decided to post my journey with my puma so far. JASAPP? What it stands for? Just Another Sub Average Puma Project. Having seen miracles performed by some of the members here, my effort is waaaaaay off that standard and abilities hence the Jasapp!

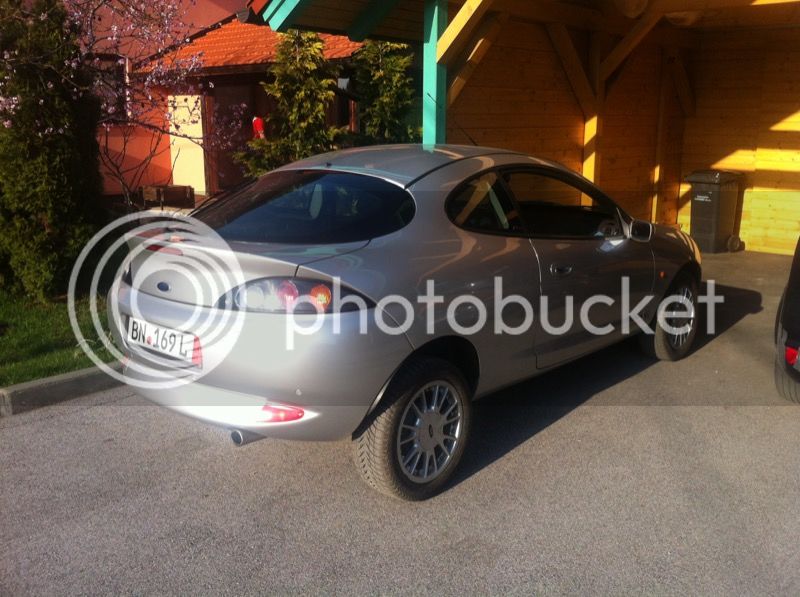
Anyway, I went to buy my puma in Germany. I wanted a good example and went to collect in Bonn. That is just about 1000 km in one direction. It was (and still is) futura model, in apperance very similar to millennium edition as far as the interior goes (recaro seats, full leather interior). The colour is moondust silver.
So, after a nice drive to Bonn and back, here she was in my carport


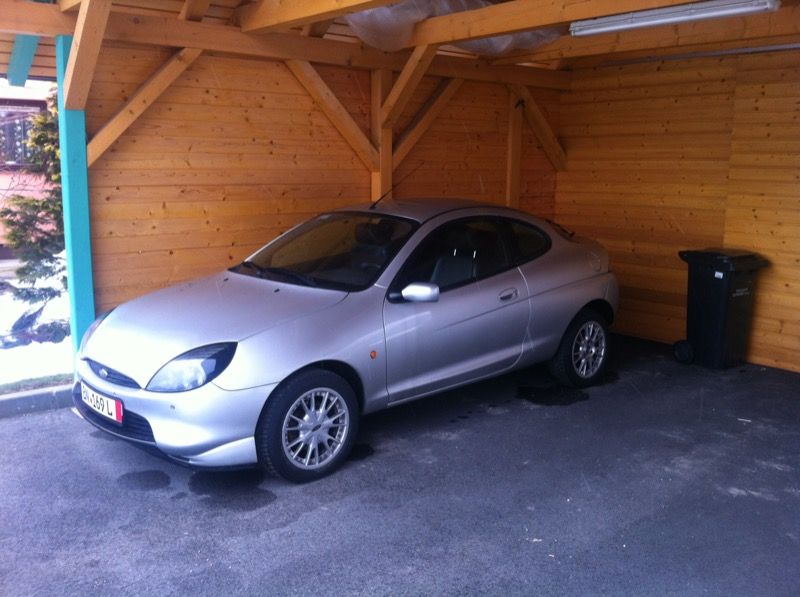
Standard car with F1 wheels. When I collected it was deep winter and going from Germany meant I7d need to pass thorugh Alps so I bought winter tyres before I went home with it; no way I would have passed through Alps without them!

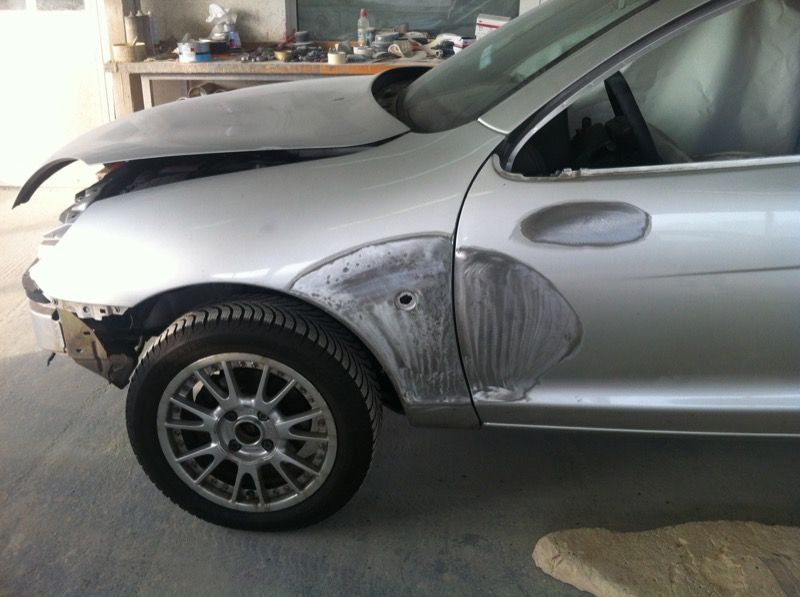
Two weeks later, I had an accident: a deer jumped into me on a local road! :cry:
The end result:


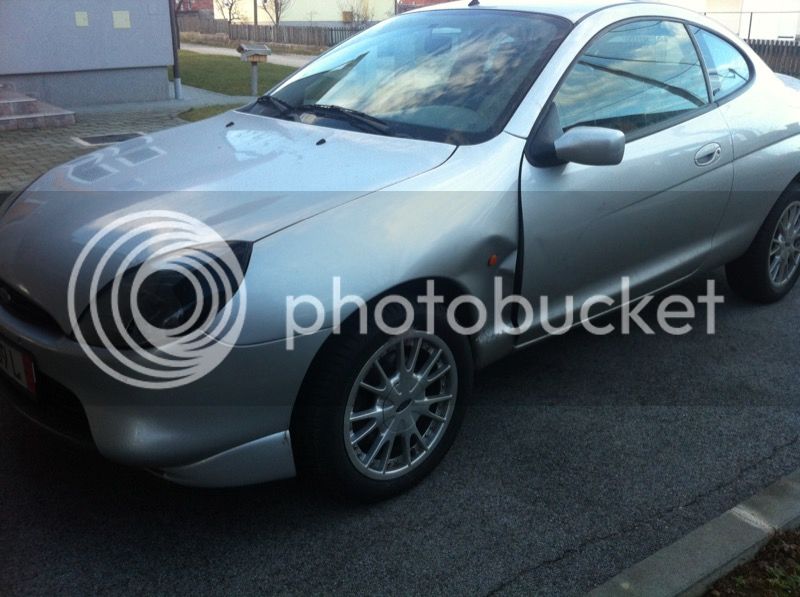
As the car was going to be repaired to get rid of the rust, not to much harm, except I had to buy a new headlamp…

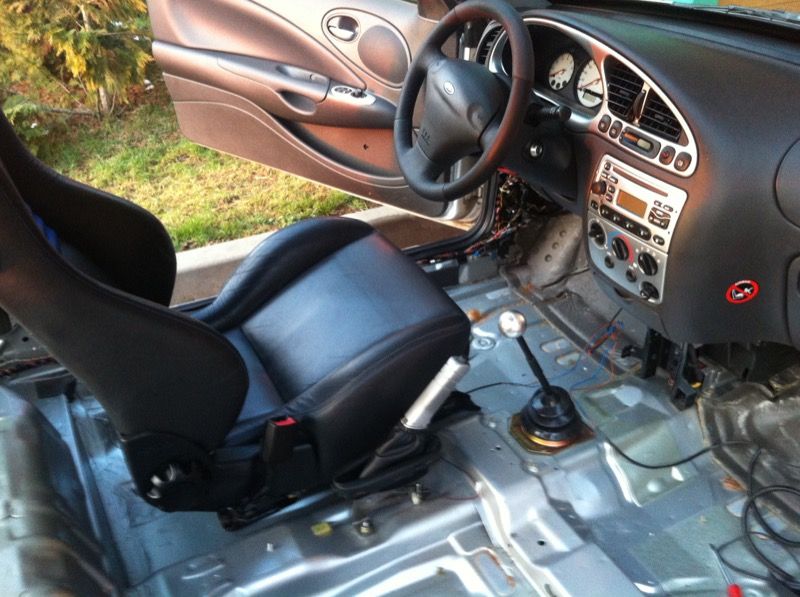
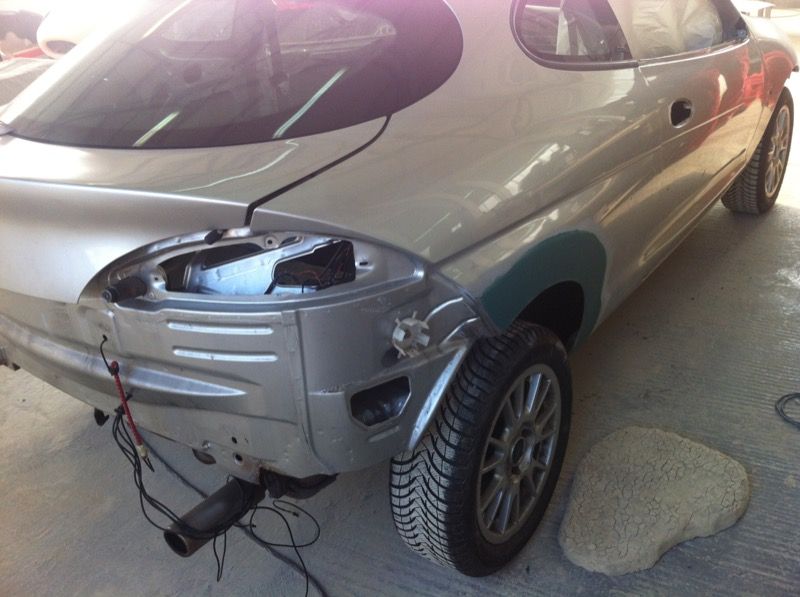
Soon I prepped the car for the bodyshop.


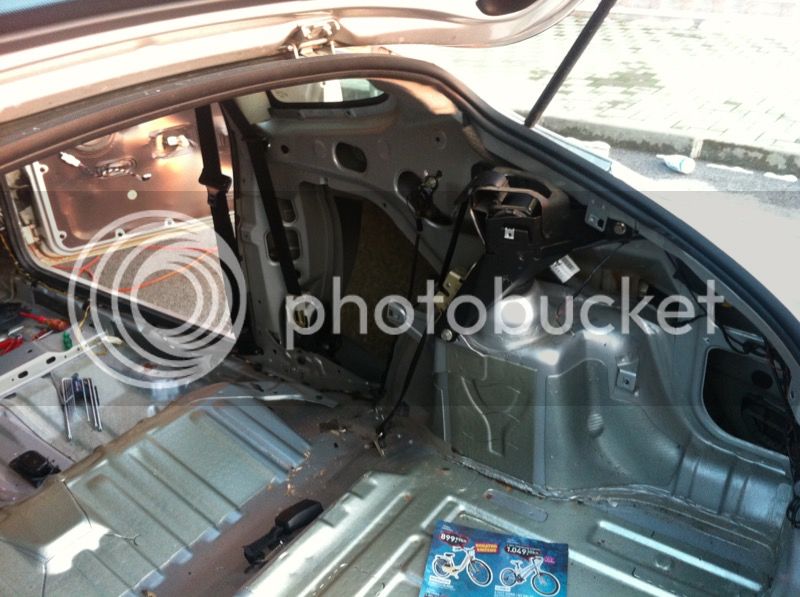
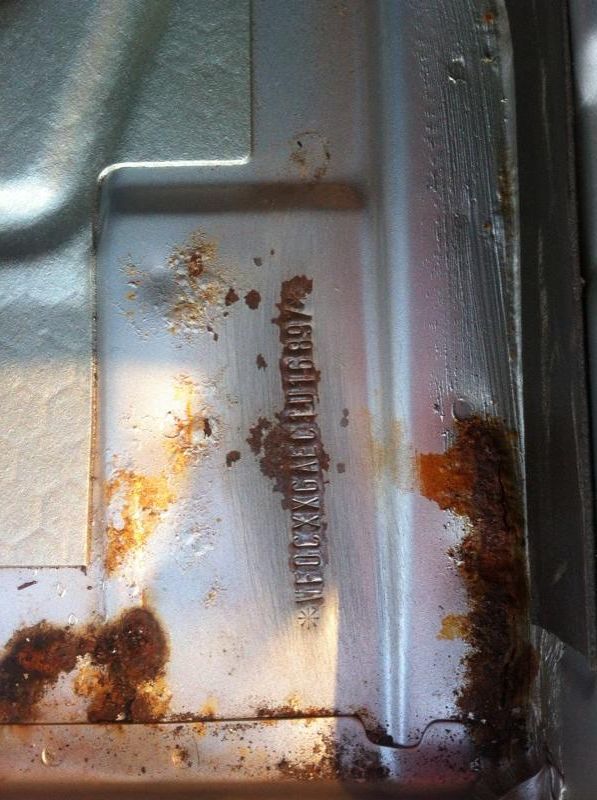
The worst of the rust was in VIN area. Went on to see my MOT tester to get advice on that. He said nothing to worry, just cut it out, repair the area beneath it and put it on top. He saw the car, the numbers are visible, no problems there! Phew, one worry less!


The car at body shop. The usual rusty rear end was replaced with zinc coated 1.2 mm thick steel. Also, did it without the bended section inside which is causing the rust in the first place!


Both sides done, the underbody as well, and sealed and sent off to paintshop. The car prepared for the spray job


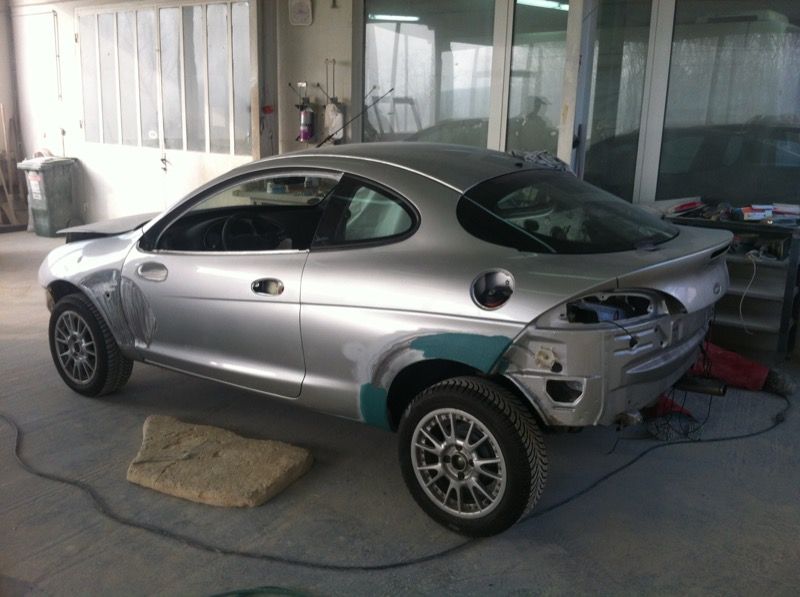
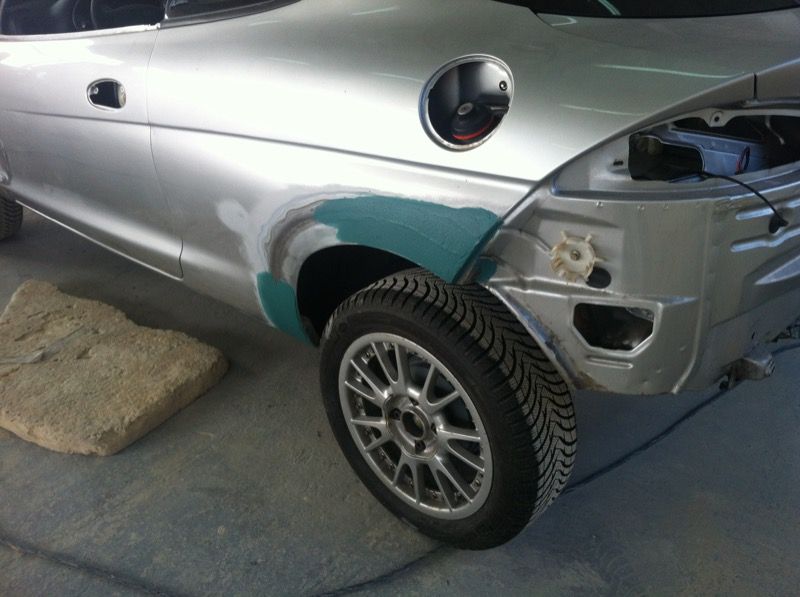
And the area hit by deer repaired


The car after respray. I did respray everything except the roof. Thought of doing that as well, but since I have heated windscreen, and the guy doing the spray job said there was 10% possibility it would crack on taking down so decided against it. It is expensive as hell…


the wheel arches look good done. how much did they cost? as i need to do mine
:roll: :thumbs:
 
I doubt it will be of any good to you as the job was done in Croatia, but nevertheless: the repair of the dents caused by that hit, plus arches, plus repairing of the rusty floor and dismantling the front and rear bonnet (undoing the seams) to treat the rust properly, derusting the complete underbody and sealing it and respray of complete car except the middle roof area was about 750 GBP
 
Last weekend I thought I would finally take the interior apart and apply some additional noise/heat insulation to the rear sections as the doors are already treted. So I took the seats out and found this...


Not looking good, out with the drill and wire brush. My fears were very soon confirmed as the rust dissapeared to leave - nothing!


Put on a very temporary patch to keep the water out (as the rain was forecast) as I don't have a welder :'( and thought of you Barry and how I wished I had your welding skills....


Gave a call to a bodyshop of trust, they just reopened after the hollyday shutdown and had no deals in pipeline so could take the car on the very next day. So it was.

Anyway, it seems Ford has cut some serious corners in rust prevention whle producing the later cars as all the rust was developing from inside. The metal was sound from beneath and in places where few sheets of metal are joined together the rust developed. Basically, everything that was orangeish was rotten all the way; about 1/3 -1/2 of all the floor area had to be replaced. While at it, they also found some rust on chassis and repaired it as well.

After three days of work, I picked up the car. I deliberately didn't want them to give it a respray in silver, opted just for the primeing (two component primer) and zinc spray over it fro two reasons. First it kept the costs lower and the second, and more importantly, I am able to tell which areas were repaired in case this thing happens again in future. Now it looks like this.


And to answer questions in advance. They stated 13 hours of work on my invoice and I payed for it 140 GBP (converted). I hope that took care of rust for some time; I caugth it just in time before it spread like cancer.....
 
Hi Sinisa
Thanks for the complement :grin: As you rightly stated the standard undersealing carried out by Ford is minimal and also most of the rot starts where the floorpans meet the strengtheners. Sometimes it's easier to see the rot from inside the car as the floor will bow up between spot welds as the rust expands the steel.
I wish we could get repairs done as cheaply as in Croatia, over here that would have cost a fortune.
Good luck with the rustproofing.
Barry
 
Just read through the whole thread! Wow! A lot of effort there mate! Looks awesome! Quick question... Are the seats you fitted any lower than standards?
 
Thanks, appreciated!

Actually, no! I would say they are just about the same height as the recaros, or even a tad higher! Have been toying up with the idea of making my own base and lower it by few cms (an inch, perhaps). But that would mean I would have to be sitting further back and still not sure if I wanted to do that as on regular basis people get driven at back and every inch there counts....
 
Hi Sinisa
Lowering the drivers seat is on my list as well. I think this winter I'll take the seat out, remove the sliders and see if I can do anything with the frame.
Barry
 
With sparcos it is dead easy thing to do as they are sitting on top of 3 mm thick steel plates which are welded onto another 3 mm thick plate to form letter I in cross section. Nothing fancy there...

 
Today did some service to my car. At 192.000 km on the clock she got new oil, new oil filter, both of the air filters and new front wheel bearings. The old ones got noisy and developed some play as the brakes started shaking.

Went to a friend who has a garage and a 20 ton press, left the car there and went to work. He said the bearings couldn't even began to be touched by his press. So he went to another guy who has 100 ton press and tehy started to pump. As the pressure rose almost to 100 ton mark they heard a loud TOK! and it let go. 14 years of service plus welded with rust and it barely let go. And when it finally did; it went out with a bang!


And a new bearing is in!


I bought them at our largest bearing stockist, they had two SNR sets on stock, so went for both of them and replaced them both sides. It should be ok, I hope. I respect more SKF, but in the end these are defo better than the old ones that were in and got noisy and developed some play.

Also, had the discs skinned just a bit to make them nice and flat again. Still plenty of them left, pads are also just about 50 % left.


This has transformed the car! It is now very stable under braking, holds line perfectly and turns in like there is no tomorrow (thanks to the LSD as well).

My normal working procedure would include derusting and paint job, but since it had to be put together today as well, and it wasn't a job I could have done on my own (due to lack of press and lathe) I left it as it was/is. Perhaps at a latter date I will do something about it, now I am just enjoying the car as it just got much better again!
 
Hi guys,

Some small update, but (sorry) no pictures this time. Since I had that close encounter with a deere and had to replace the FL headlamp I was not happy with the lights at night. After the EU passed the law under which xenon of 35W need no automatic levelling and a washing system (admittedly on new cars which have it ex factory, but still...) started toying with idea of putting in the xenon bulbs. So when spotted on eBay complete HB3 system (5300 K advertised more about which a bit later) for 19 USD posted went for it. It even arrived rather swiftly (in about 10 days from China) so was happy about that and especially the price. Got a pair of back covers from IanG as didn't want to butcher my lights and when they arrived (thanks, mate!) installed them. It is an easy job, nothing major there and that evening gave them a try. Firstly, they are brighter then regular Osram night breaker bulbs, but I wouldn't say they were 5300 K as they were very white. Also, on box nothing was marked so my guess is they produce one size and one temperature fits all and just give you a choice at ordering to promote selling the thing.
Secondly, the left bulb (or the one I installed in left HL was not very solid mechanicaly and that one was flickering. After two weeks of constant scare that it would fail finally decided to take them of and return to the Osrams.
At the same time, went to a colleague who has the tools for adjusting the headlight. When it was really foggy I could see that left beam of light was pointing to the right all the way and basically was heading of the road (not to forget we drive on the right side of road and the beam pattern should be a mirror image of yours in UK).
After adjusting it to the center of the road and putting it down a bit it was finally ok and suddenly the dark spots in front of me dissapeared and I have nice, homogenous light in front of me!
What I am trying to say: put some effort in adjusting the headlights and you will be rewarded with some very solid, if not really good headlights. Most of the visibility problems have their roots in scattered beam patterns that need proper adjustment!
Of course, how that car has passed MOT twice with such lights puzzles me, but that is another subject...
 
Hi Sinisa
Awesome work as usual, not sure about skimming the discs but everything else, a credit to you :)
Barry
 
Thanks Barry,

The discs were just, as we would say, licked. Less than 0.1 mm. Plenty of life on them left (I'd say they weren't worn not even halfway through) so I just couldn't replace them and then be OK with it. After all, the money is not falling from the skies....

But, a word of recommendation to everybody on PP. Have your headlights set up properly and you will be amazed at the difference it makes!
 

Latest posts

Back
Top