You are using an out of date browser. It may not display this or other websites correctly.
You should upgrade or use an alternative browser.
You should upgrade or use an alternative browser.
Project Aiya (Pic heavy)
- Thread starter slayllian
- Start date
Help Support ProjectPuma:
This site may earn a commission from merchant affiliate
links, including eBay, Amazon, and others.
Cheers stevieg , just follow scubasteves guide in the how 2 to section, it really is simple, I just used speaker connectors, crimped tight as they had insulating sleeves over them. its the last two pins from memory that you need to connect the wires to.
Little catching up to do:
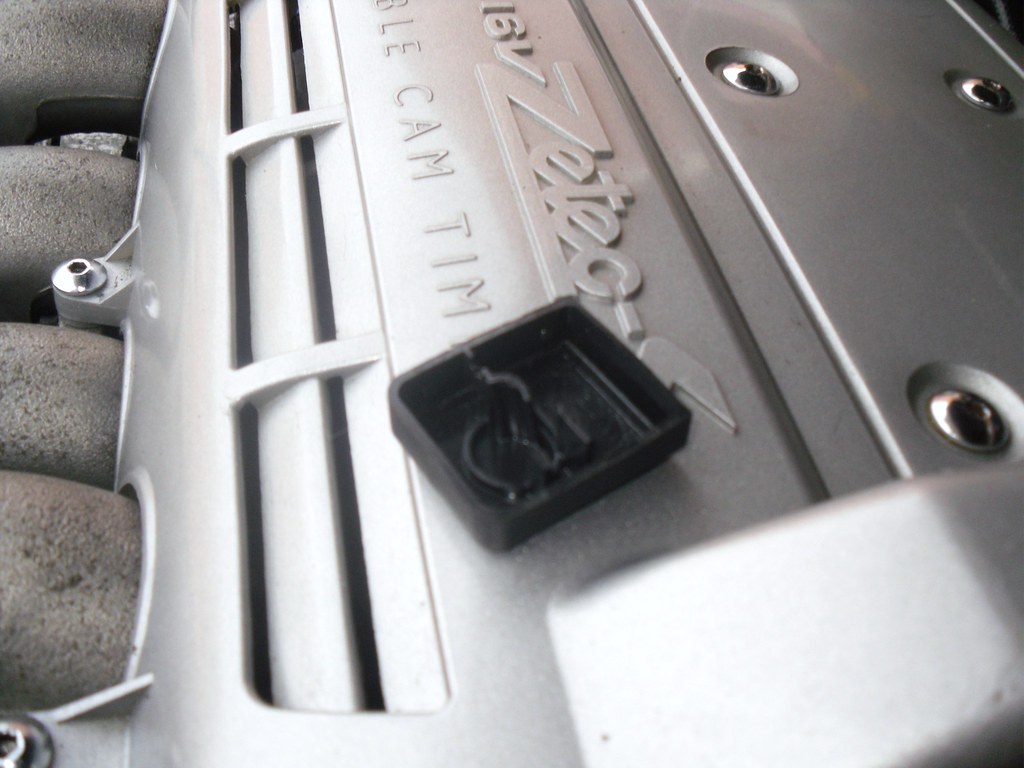
I found where this thing goes thanks to Arch Bishop and some puzzle solving skills. it just clips in here:
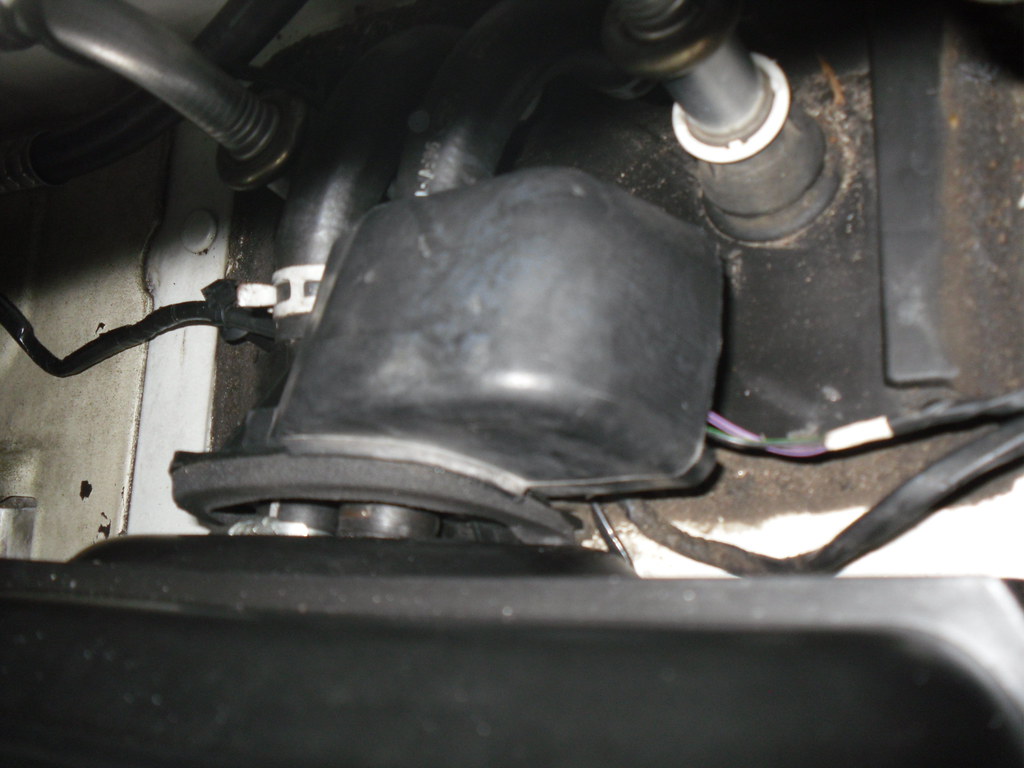
Ayia 2 (5) by slayllian, on Flickr
Replaced the mirror, had to remove all the remnants of the old sticky pad to ensure it adhered correctly. I opted for a genuine mirror, not cheap @ £50!
The old metal casting snapped when I tried to adjust the mirror because it had become stiff:
Ayia 2 (2) by slayllian, on Flickr
Removing old sticky pad, used some alcohol cleaning soloution and a blunt plastic scraper
Ayia 2 (3) by slayllian, on Flickr
New mirror fitted:
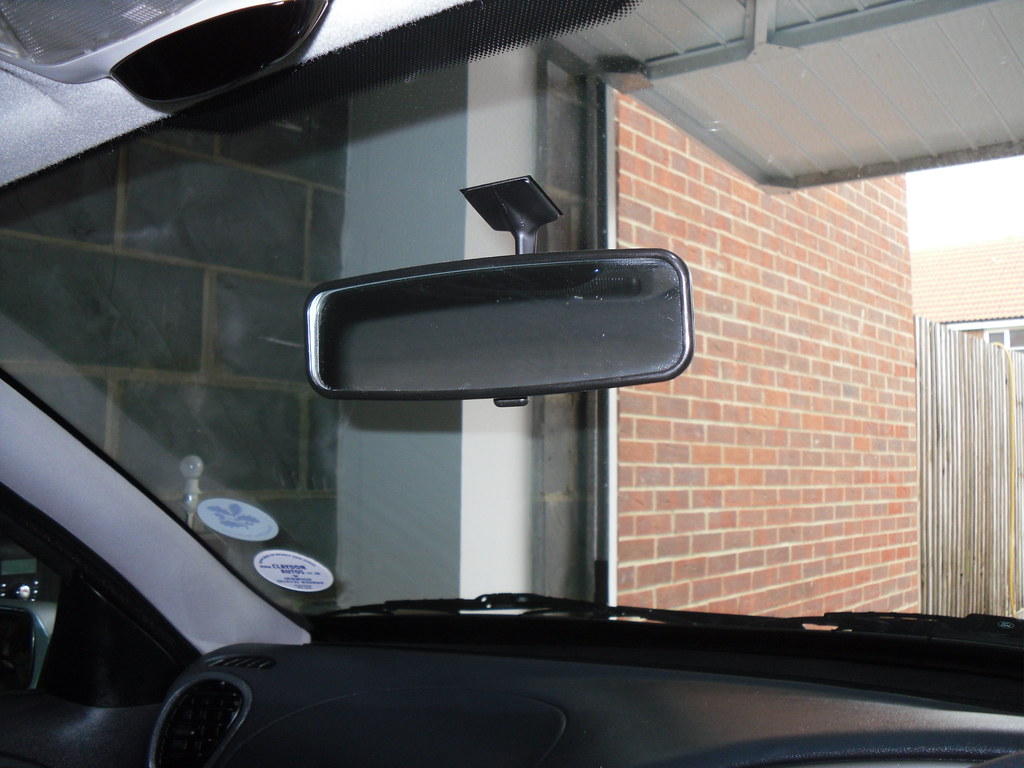
Ayia 2 (4) by slayllian, on Flickr
I found where this thing goes thanks to Arch Bishop and some puzzle solving skills. it just clips in here:
Ayia 2 (5) by slayllian, on Flickr
Replaced the mirror, had to remove all the remnants of the old sticky pad to ensure it adhered correctly. I opted for a genuine mirror, not cheap @ £50!
The old metal casting snapped when I tried to adjust the mirror because it had become stiff:
Ayia 2 (2) by slayllian, on Flickr
Removing old sticky pad, used some alcohol cleaning soloution and a blunt plastic scraper
Ayia 2 (3) by slayllian, on Flickr
New mirror fitted:
Ayia 2 (4) by slayllian, on Flickr
I learned driving home in the dark is rather scary in a Ford Puma, so I decided to improve the situation by cleaning the lights. Only problem was I needed to use the car the following day, so I had to put the lights back on early, thus the steaming up! but that's now cleared and the lights have improved marginally.
My lights were really filthy, which doesn't really show in photo:
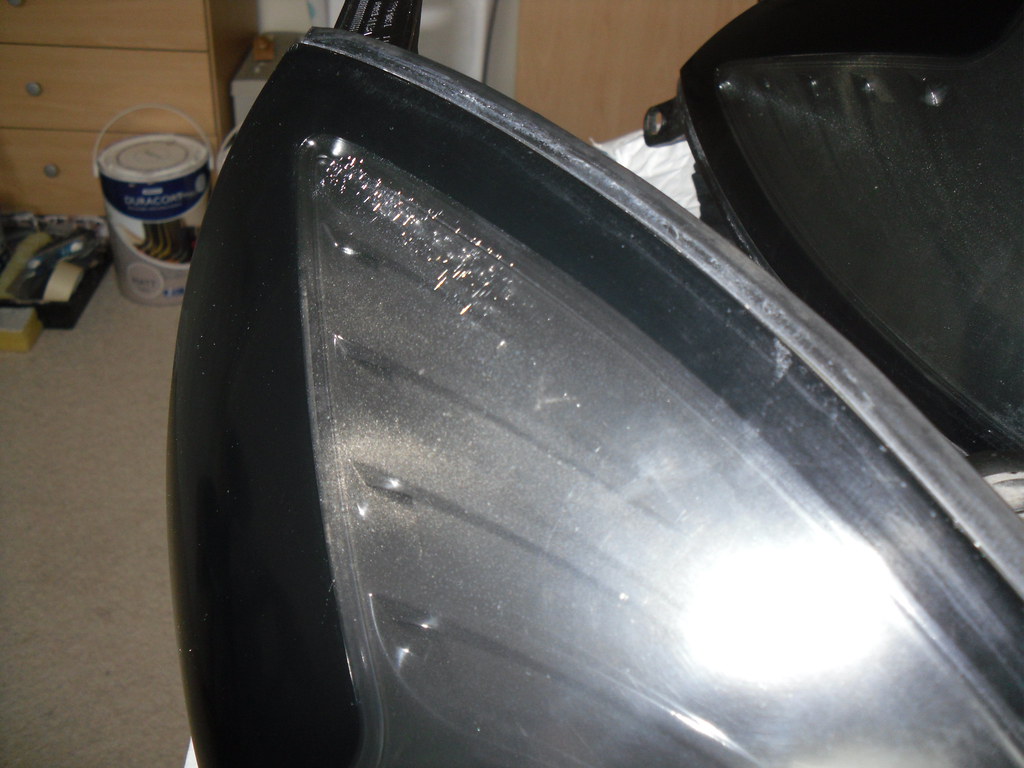
Ayia 2 (6) by slayllian, on Flickr
Unit washed out with de-ionised water (to reduce water marking):

Ayia 2 (8) by slayllian, on Flickr
Lights are better (condensation has now cleared):
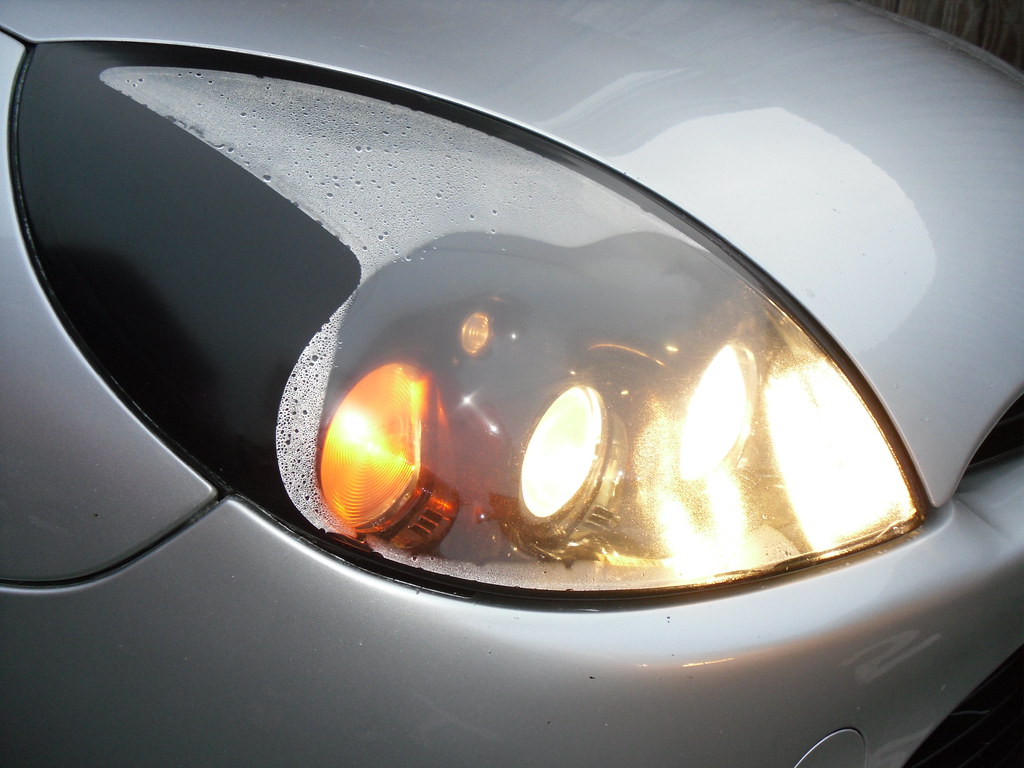
Ayia 2 (9) by slayllian, on Flickr
Ayia 2 (12) by slayllian, on Flickr
My lights were really filthy, which doesn't really show in photo:
Ayia 2 (6) by slayllian, on Flickr
Unit washed out with de-ionised water (to reduce water marking):
Ayia 2 (8) by slayllian, on Flickr
Lights are better (condensation has now cleared):
Ayia 2 (9) by slayllian, on Flickr
Ayia 2 (12) by slayllian, on Flickr
You may have noticed in the picture above, that I have re-fitted the bonnet liner and resonator box. I have also made a temporary repair to the liner.
The liner before repair, I used some black weathering powder designed for weathering model aircraft:
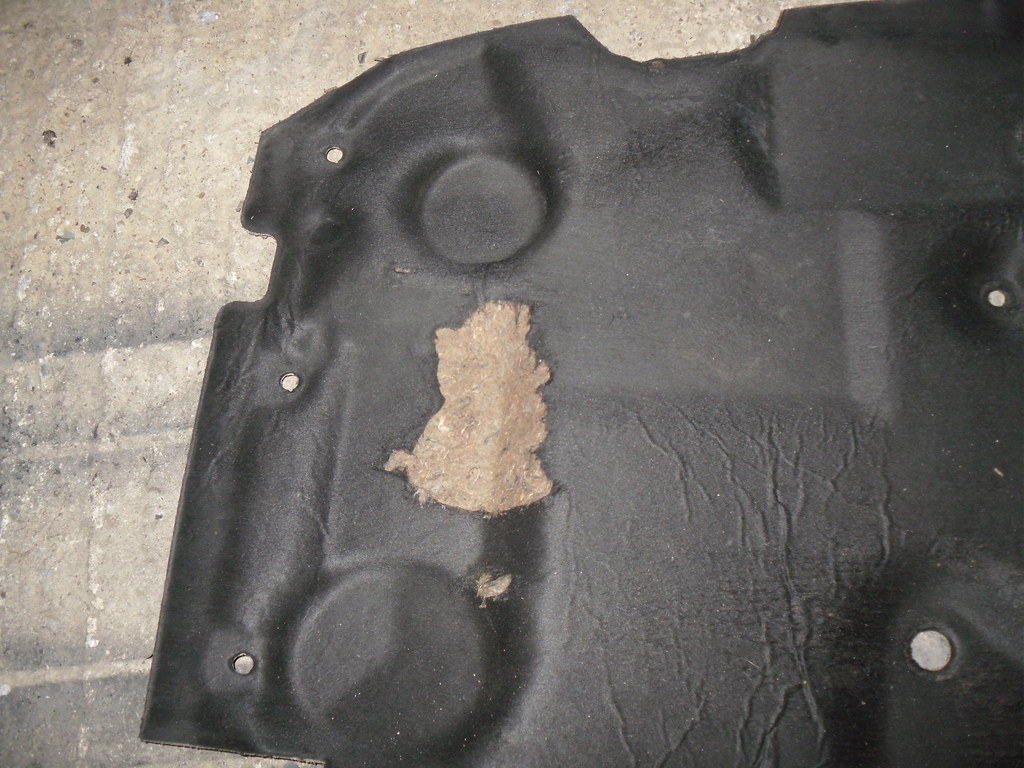
Ayia 2 (10) by slayllian, on Flickr
The liner before repair, I used some black weathering powder designed for weathering model aircraft:
Ayia 2 (10) by slayllian, on Flickr
I decided to treat some of the rust in the foot well, caused by the water leak.
Pulled carpet back to gain access:
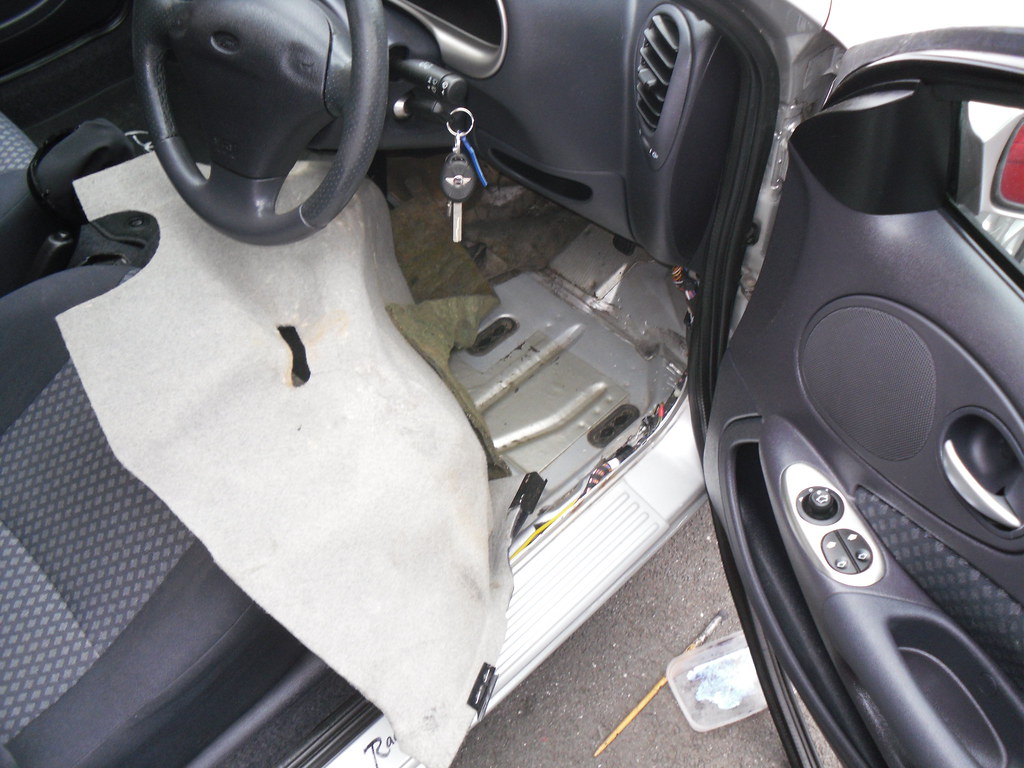
Ayia 2 (14) by slayllian, on Flickr
Chipped away loose paint/rust, then used a rust treatment:

Ayia 2 (13) by slayllian, on Flickr
I then used Hammerite to seal in:
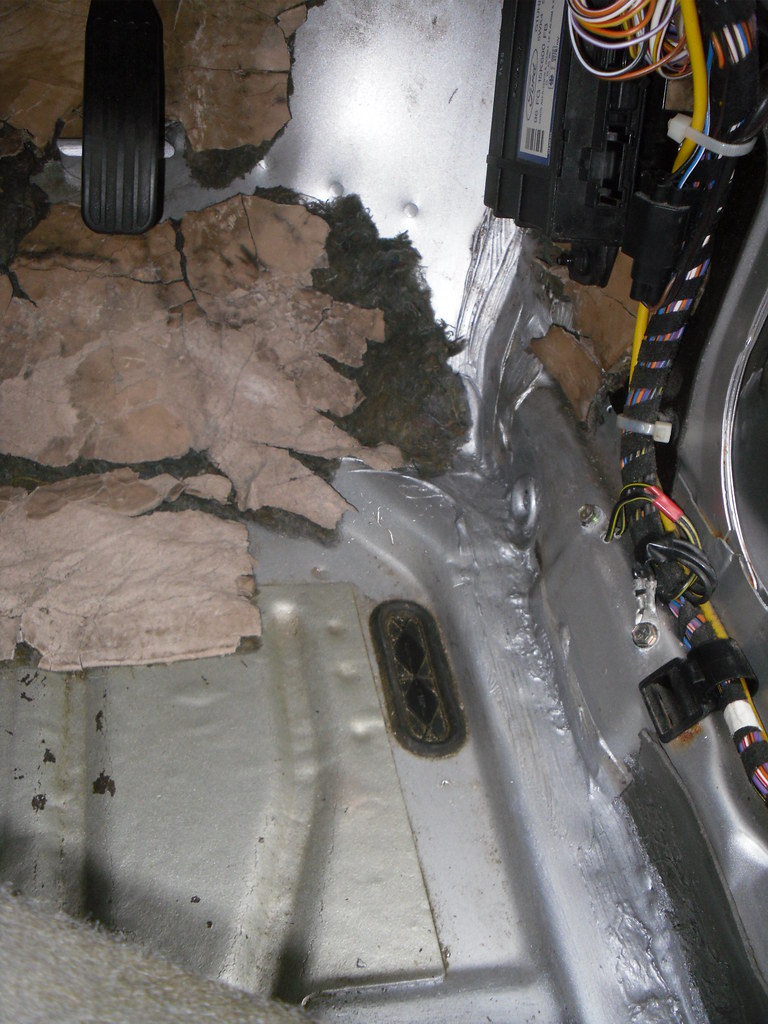
Ayia 2 (16) by slayllian, on Flickr
Pulled carpet back to gain access:
Ayia 2 (14) by slayllian, on Flickr
Chipped away loose paint/rust, then used a rust treatment:
Ayia 2 (13) by slayllian, on Flickr
I then used Hammerite to seal in:
Ayia 2 (16) by slayllian, on Flickr
This is where the car is now, I have just orderd a replacement gear stick surround to replace the damaged one. Not a big job but one that will improve the interior finish no end.
I am keen to get the rear arches done at the body shop soon and also get a new drivers door lock made up and fitted. Here are a few pics of the project as it stands...
Interior:
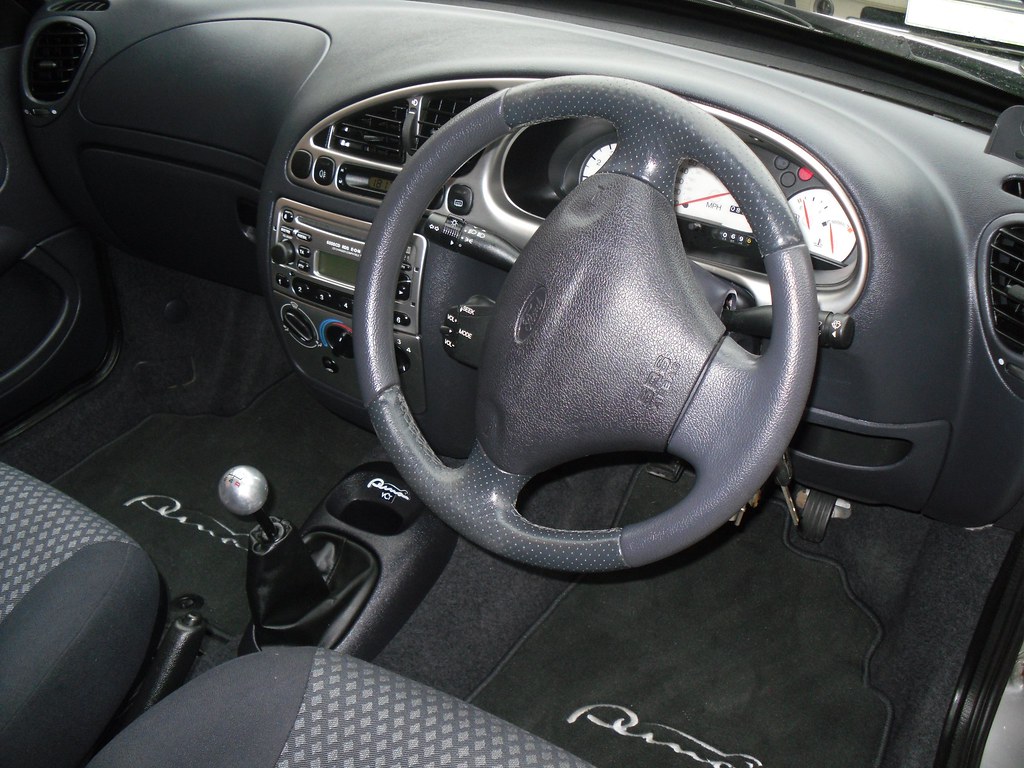
Ayia 2 (17) by slayllian, on Flickr
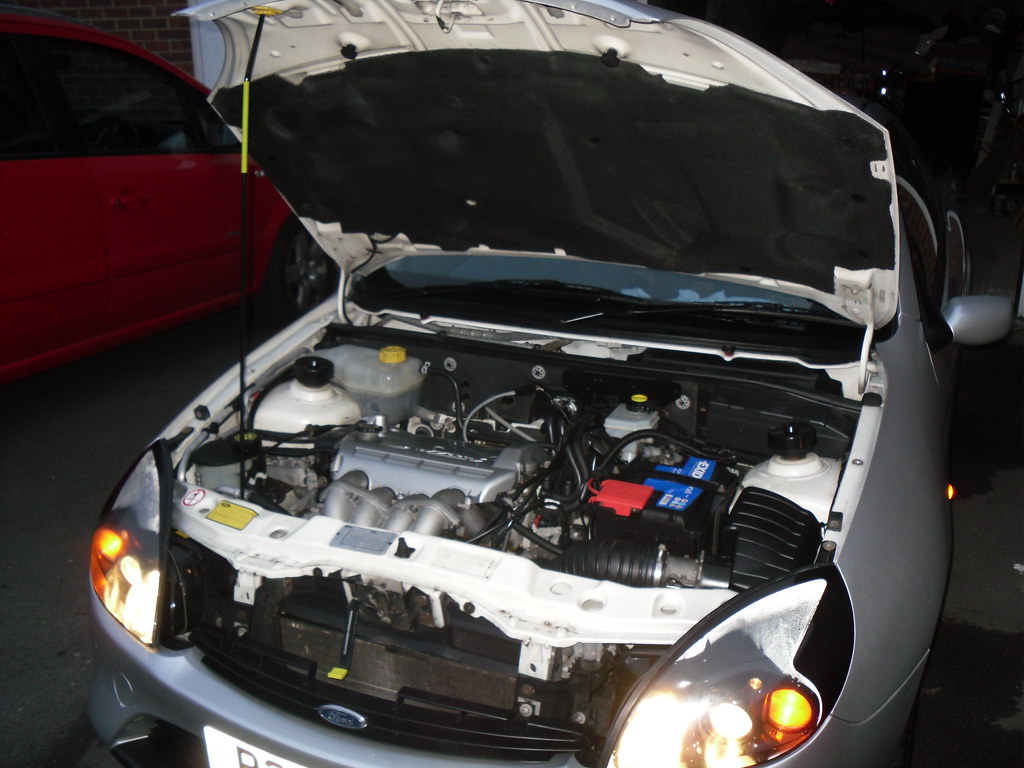
Engine (pleased how this has come up, with not much work):
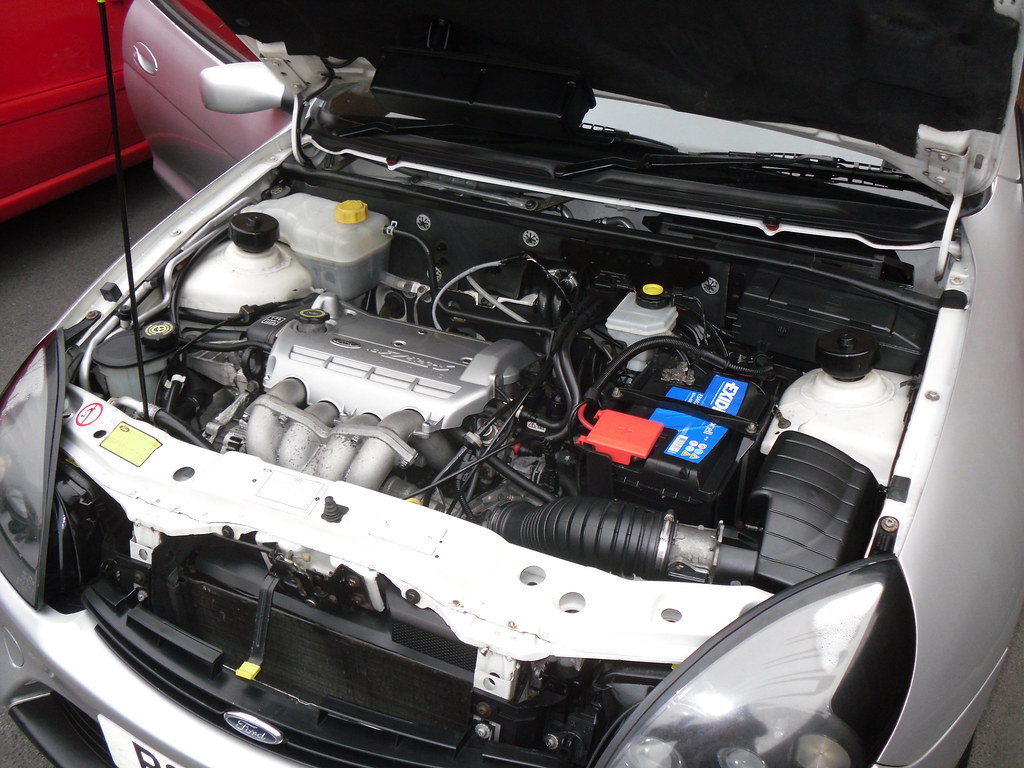
Ayia 2 (15) by slayllian, on Flickr
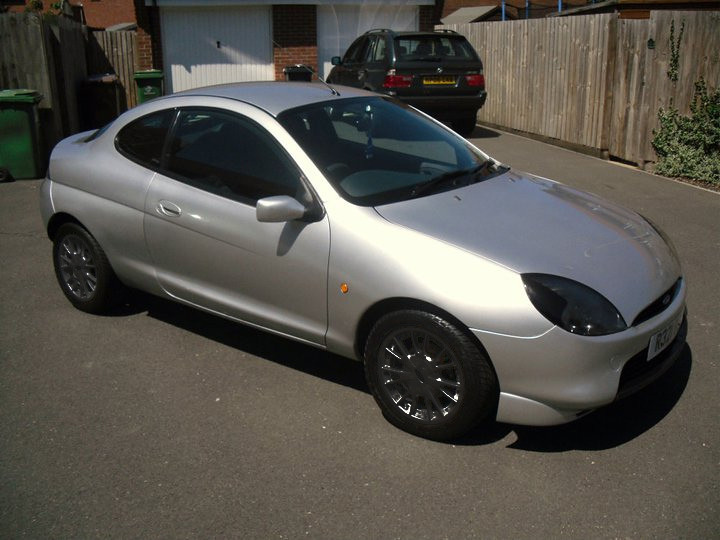
Exterior (not much changed yet, just trying to restore before I modify):
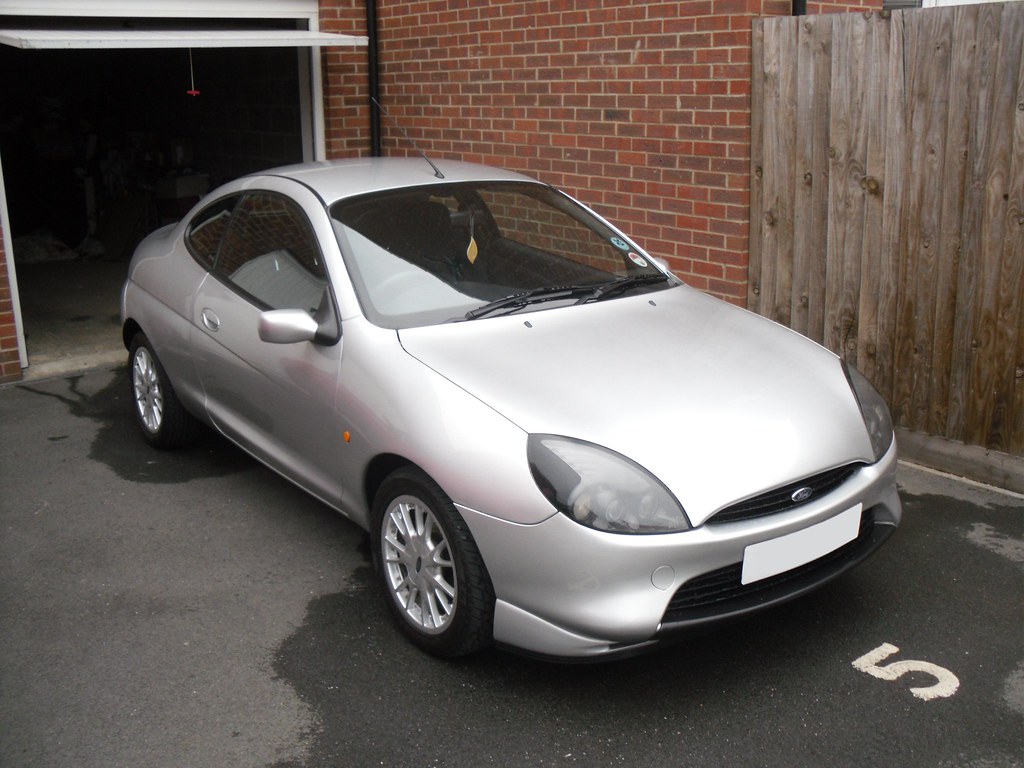
Ayia 2 by slayllian, on Flickr
I am keen to get the rear arches done at the body shop soon and also get a new drivers door lock made up and fitted. Here are a few pics of the project as it stands...
Interior:
Ayia 2 (17) by slayllian, on Flickr
Engine (pleased how this has come up, with not much work):
Ayia 2 (15) by slayllian, on Flickr
Exterior (not much changed yet, just trying to restore before I modify):
Ayia 2 by slayllian, on Flickr
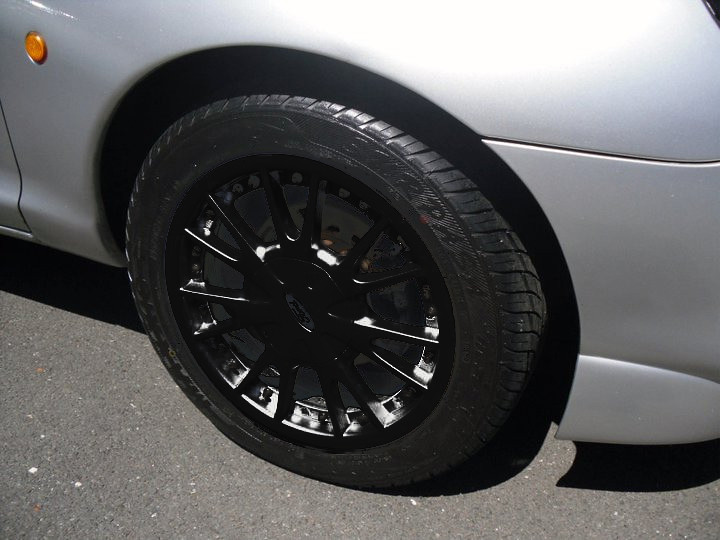
Been thinking about this for a while now, my wheels need refurbishing and I came accross a thread about spraying standard puma alloys black.
I have photo shopped my alloys, what do you guys think? might spray them in the next month or so, just finding the time?
5934002823_d4be8cc4cc_b1 by slayllian, on Flickr
5934563052_fc20e8c4fe_b by slayllian, on Flickr
I have photo shopped my alloys, what do you guys think? might spray them in the next month or so, just finding the time?
5934002823_d4be8cc4cc_b1 by slayllian, on Flickr
5934563052_fc20e8c4fe_b by slayllian, on Flickr
yippeekiay
Well-known member
I'd give an opinion but it takes so bloody long for your photo's to load I haven't got the time to wait...lol.
Need a quicker photo hosting site....or I need a faster connection....ehhe.
Need a quicker photo hosting site....or I need a faster connection....ehhe.
The Arch Bishop
Active member
Nice one fella! Can put mine back on now! Cheers for the picture; I just couldn't work it out when I was trying to fit it back in February. I'll put it down to it being about -1 degrees in the garage at the time! :wink:slayllian said:Little catching up to do:
I found where this thing goes thanks to Arch Bishop and a little puzzle skills lol! it just clips in:
Just a quick update:
- Arghhh..... thought I had fixed the gearbox leak last night, just to be foiled on the first drive! turned out the gearbox breather was fitted the wrong way (the arrow pointing to the rear) hoped correcting this would solve the problem, but its still leaking. Will have another look tonight, Im hoping its just the breather not seated correctly. fingers crossed!!
Also before I shoot off for a weeks holls, I'm hoping to cure an annoying squeak, which I believe is coming somewhere in the region of the rear bumper/passenger side arch. I will post some pics before I go away!
Last night I super glued all the trim clips into the back of door cards, which has really made a difference and cured the last of the interior rattles, the car is nearly sounding like new! makes it feel much more solid!!
found out where that bit of rubber that I hoiked out of the door the other week goes! it was missing from the side of the window as it lowers into the door. I have refitted it and this has now stopped the window clunking in the door when I shut it. whole car is starting to feel more solid now!
had various bits of trim turning up over the last couple of week, so I will be fitting these to replace the damaged items. I will also re-paint my alloys in the next month and I'm thinking of fitting clear side repeaters?
However my top priority is still to sort this damn gearbox leak! :'(
Done a couple of things this week, finished off painting my front arches. Now all I have to do is get her up on stands and seal her under regions. 
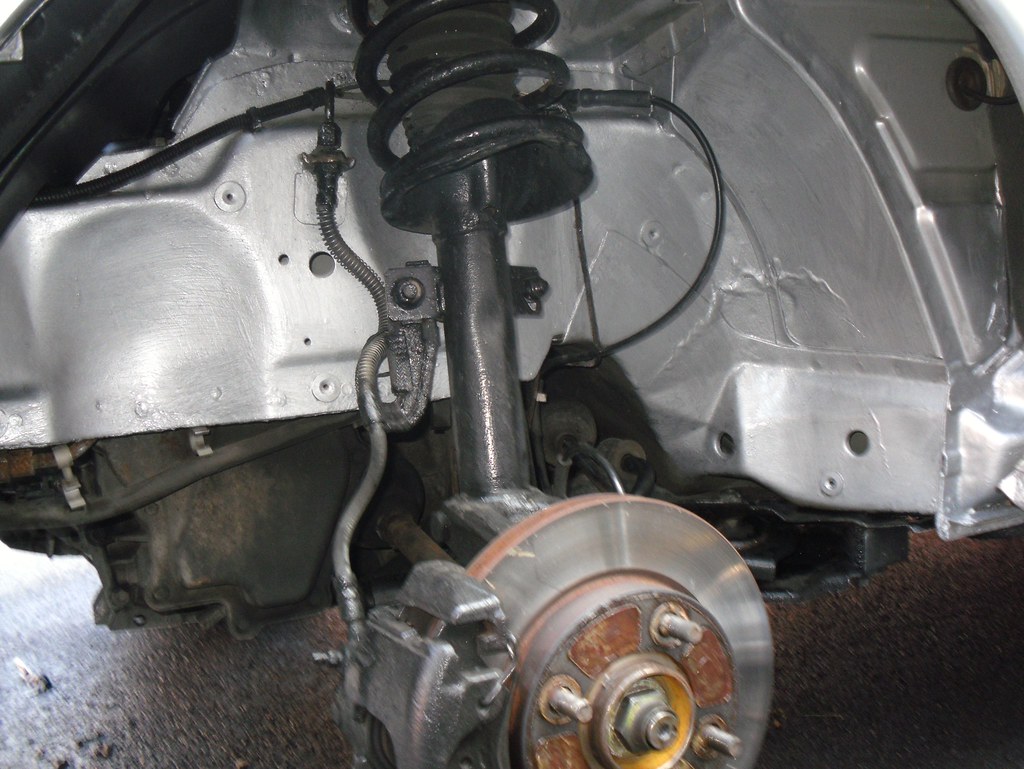
Aiya by slayllian, on Flickr
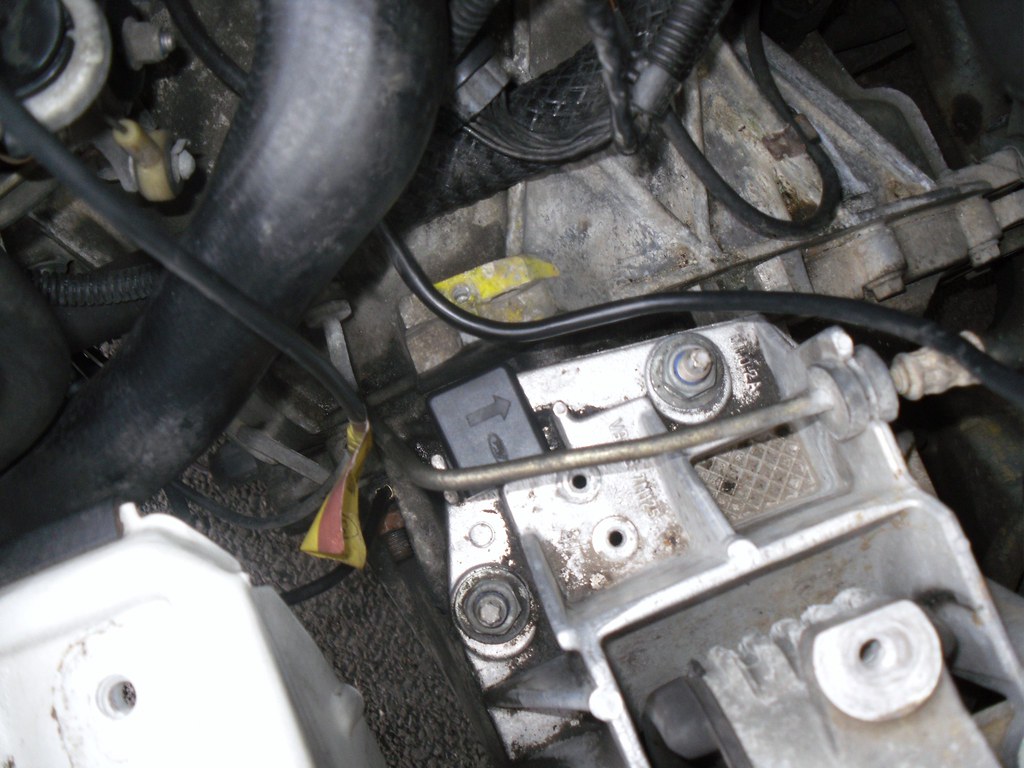
Hoping I have also sorted gearbox leak, it only happened when I pushed the engine hard. Oil was dripping from the top of the gearbox, down the side. Turned out that the gearbox was full to the filler point and had nowhere to go except up out of the breather. I have now drained it to correct level and so far so good!
This is where the oil has been leaking from the breather:
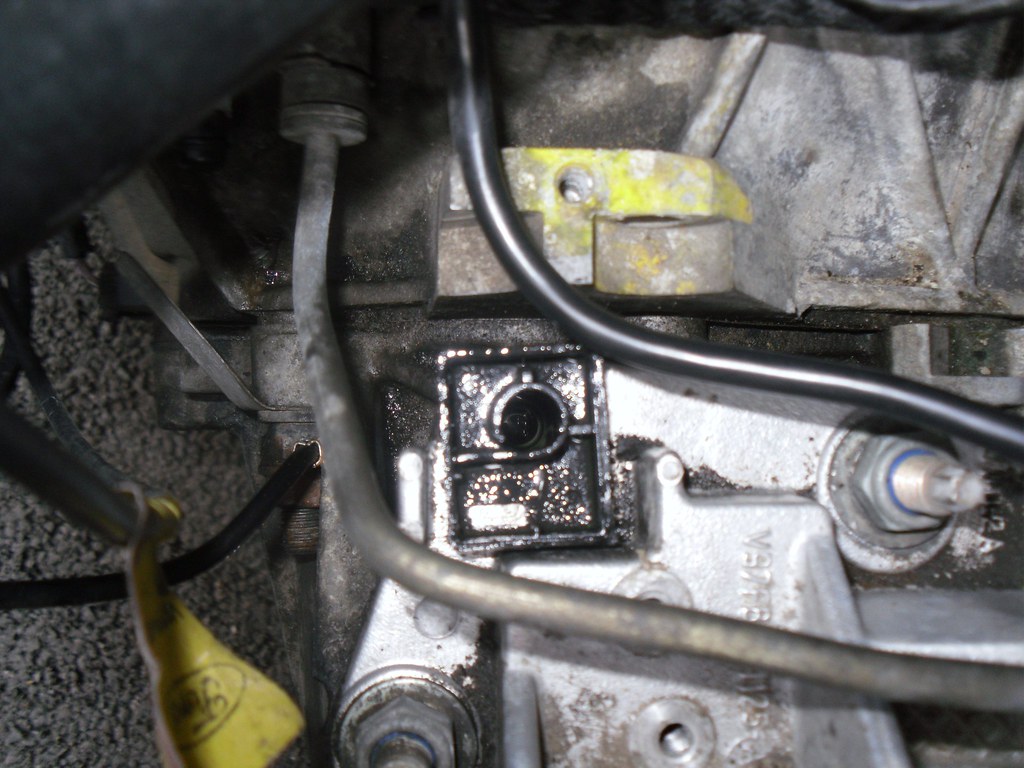
Aiya (2) by slayllian, on Flickr
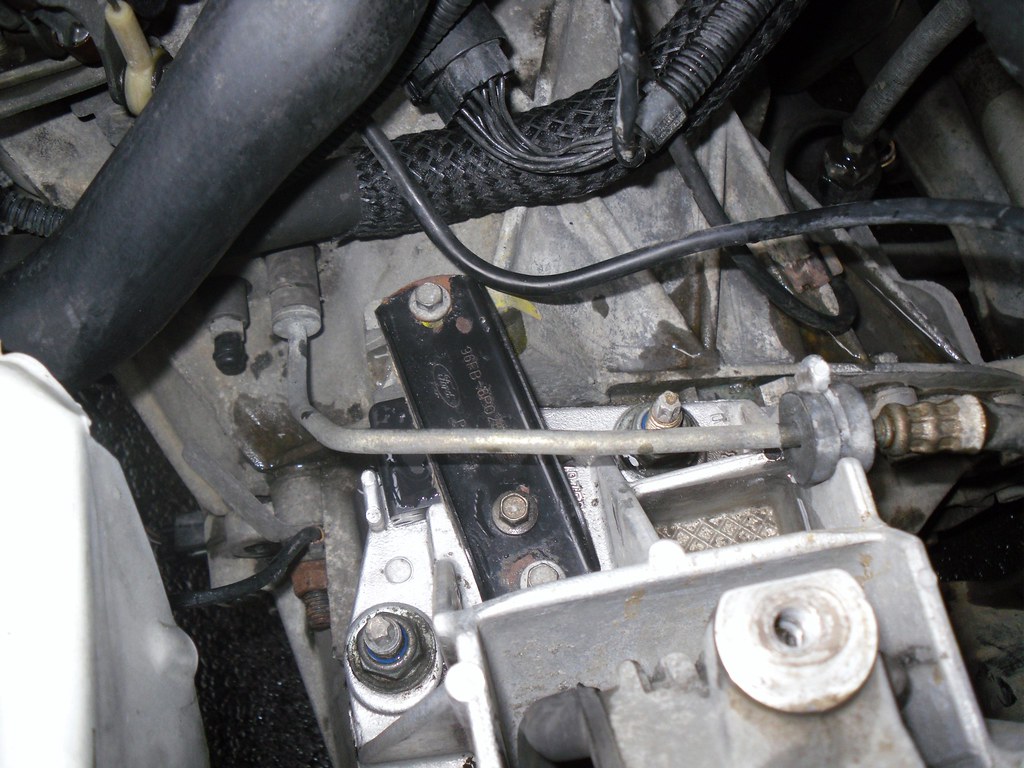
The top half, which I managed to damage, I will get new one from ford:
Aiya (4) by slayllian, on Flickr
Aiya (6) by slayllian, on Flickr
Bracket back in position over breather:
Aiya (10) by slayllian, on Flickr
Area under battery tray:
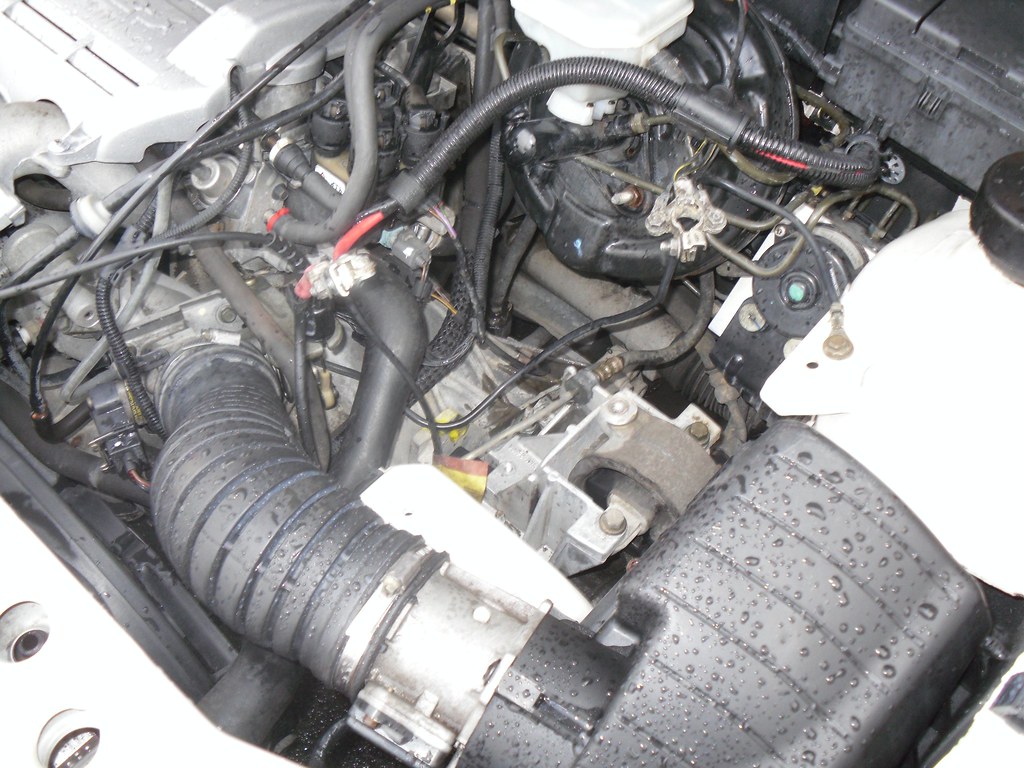
Aiya (8) by slayllian, on Flickr
Gunked underside of engine & gearbox, little cleaner now:
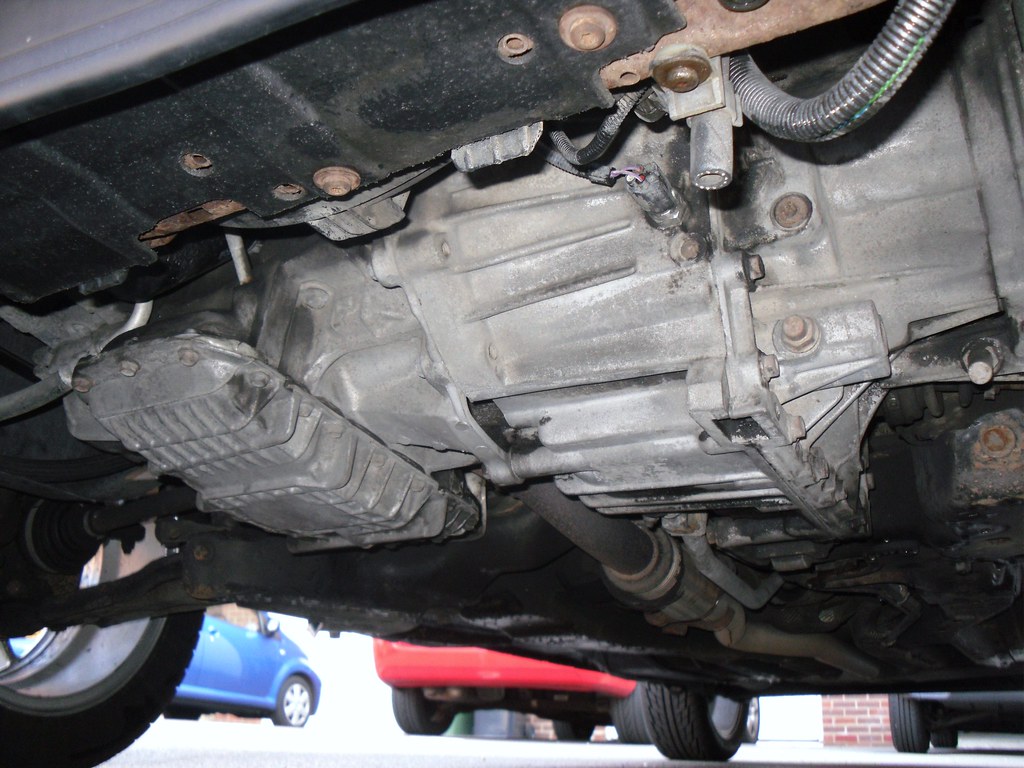
Aiya (3) by slayllian, on Flickr
Another problem I had was the seal on the nearside tail light. It had perished, causing dirt ingress:
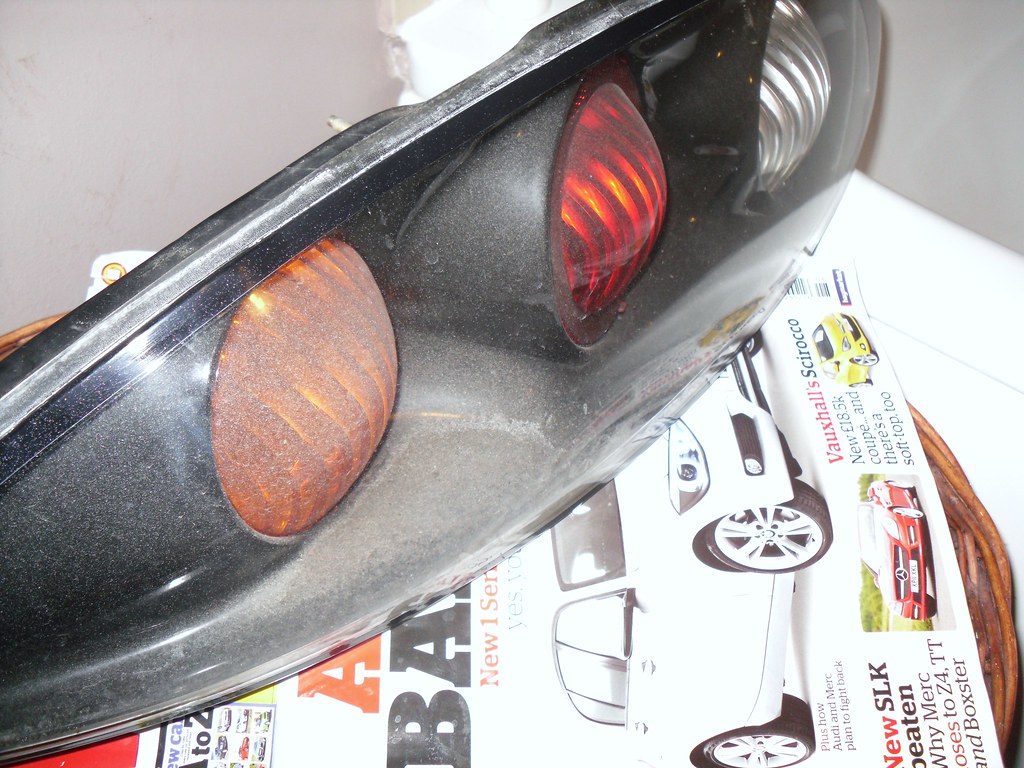
Aiya (7) by slayllian, on Flickr
Cleaned in the same way as the headlight, then silicone sealed:
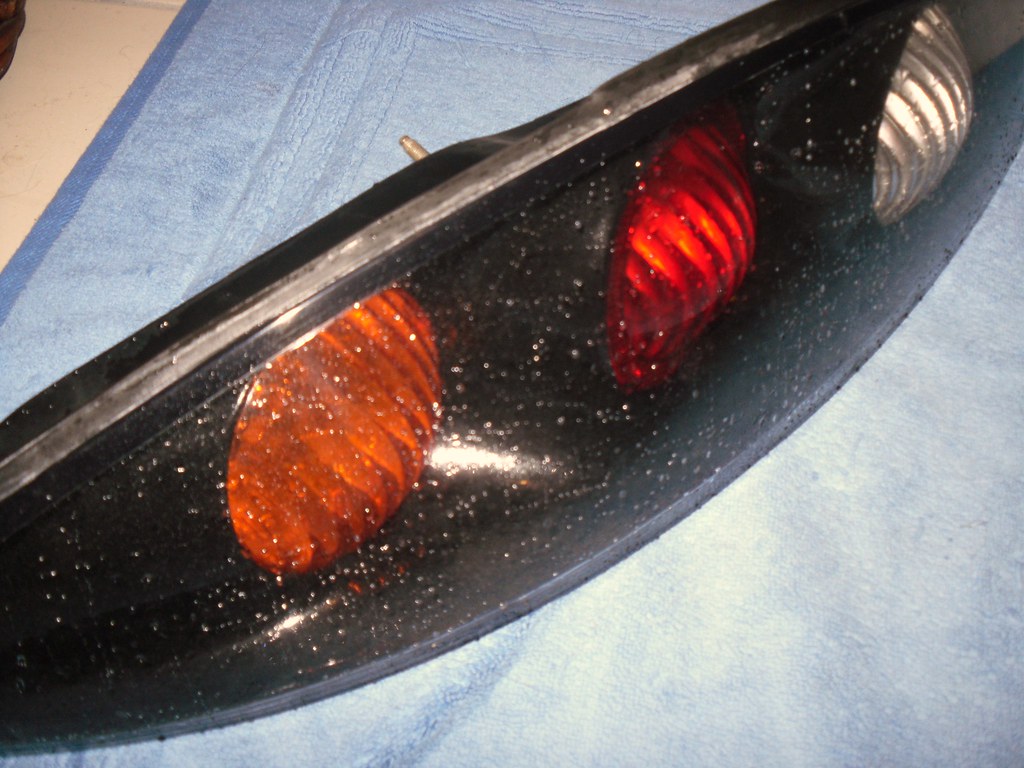
Aiya (9) by slayllian, on Flickr
Aiya by slayllian, on Flickr
Hoping I have also sorted gearbox leak, it only happened when I pushed the engine hard. Oil was dripping from the top of the gearbox, down the side. Turned out that the gearbox was full to the filler point and had nowhere to go except up out of the breather. I have now drained it to correct level and so far so good!
This is where the oil has been leaking from the breather:
Aiya (2) by slayllian, on Flickr
The top half, which I managed to damage, I will get new one from ford:
Aiya (4) by slayllian, on Flickr
Aiya (6) by slayllian, on Flickr
Bracket back in position over breather:
Aiya (10) by slayllian, on Flickr
Area under battery tray:
Aiya (8) by slayllian, on Flickr
Gunked underside of engine & gearbox, little cleaner now:
Aiya (3) by slayllian, on Flickr
Another problem I had was the seal on the nearside tail light. It had perished, causing dirt ingress:
Aiya (7) by slayllian, on Flickr
Cleaned in the same way as the headlight, then silicone sealed:
Aiya (9) by slayllian, on Flickr
I finally replaced the broken gear leaver surround, picked it up on ebay for £15. The new one has the later style badge, so I will swap the badge back over in the next couple of weeks.
Original broken trim:
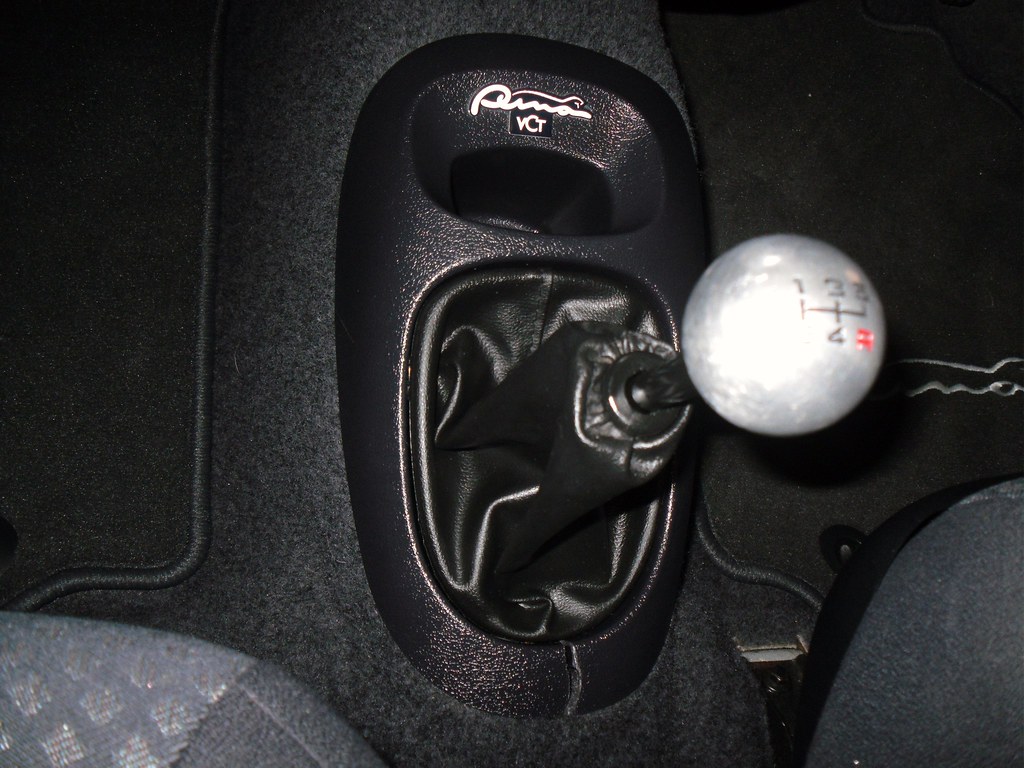
Aiya (11) by slayllian, on Flickr
Spot the difference:

Aiya (12) by slayllian, on Flickr
New item in car:
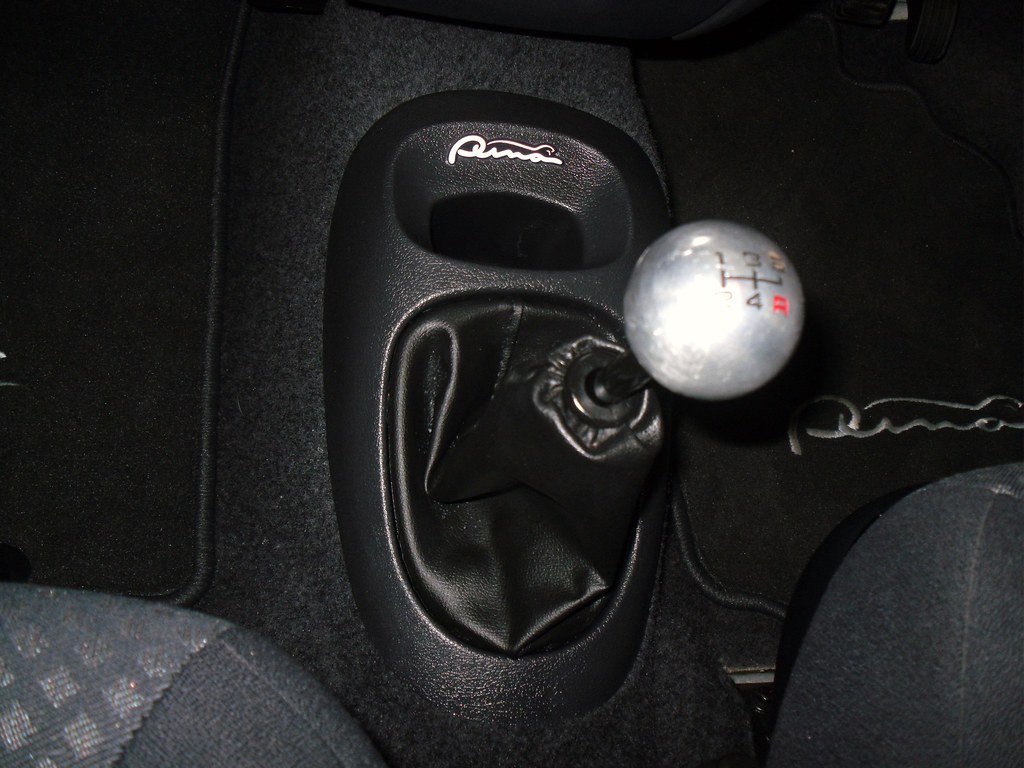
Aiya (13) by slayllian, on Flickr
Finally couple pictures of Aiya all cleaned up:
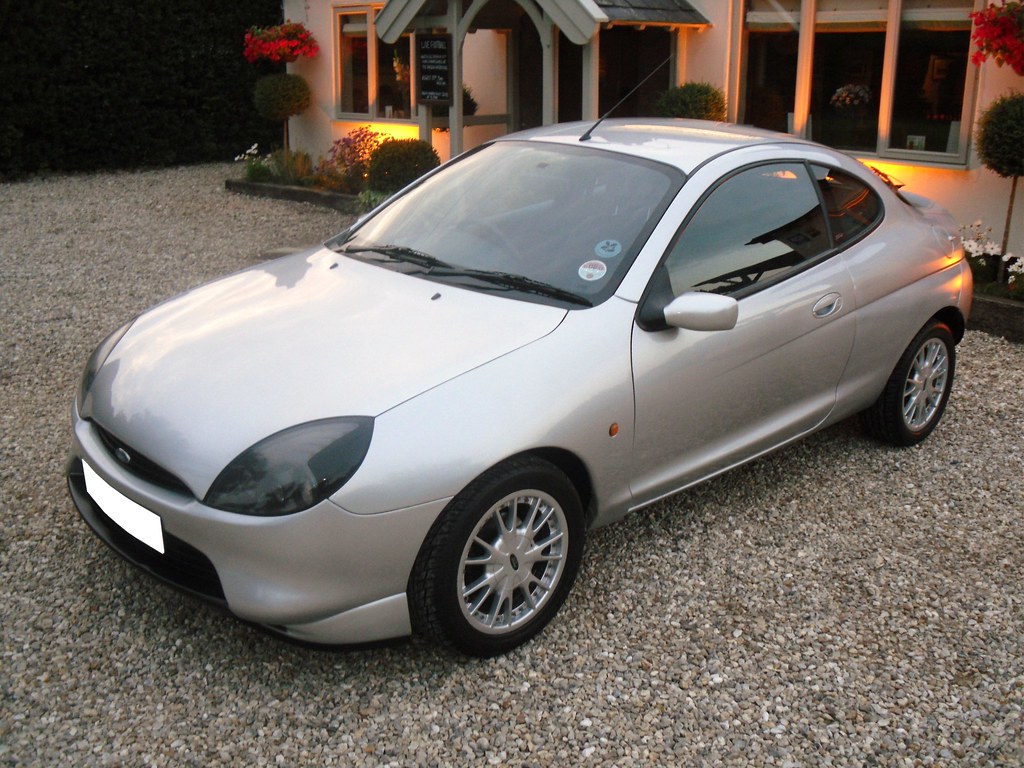
Aiya (16) - Copy by slayllian, on Flickr
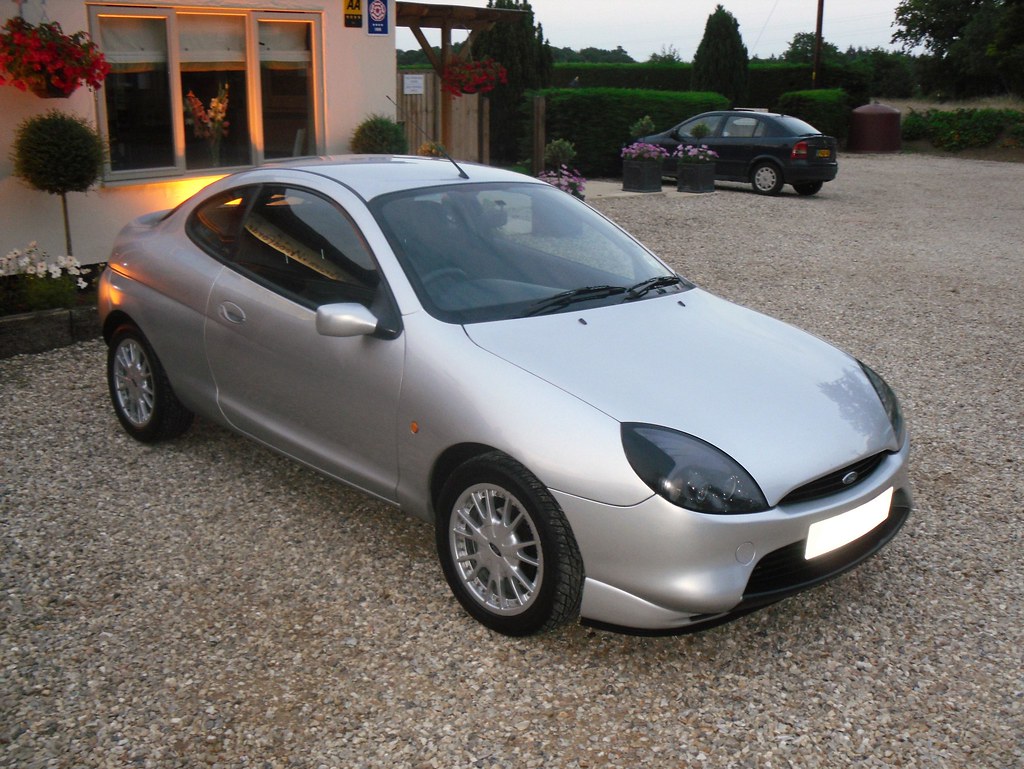
Aiya (15) - Copy by slayllian, on Flickr
Got plenty more jobs coming, will post updates as I go along.
Original broken trim:
Aiya (11) by slayllian, on Flickr
Spot the difference:
Aiya (12) by slayllian, on Flickr
New item in car:
Aiya (13) by slayllian, on Flickr
Finally couple pictures of Aiya all cleaned up:
Aiya (16) - Copy by slayllian, on Flickr
Aiya (15) - Copy by slayllian, on Flickr
Got plenty more jobs coming, will post updates as I go along.
Almost forgot, fixed that pesky squeak (the last one) found out it was the mudflap screws rubbing on the bodywork over rough roads, so simply stuck some foam on the rear of the screws and thats it, finally no more rattles.. at all!!
* Edit 22/02/12 - Red herring, it appears to be coming from the rear n/s suspension strut, so will have to wait until I can fit my Spax struts, however replacing rear bushes has improved it so much, its barley audible any more.
* Edit 22/02/12 - Red herring, it appears to be coming from the rear n/s suspension strut, so will have to wait until I can fit my Spax struts, however replacing rear bushes has improved it so much, its barley audible any more.
The Arch Bishop
Active member
Ah, good old squeak fixing eh? It's a PITA to find them but very satisfying when you do! Have tracked down and killed two this week on mine.slayllian said:Almost forgot, fixed that pesky squeak (the last one) found out it was the mudflap screws rubbing on the bodywork over rough roads, so simply stuck some foam on the rear of the screws and thats it, finally no more rattles.. at all!! :lol:
Similar threads
Latest posts
-

-
-
-
-
Vehicle For Sale 2001 (Y) 1.7 85k FSH bodywork mint £2990 Warwickshire
- Latest: John Woodward
-

-