Pumacharger mk2

ProjectPuma

Help Support ProjectPuma:

This site may earn a commission from merchant affiliate links, including eBay, Amazon, and others.
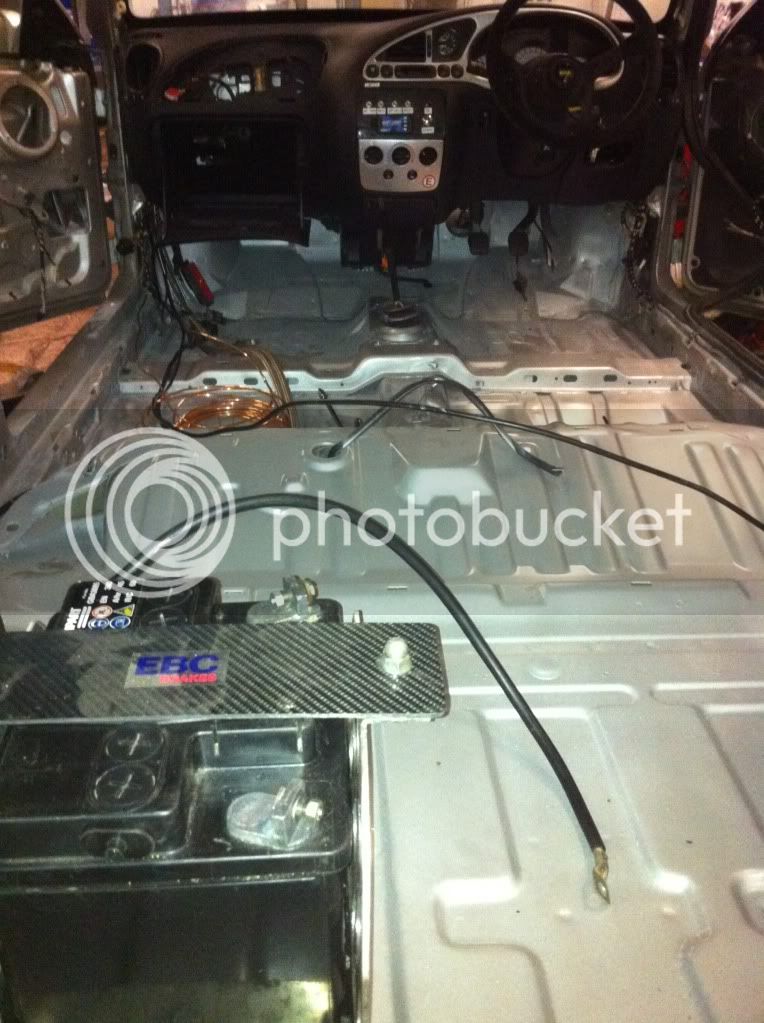
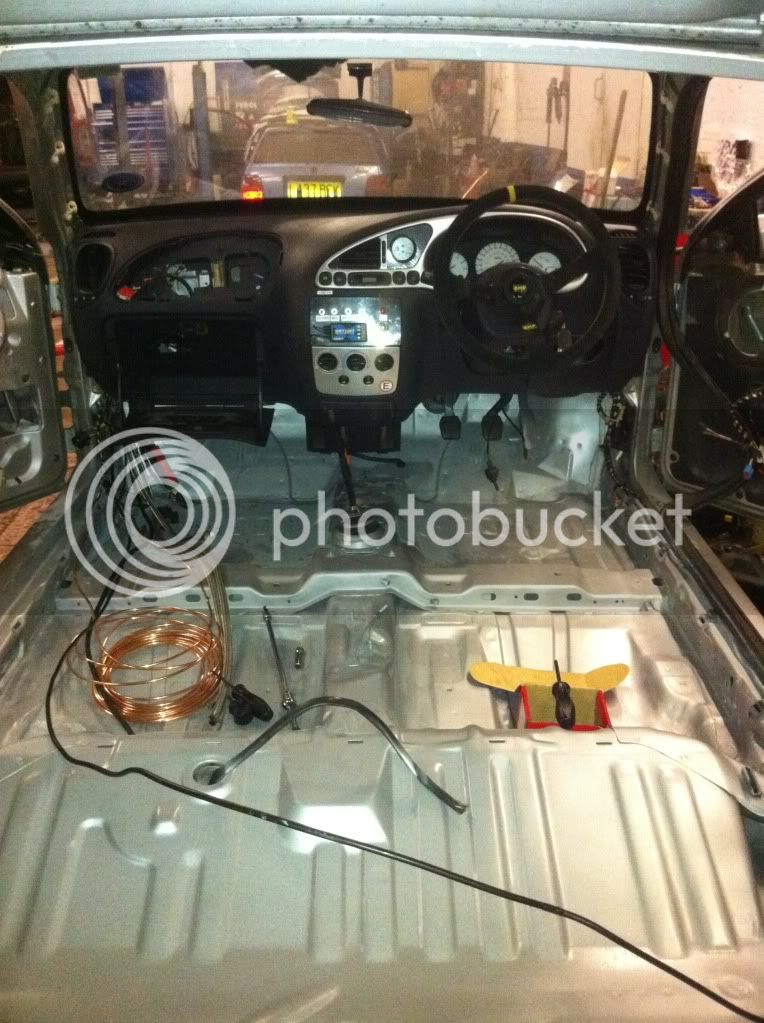
Decided it would be faster and easier to just put it back to silver inside.

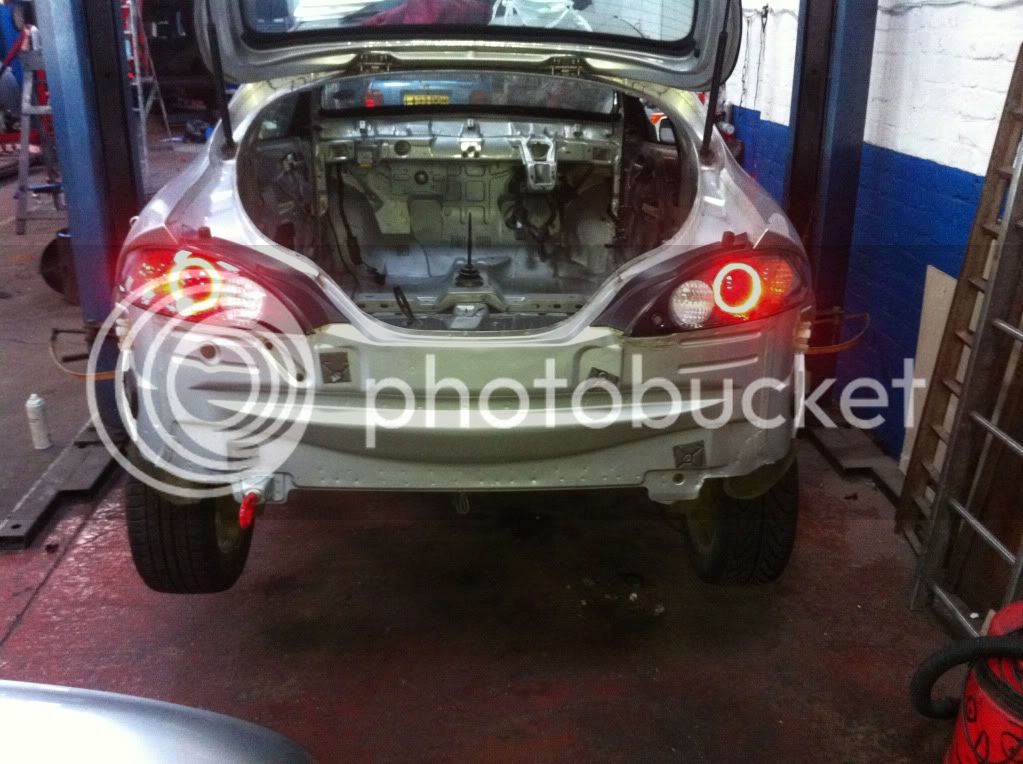
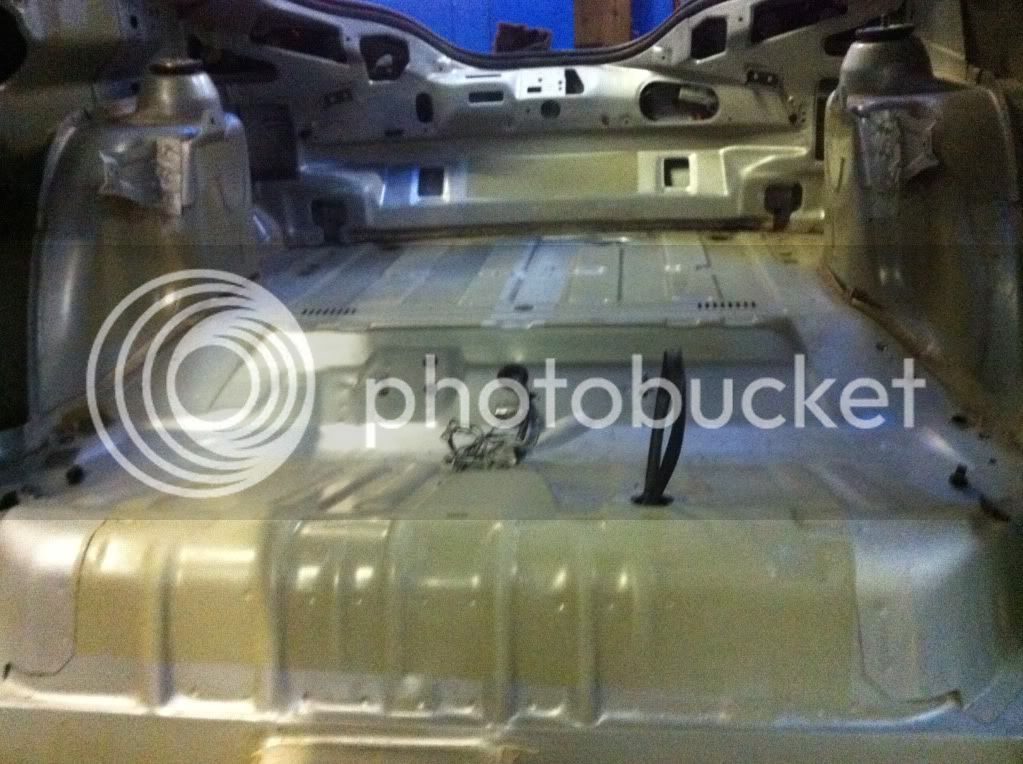
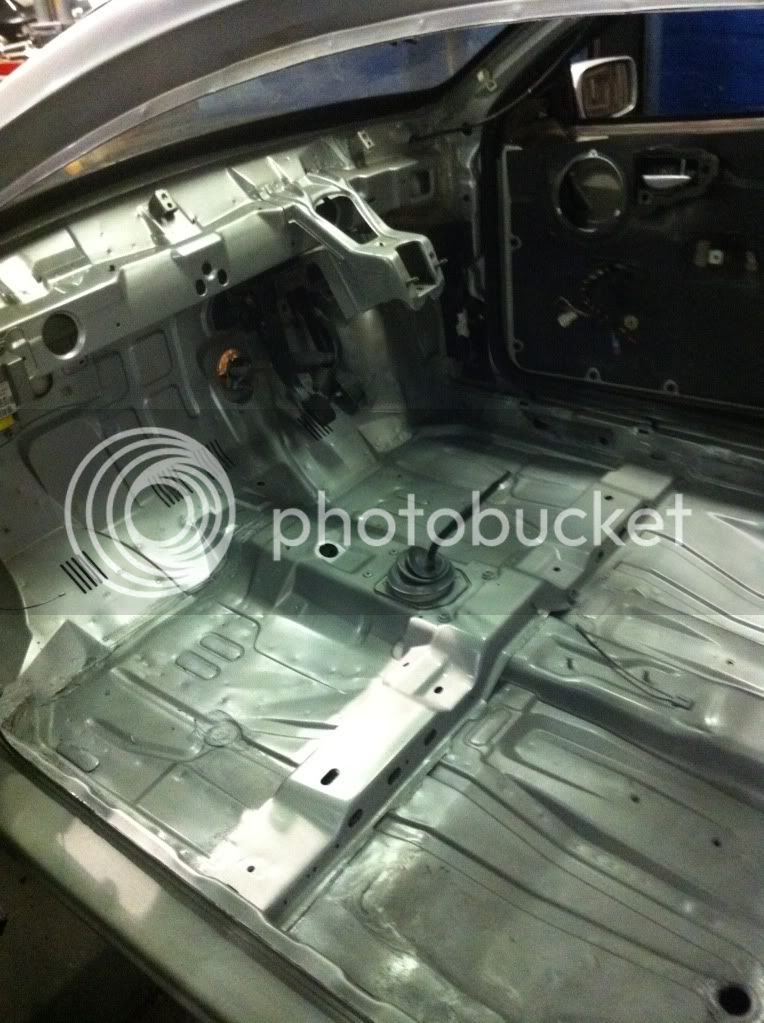
pic of rear after prep. de-tar, clean, scuff all with scotchbright then cleaned again before masking.
IMG_0170.jpg

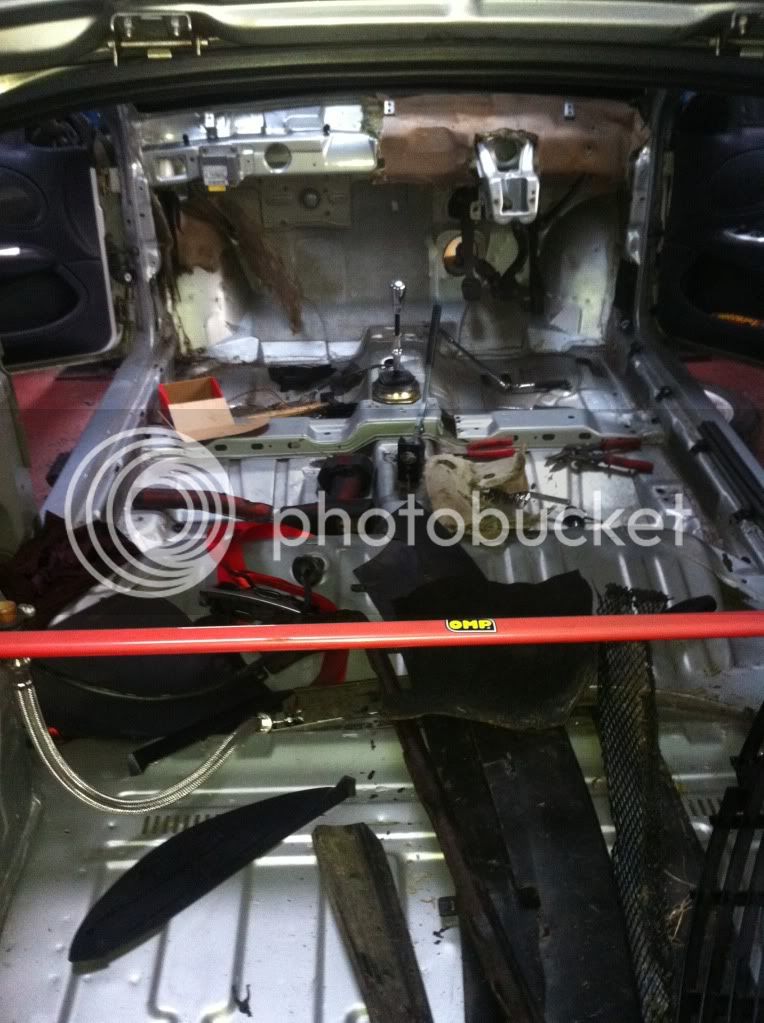
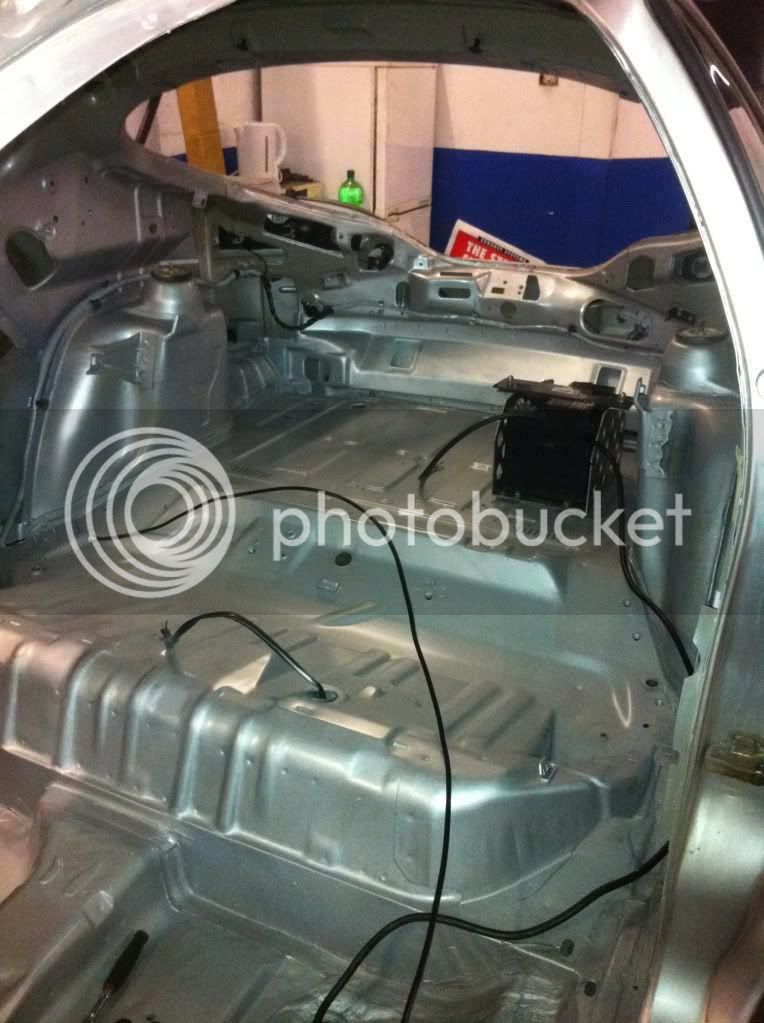
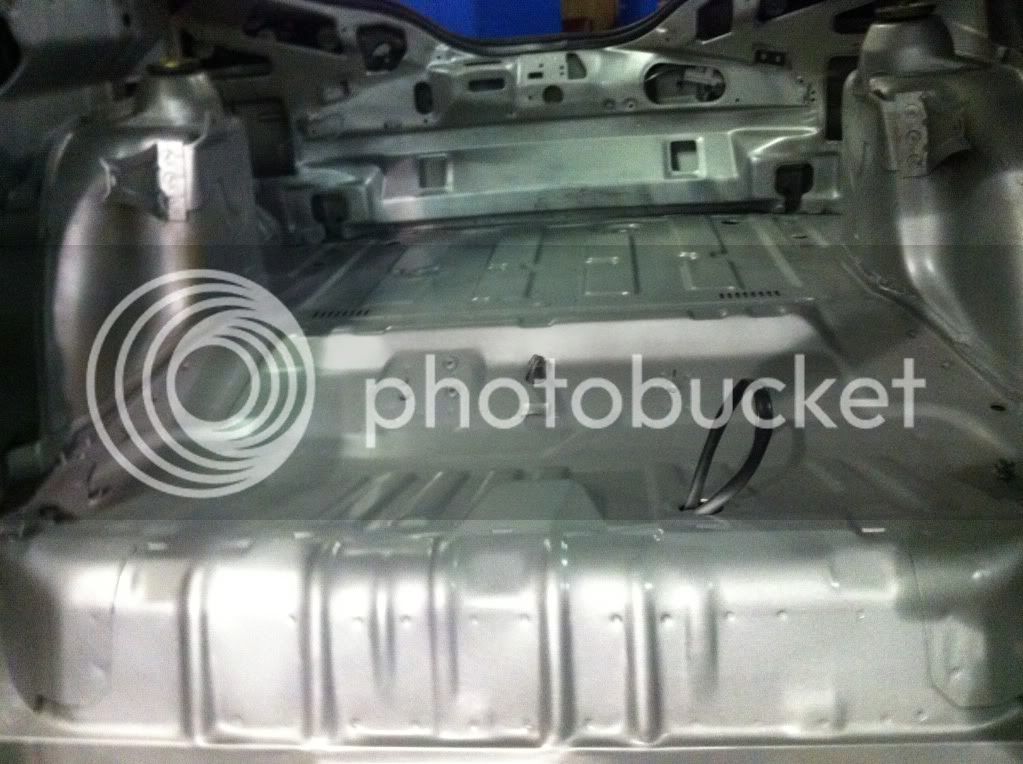
inside painted, 2 coats of primer, 3 silver, 3 clearcoat.
IMG_0177.jpg

IMG_0172.jpg

IMG_0175.jpg

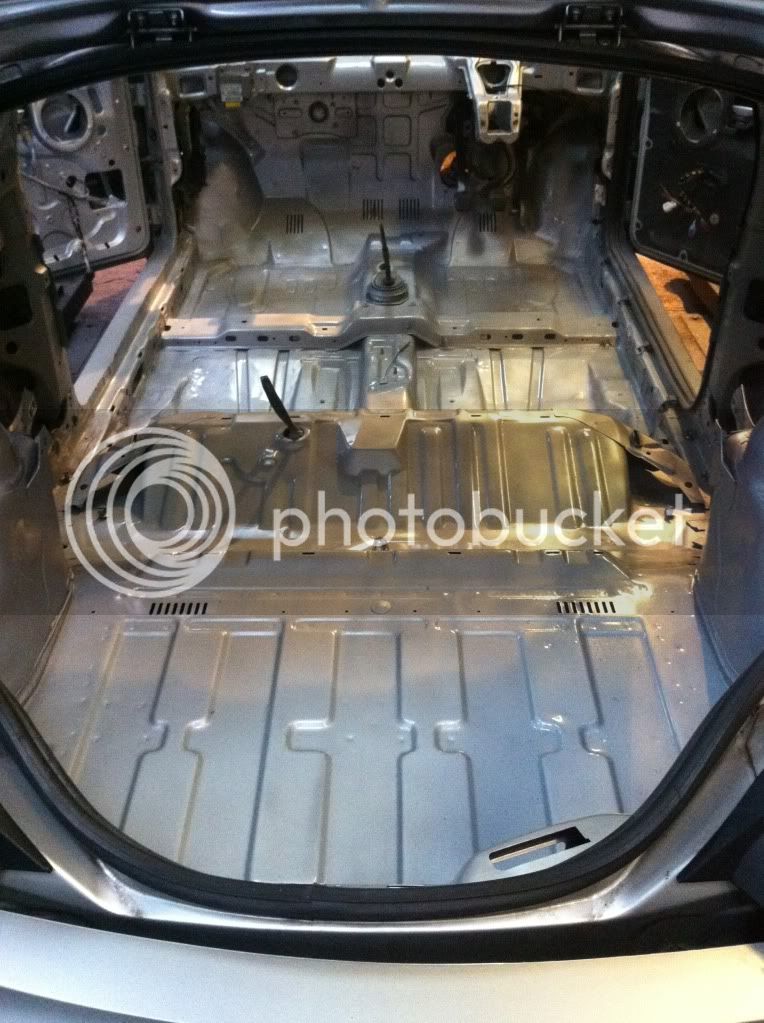
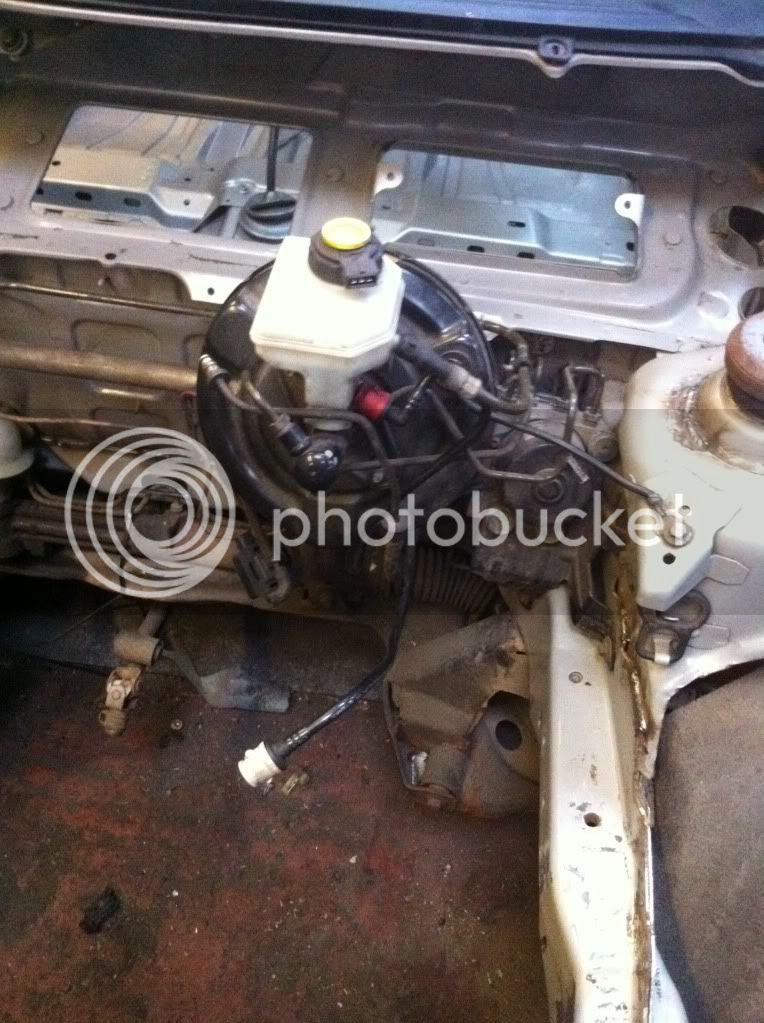
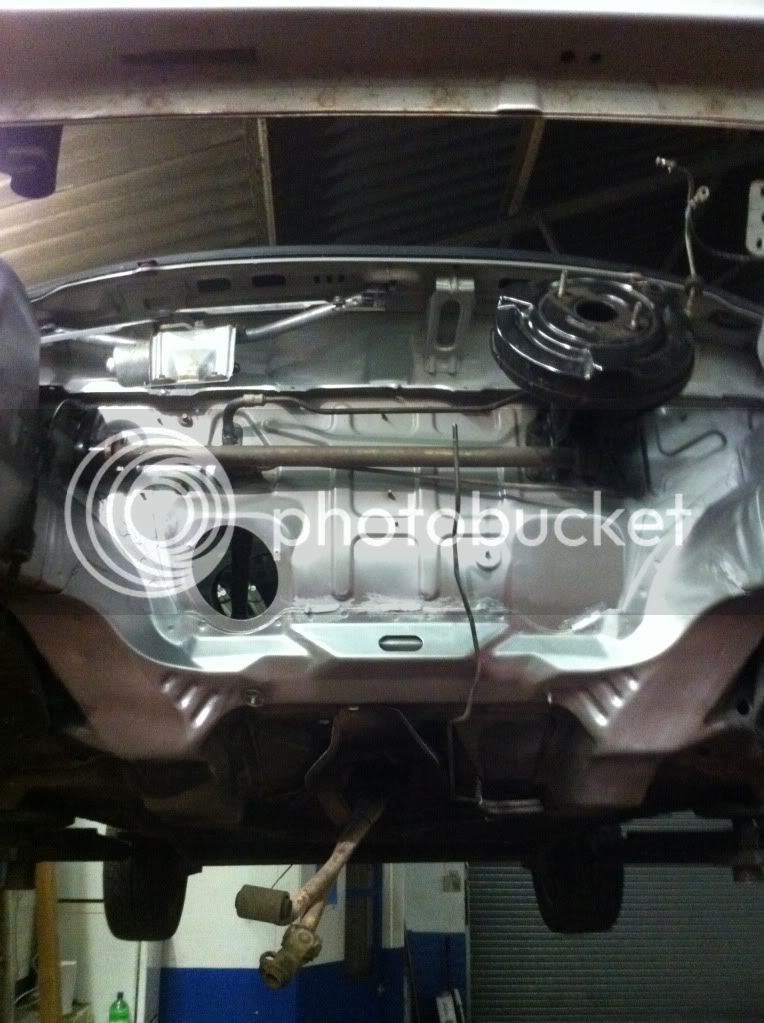
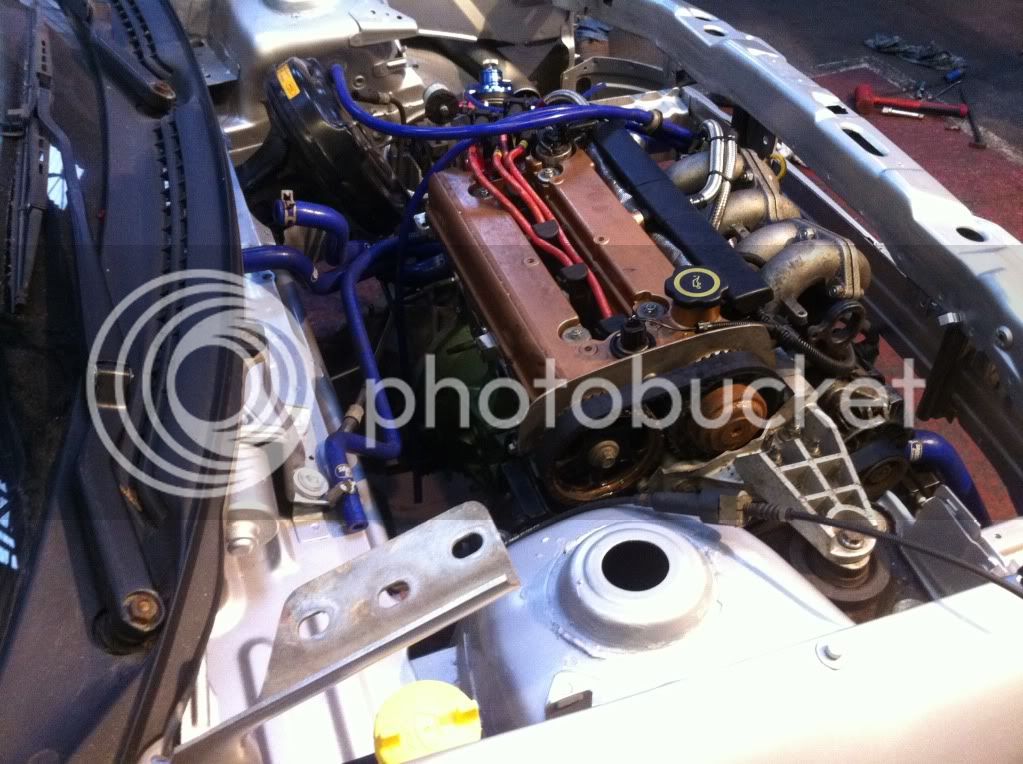
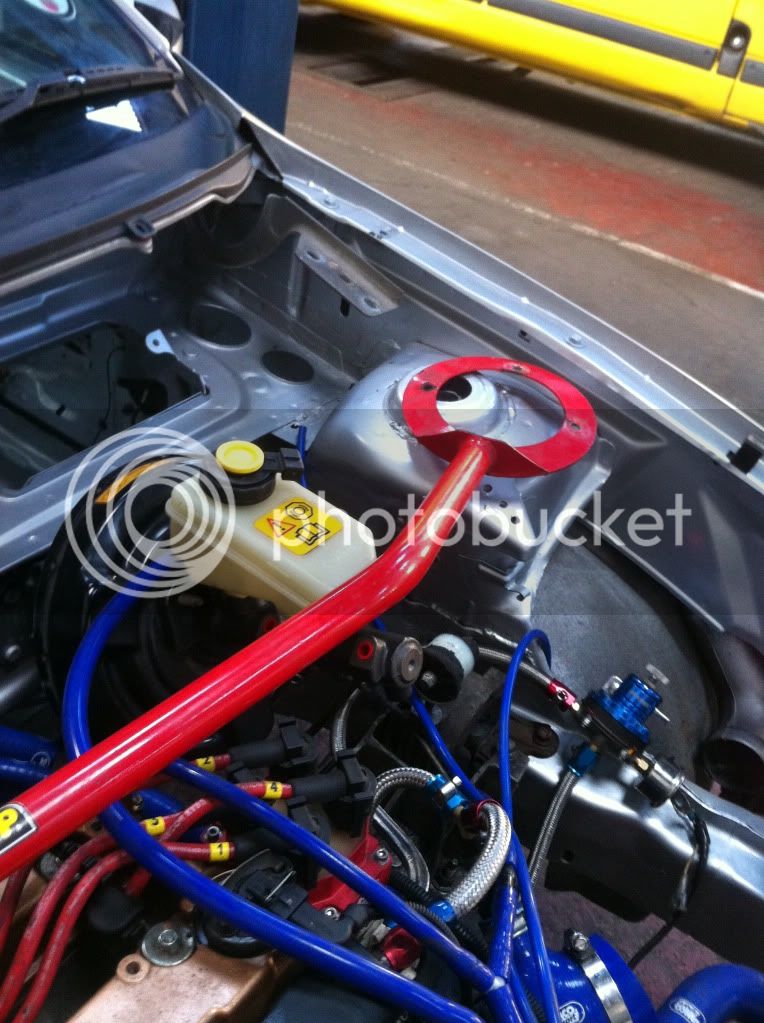
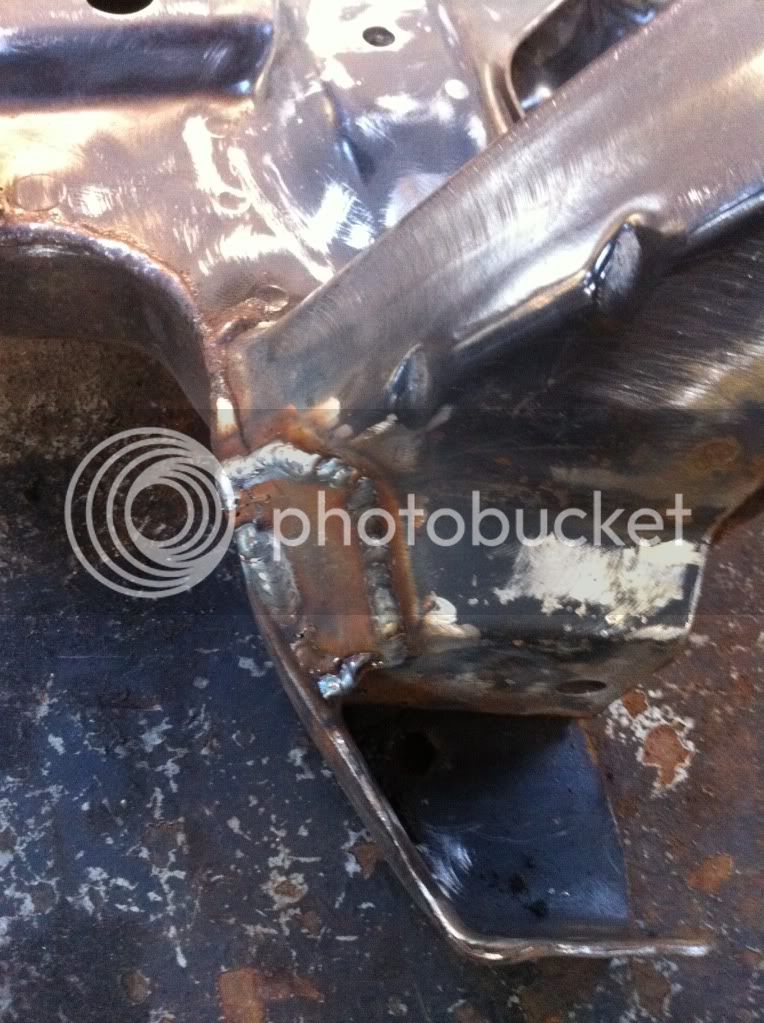
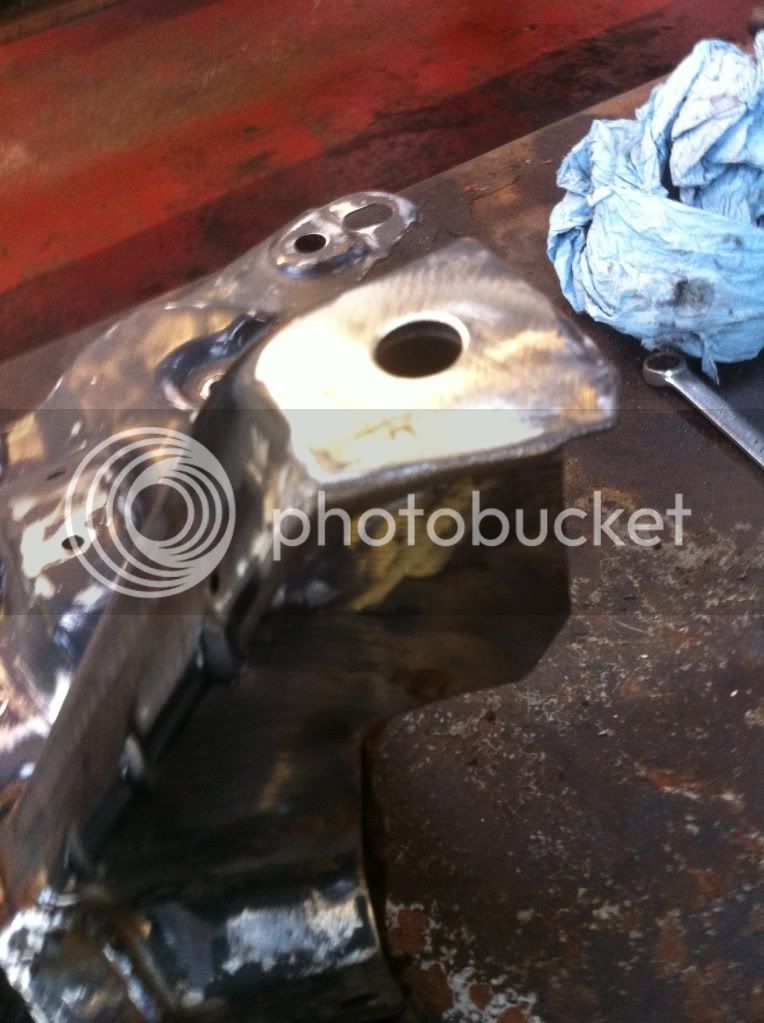
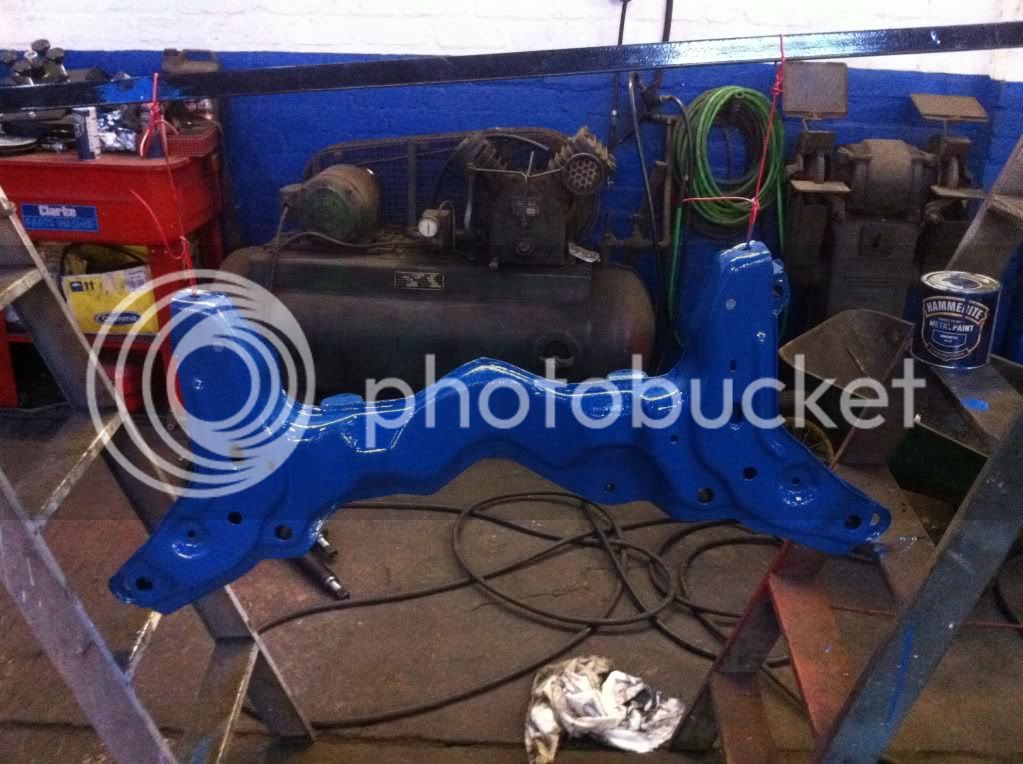
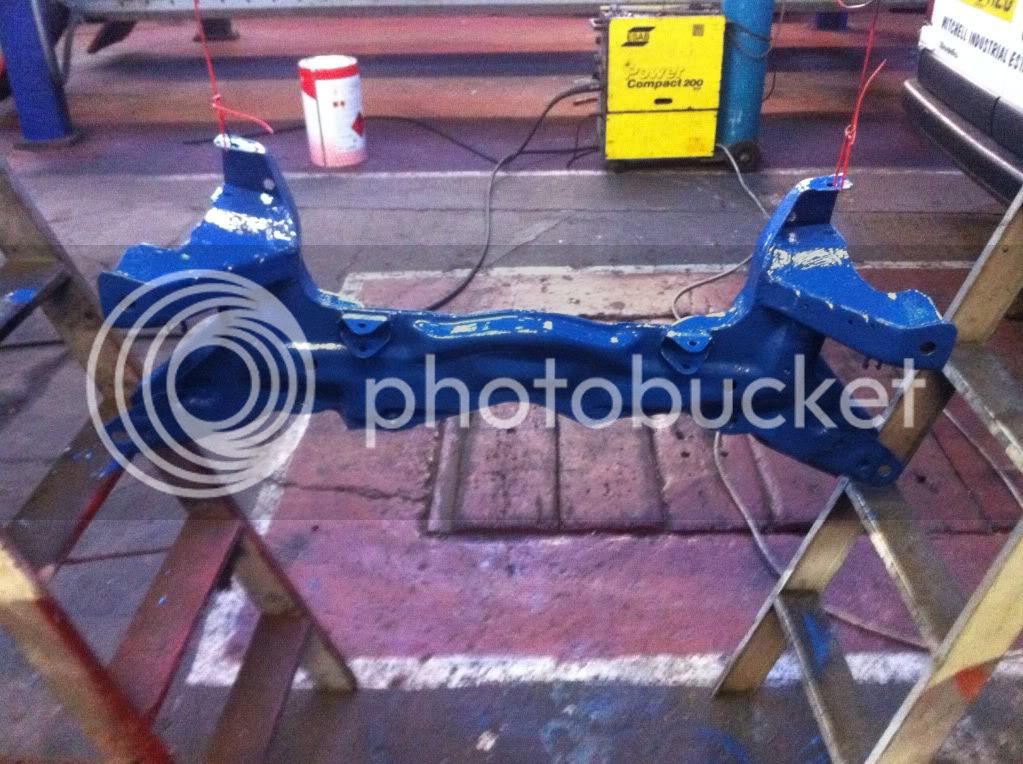
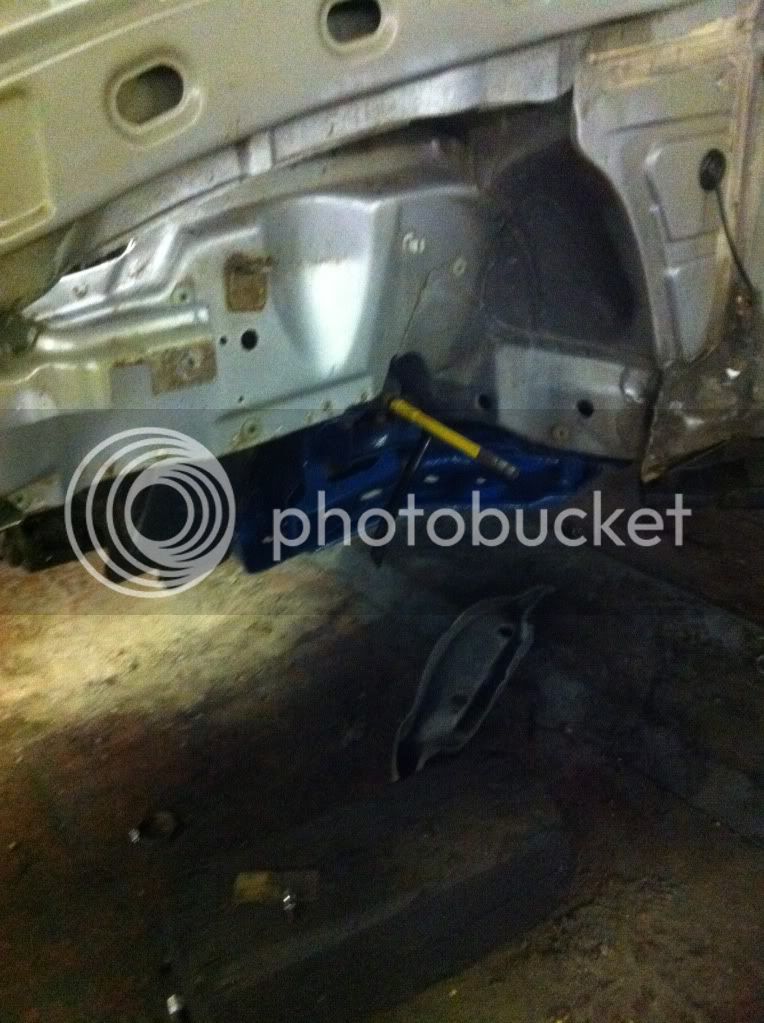
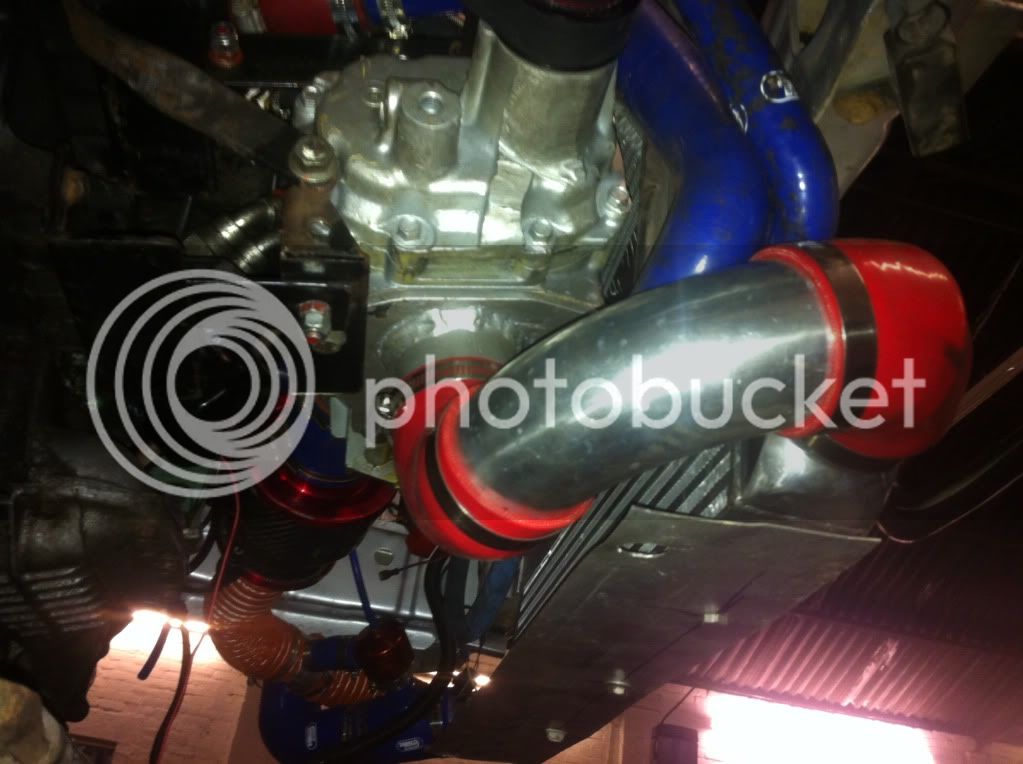
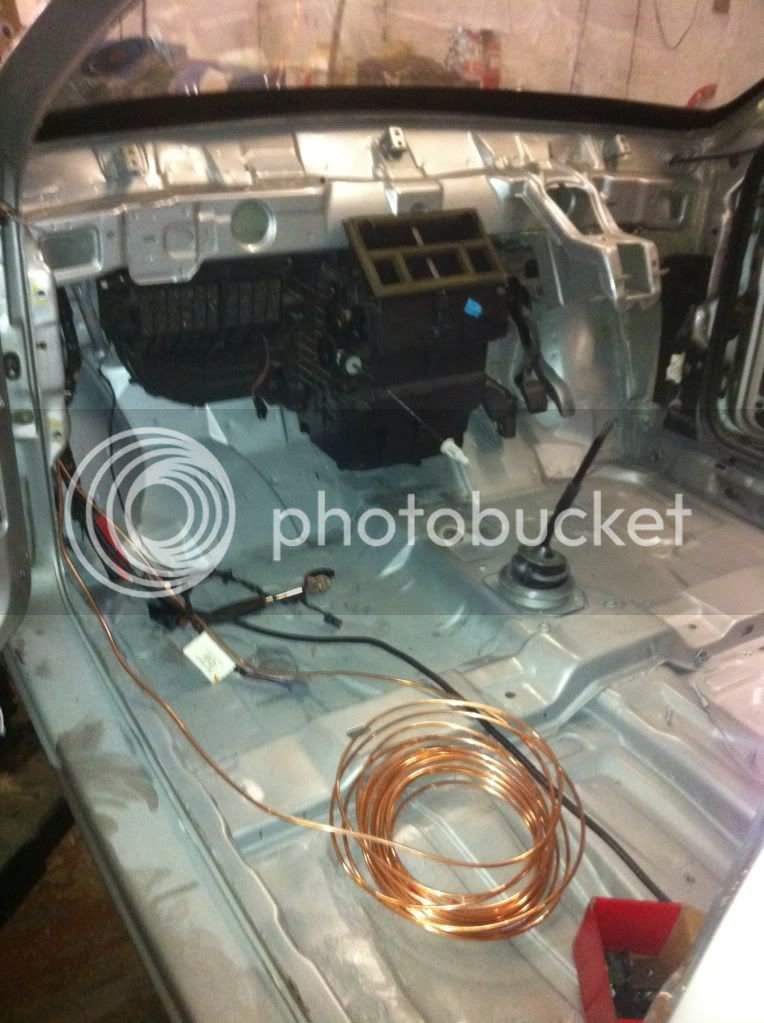
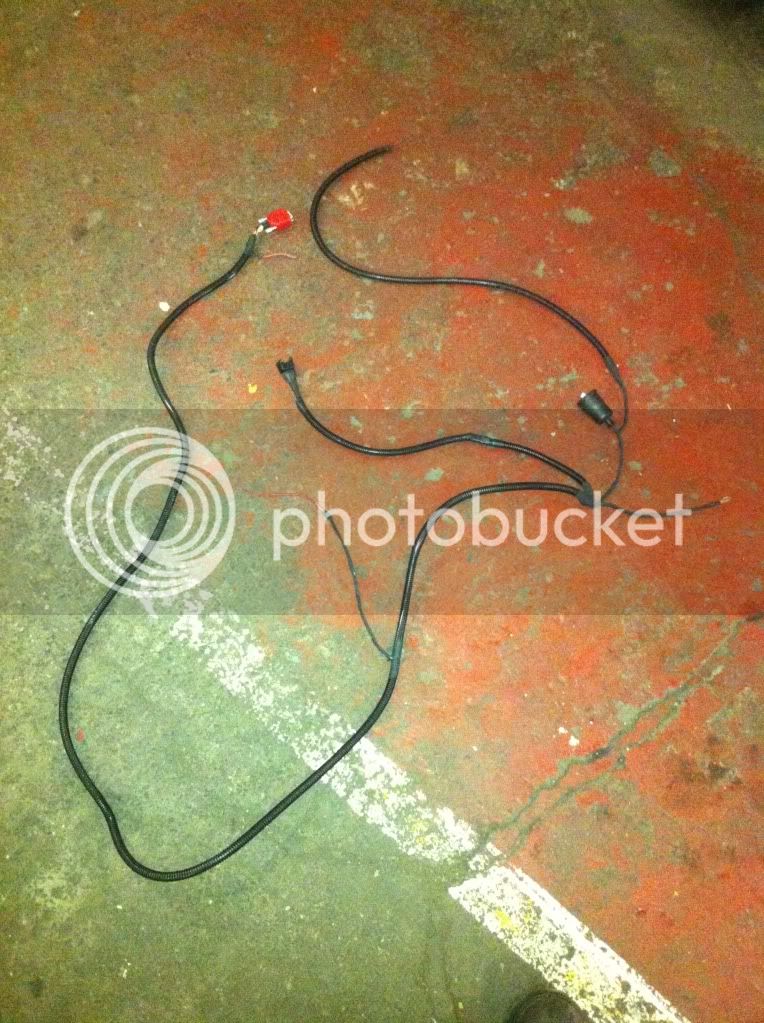
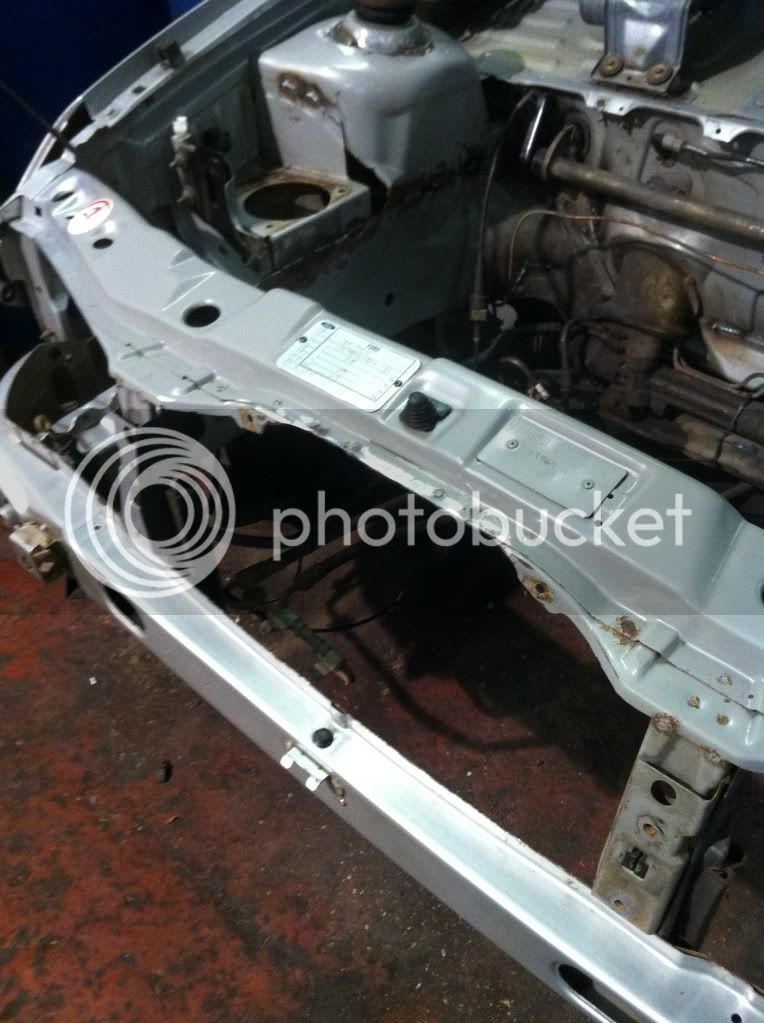
Next is under the engine bay.
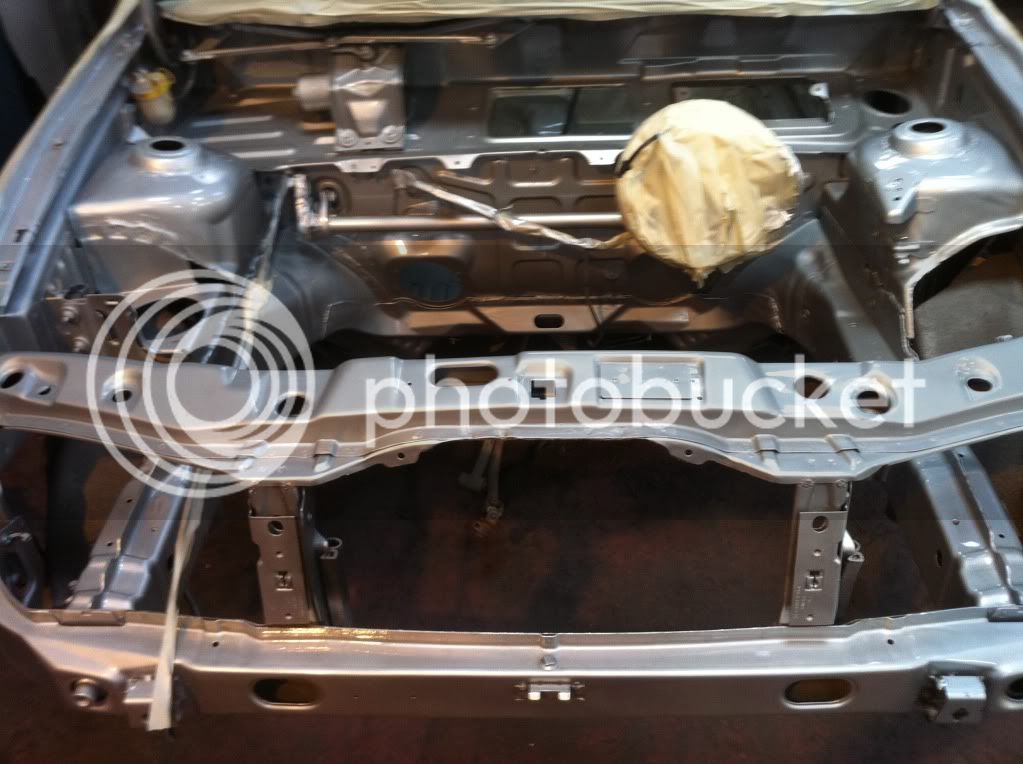
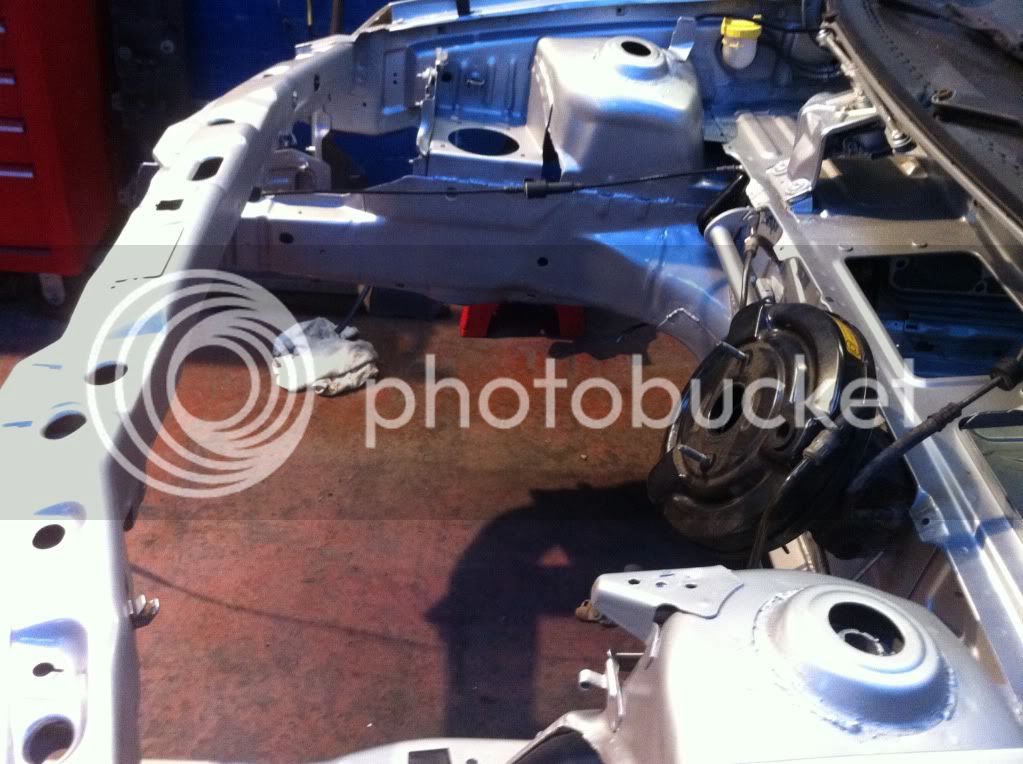
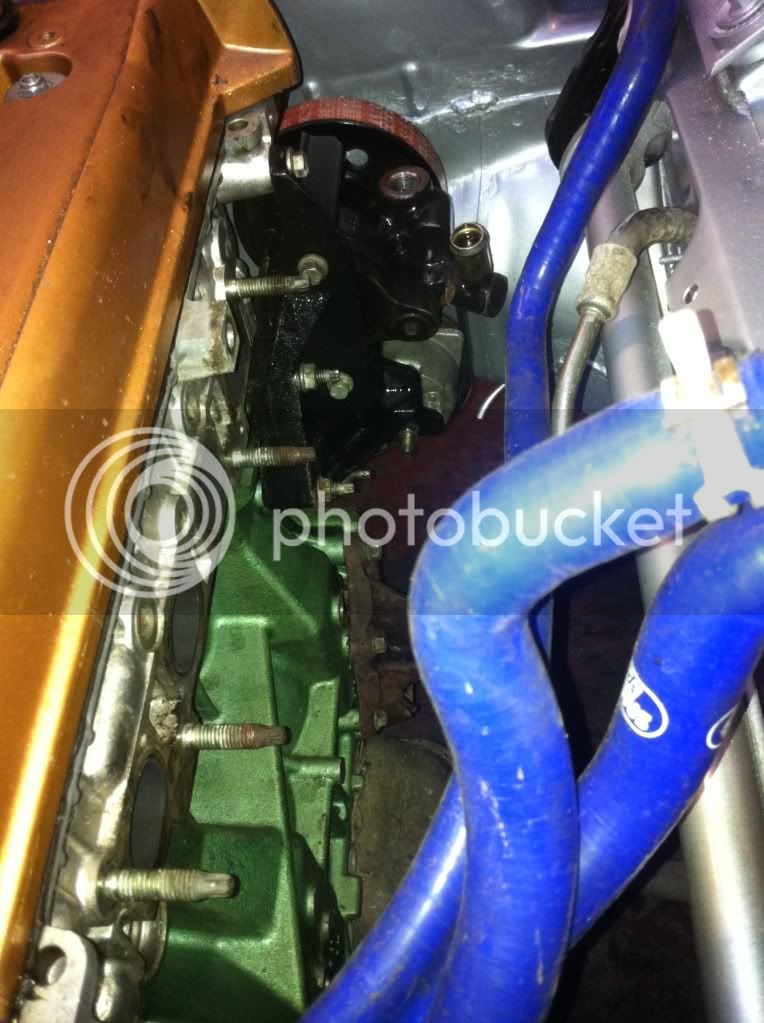
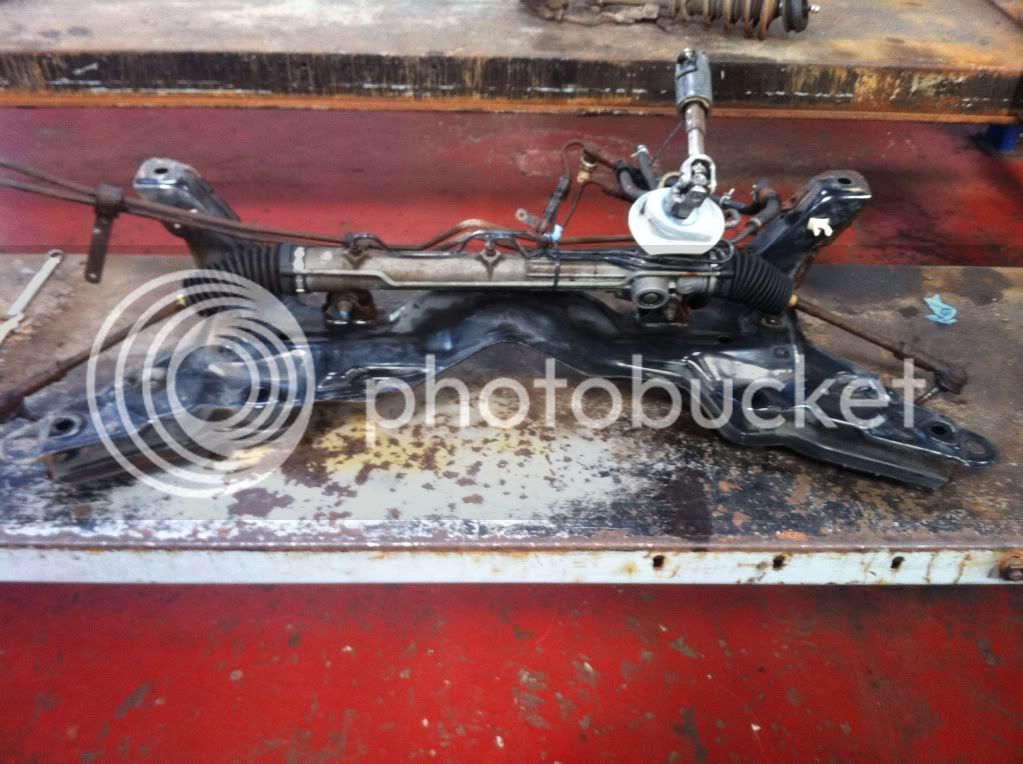
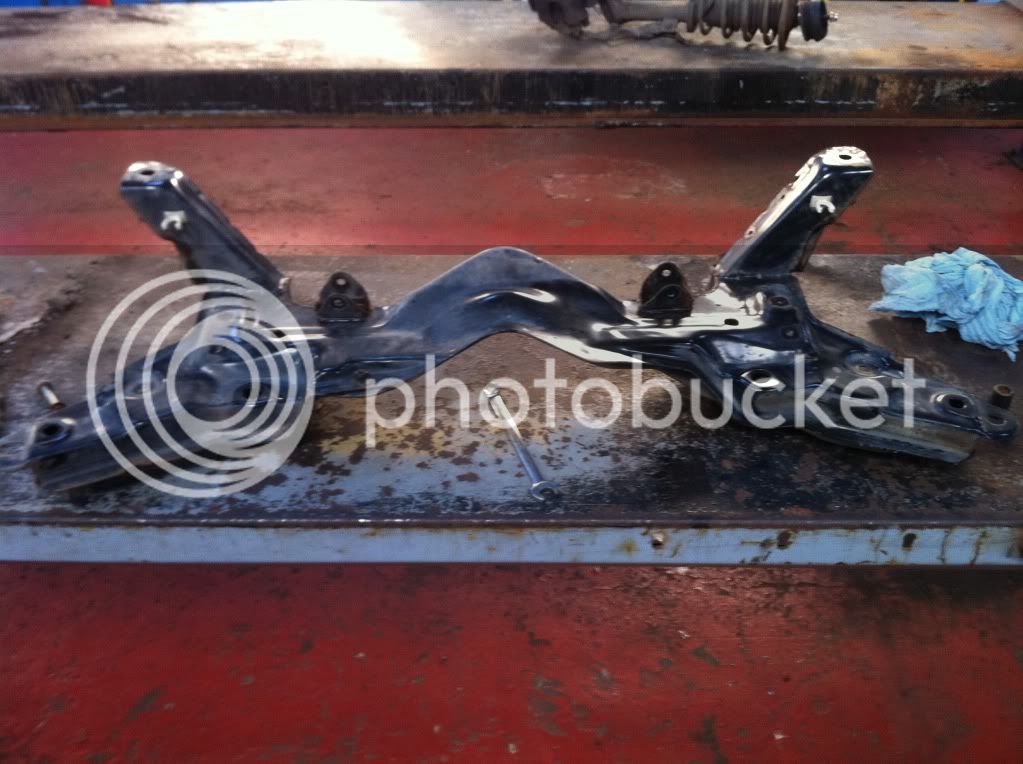
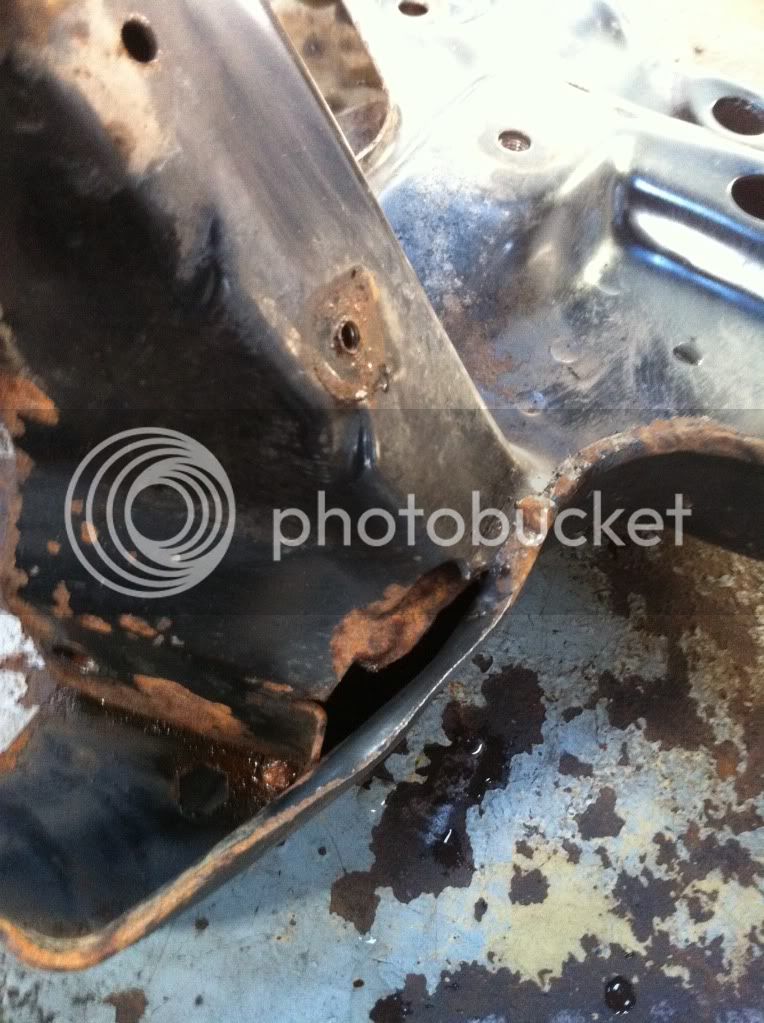
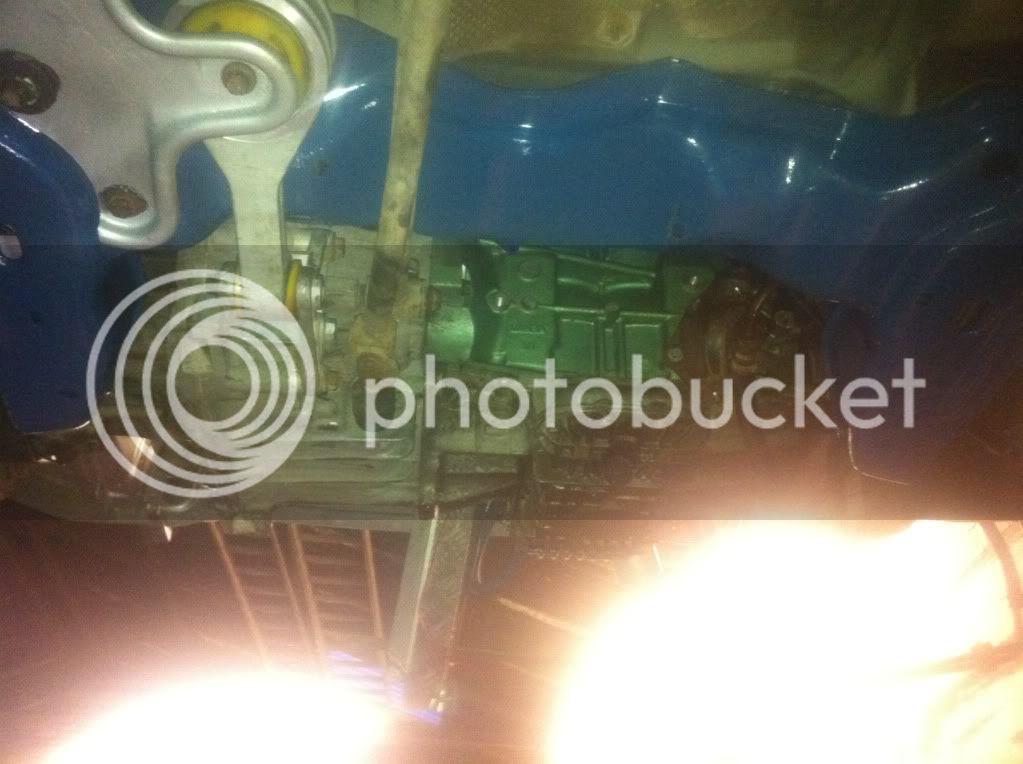
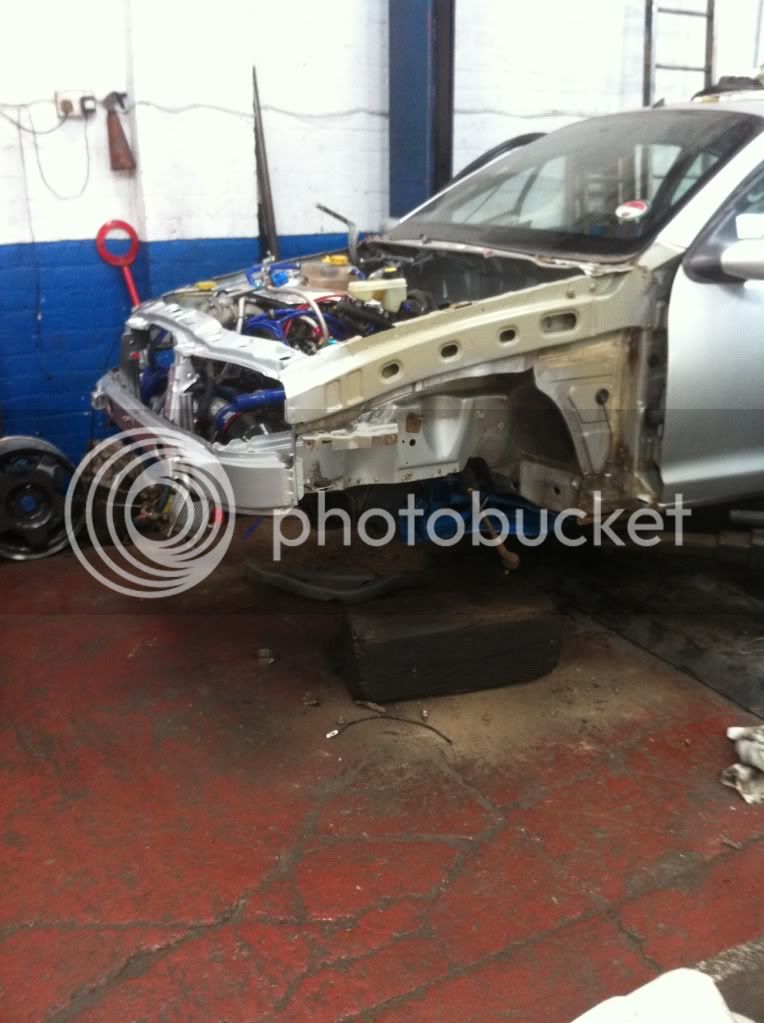
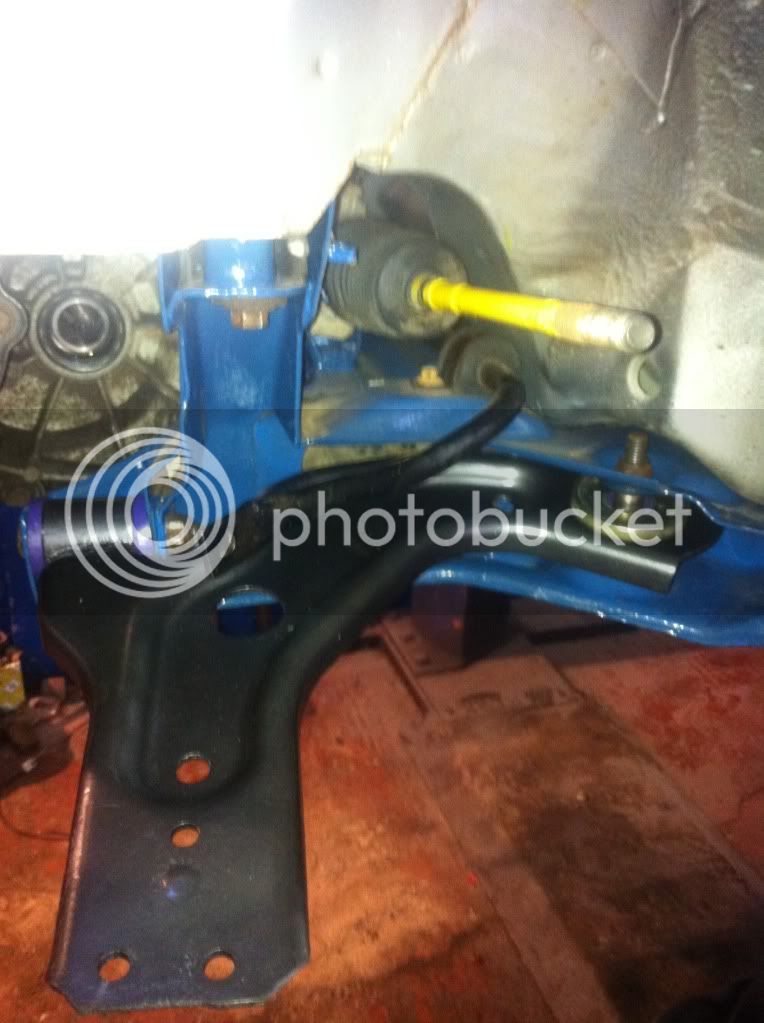
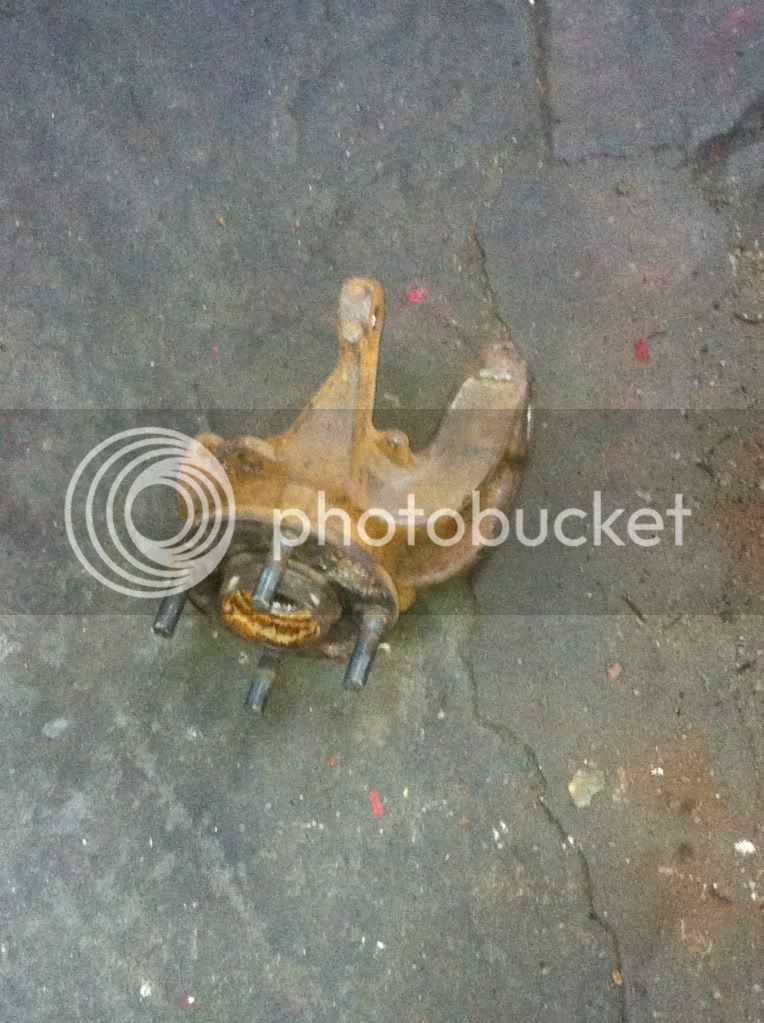
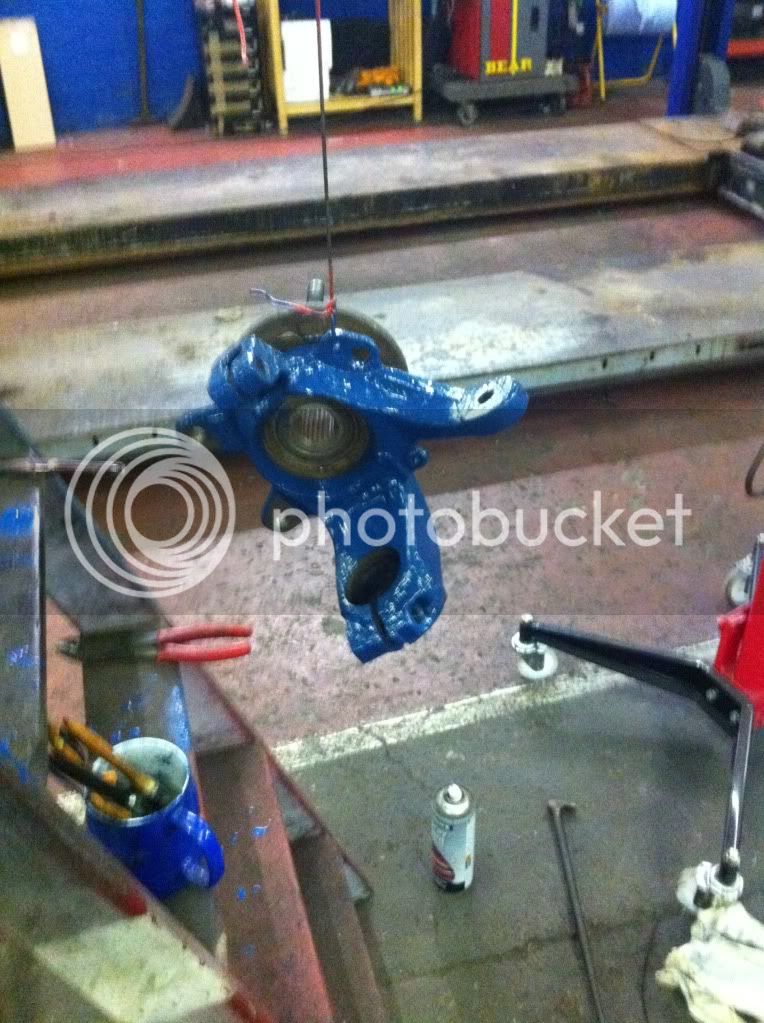
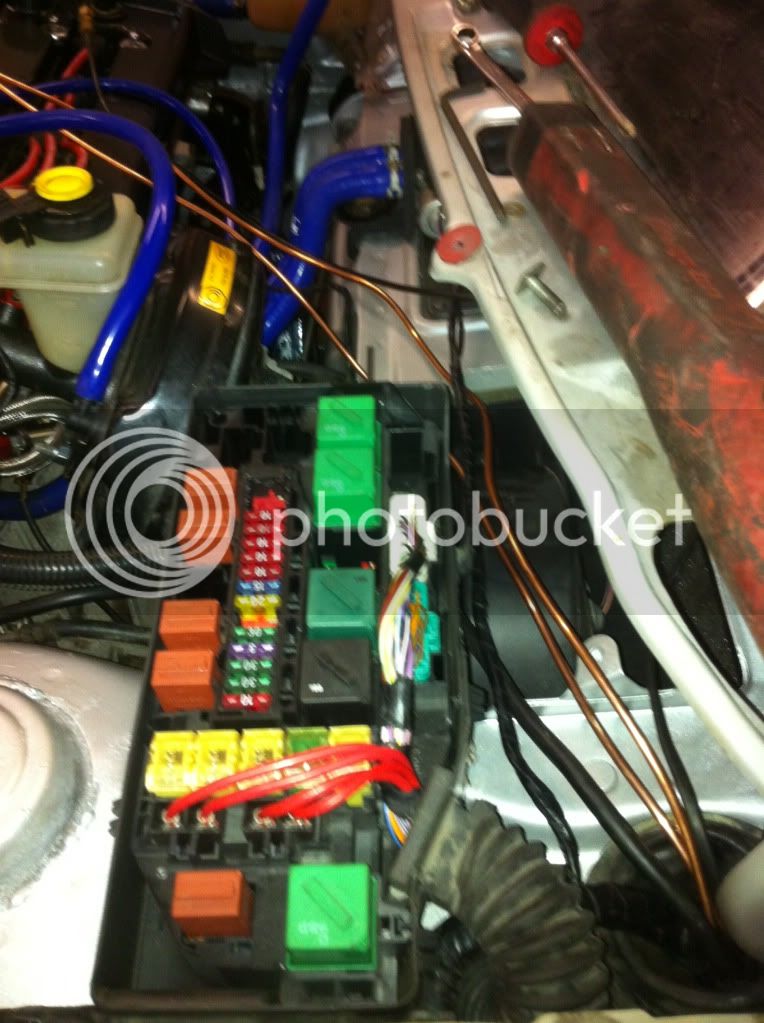
Battery tray support structure removed
IMG_0174.jpg

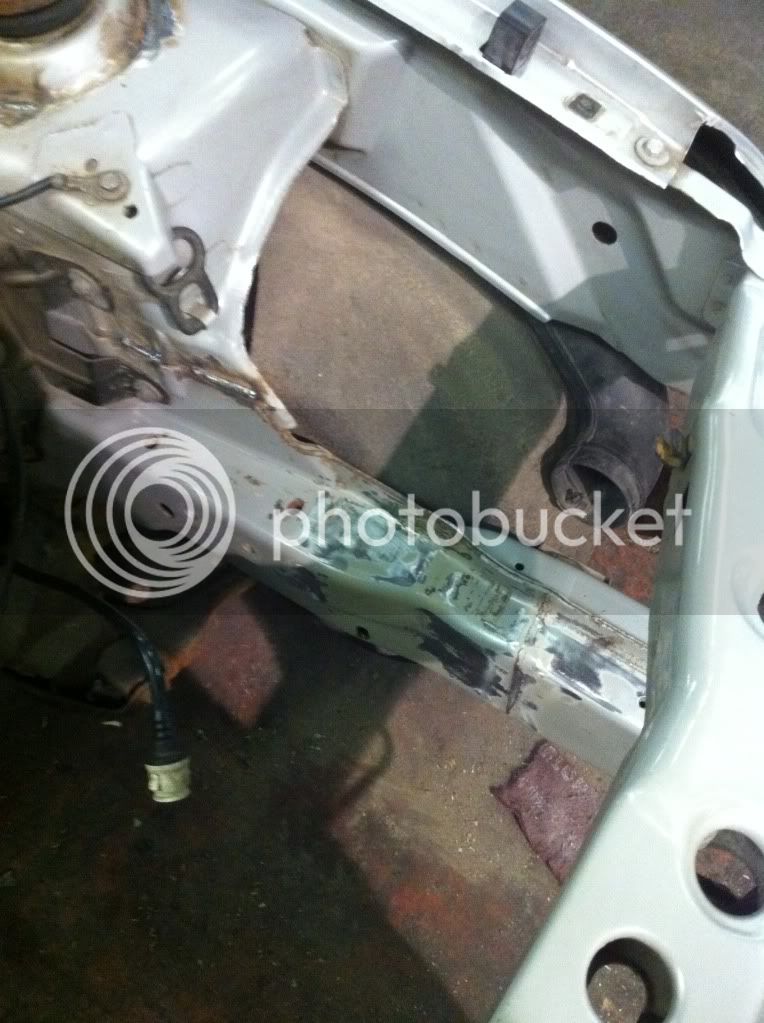
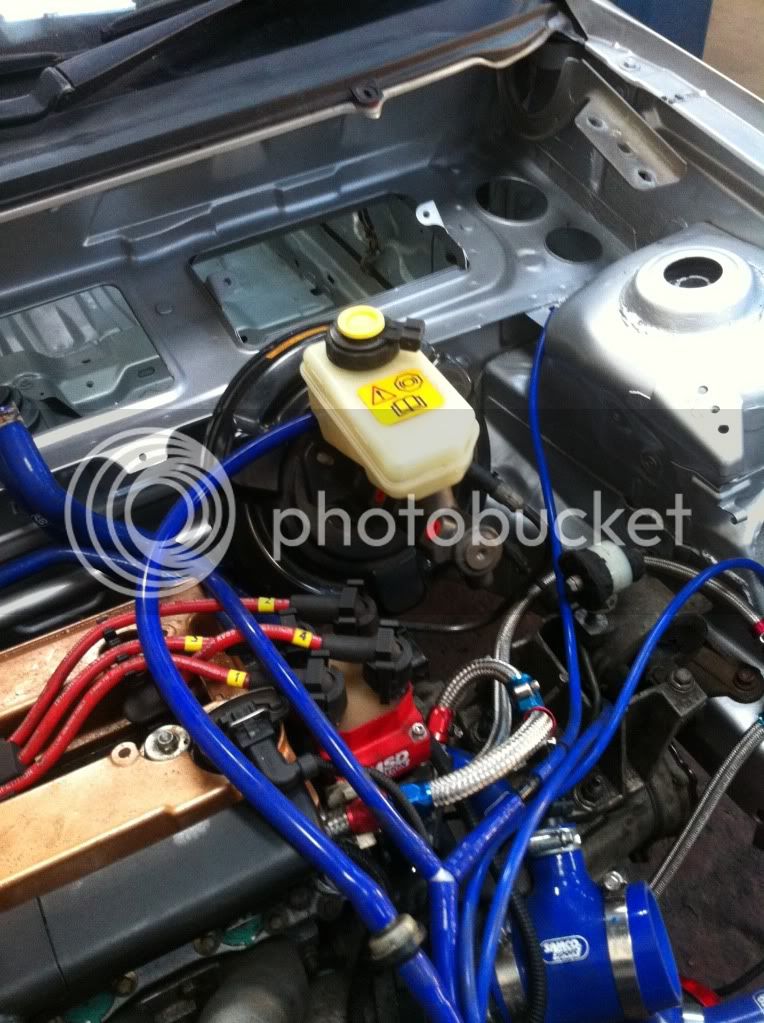
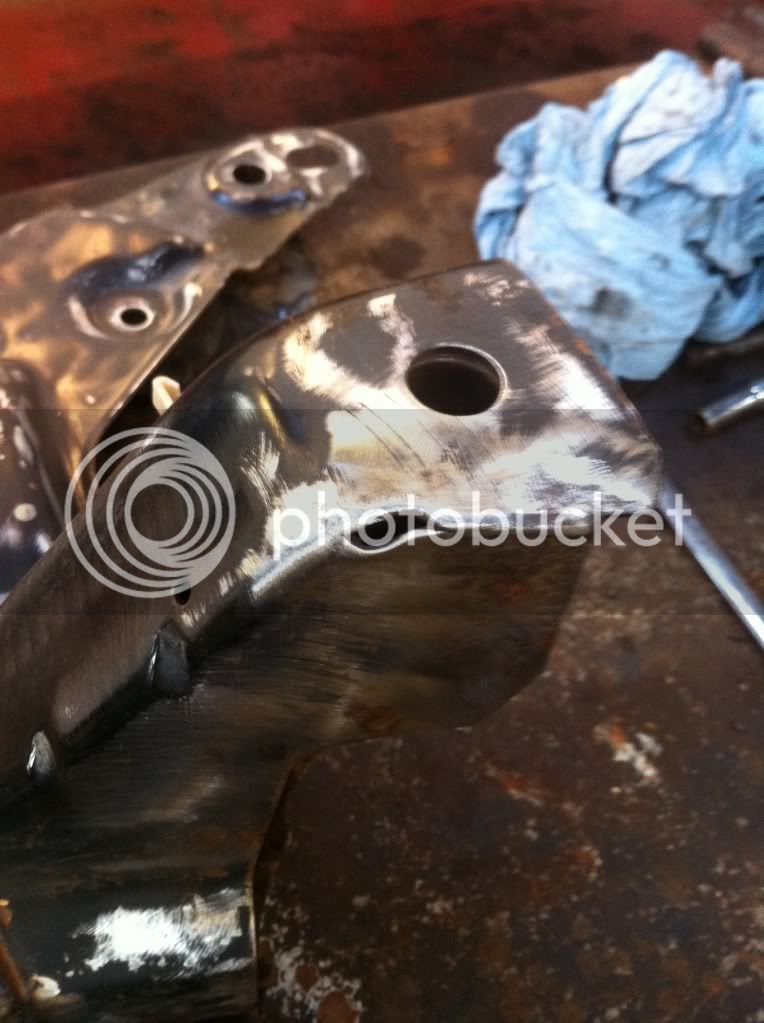
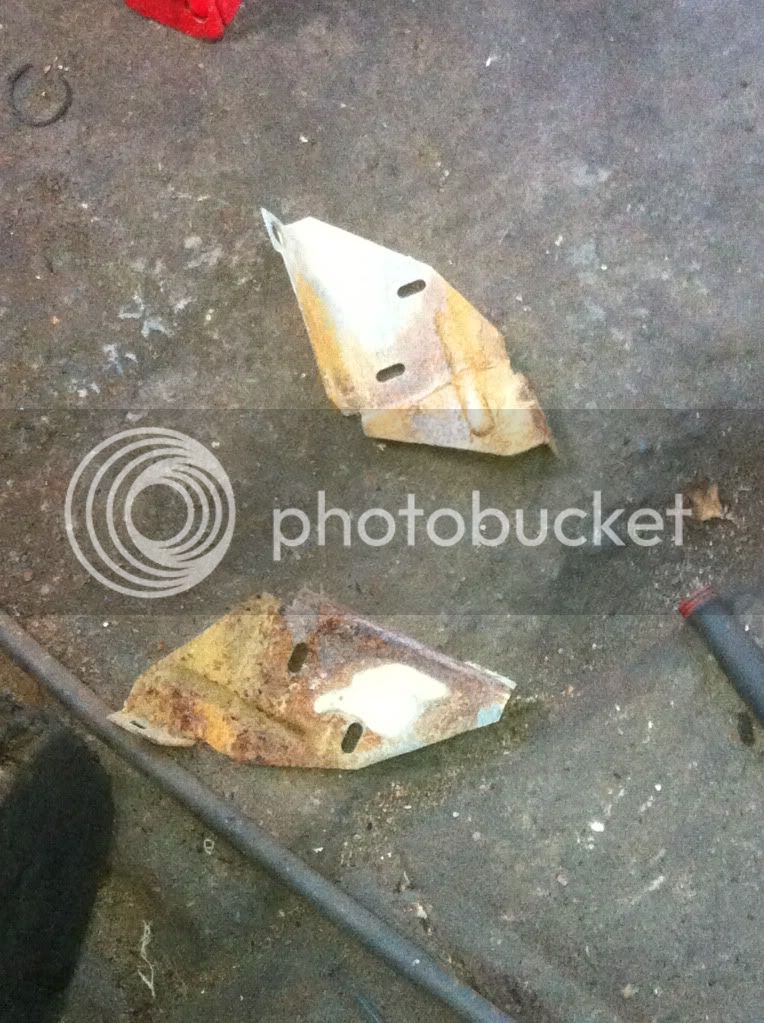
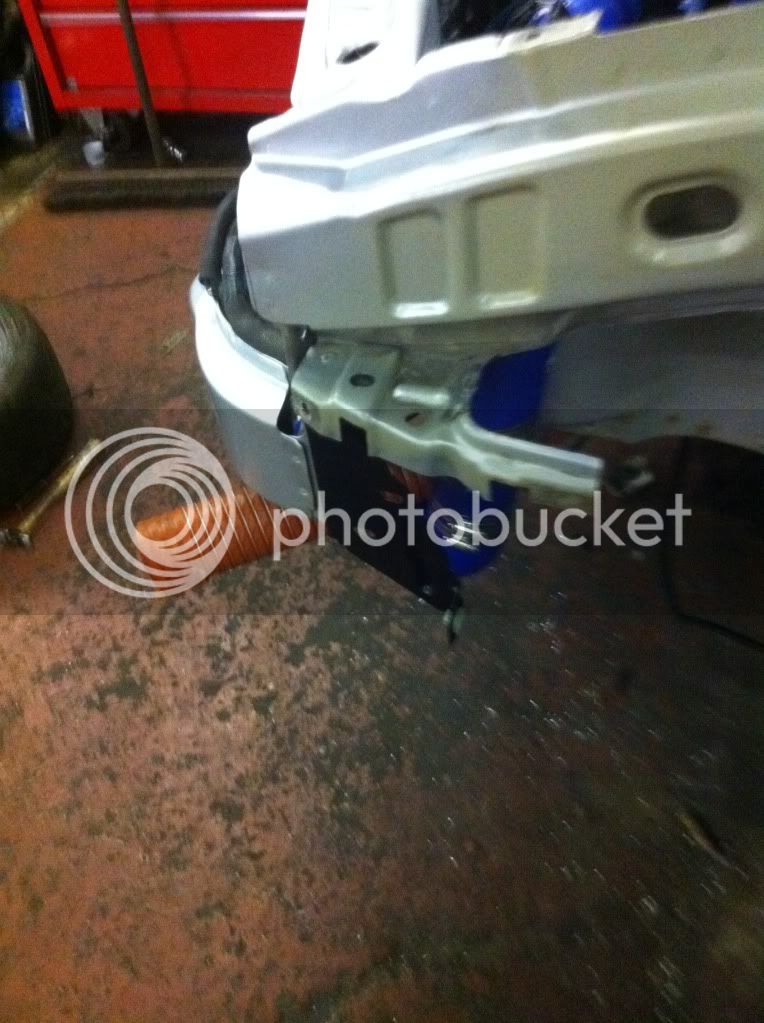
Bonnet catch mounting plate on front panel removed.
IMG_0173.jpg


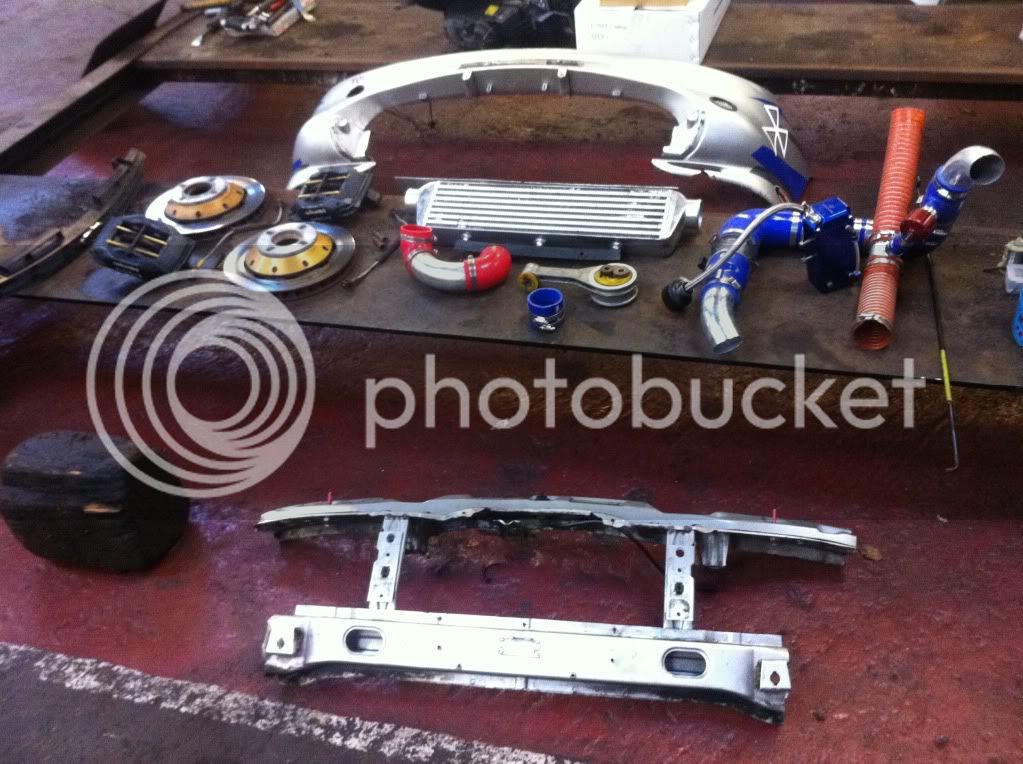
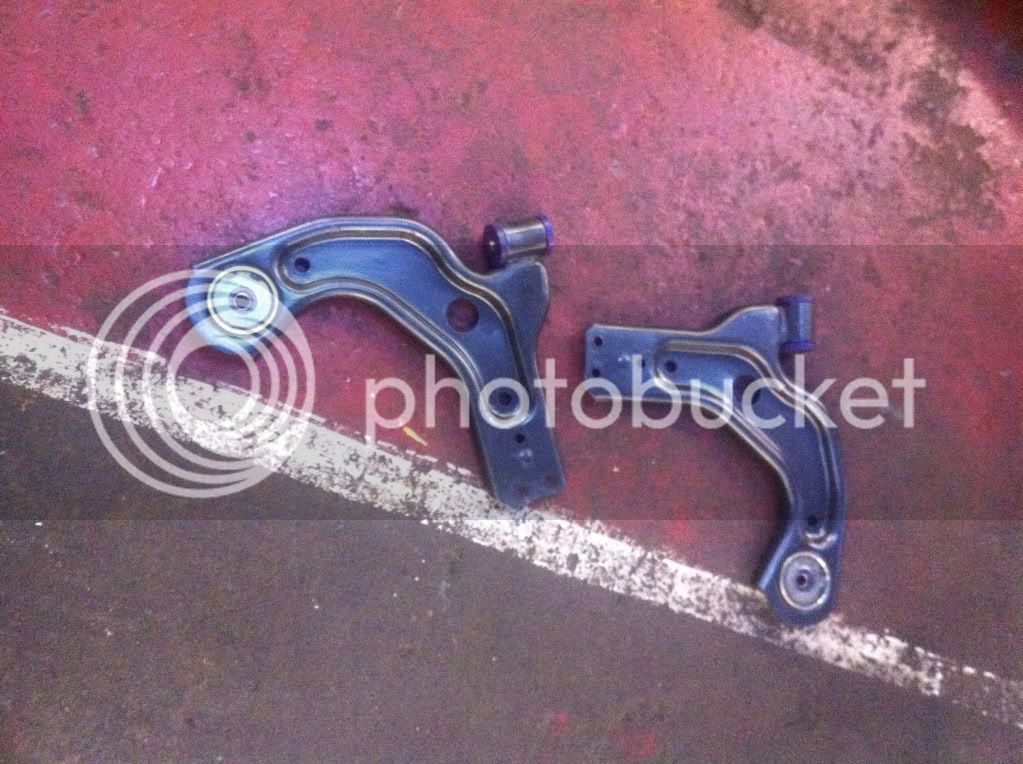
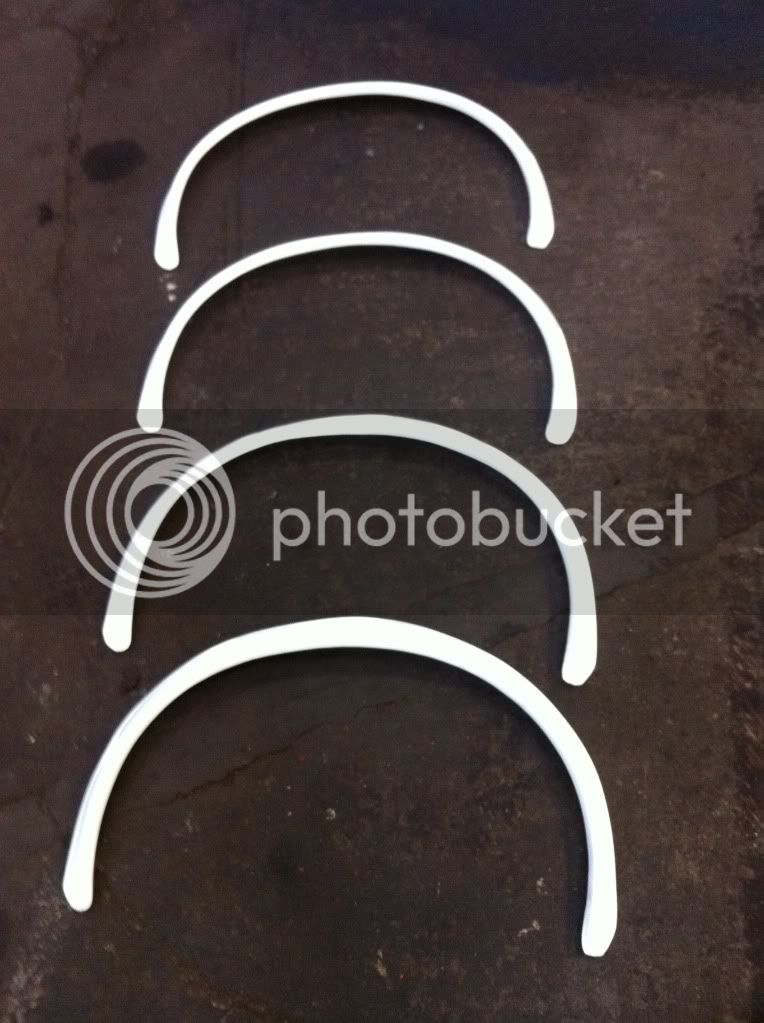
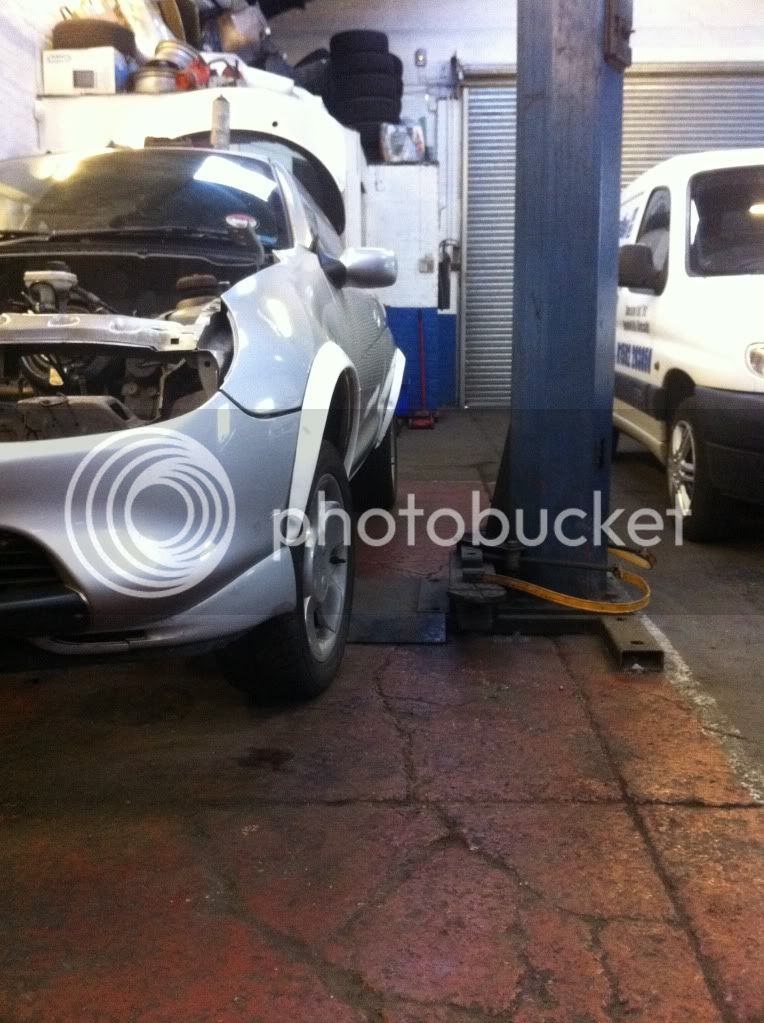
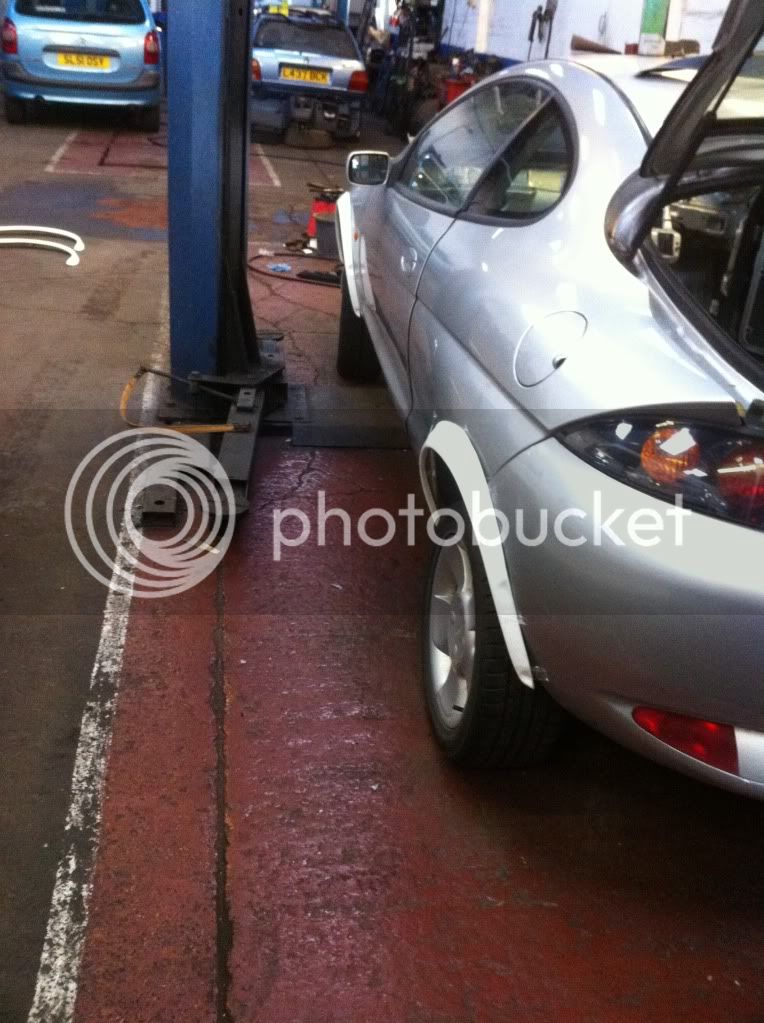
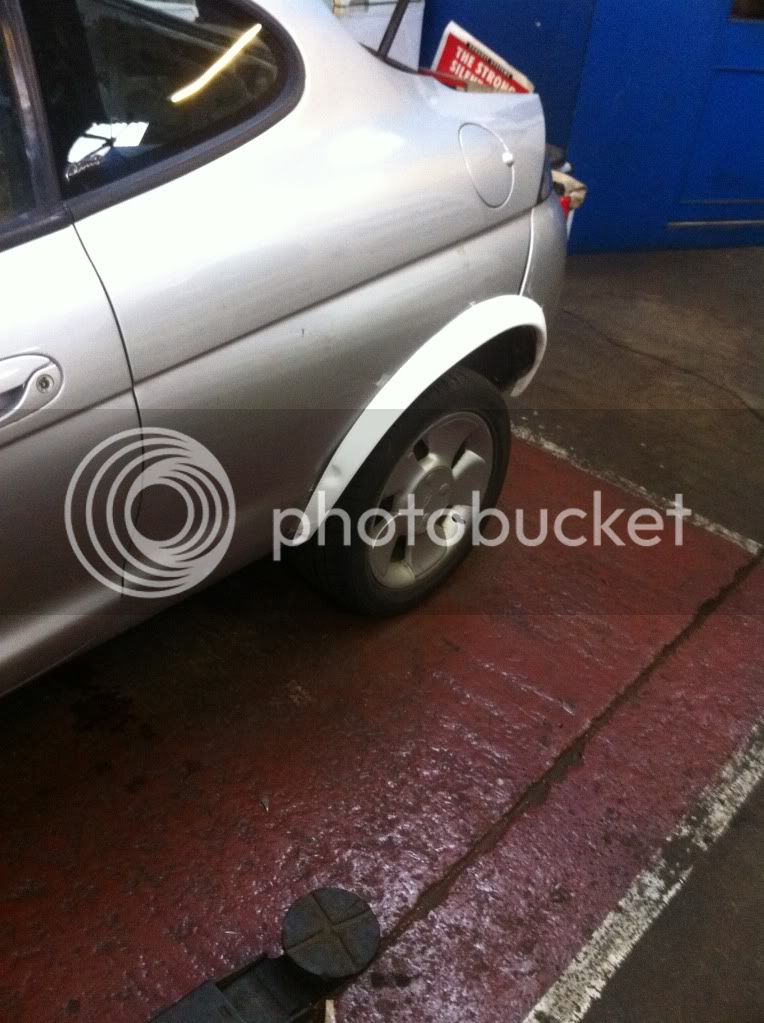
these arrived yesterday. once thier silver and the graphics are on, i think they'll look ok. sellotaped them on for a quick peek. fit pretty good too. not much modification required. you have to try to imagine the car being about a foot lower with wider bigger wheels tho.
IMG_0164.jpg

IMG_0169.jpg

IMG_0166.jpg

IMG_0165.jpg


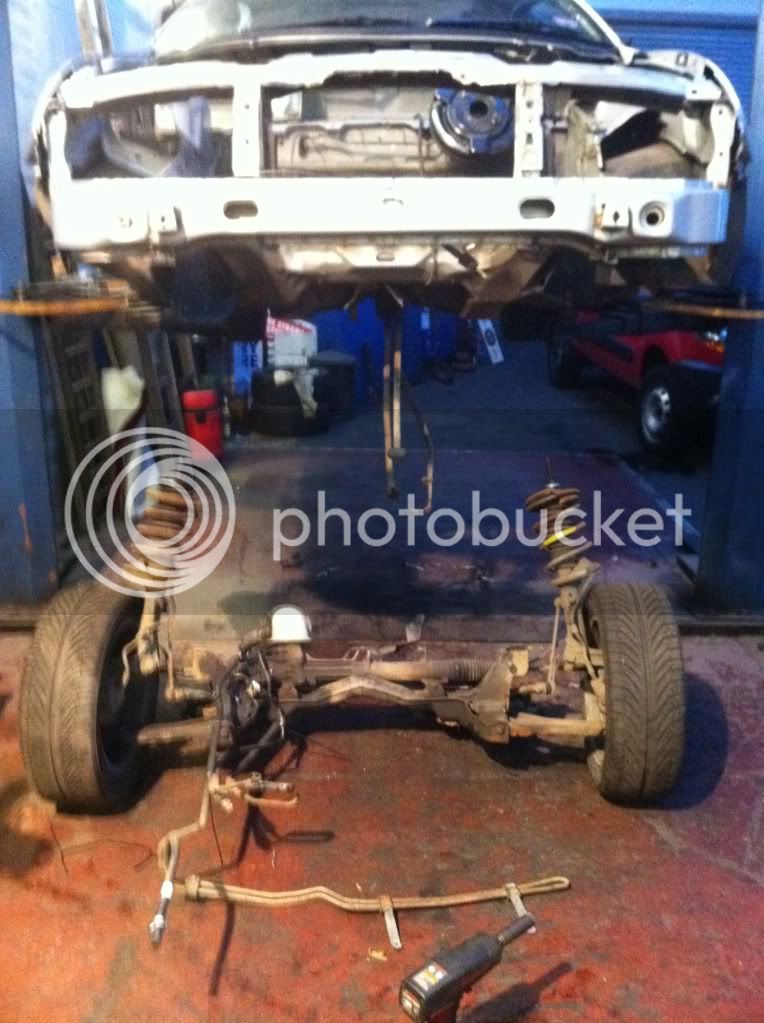
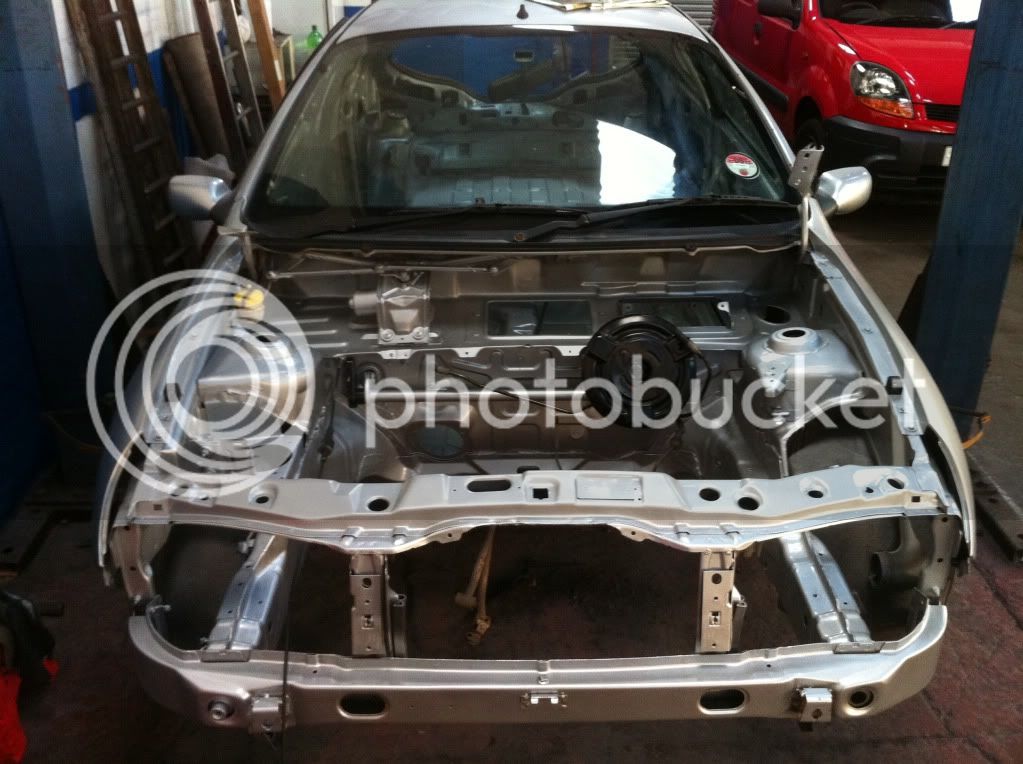
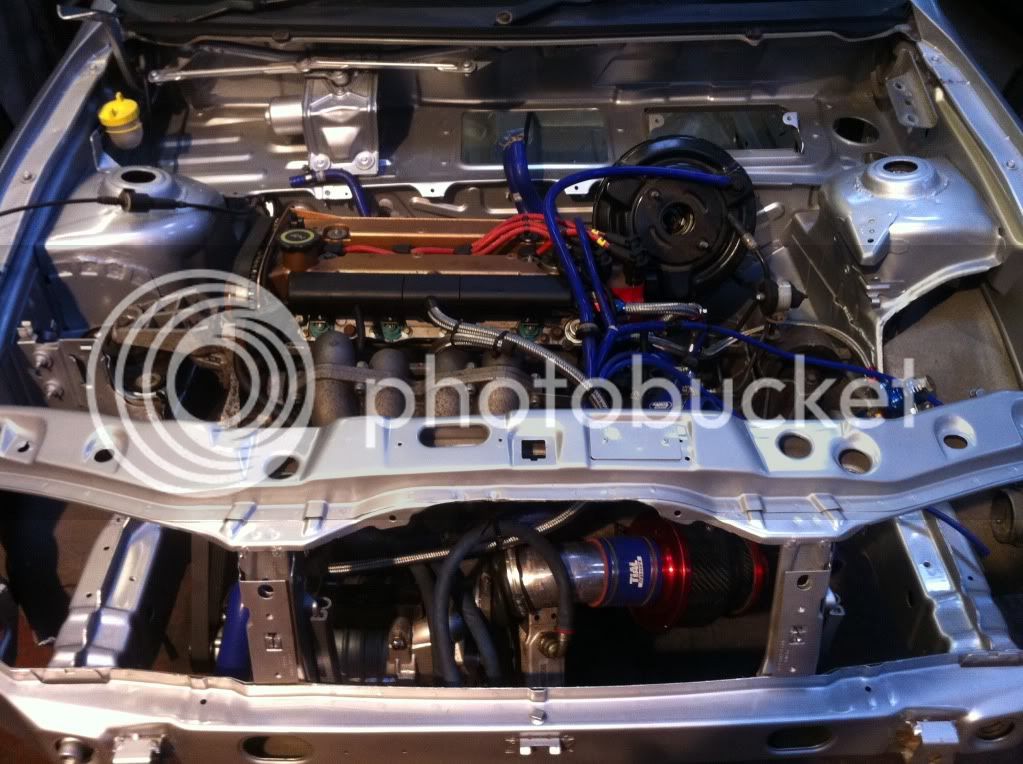
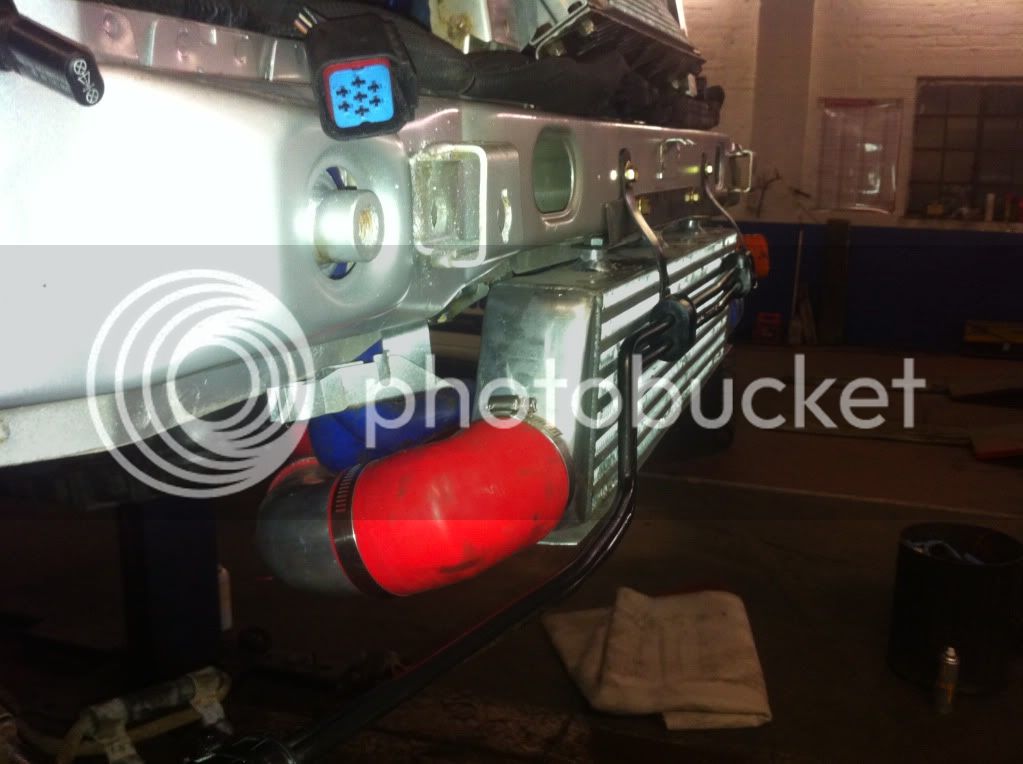
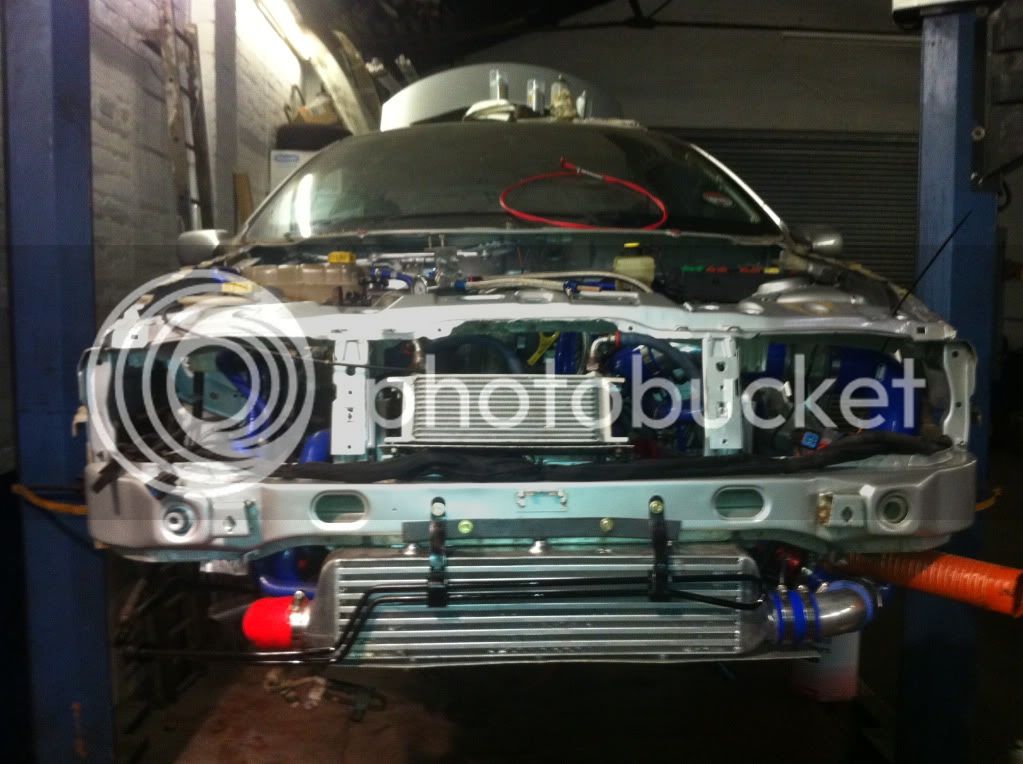
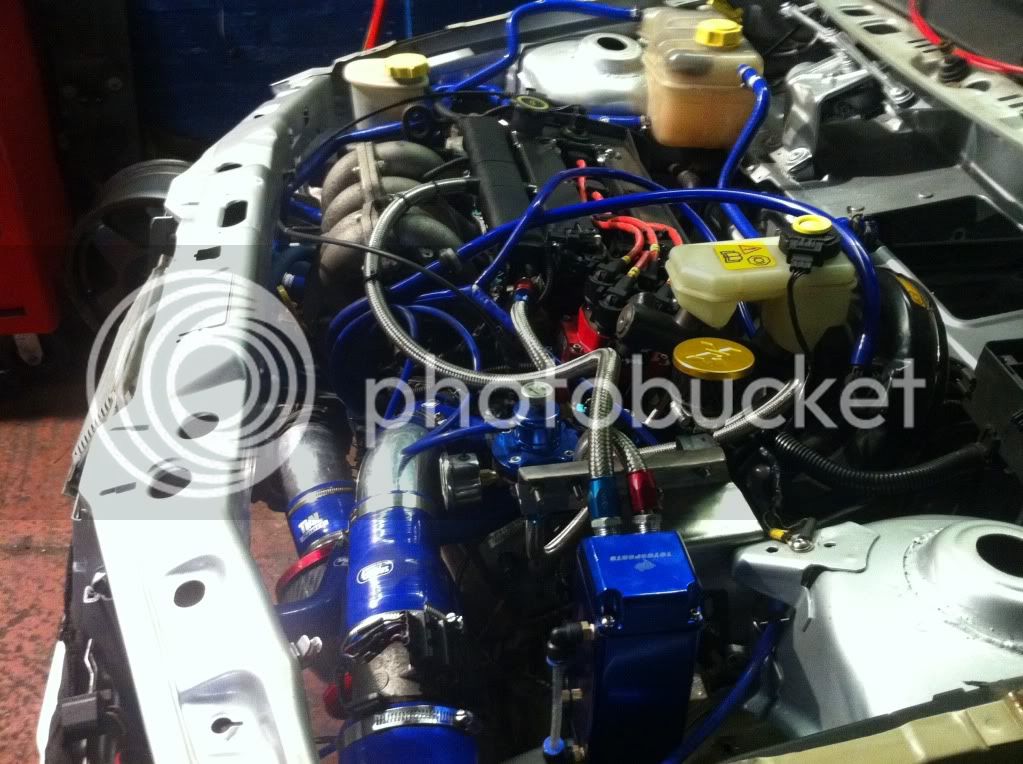
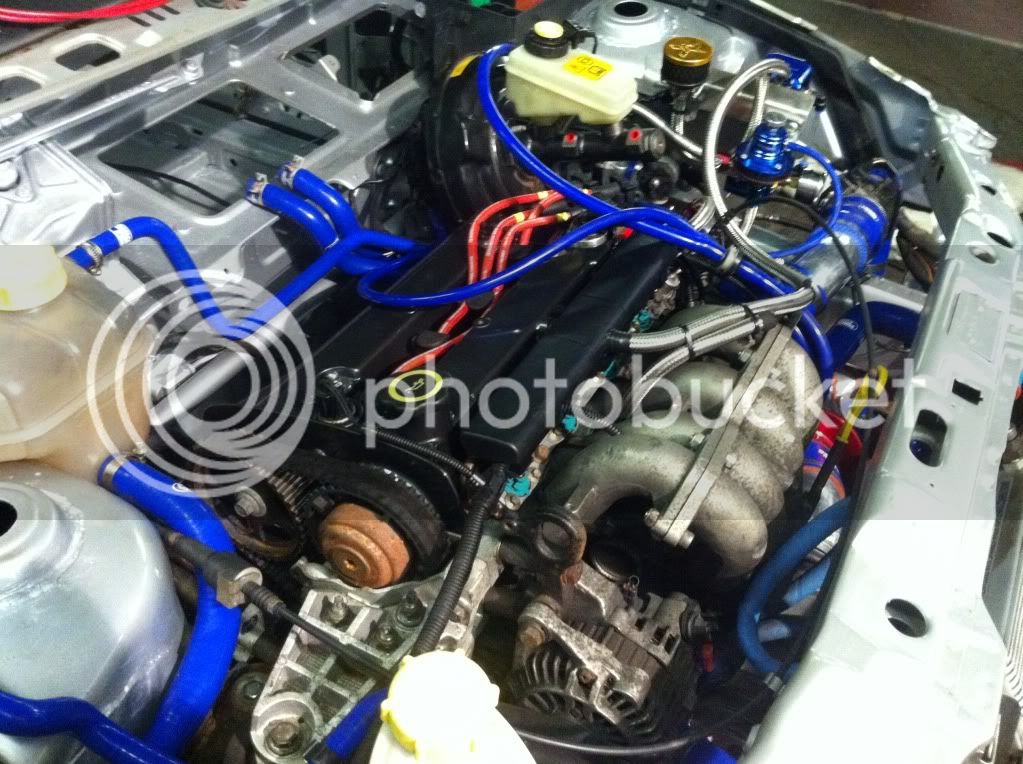
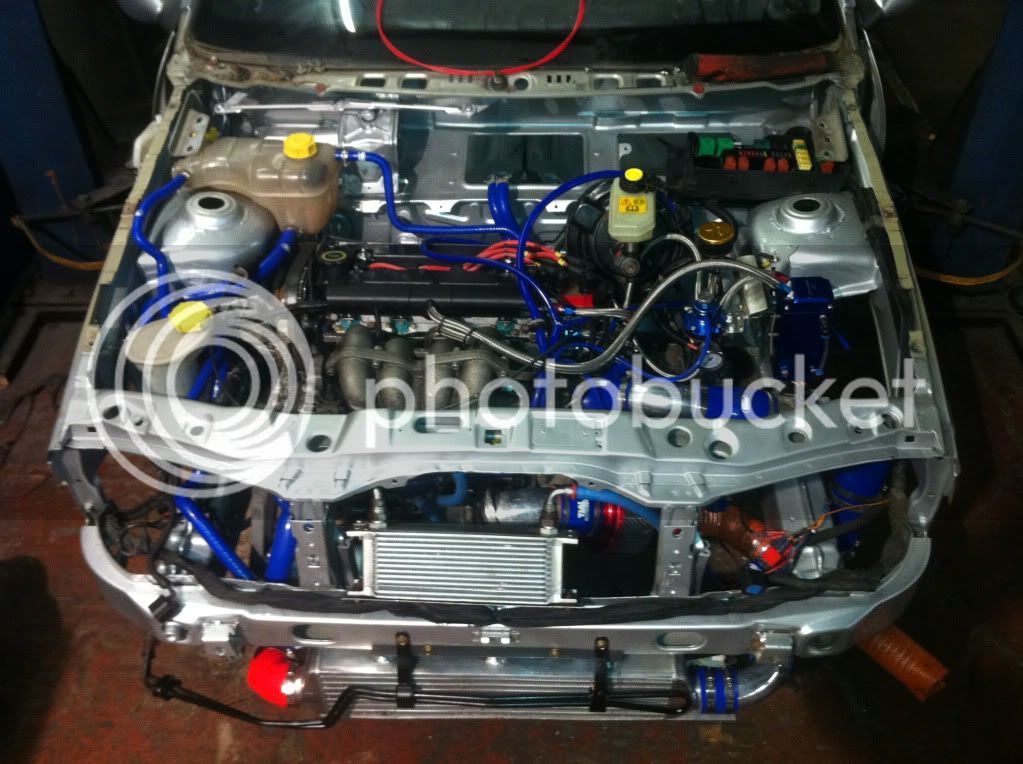
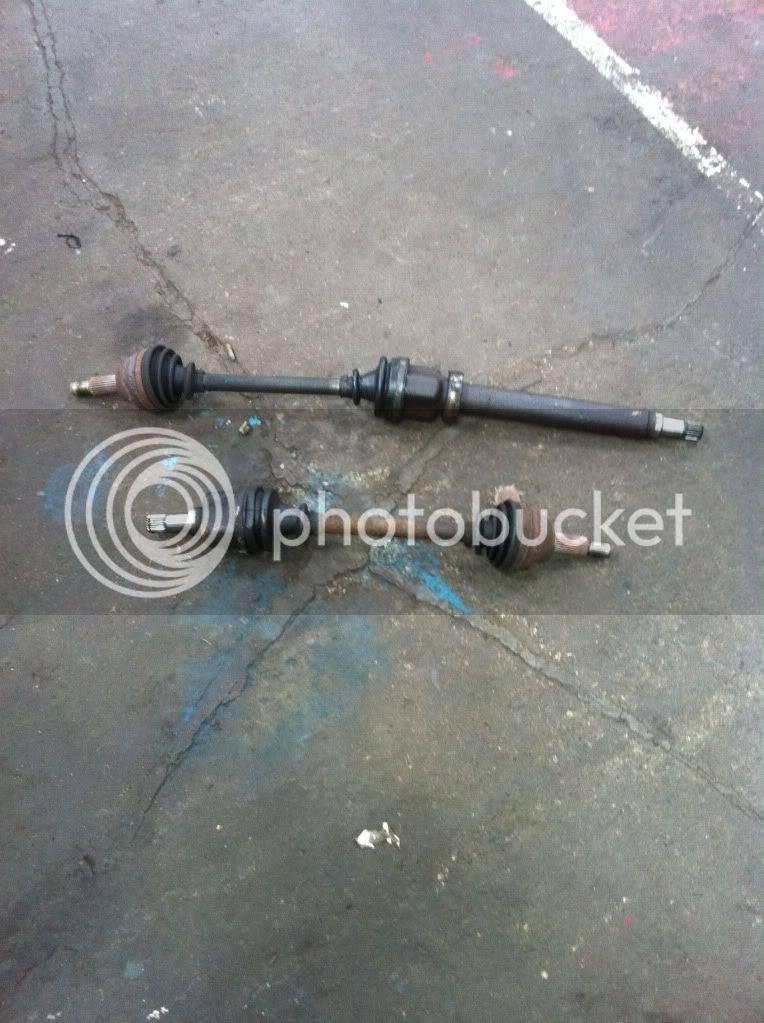
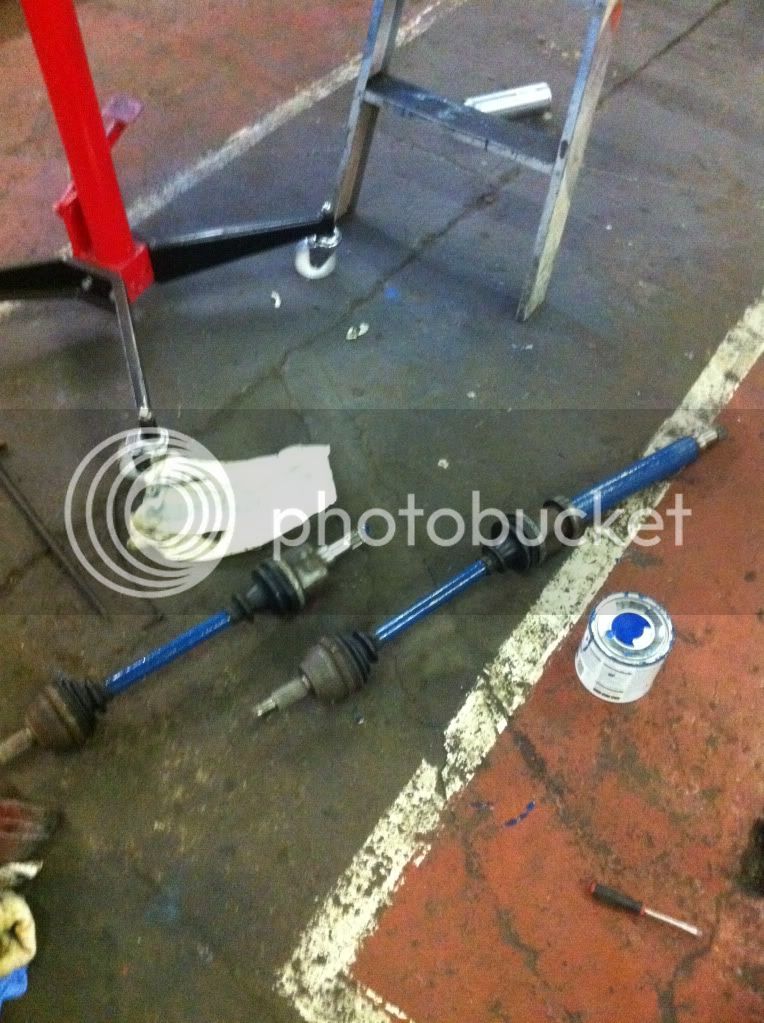
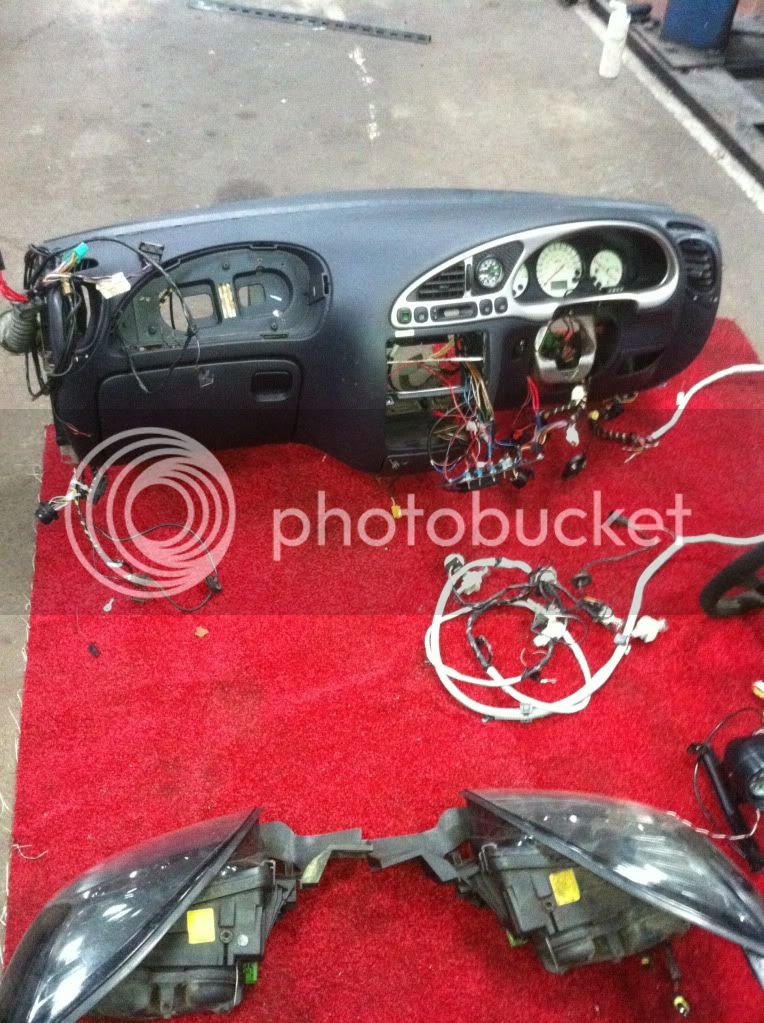
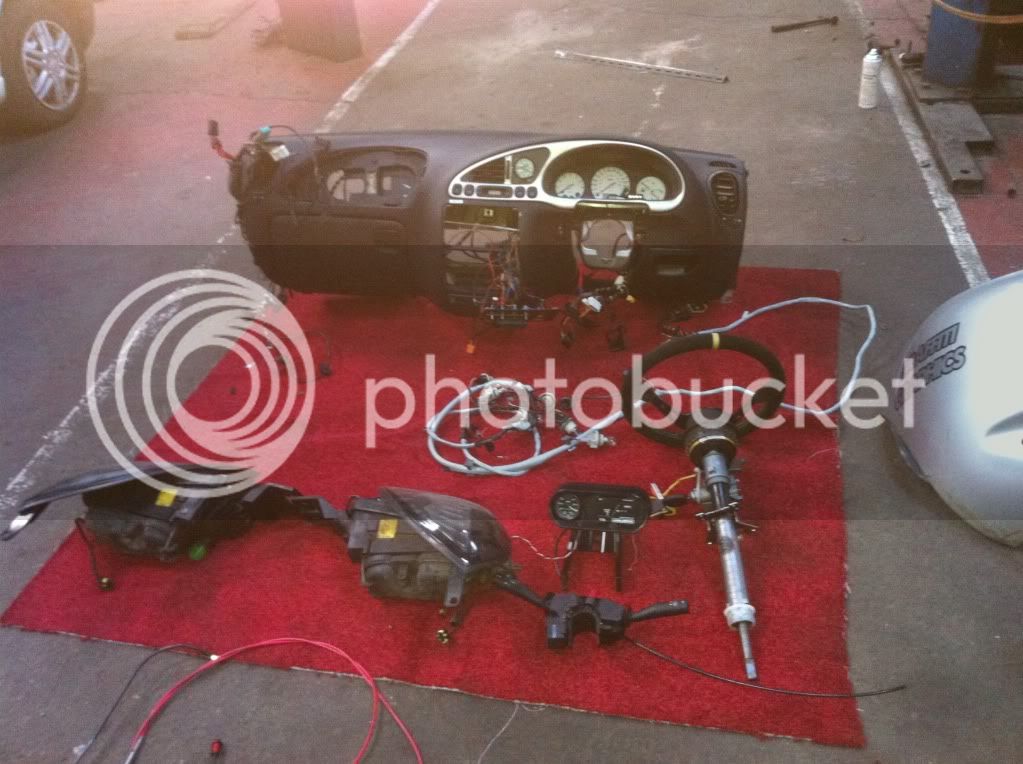
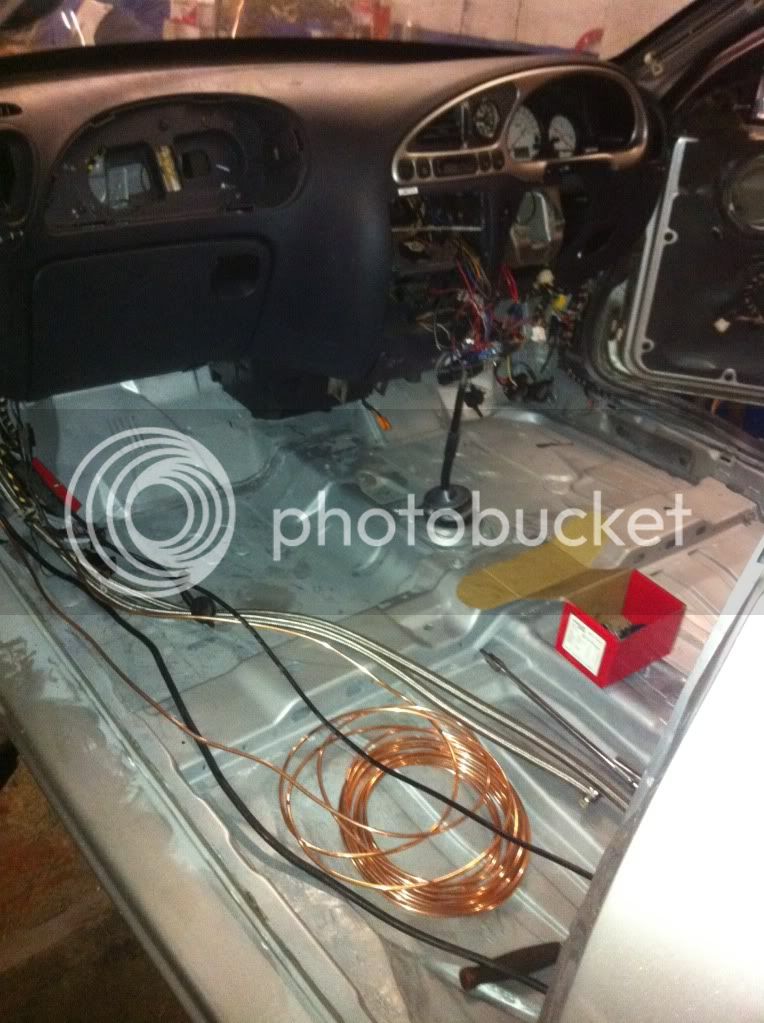
Two weeks into my five week schedule and im almost finished with the shell prep. final few bits and bobs will be removed from the engine bay tomorrow, then the bay can be painted. after that its just a case of putting it all together. :grin:
 
:cool: 
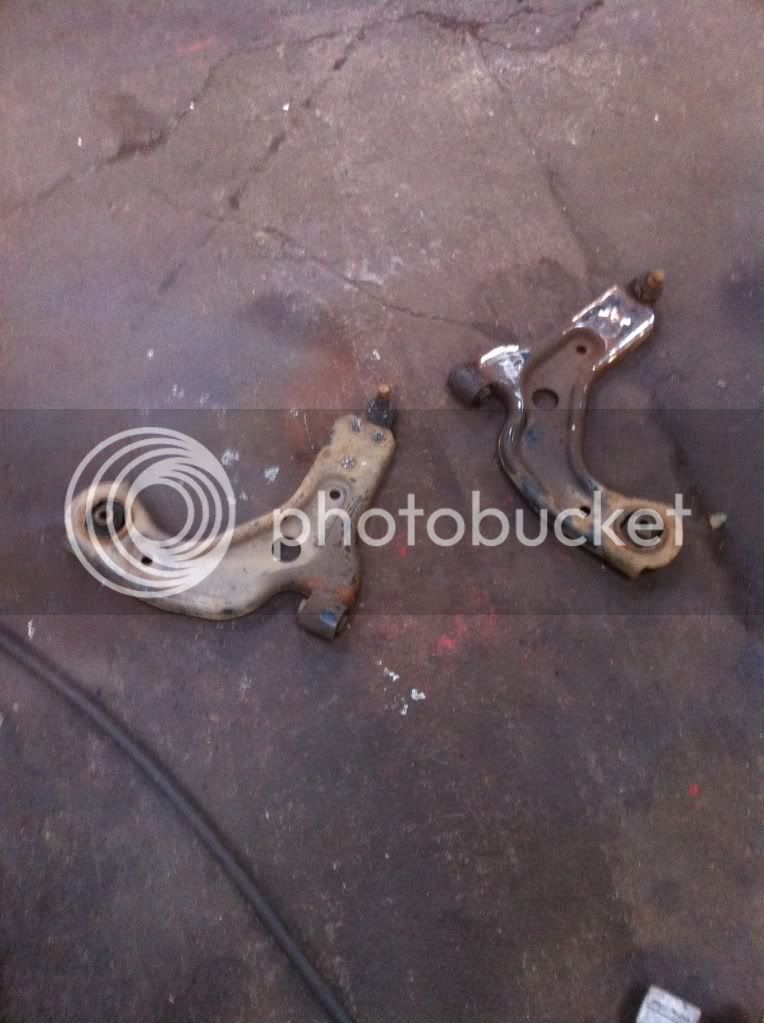
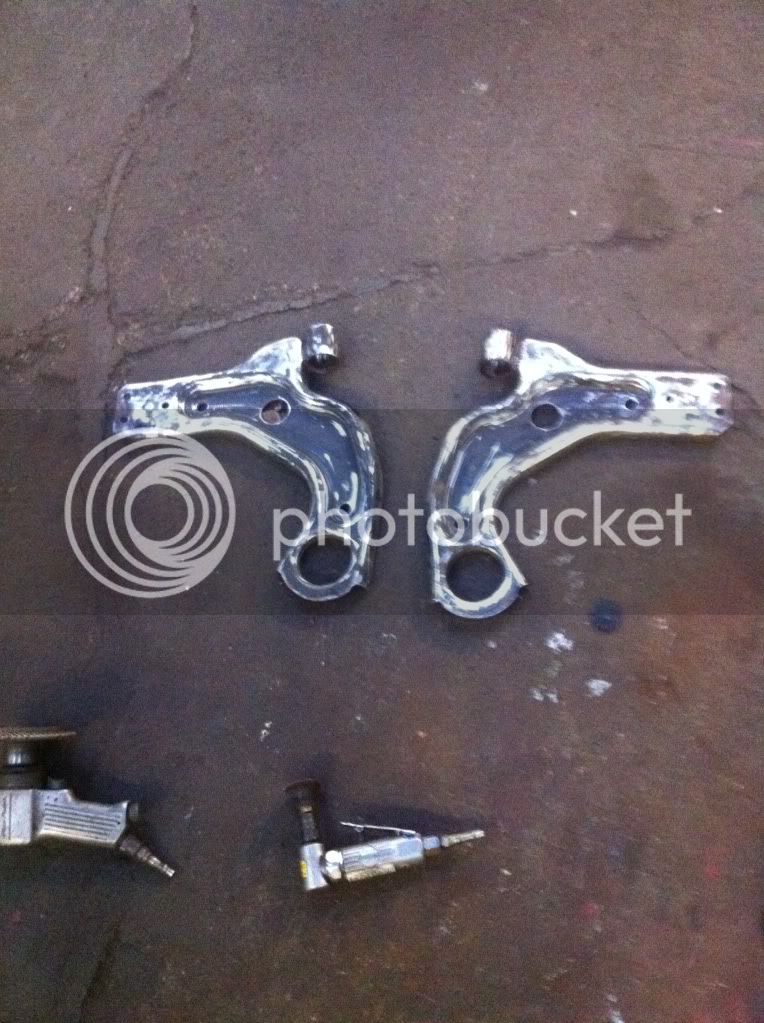
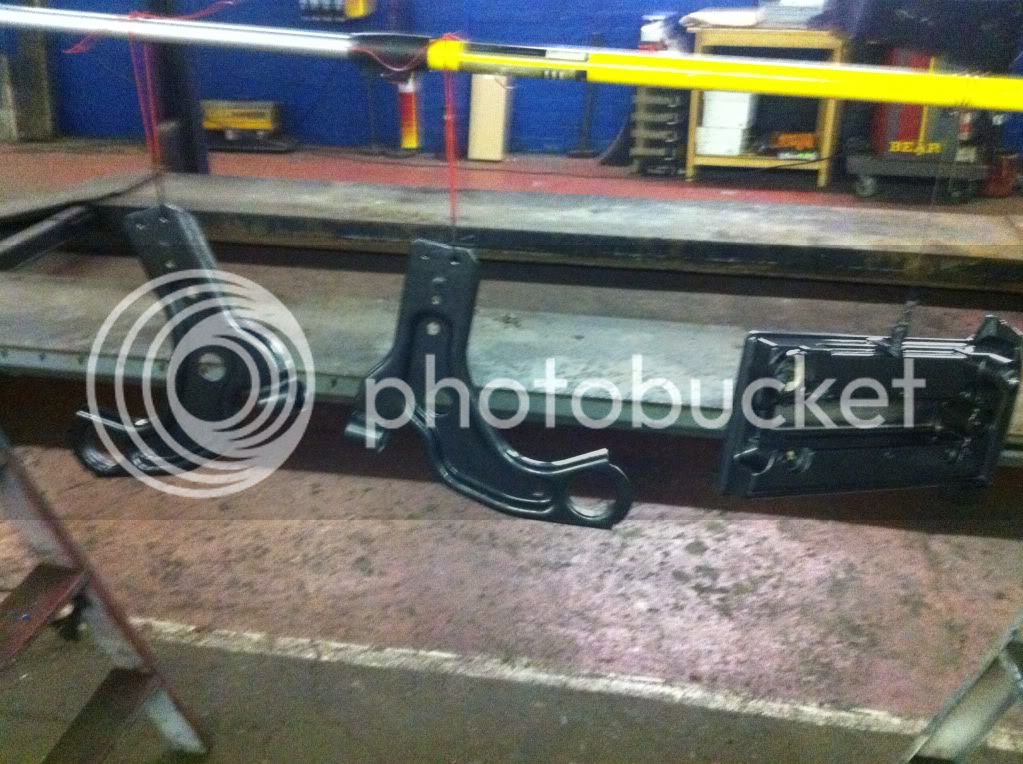
Those arches probably won't look to bad.

Do you modify them so you can still remove the rear bumper when fitted or can you just take them off?
 
Hi red. they're bolt on so i'm not going to bother cuting them at the bumper lines. although on a road car it would finish them. All i need to do is open the fronts out a little and cut a curve for the bottom of the quarter panel where it bulges at the bottom. Got dome headed stainless hex bolts and stainless washers for fixings, thinking about a thin rubber trim for the edge but coming up short. Any ideas? Thought caravan window edge but its too thick.

tonight the engine bay got its turn.
removed abs pump, master, brake lines, fuel lines, subframe, steer rack, front suspension etc.
IMG_0178.jpg

IMG_0179.jpg

IMG_0182.jpg


cleaned, scuffed with scotchbright, welds cleaned with small cleaning buff and seam sealed. spot primed and a quick bit silver over the worst. will mask and do it proper tmo.
IMG_0184.jpg

IMG_0185.jpg

IMG_0183.jpg


getting there.
 
Thanks mate, i watched that ford badge for a bit lol.

engine bay finished.
IMG_0191.jpg

IMG_0192.jpg

IMG_0193.jpg

IMG_0194.jpg


time to start stripping the other one.
IMG_0195.jpg

cut the front panel clean off for speed.
IMG_0197.jpg

IMG_0202.jpg

IMG_0201.jpg

IMG_0200.jpg

IMG_0198.jpg

IMG_0203.jpg


Will start to clean and put it back together tomorrow. this is the fun bit :D
 
thanks XIIVVX.

tonight i removed both gearboxes, cleaned the 1.4, fitted new clutch slave cylinder, fitted box then put the engine in the car.
1.4
IMG_0205.jpg

1.7
IMG_0204.jpg

boxes. 1.4 left 1.7 right
IMG_0208.jpg

IMG_0209.jpg

IMG_0213.jpg

IMG_0210.jpg

IMG_0214.jpg


fiesta non abs master cyiinder arrived. fits servo perfectly.
IMG_0190.jpg


cylinder is quite a bit longer and i think the standard resevoir for this will interfere with the top strut brace. remote resevoirs it is then. or possibly run the brace around the back of the servo.
 
Thanks to a friend i managed to get a brake res today s/h, god knows what ford would want for it :shock: as you can see the strut brace no loger fits as expected.
IMG_0218.jpg

IMG_0217.jpg


I intend to cut the brace and turn it to around the servo.

Subframe time. Theres a hole in the sf where the metal pressing all comes together at the front wisbone bush. Then a hole at the top where it mounts to the body. Only 2 reasons i can see for these are cheap manufactured ford rubbish or maybe to have a crumple point before bending the floor. Either way they looked like a weak point and a common sense thing to do.

IMG_0216.jpg

IMG_0219.jpg

IMG_0224.jpg

IMG_0221.jpg

IMG_0225.jpg

IMG_0226.jpg


Next problem was the fact that I was out of black hammerite. mmm, BLUE it is then lol.

IMG_0228.jpg

IMG_0227.jpg


will fit up the rack etc tomorrow and get it on the car. Next is suspension and brakes then wiring and fuel system. avo coilovers arrive on thursday :grin:
 
Subframe on. steering rack and anti-rollbar also. power steering system is fully built aswell. just needs fluid.
IMG_0231.jpg

IMG_0230.jpg

Removed rocker cover to replace gasket and change its colour from god awful gold.
IMG_0238.jpg


Pumanoob asked me a while back if i had frp cams. tbh i didn't know. this engine was reported to be built by a welsh rally firm, and until now ive not had to split it anywhere so its a relative unknown whats been done inside it. Both cams have a rolling diameter of 30mm.
IMG_0246.jpg


However the lift is different from inlet to exhaust.

inlet
IMG_0237.jpg

exhaust
IMG_0235.jpg


Exhaust 7mm lift and inlet 8mm. Are these standard or frp guys? Its too late to go surfing for info. bedtime. 2am lol. :zzz:
 
Hey voa, yep found out they're standard. Gives me an upgrade to do I suppose :lol: so what's the most aggressive cam out there? I have an iPad too, great bit kit but when posting here and trying to paste in more than a couple of image codes it keeps losing the rest of my post when going into photo bucket and back. Does yours do this mate? Maybe settings or something.
At the workshop now, coffee break lol. Stripping the wishbones and suspension, hoping to have it all prepped and painted before I finish tonight. Will put some pics up as always.
 
Wishbones from the 14 are genuine ford and other than a little surface rust ok.
IMG_0248.jpg

Bushes and balljoints removed.
IMG_0249.jpg

Primed, painted and laquered antrhacite along with the rocker cover.
IMG_0250.jpg

Bottom strut brace painted metallic blue. Was aiming for samco blue but its not right.
IMG_0253.jpg

As i'm running the brake lines tomorrow i removed the front wings to make access easier for a good neat job. Replacing them anyway.
IMG_0247.jpg

Removed trackrod ends and lock nuts. Cleaned trackrod threads and shaft then painted yellow.
IMG_0252.jpg


New track rod ends and balljoints tmo and put it togrther with brakes. I've also removed the engine bay wiring loom and fuse box including ecu tonight from the other one. Because ive spliced into the loom here there and everywhere, this took a while. Cleaned down the inner wings/arch also, thinking bout painting them black. Because of the position of the new brake cylinder and the header tank for the coolant the top strut brace isn't any use. making a new one on sunday :grin:
 
mrMechanix said:
Hey voa, yep found out they're standard. Gives me an upgrade to do I suppose :lol: so what's the most aggressive cam out there? I have an iPad too, great bit kit but when posting here and trying to paste in more than a couple of image codes it keeps losing the rest of my post when going into photo bucket and back. Does yours do this mate? Maybe settings or something.
At the workshop now, coffee break lol. Stripping the wishbones and suspension, hoping to have it all prepped and painted before I finish tonight. Will put some pics up as always.

ipad ok m8 just I am travelling asia at the moment and the links from the hotels are really rubbish and intermittent place to place won't beback in uk until sept

m8 aggressive cams may mean losing vvt, the best cams with vvt are the shaw cams ss4 see http://www.shawspeed.co.uk" onclick="window.open(this.href);return false; seem to be more agressive then the frp cam.

Piper do a ultimate road http://www.pipercams.co.uk/pipercams/www/product_search.php?search=Ford+puma&go.x=0&go.y=0 cam 3500 - 8000 power band so u loose lower end more agressive lift but i am sure this isn't a straight fit withe standard cam followers and standard springs in your head as these cams rev to 8k plus
 
Voa said:
ipad ok m8 just I am travelling asia at the moment and the links from the hotels are really rubbish and intermittent place to place won't beback in uk until sept

m8 aggressive cams may mean losing vvt, the best cams with vvt are the shaw cams ss4 see http://www.shawspeed.co.uk" onclick="window.open(this.href);return false; seem to be more agressive then the frp cam.

Piper do a ultimate road http://www.pipercams.co.uk/pipercams/www/product_search.php?search=Ford+puma&go.x=0&go.y=0 cam 3500 - 8000 power band so u loose lower end more agressive lift but i am sure this isn't a straight fit withe standard cam followers and standard springs in your head as these cams rev to 8k plus

Didn't know you were travelling mate. business or pleasure? As its forced induction i'm going to have to select the cams to suit. Pricey job if i end up doing buckets and valve springs etc, means head off too so would wait till i'm dropping the compression in the winter. like the sound of 8000 rpm tho :D

Got quite a bit done today. Slept in and missed the parts place so couldnt do a few bits and bobs.
Bushes in wishbones and then fitted
IMG_0256.jpg

IMG_0257.jpg

Intercooler oil cooler and power steering cooler fitted with all pipework.
IMG_0262.jpg

IMG_0263.jpg

IMG_0258.jpg

IMG_0261.jpg

Rocker cover gasket fitted and installed.
IMG_0254.jpg

IMG_0255.jpg

Fuel reg,oil catch tank and breather, fuel piping and whole engine loom installed including fuse box and earth/main live cables.
IMG_0265.jpg

IMG_0266.jpg

IMG_0267.jpg

IMG_0264.jpg

Took the whole fuel system out as a oner, will fit this and run brake pipes inside the car tomorrow. dash etc and im not far away :grin:
IMG_0269.jpg

IMG_0270.jpg

aside from radiator,strut brace and fire extinguisher system, the engine bay is almost complete.
 
Bit of both mean't to be pleasure as with the family not back until Sept, looking good m8 your progress so far is amazing how is your budget holding out ?
 
Ah OBP swirl pot is that?

This is a great build. Giving me some inspiration to go out in the rain to get to the barn 20mins away lol.
Looking forward to seeing more progress on this.
 
Voa said:
Bit of both mean't to be pleasure as with the family not back until Sept, looking good m8 your progress so far is amazing how is your budget holding out ?

Reechard said:
Ah OBP swirl pot is that?
This is a great build. Giving me some inspiration to go out in the rain to get to the barn 20mins away lol.
Looking forward to seeing more progress on this.

Thanks guys, ive about another week of these shifts left in me then I reckon I'll keel over or something :zzz: lol. Budget is holding out just voa. Trying to organise some more cash for bits and pieces next week but don't have much more to buy thankfully. everything left is expensive tho. Graphics and cage being the biggest. It is an obp swirlpot reech, well spotted :wink: get out to that barn now boy! no exuses lol. Going to the workshop again shortly.
 
Haha I did go and do some work lol.

I only knew it was as Sam sorted me out a catch tank when I supplied them with a part for something :)
Great products they have though. Want a pedal box when I can afford one.
 
Reechard said:
Haha I did go and do some work lol.

I only knew it was as Sam sorted me out a catch tank when I supplied them with a part for something :)
Great products they have though. Want a pedal box when I can afford one.
Yep they've got some nice stuff. Actually had an obp pedal box sitting on the floor of my car last week. Unfortunatly for a puma we need top mount not floor mount so it was no use. To fit the top mounted one the dash will have to be removed and mount it under the steering column bracket, would let it be brought back so the seat could be further back also. Aids weight distribution. I'll defo be doing this in the winter, ask your mate if he'll do us a deal on a pair closer the time maybe? Railroaded you into doing some work eh, love it lol.

Got lots done today, cleaning and painting jobs. Drive shafts, hubs, front splash guard mounts and rear panel.
Picture005.jpg

Picture004.jpg

Picture003.jpg

Picture021.jpg

Picture019.jpg

Picture022.jpg

Picture012.jpg

time to start stripping the dash etc out the other one.
Picture001.jpg

Picture006.jpg

Picture008.jpg

Picture010.jpg

Picture013.jpg

Heater box cleaned aircon rad removed and fitted to mk2.
Picture007.jpg

Picture011.jpg

Picture014.jpg

Dash fitted, all wiring connected to main fuse box, lights etc. Battery and tray, fuel pipes main power cables, mf2 wiring loom taped up and installed. switches gauge wiring and pipes all run and connected. Steering column and all switch gear/covers installed.
Picture017.jpg

Picture016.jpg

Picture018.jpg

Picture023.jpg

Picture024.jpg

Picture025.jpg


Should be running by tomorrow night. suspension still hasn't arrived tho :-(
 
Back
Top