Steel Blue track car project

ProjectPuma

Help Support ProjectPuma:

This site may earn a commission from merchant affiliate links, including eBay, Amazon, and others.
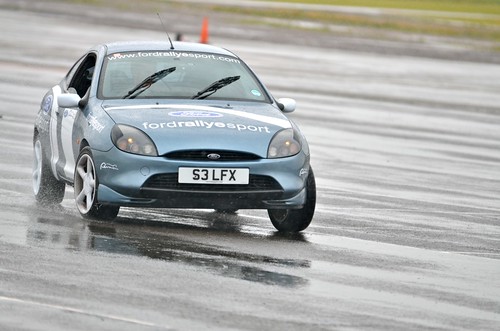
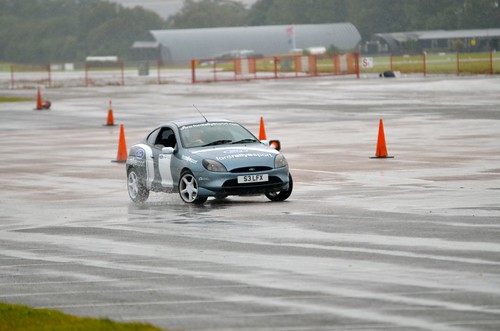
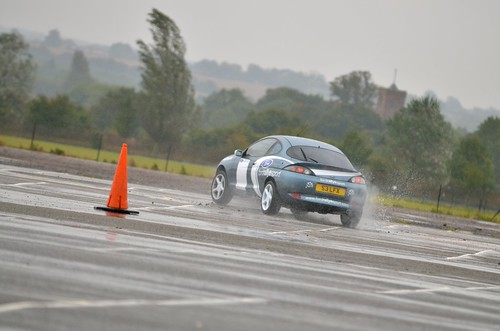
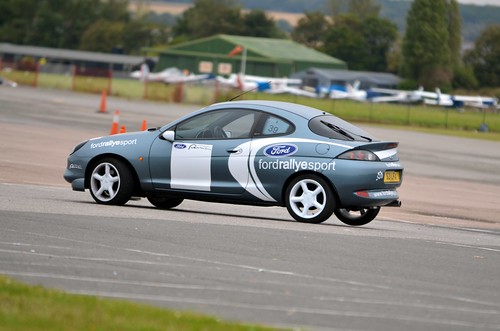
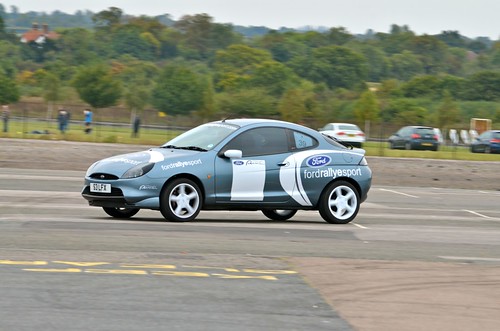
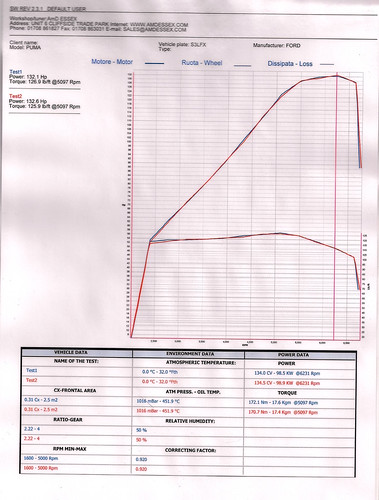
Well, my standard exhaust had been hanging off for a while (as you can see from some of the track photos above! Lol) and it finally gave up last week. It was pretty much scraping the floor! I have already spent a fair bit this month on suspension goodies (which will be in a later update) so I didn't have the funds for a full new shiny system. After looking around, I was tempted by the price of the mild steel Sportex systems. However, after a quick call to Chris at Lightning Motorsport, he knew some customers that were selling second-hand stainless steel systems. Chris managed to pull together a full stainless Scorpion system for me and also a Pro-Tech manifold with de-cat! It was a good deal and I got Chris to fit everything for me, as the manifold and system needed a bit of fettling to make them fit together (the system had previously been mated to a different aftermarket manifold). This system suited me well, as I didn't want a large tail pipe or anything too loud. The Scorpion has two silencer boxes in the system and so is only loud when you put your foot down!

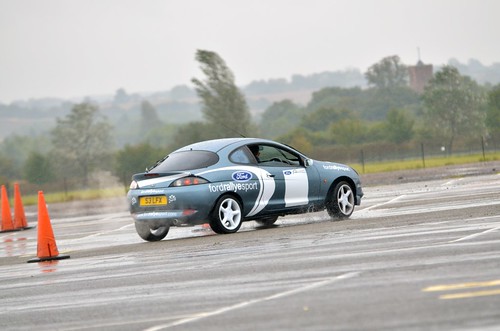
I picked the car up this morning and Chris showed me around his work while it was still on the ramp and I have to say it was impressive work. He has done a top job with the welding required and sorting the lambda extension. The exhaust fits perfectly, looks smart and doesn't knock anywhere. I'm very pleased with it. The car feels much stronger in the higher rev range and finally has the sound to match the track-inspired theme!

I'm looking forward to testing the car out at the Autosolo in North Weald tomorrow and will get some photos/videos up after the event.

For now, here is a link to a short video on Youtube of the exhaust sound:

http://youtu.be/YeP0gCY7x84" onclick="window.open(this.href);return false;
 
Well it was another wet weekend at North Weald last week but it was a great event. I finished 6th in class out of 16 and 13th overall out of 50 (beating the guy that turned up with the Ferrari 355! :lol: ). My brother went one better in the Puma getting 5th in class and 12th overall by a few tenths ( :roll: ). It was very close all day though between us, which was great.

Here are a few photos of the Puma in action at the autosolo:


This was the only shot I had that showed the inside rear wheel lifting slightly but it was coming off the ground all day! It was just too wet most of the day to keep my camera out, or stand at the side taking photos!


We made the mistake of setting the coilovers as if it was a track day when we first arrived, setting it really stiff all round. However, after one run on the bumpy airfield surface, we realised that was not going to work. The car skipped and bounced all over the place, so we spent the next three rounds softening the suspension off until it felt about right.

I forgot to add before, that I finished off the graphics by picking up the additional Rallye Sport and Puma graphics I wanted at Ford Fair, for the front wing and the front bumper. I fitted these ones myself and this picture shows the new graphics quite well:

 
I had the Puma on the rolling road for the first time today. It was a group shootout a few local people organised at AmD Essex near Lakeside. I really wanted to get mine on the rollers now to set a bench mark for later tuning and to make sure I had a decent starting point.

I am pleased to say that the car survived the day, although it is nerve wracking watching car being revved so hard! Here is the print out:


The best power was in run 2, when it made 132.6 bhp. The best torque was made on run 1 at 126.9 lb/ft. The 2 runs were pretty consistent and the power and torque curves are beautifully smooth.

I am pleased with the result. The car sounded good and felt smooth. It shows the exhaust and manifold have made a difference on what is basically a standard engine and it shows I have sound base for the future tuning I am hoping to carry out.

Here are links to the 2 short videos I took of the car on the rollers today:

http://www.youtube.com/watch?v=metxDBT6Dfg&feature=youtube_gdata_player

http://www.youtube.com/watch?v=8VPaZD1GjXw
 
Hope you all had a good Christmas. Santa was very good to me this year! Here are some of the bits he brought me ... Thanks Jay for the seat recommendation. Really pleased with them so far.


I'll update again soon but we've got a fair bit of work to do over the coming weeks!
 
Well, work has started on the interior. This was the pile of stuff we had accumulated after a couple of hours work!


Got to this point more quickly than expected, with 3 of us working on it the interior came out in no time!


Got the new steering wheel on.


A lot more still to do yet. Making a start on the stuck-on sound deadening tomorrow and we need to make some brackets up for the seats as the universal mounts don't fit very well. Then we need to get the harnesses in and prep the floor for painting. It's getting there though!
 
Set to work on the long job of getting out all the stuck on sound deadening today. It's one of those jobs where it has to look worse before it can look better! It's a pig of a job that took all day but its worth it.

I had my heat gun and scrapers ready and got started:


Finished the driver's side front:


Half the boot done:


Boot floor done:


All finished! Got all the little bits inside the rear quarters and boot, etc.


I put all the sound deadening removed in a bag as I went and weighed it when I had finished. Just the stick on sound deadening weighed 16lbs, or 7.2kg!

Now we just need to clean up the glue, finish the seat subframes and paint everything!
 
I know! I'm feeling it today!
The hotter you get it though, the easier it comes off.
 
Lookin good dude! seats are brilliant for the money they cost, perfect for a car on a tight budget!

progessing nicely.
 
Thanks Jay. Yeah, I'm really pleased with the seats. The subframes they come with are a bit useless but we're fabricating our own to mount the seats to and so that we can retain the slider for front to back adjustment. There'll be different people using the car on track days and events so I wanted to keep the seat adjustable. What subframes did you use for your seats?
 
Got a chance to visit the car again today (it's currently at my Parent's with my Dad working hard on it!), so thought I'd post a quick update. Photos are just from my phone again but I'll get some proper ones once the interior is finished.

I started cleaning off the glue left by the stuck on sound deadening. Here is the first bit part way through. Plenty of thinners and a supply of old rags and it comes off ok!


Here's the driver's side done. Note the essential tools for this job ... tea and chocolate digestives!


Most of the boot done. You can see the bit I haven't cleaned up yet where the rear seat used to be:


Once cleaned up you could see better where there were still some stuck on bits of glue that will need scraping off still. It's a long job and not yet finished but it should be ready for paint soon.

Dad's been busy making subframes for the seats so we can still use the runners that came with the seats to retain the adjustment. We're adding weight back in but the mountings are going to be solid, which is important! Here's how the passenger side looks now. Not quite finished, as we're adding another bracket for the lap belt of the harnesses to bolt to, a bit like how the original seatbelt mounts to the subframe of the standard seat. The subframes will be painted together with the floor to finish it off.


One seat loosely bolted in to finalise the position:


While I was there, I also removed all this:


I took off all the under bonnet sound deadening and the large plastic resonator box. Anyone know what this does? Anyway, I saved around 2kg in total so it's staying off!
 
Earlier in this thread, I mentioned that I was looking into options for camber adjustment so I could wind the coilovers down lower without adversely affecting the handling. After chatting to Chris at LMS who can offer a couple of different solutions, I went with a simple replacement ball joint that allows you to screw the end in and out to effectively change the length of the wishbone. Chris was in the process of fitting these to his own FRP, so that's good enough for me. I'll be getting all the suspension set up at Bubble & Kick Racing in Essex once the car's back on the road.

I've also fitted my Powerfkex poly bushes. I got hold of a spare set of wishbones (again, thanks to LMS) and my Dad very helpfully cleaned them up and painted them! Here's an old wishbone off my car next to the replacement one:


Close up of the poly bushes and replacement ball joint:


I'll update on this again once the car has been set up properly.
 
Like the new lower arms, the adjustable ball joint is a v good idea. Out of interest, how much was it?
 
Thanks Davey. I've had them a while now but just got round to fitting them. I think they were around £150.
 
With the polybushes fitted, thats not a bad price. Wouldnt mind getting hold of the adjustable joints and fitting them to my polybushed arms!
 
Lol. That's without the poly bushes! :lol:
Area 51 also do the adjustable ball joints but they're the same price.
 
Ouch! Ahh well, if it gets it round the track quicker, its worth the extra shrapnel. May have to get my membership sent off so i can try my hand at these autosolos, see how well these pumas go!
 
Nice car. What seats are they?

I stripped one of my old Clios, spent ages with white spirit and rags cleaning the rest of the glue of! Not a fun job.
 

Latest posts

Back
Top